
Steps for HSBC Mobile Banking Registration
For customers who do not have access to HSBC Internet Banking
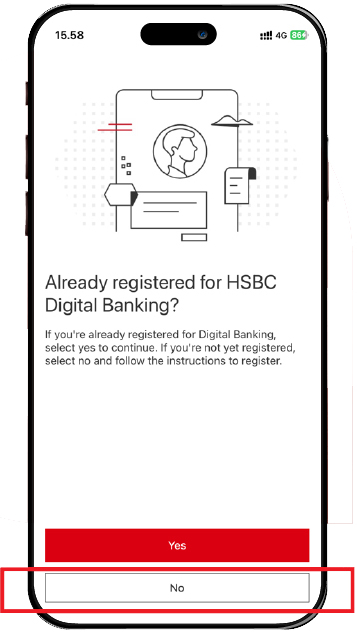
Download HSBC Indonesia Mobile Banking then select "No" to start registration.
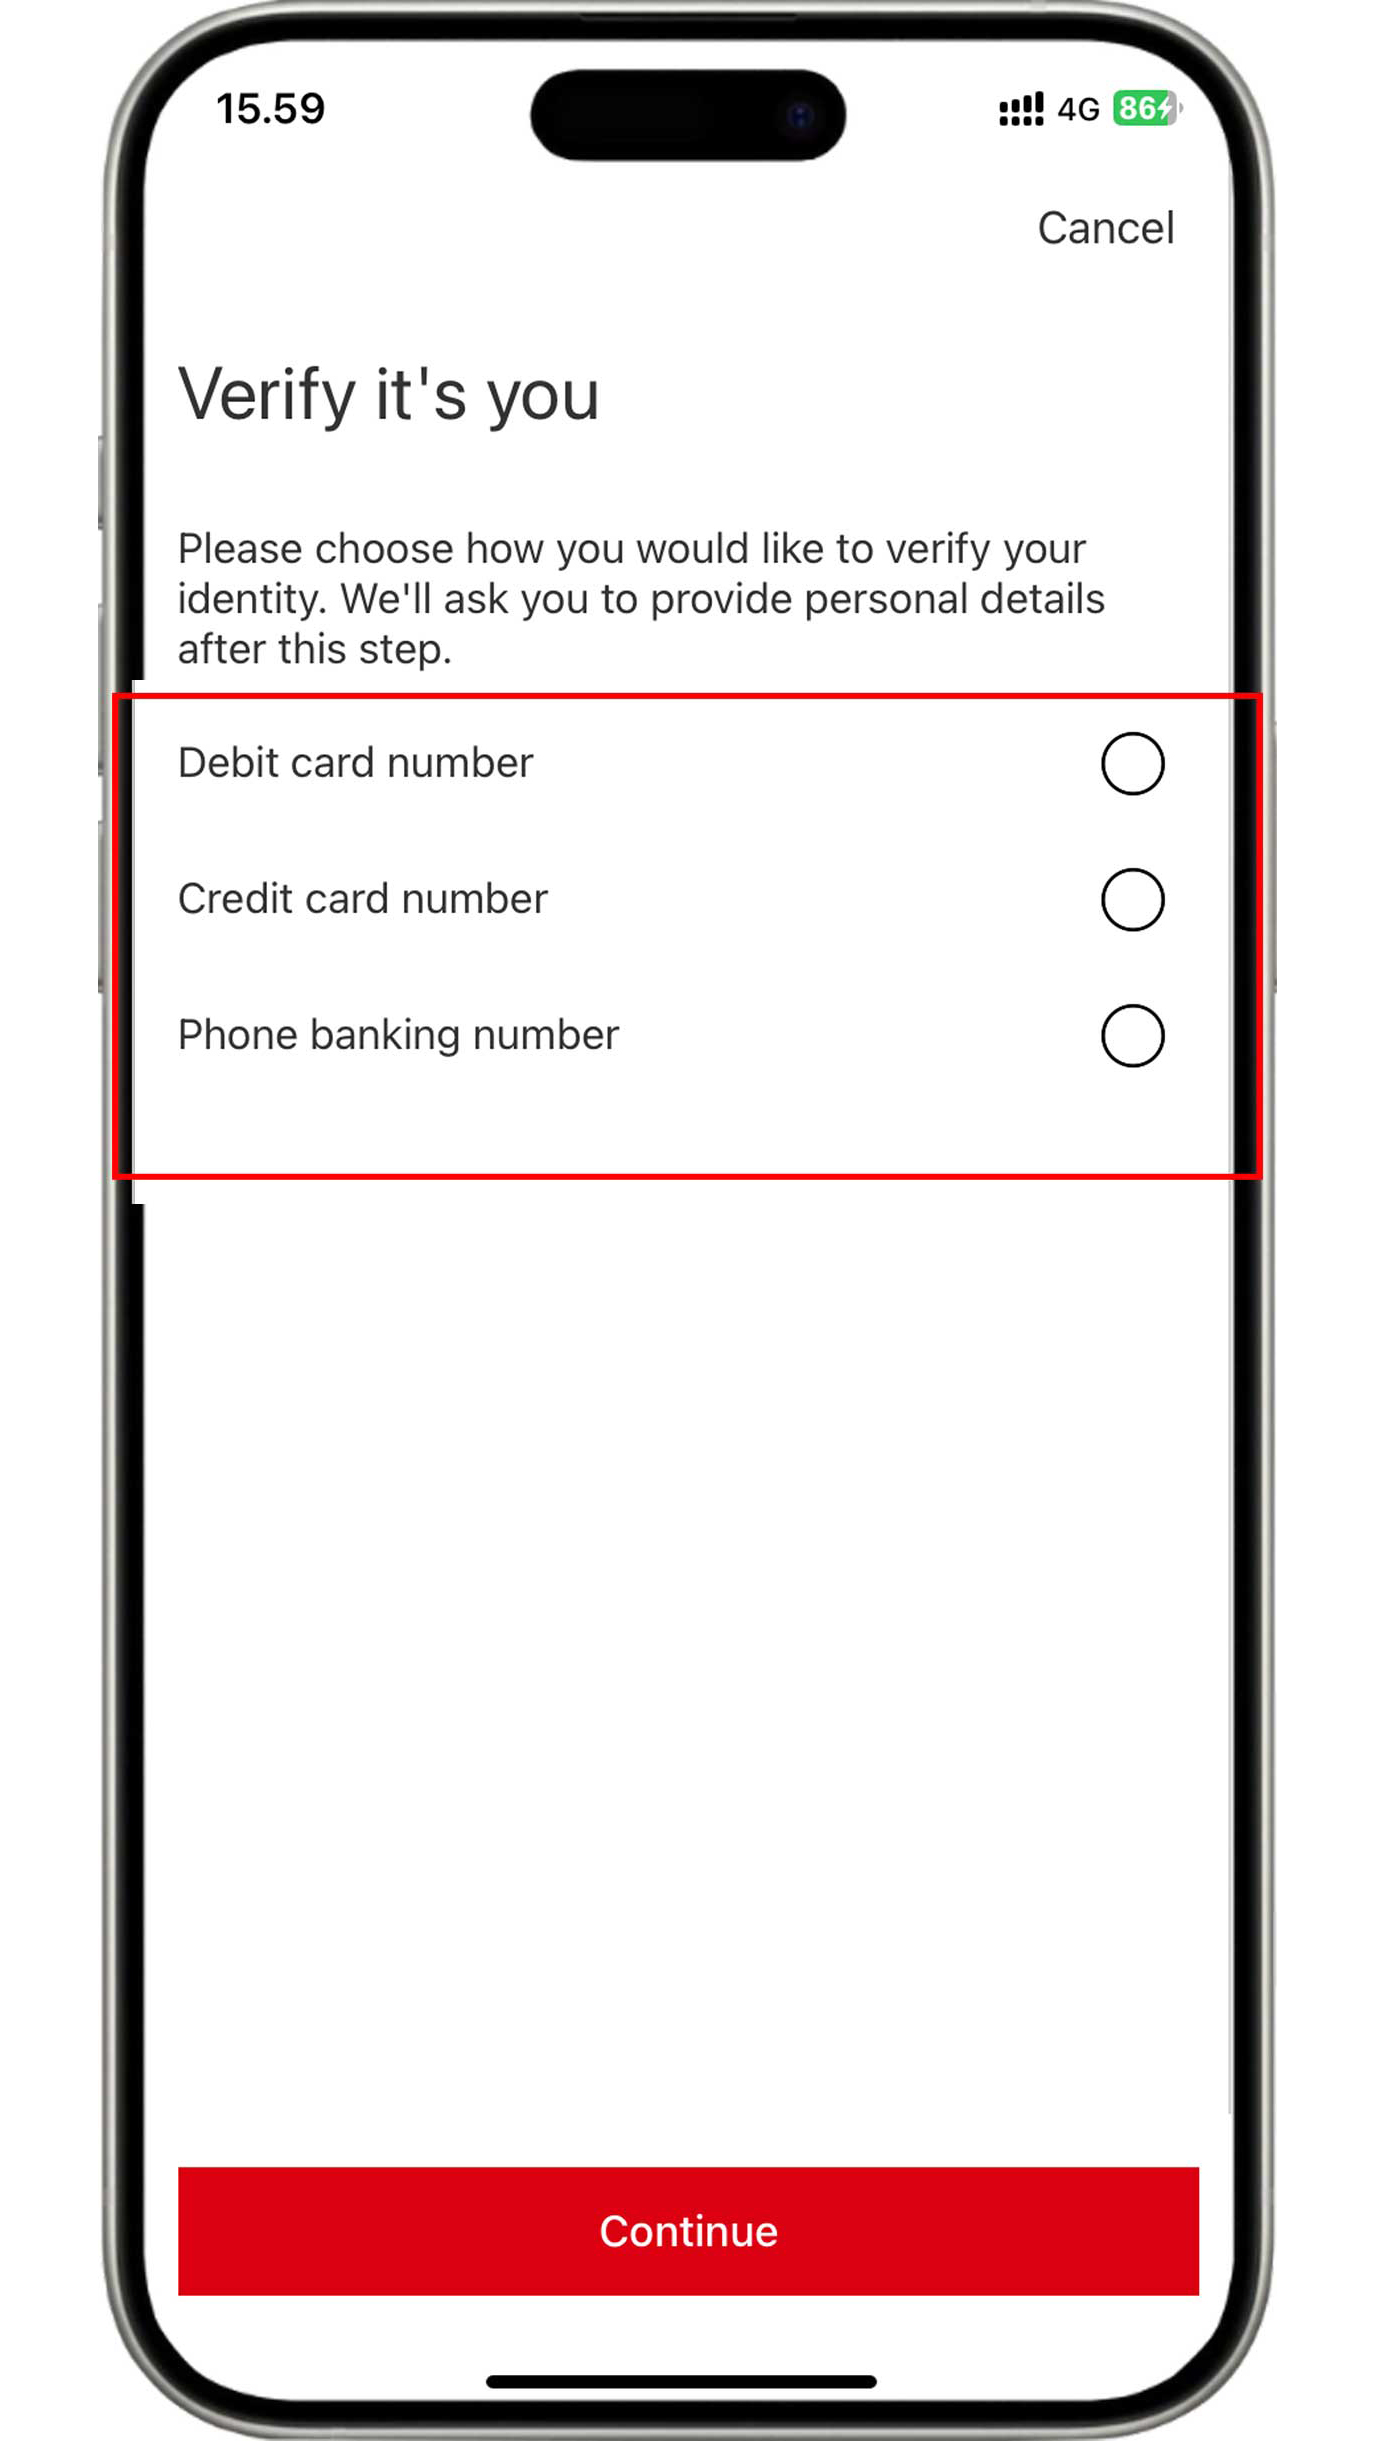
Verify using any of the information you have (debit card
number/phone banking ID number/credit card number).
Please note for customers who have both debit and credit cards,
please use your active debit card number for registration.
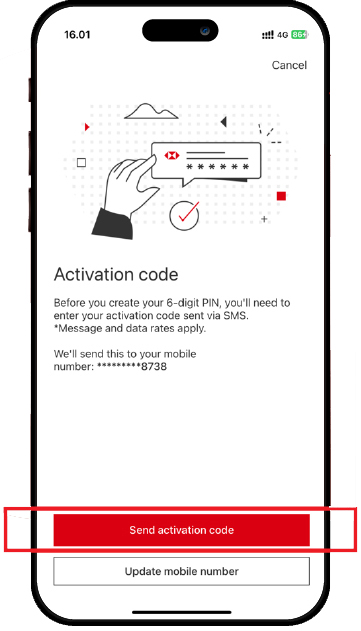
Enter the OTP code sent to your mobile number that is registered with the bank for activation.
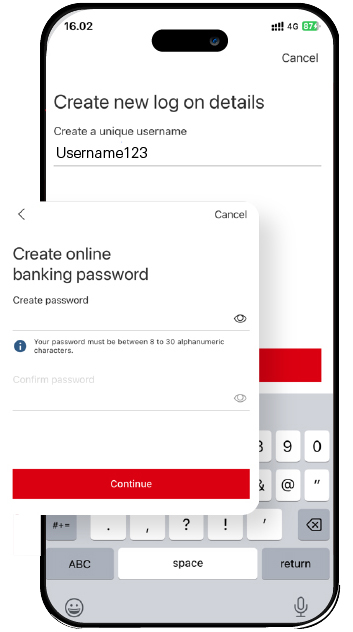
Create username and password to access HSBC
Indonesia Mobile
Banking.
Do not share your information with anyone.
For customers who have access to HSBC Internet Banking
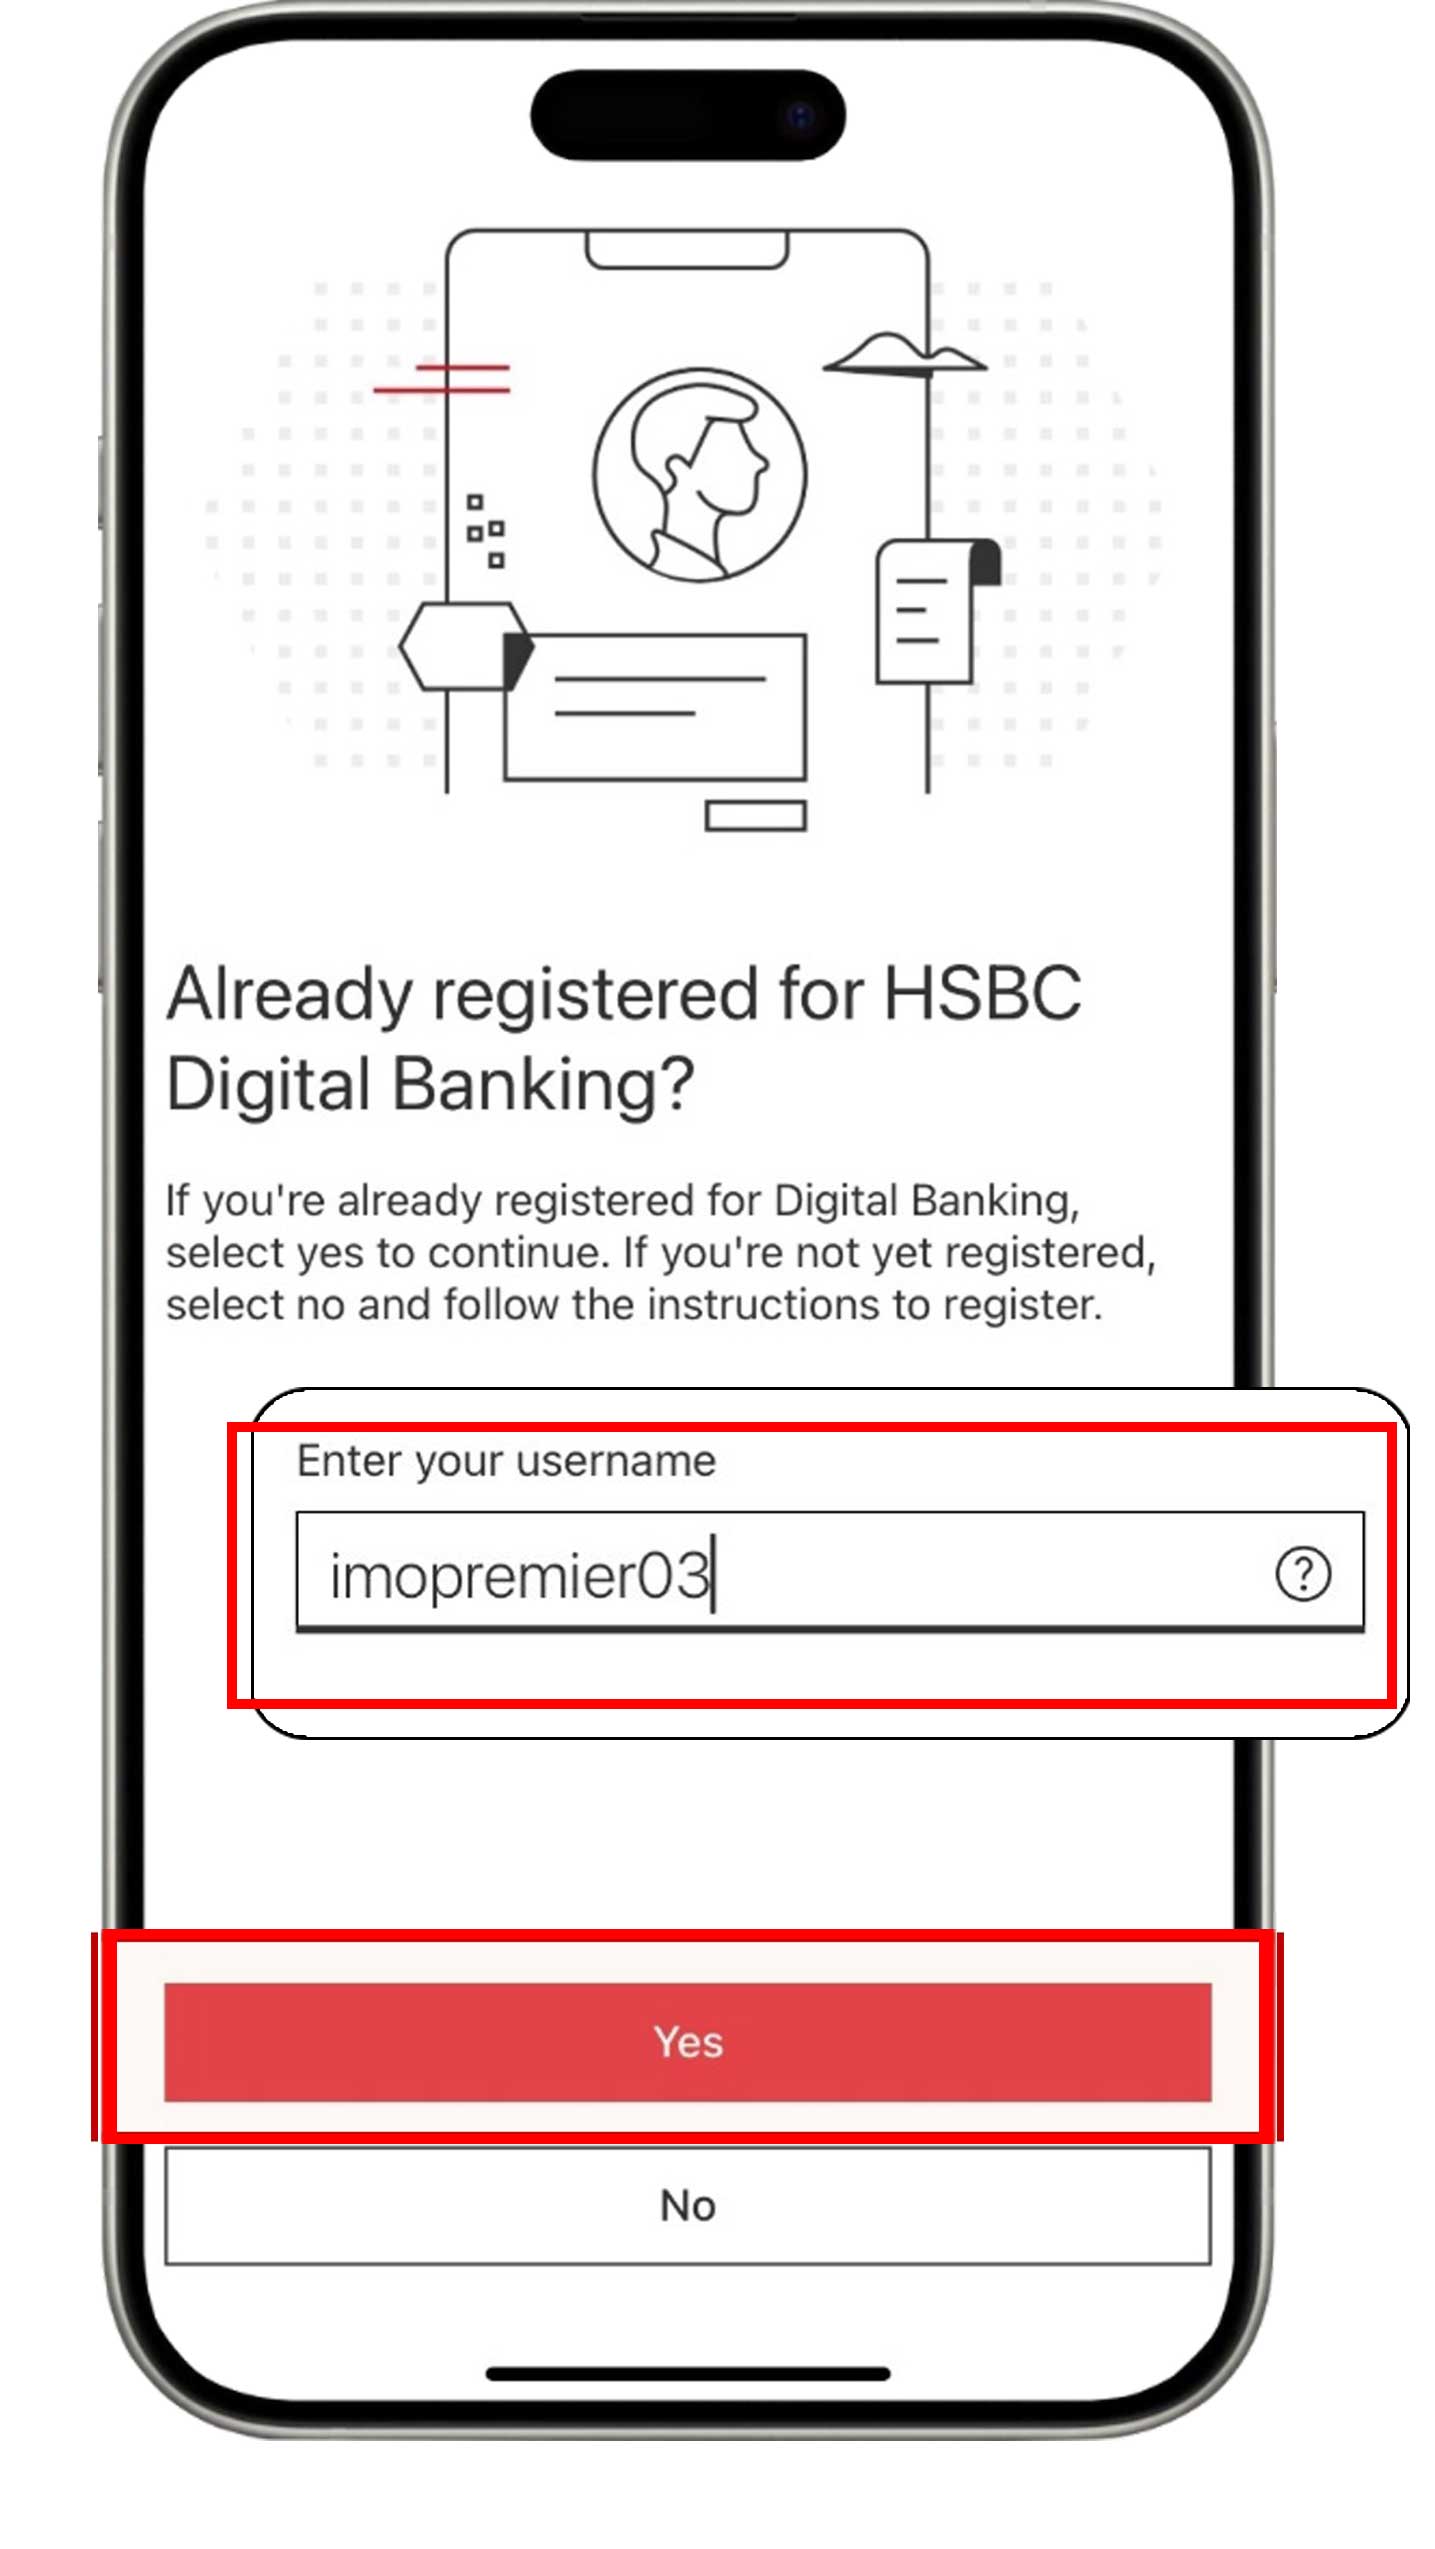
Download the HSBC Indonesia Mobile Banking Application. Select "Yes" on the following page and enter your HSBC Internet Banking username.

-
Using Token: Select "Security Code".
-
Not Using Token: Select "Password and SMS activation code".
Follow these steps if you are:
-
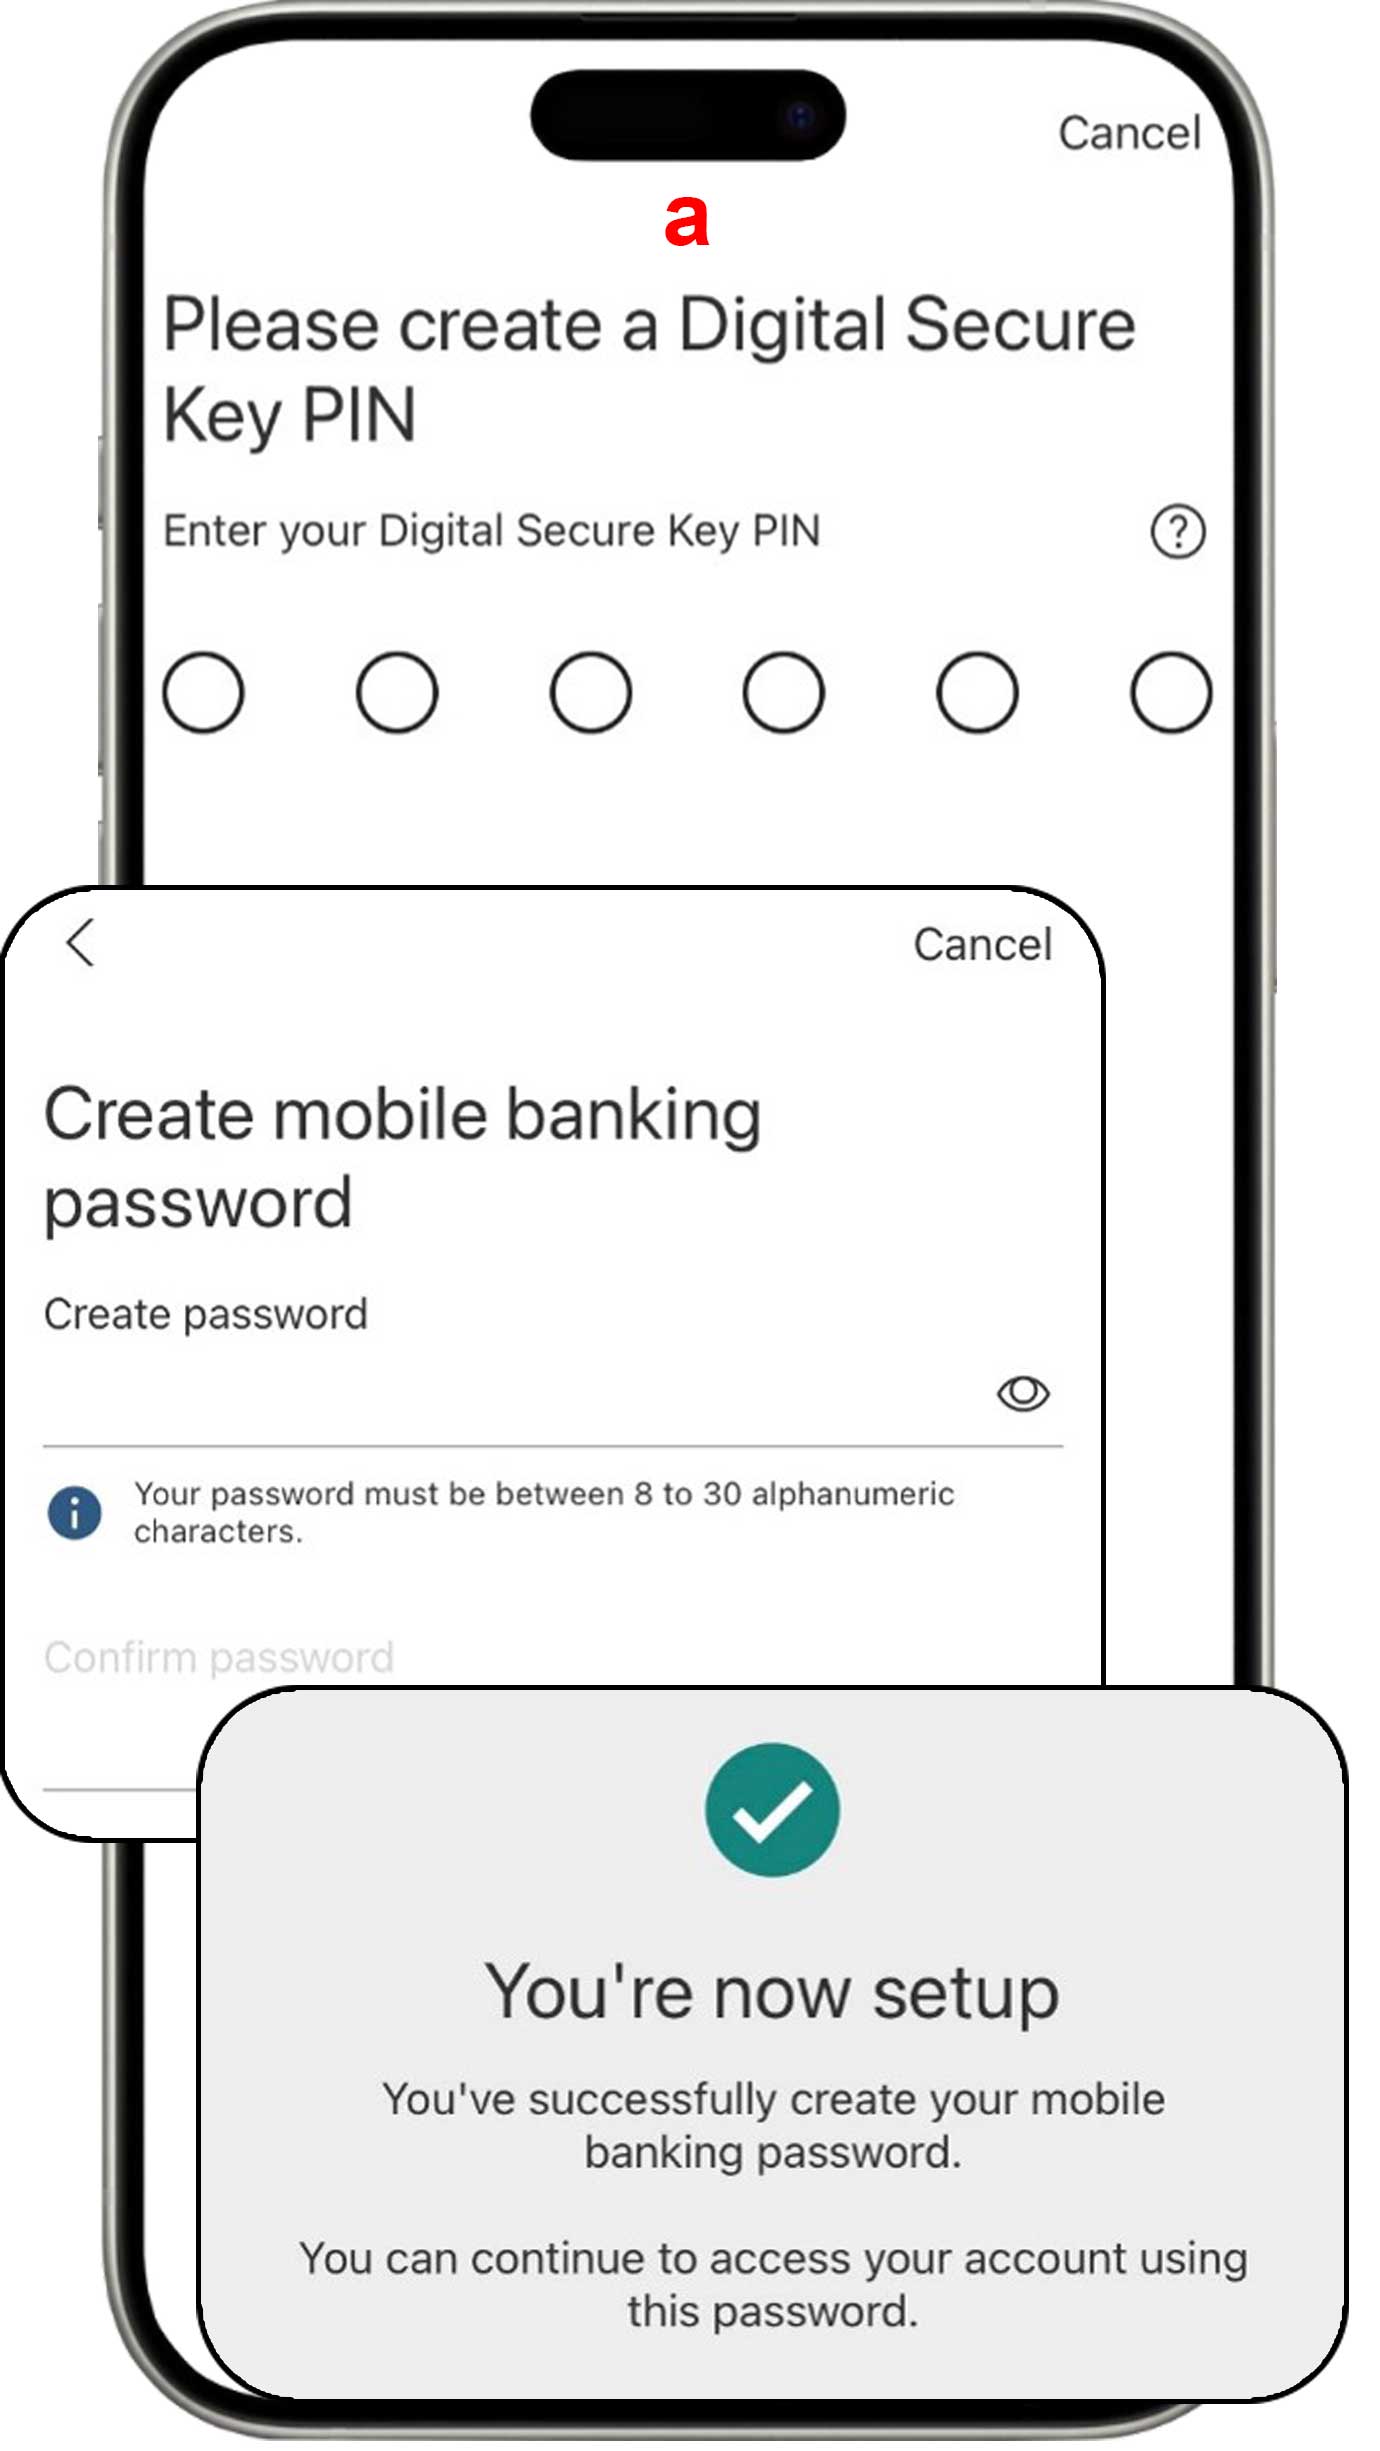
Using Token: Please follow the next steps to create a PIN and password for HSBC Indonesia Mobile Banking.
-
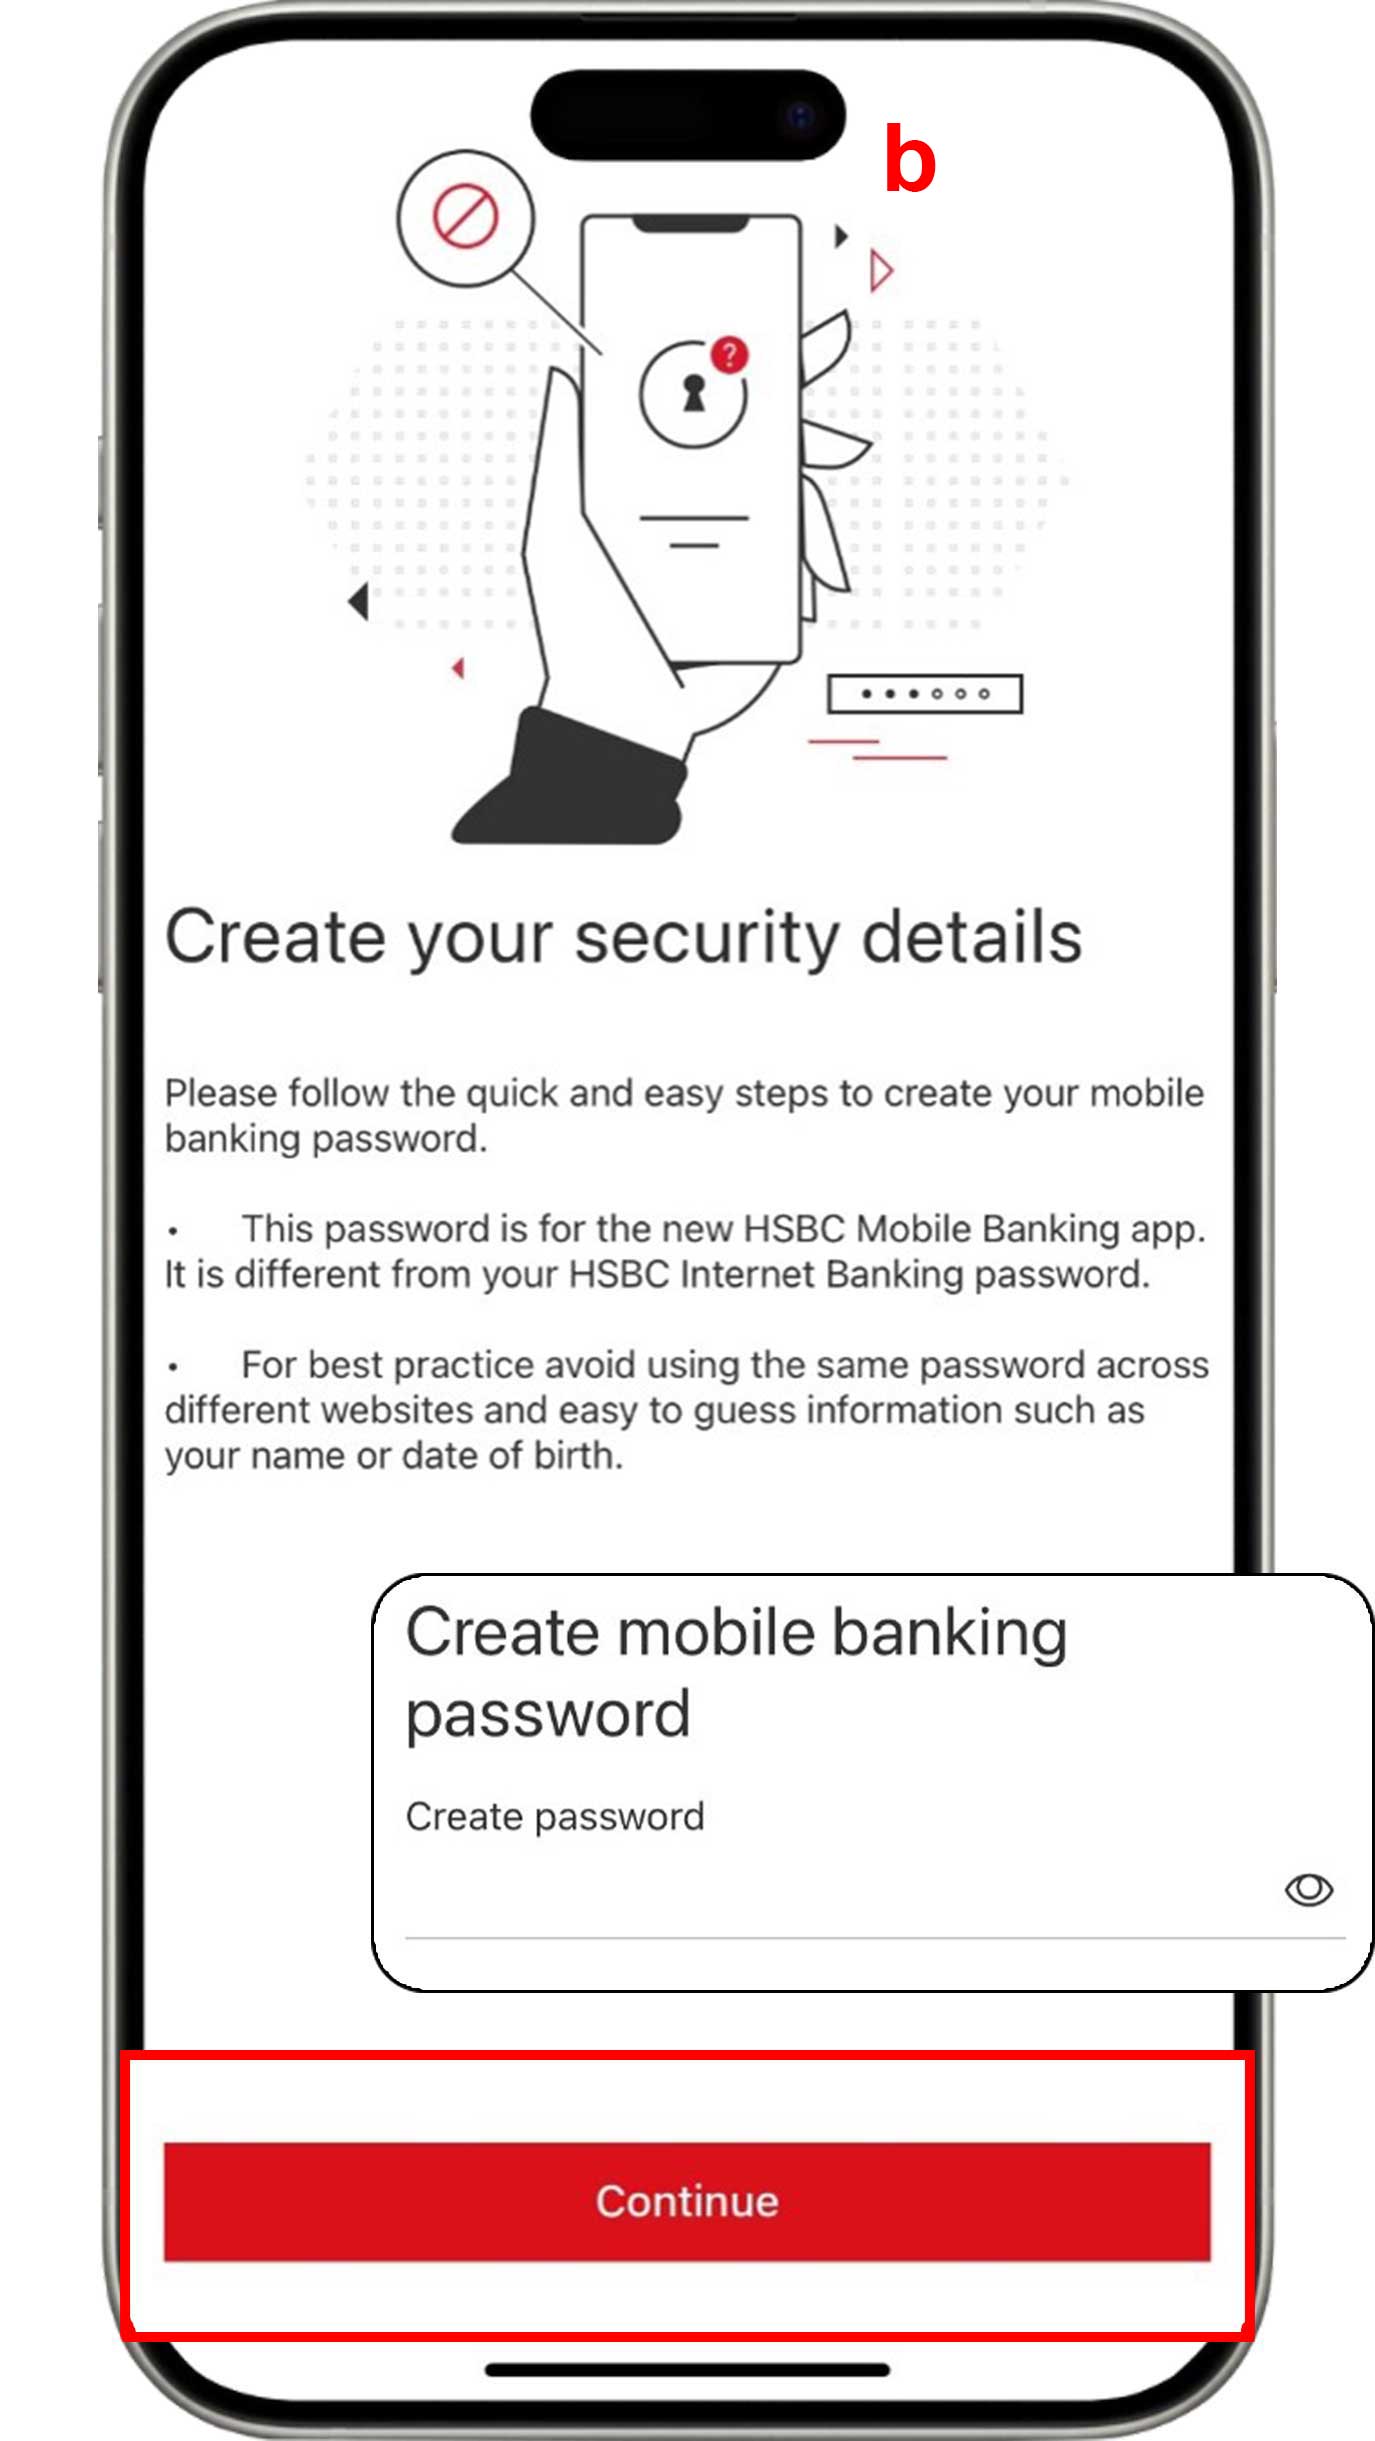
Not Using Token: Click "Forgot Password" and create a new password for HSBC Indonesia Mobile Banking.
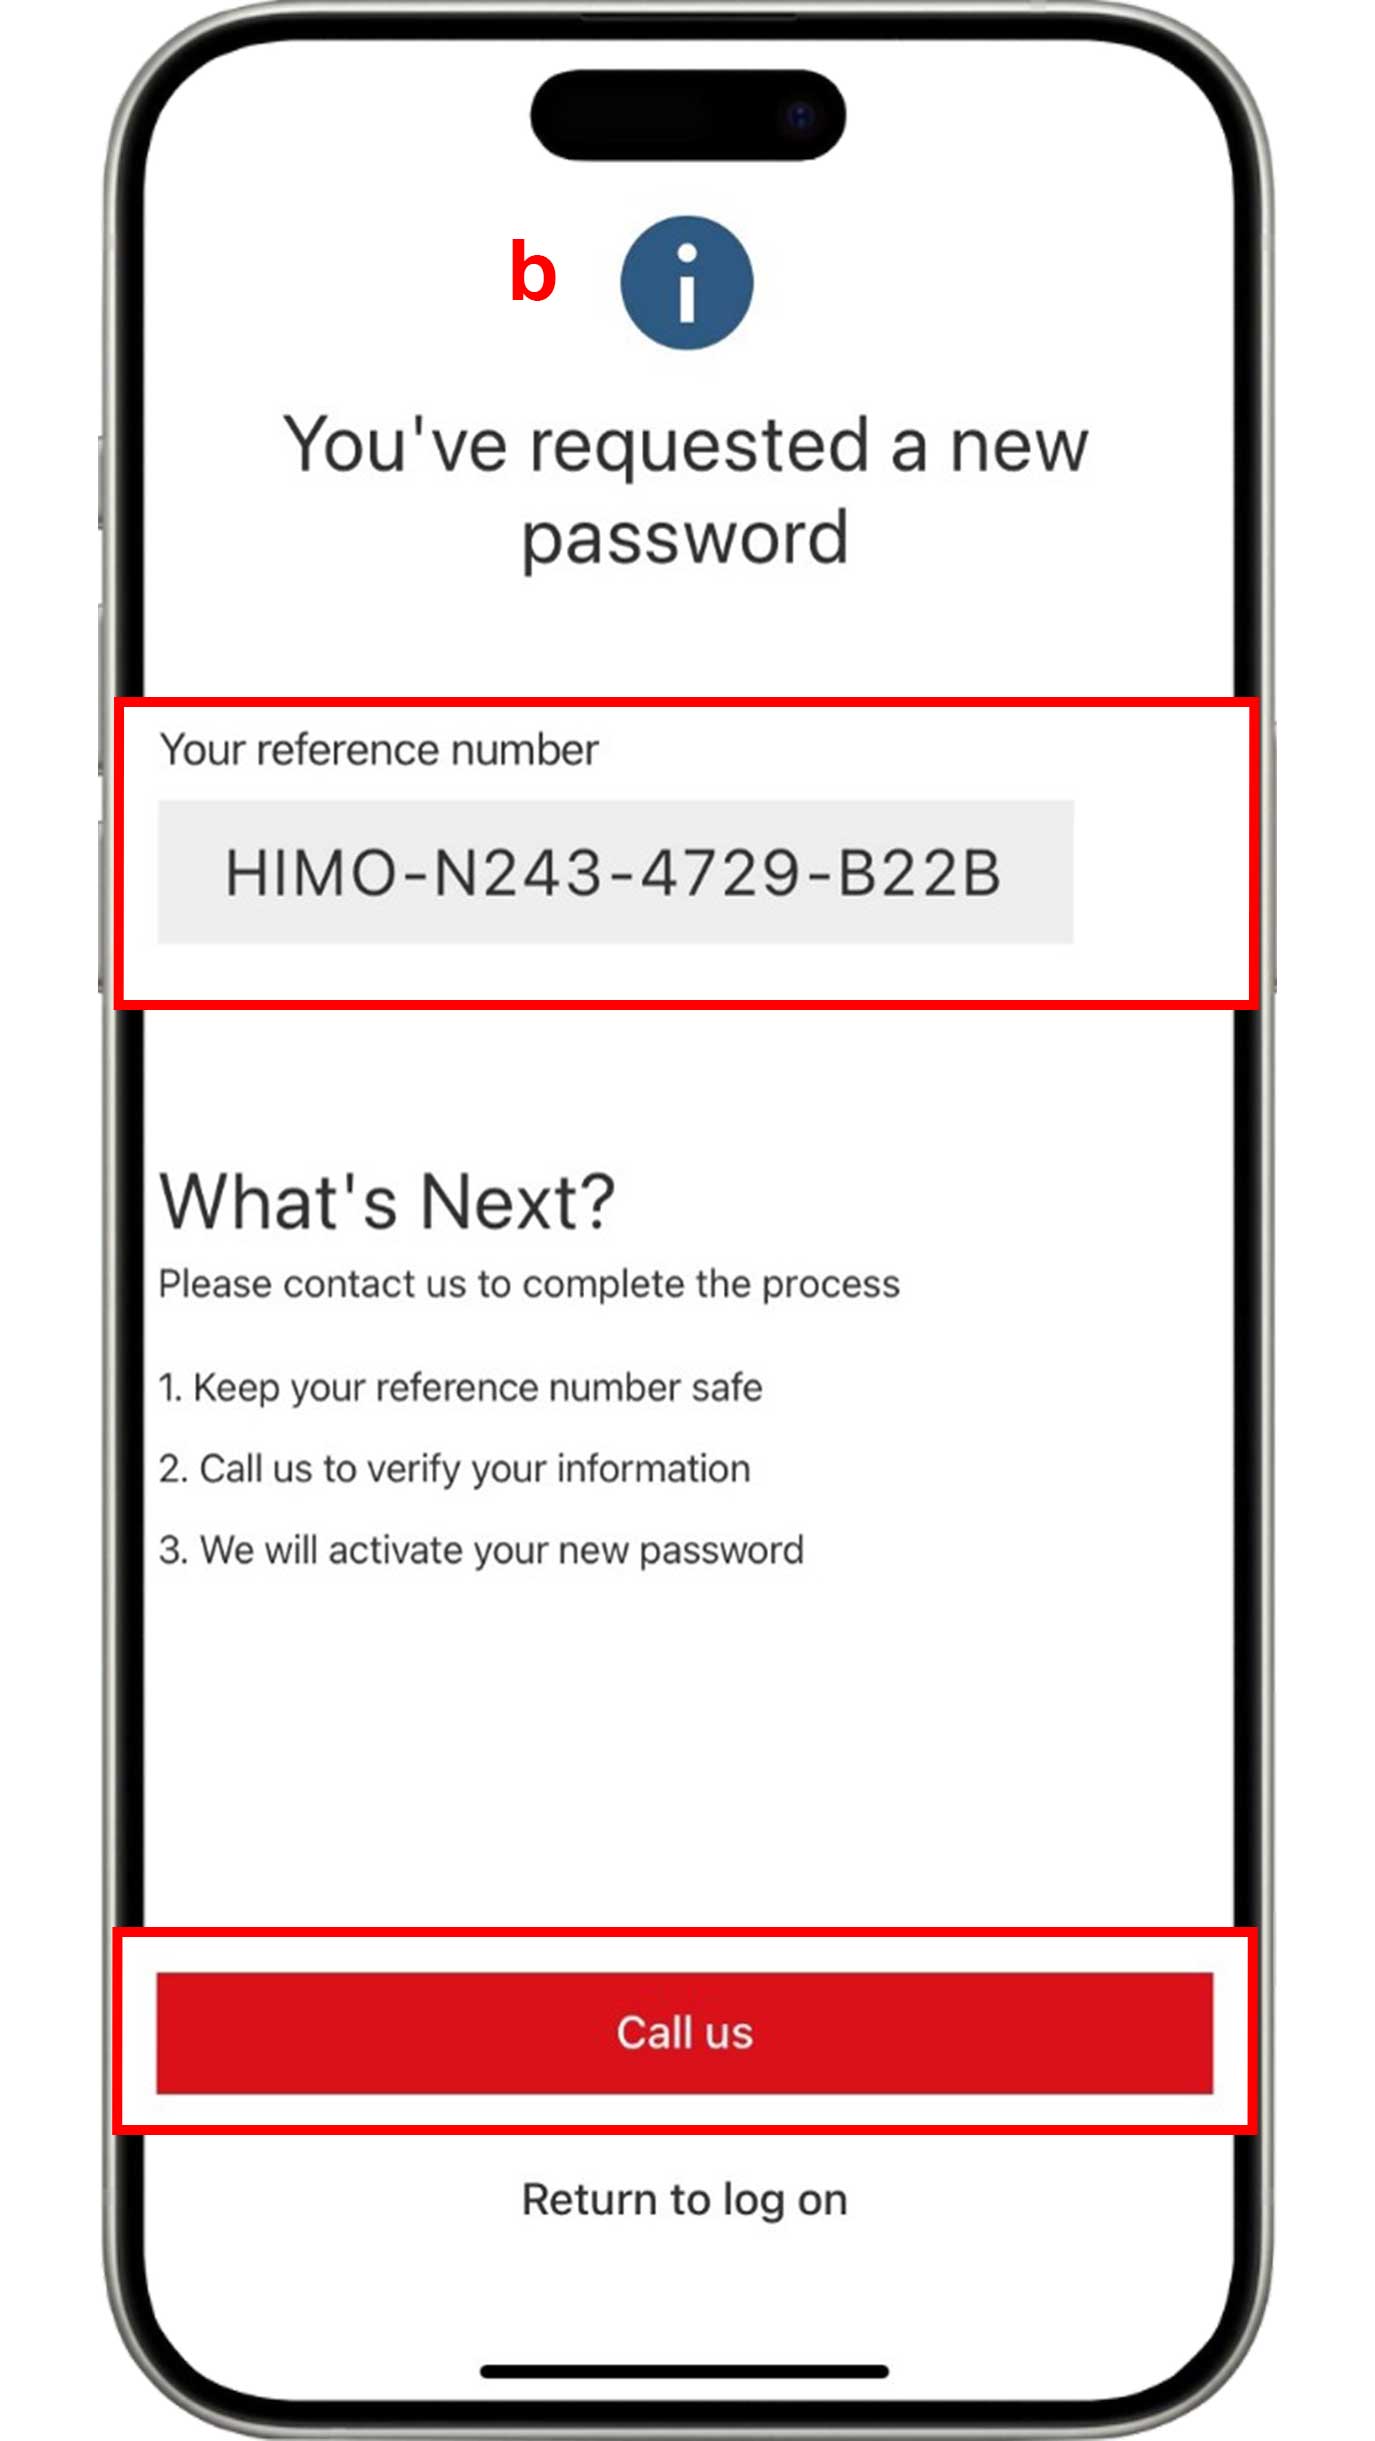
If you are not using token, you will receive a reference code. Please call HSBC Contact Center for verification.
Steps to Open Savings Account
Open HSBC High Rate Savings
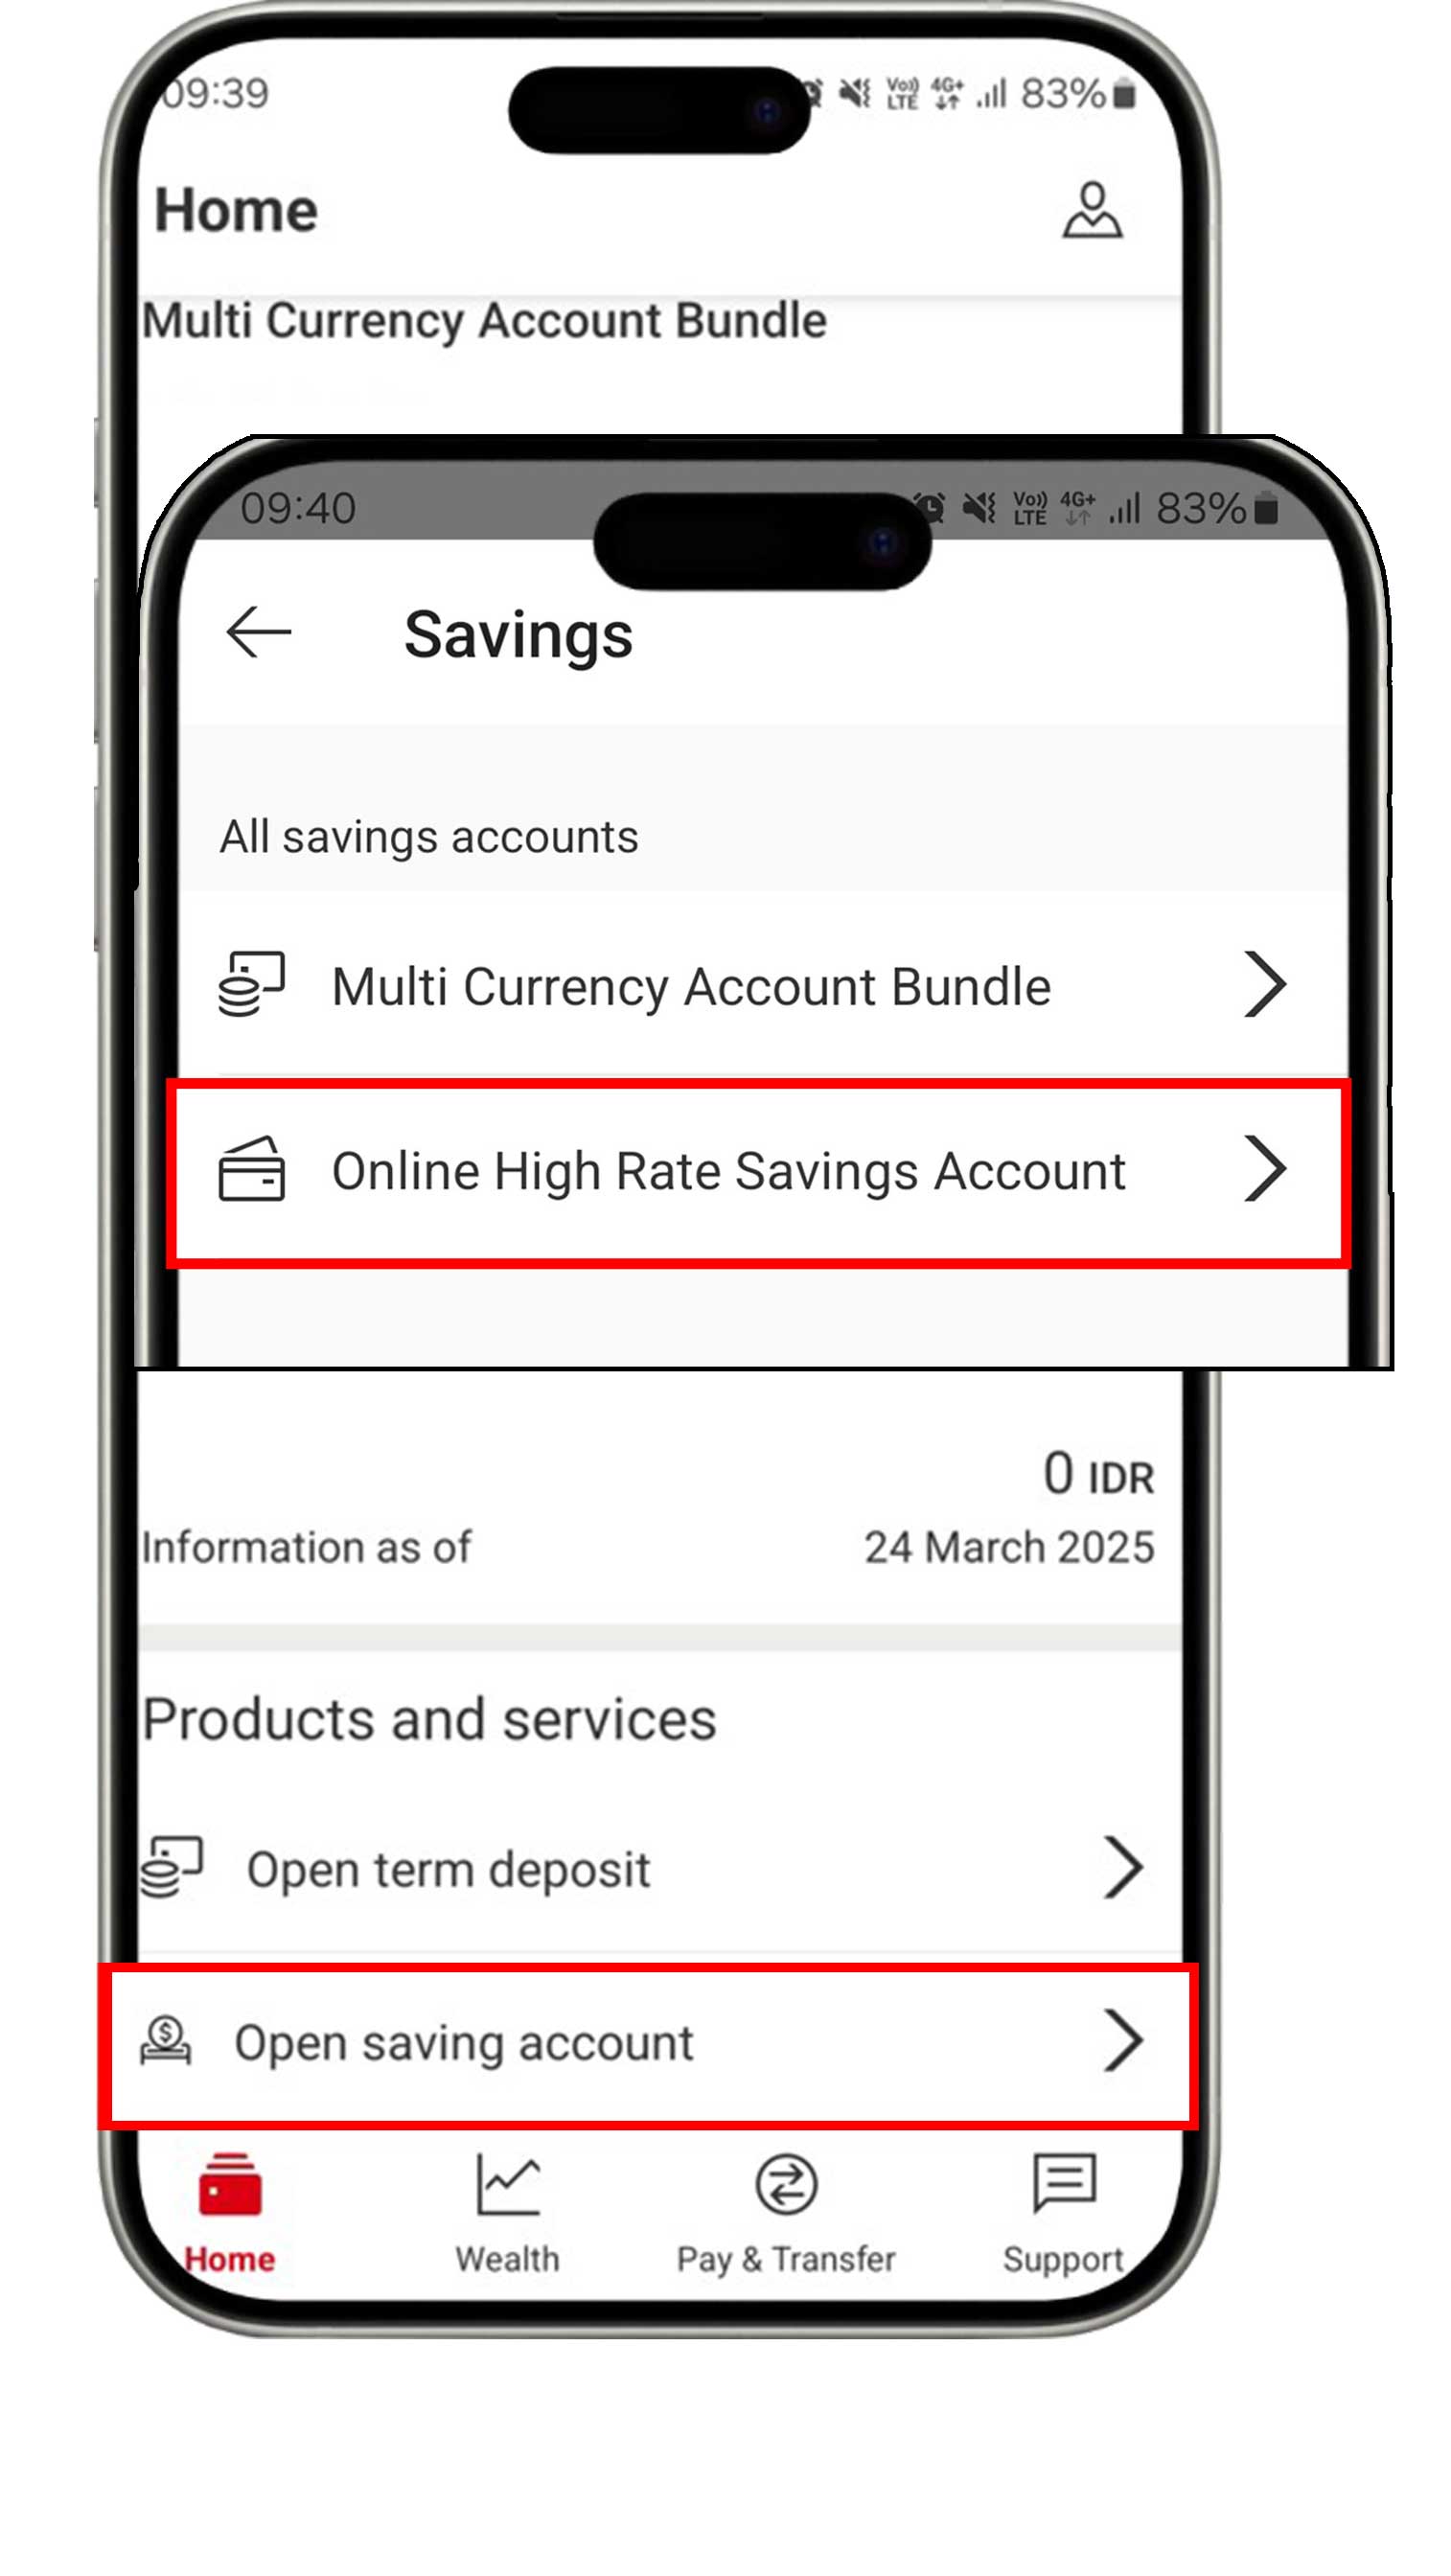
On the Home menu, click "Open savings account" and select "Online High Rate Savings Account".
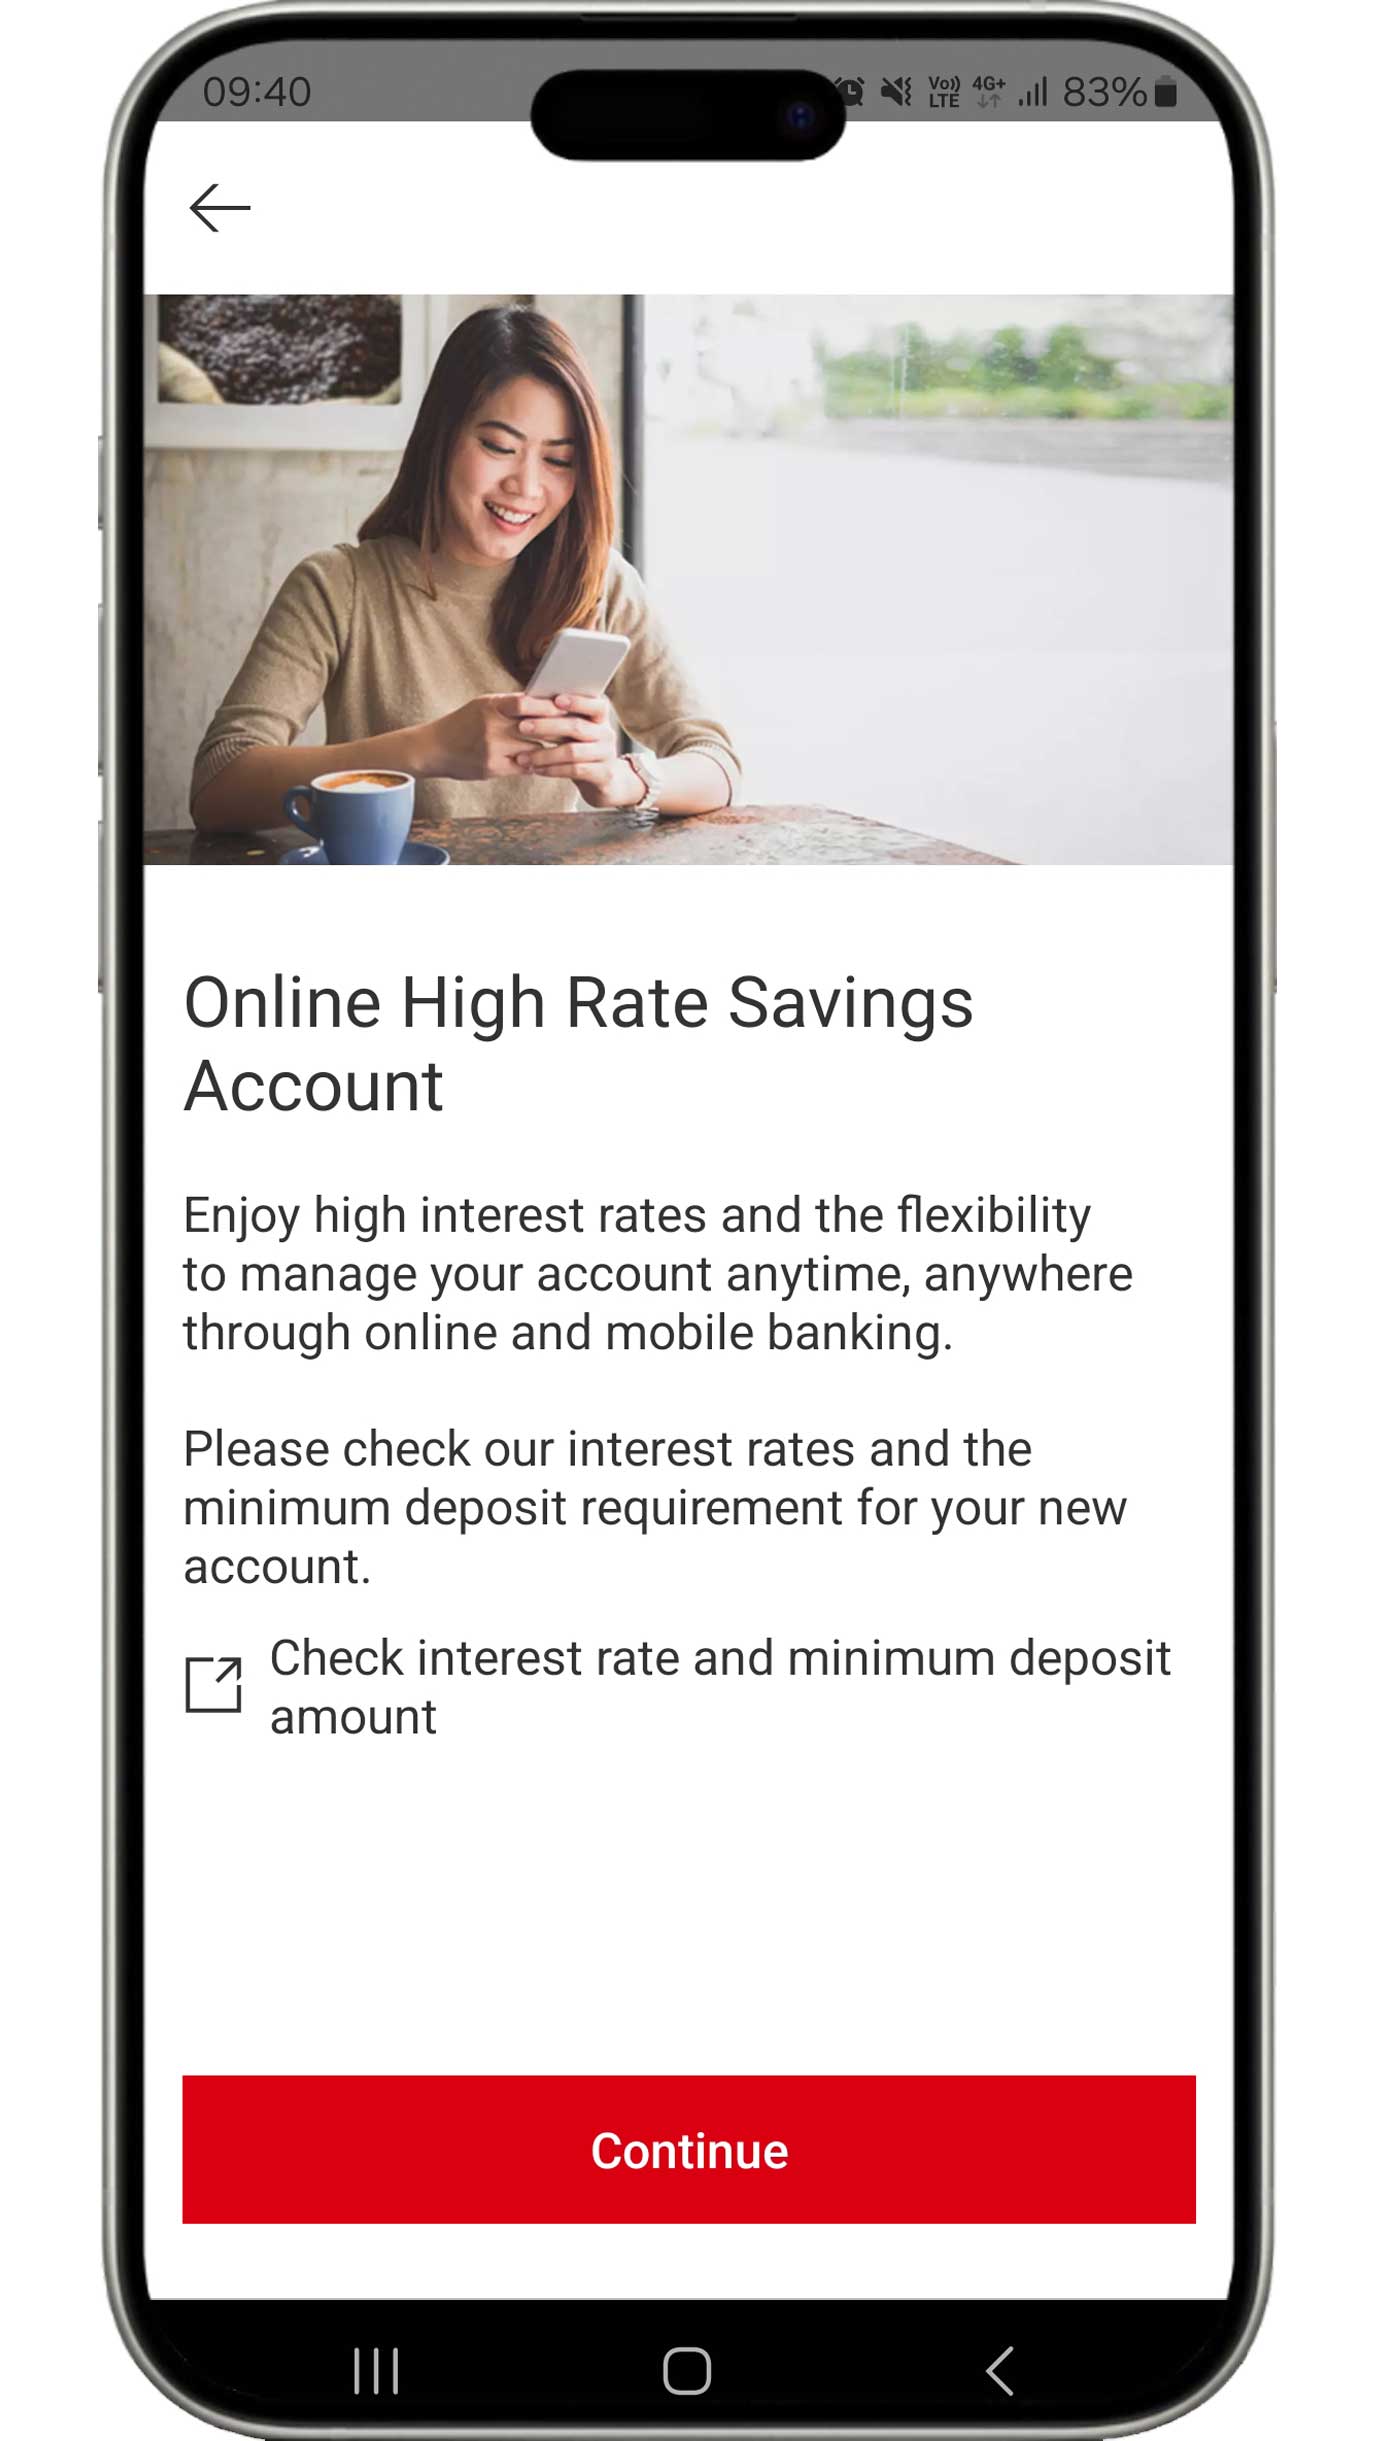
Before clicking the "Continue" button, ensure you have read the information in "Check interest rate and minimum deposit amount".
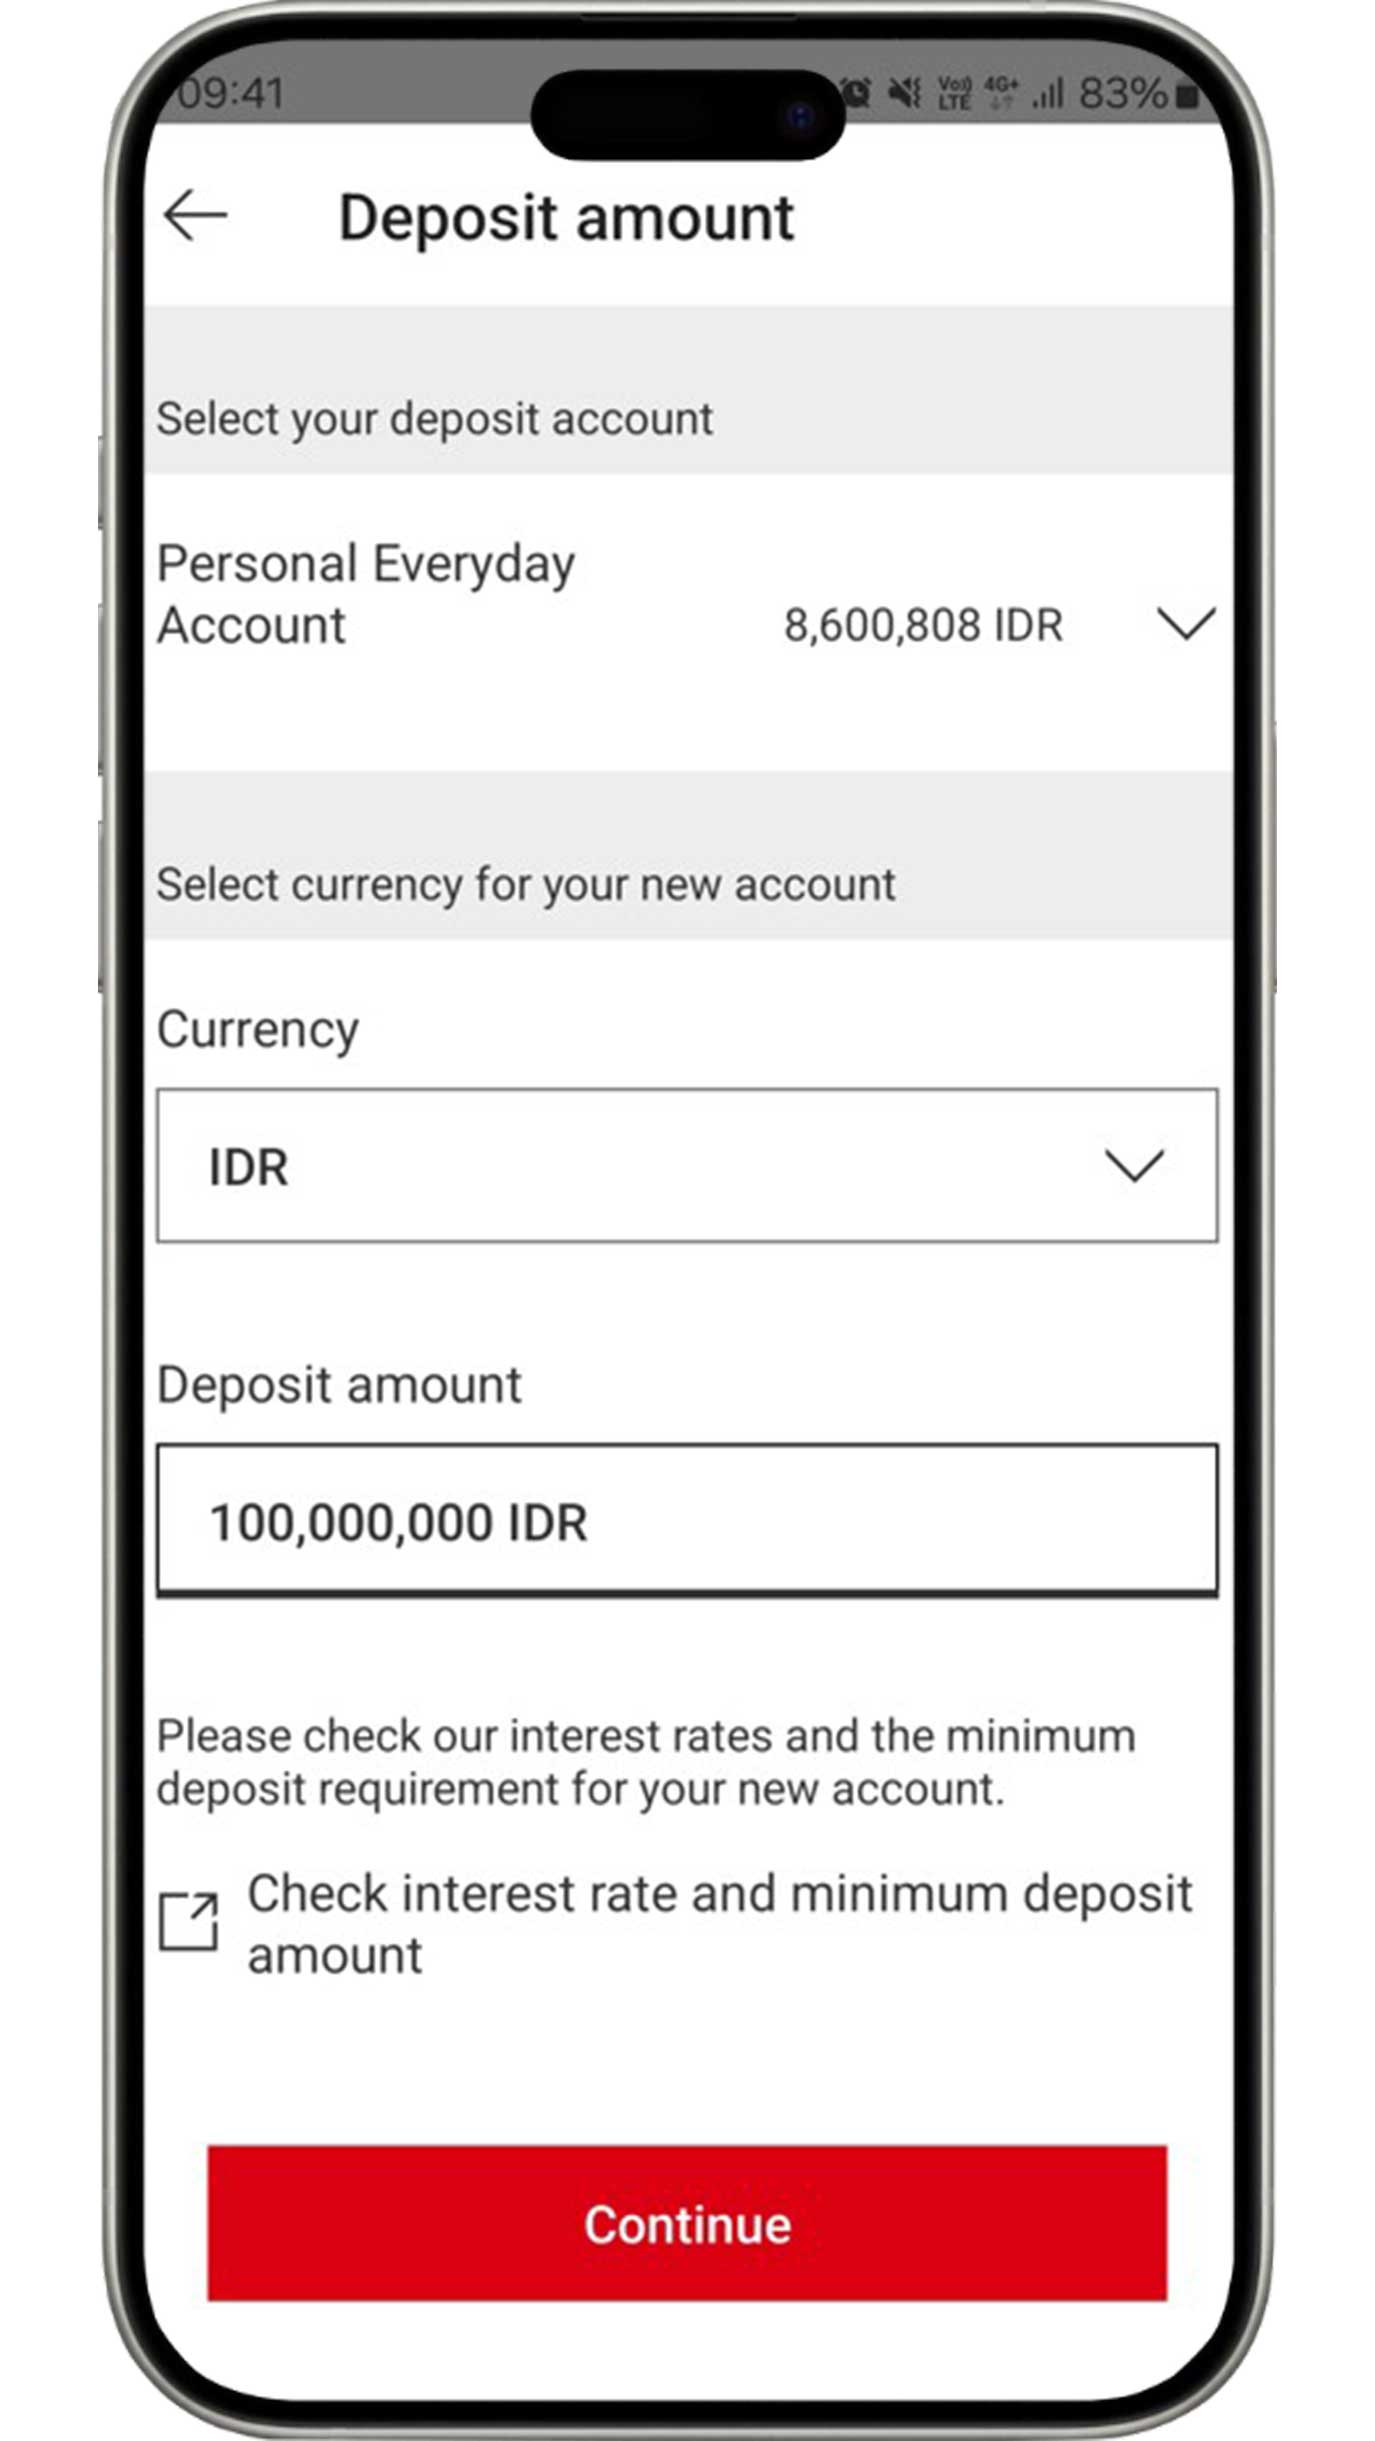
Complete your deposit information and click the "Continue" button.
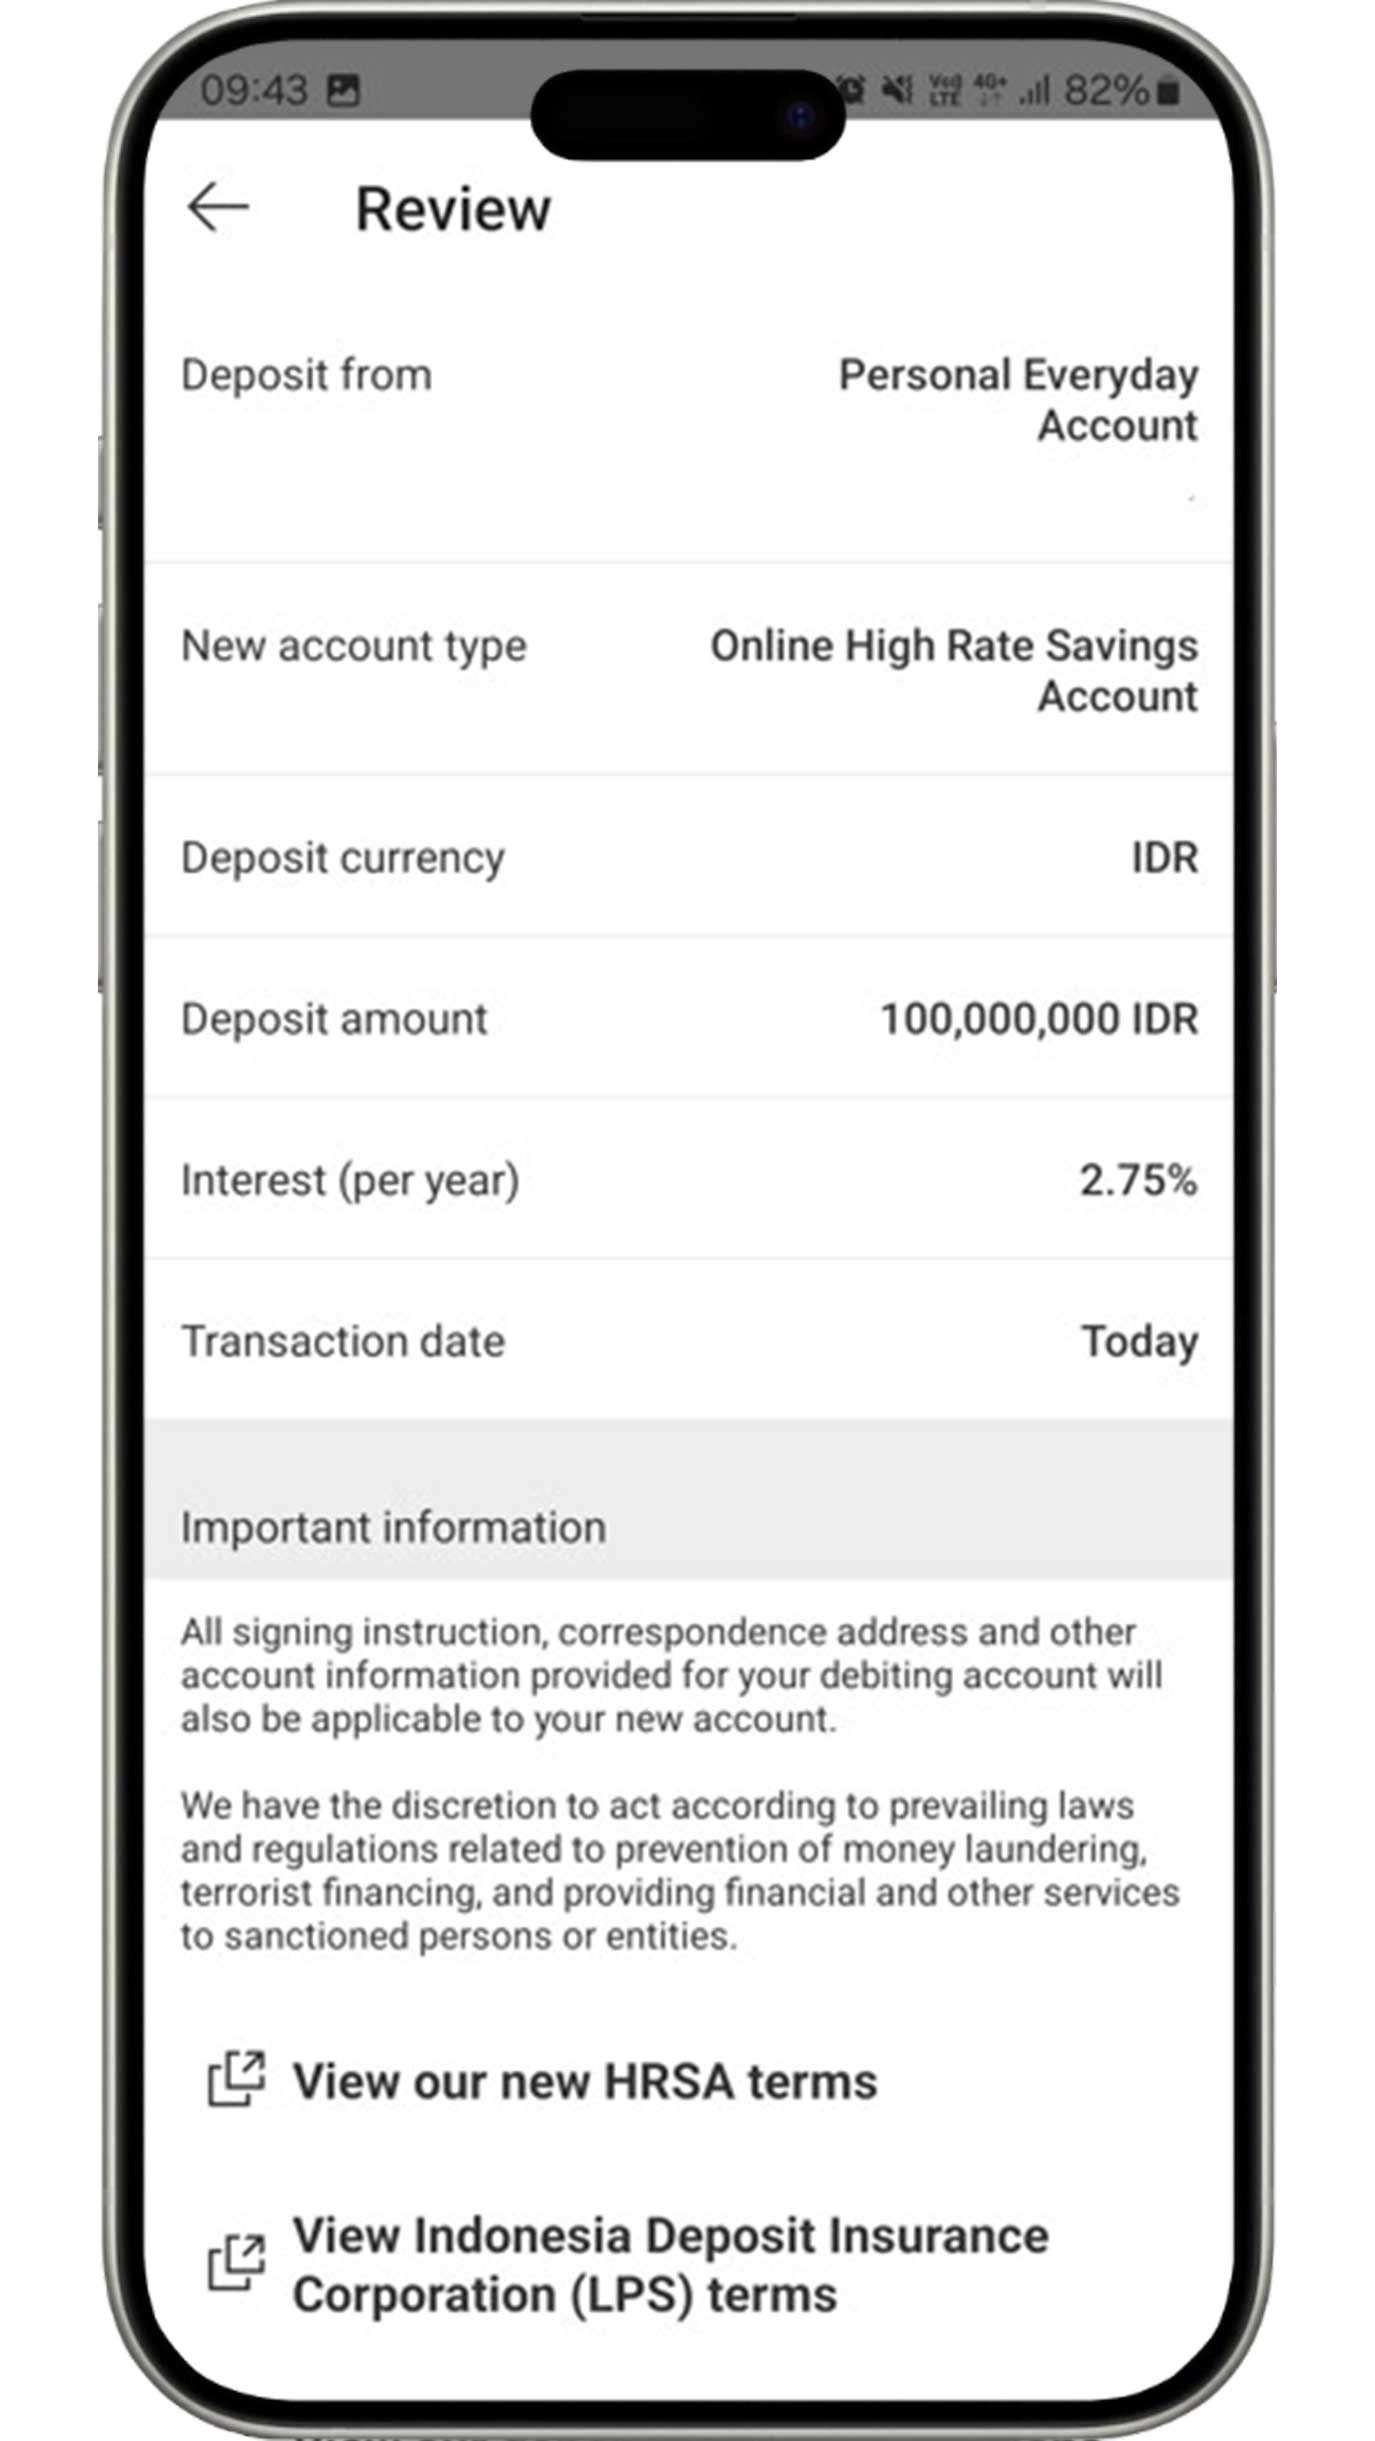
Review the information you have input as well as read and agree to
the applicable terms and conditions.
If all the information is accurate, click the "Confirm"
button to
complete the High Rate Savings account opening process.
Open time deposit
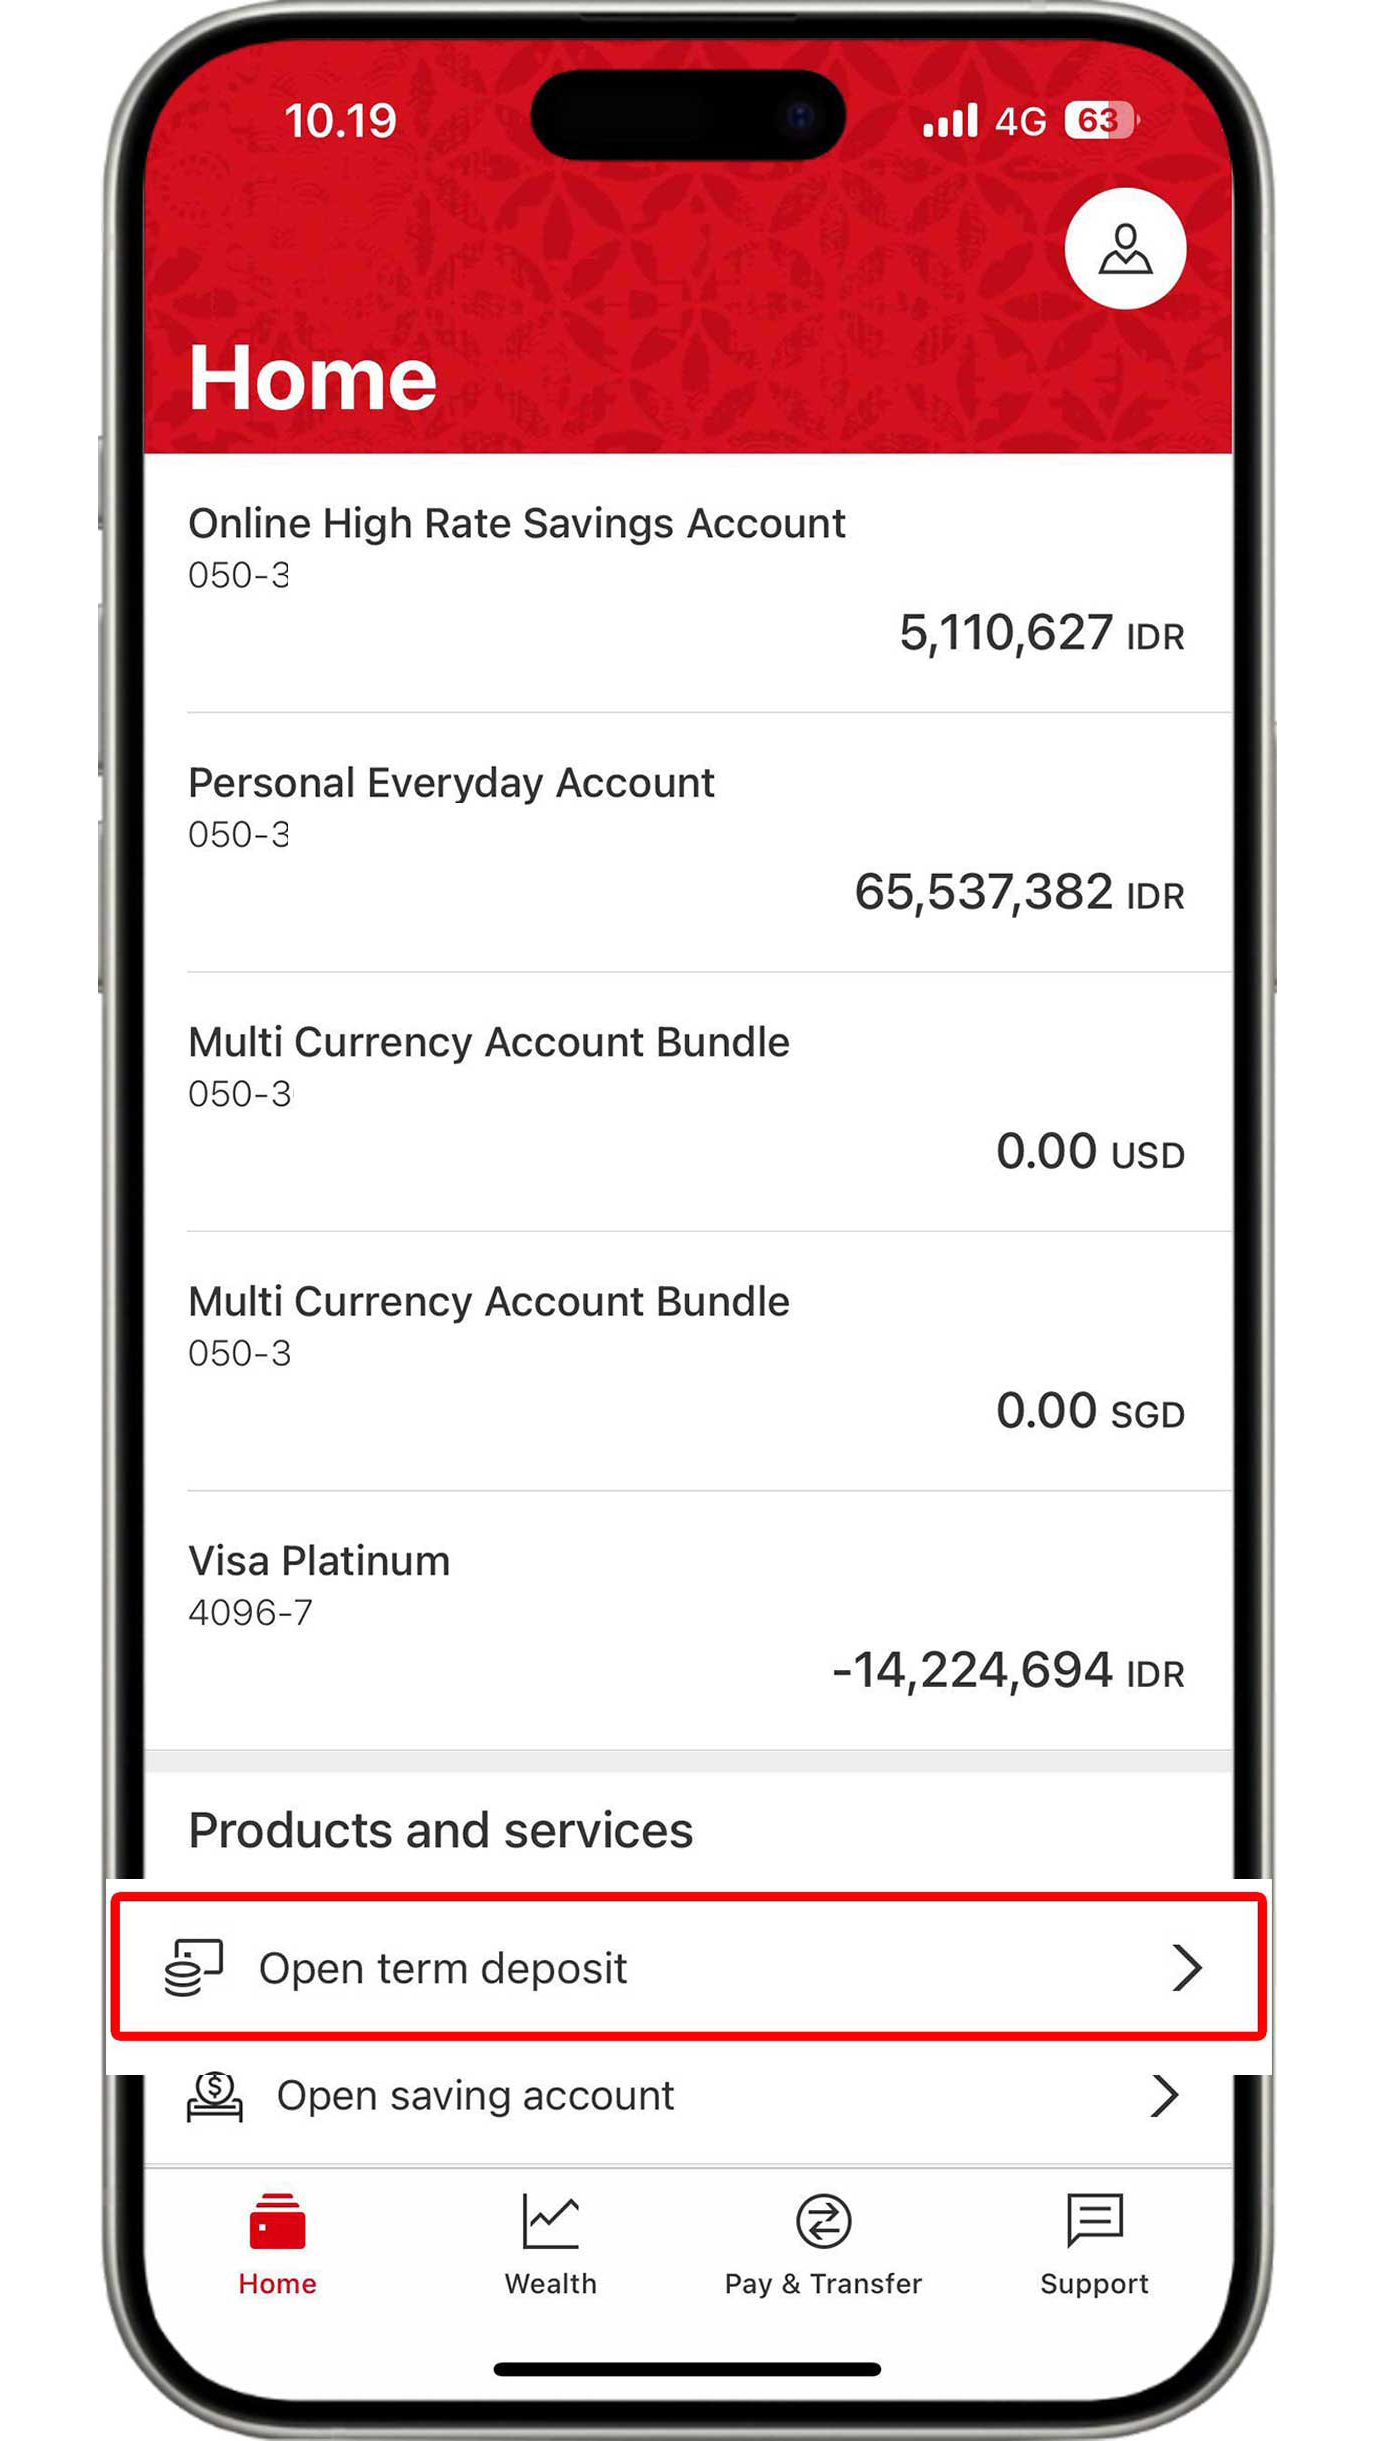
On the Home menu, click "Open term deposit".
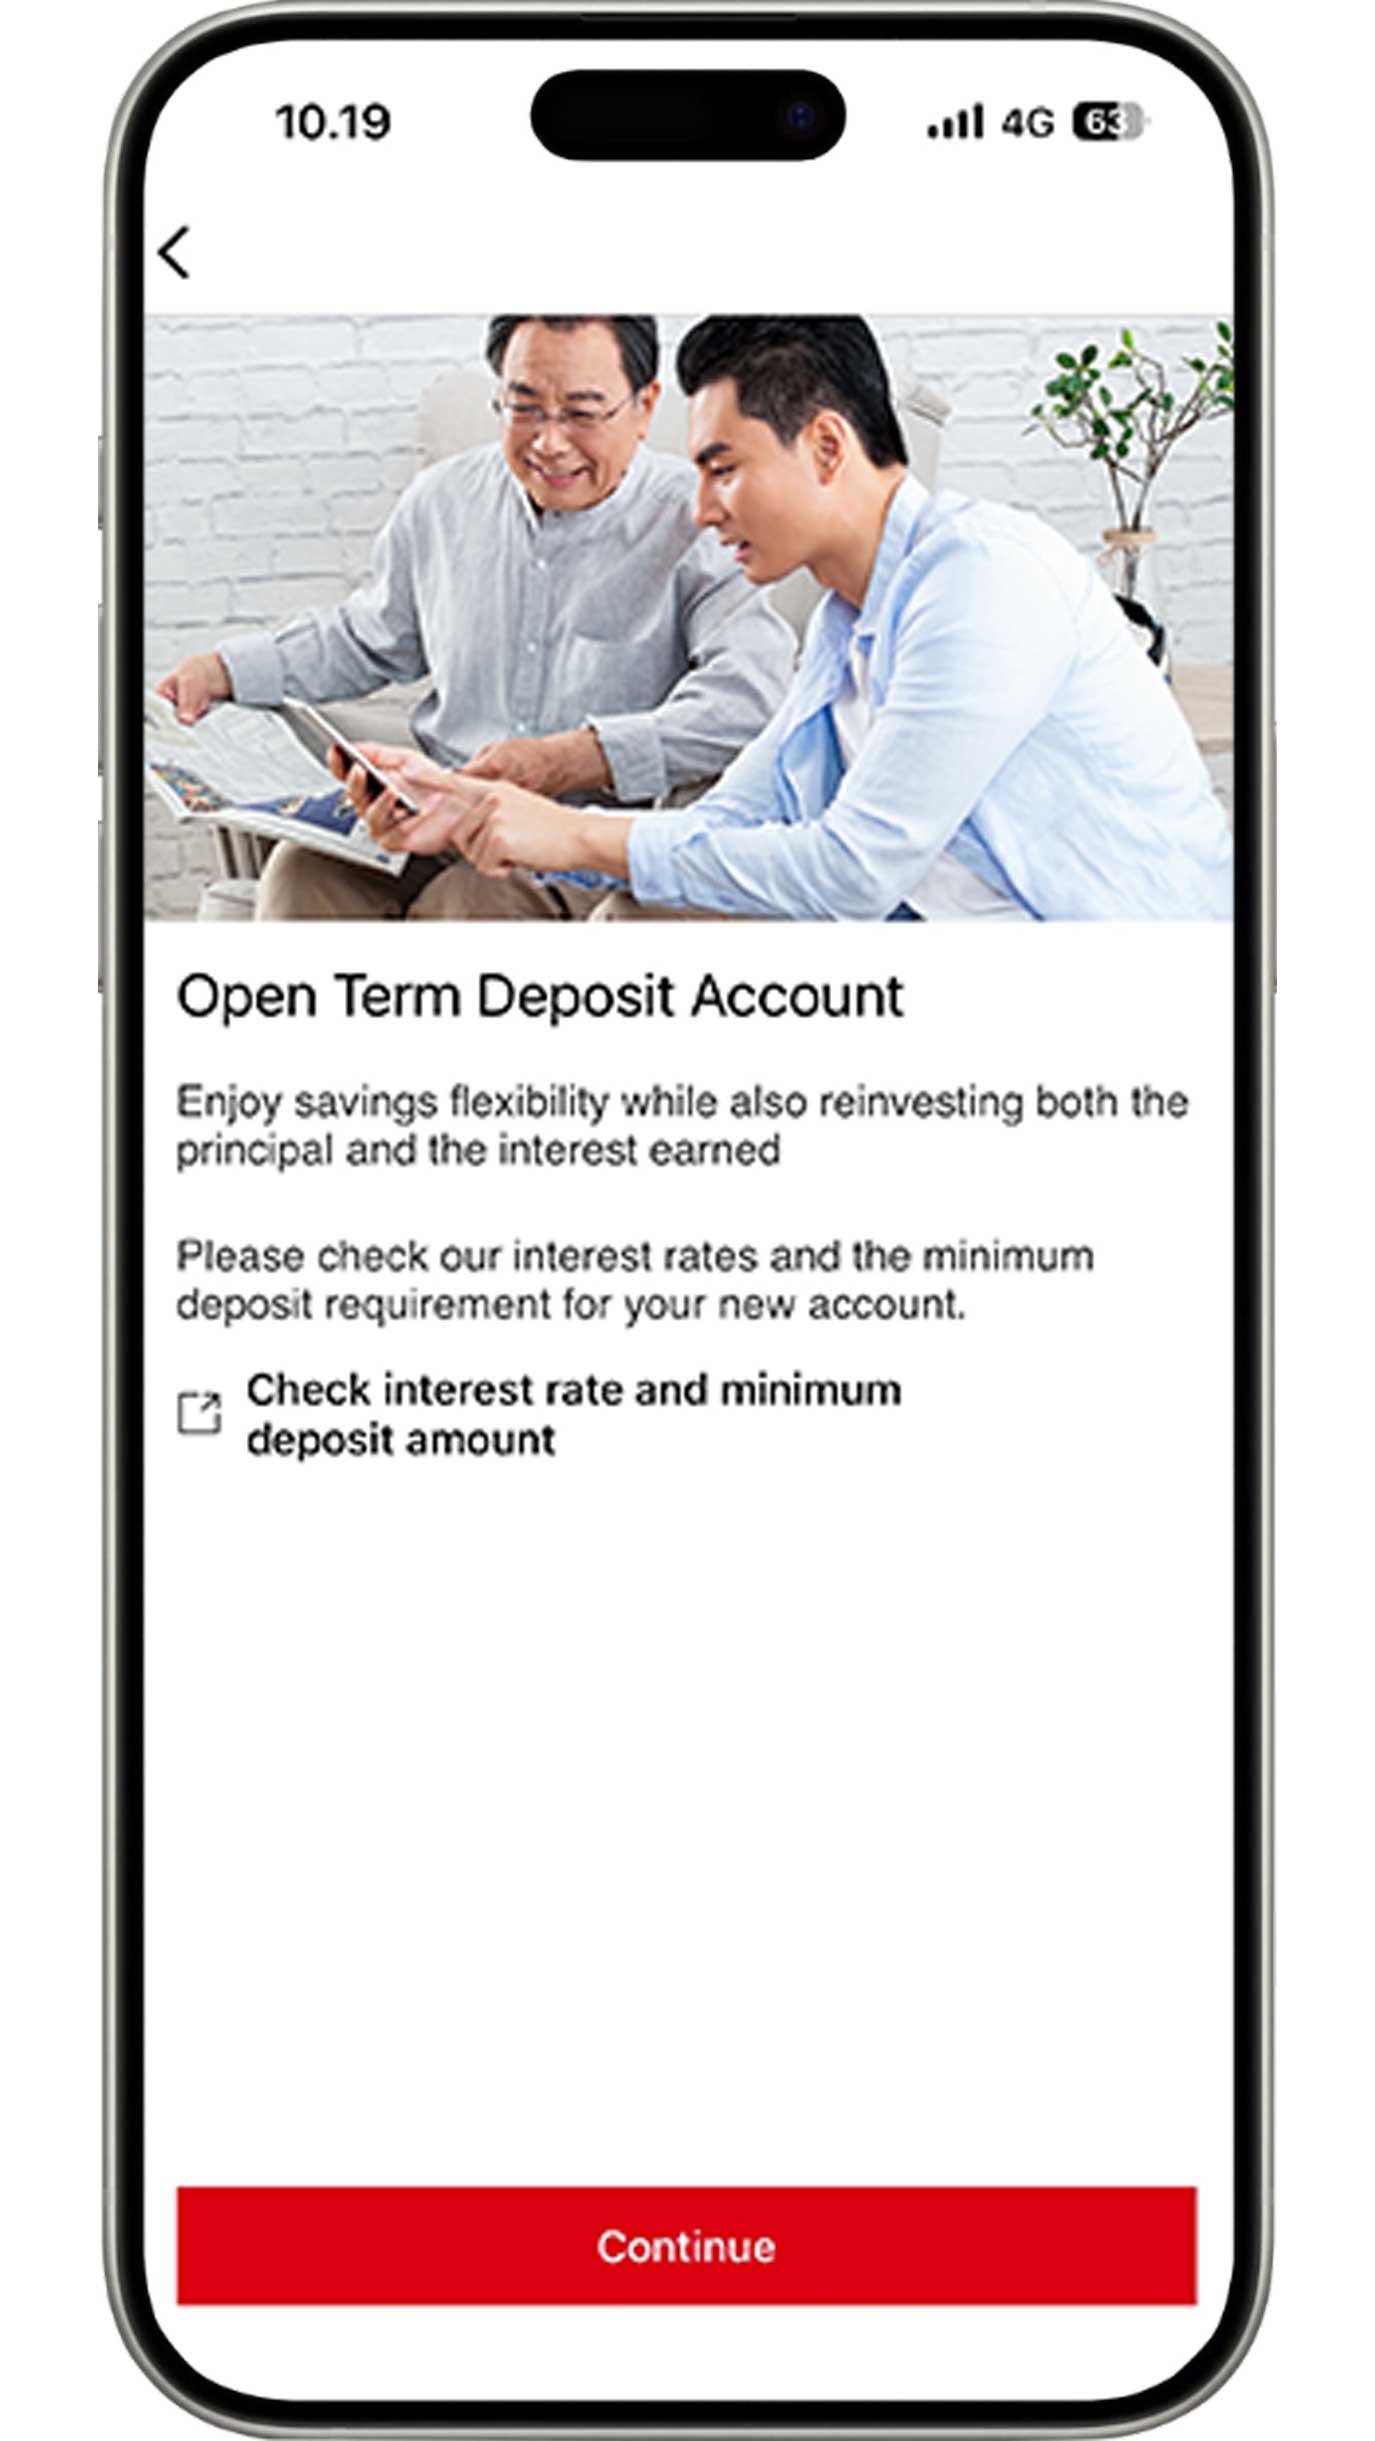
Before clicking the "Continue" button, ensure you have read the information in "Check interest rate and minimum deposit amount".
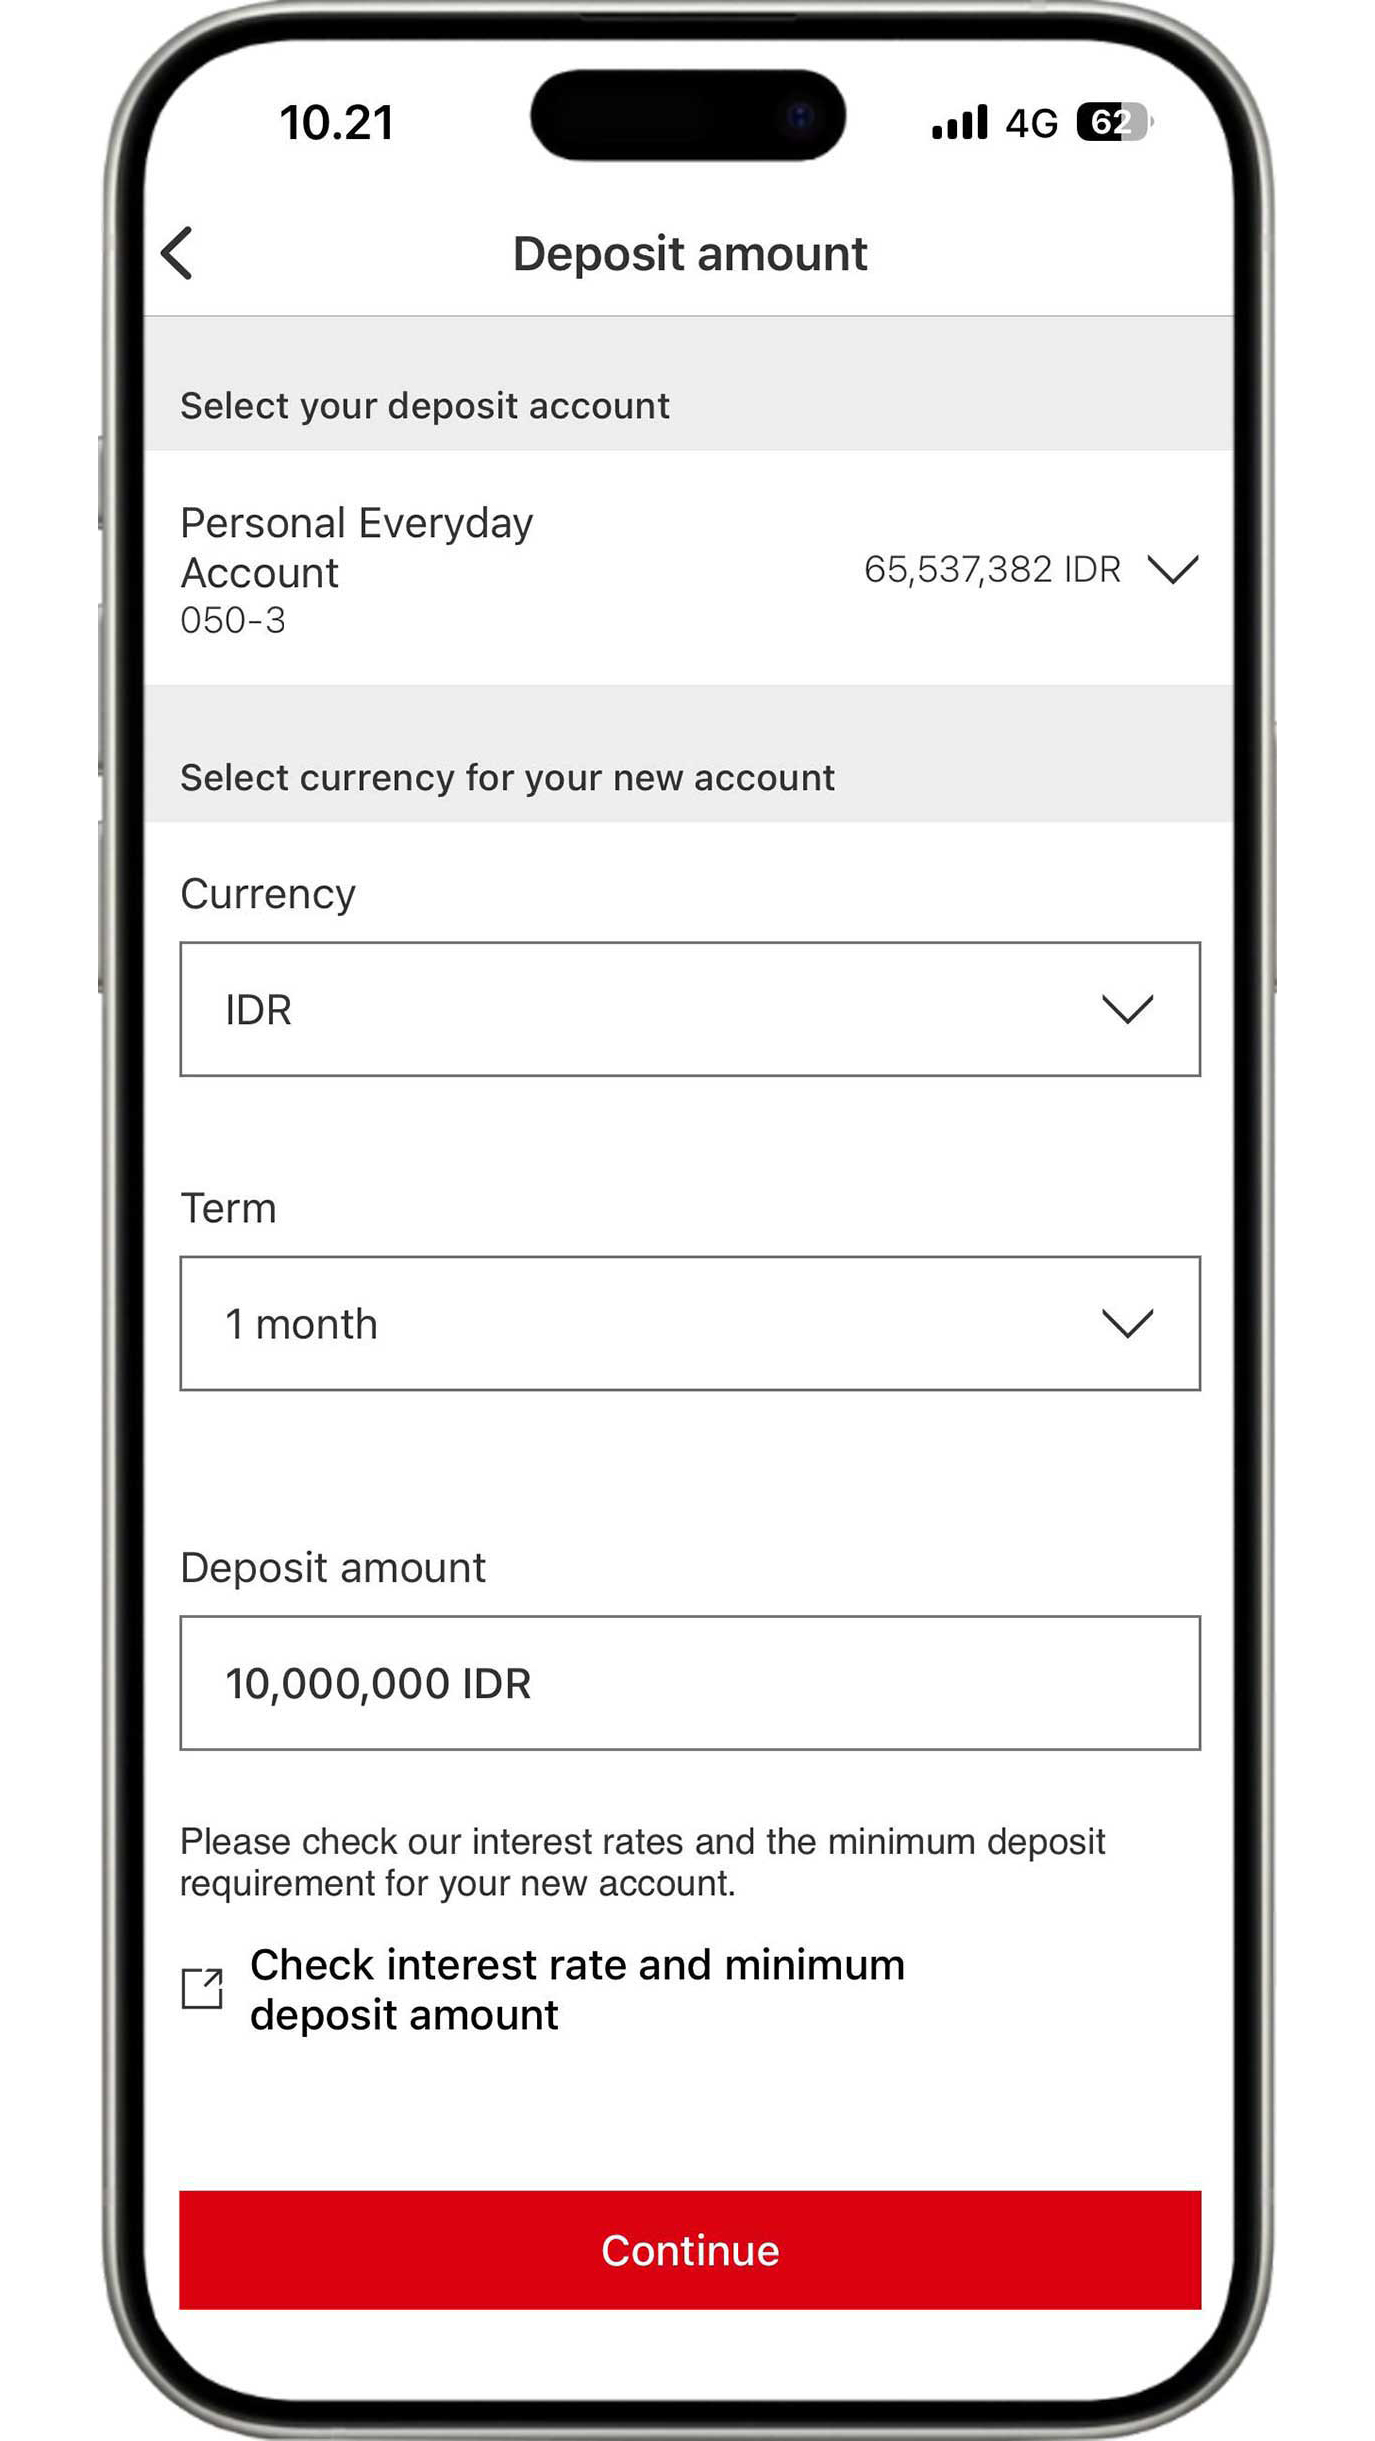
Complete the deposit information based on your requirements and click the "Continue" button.
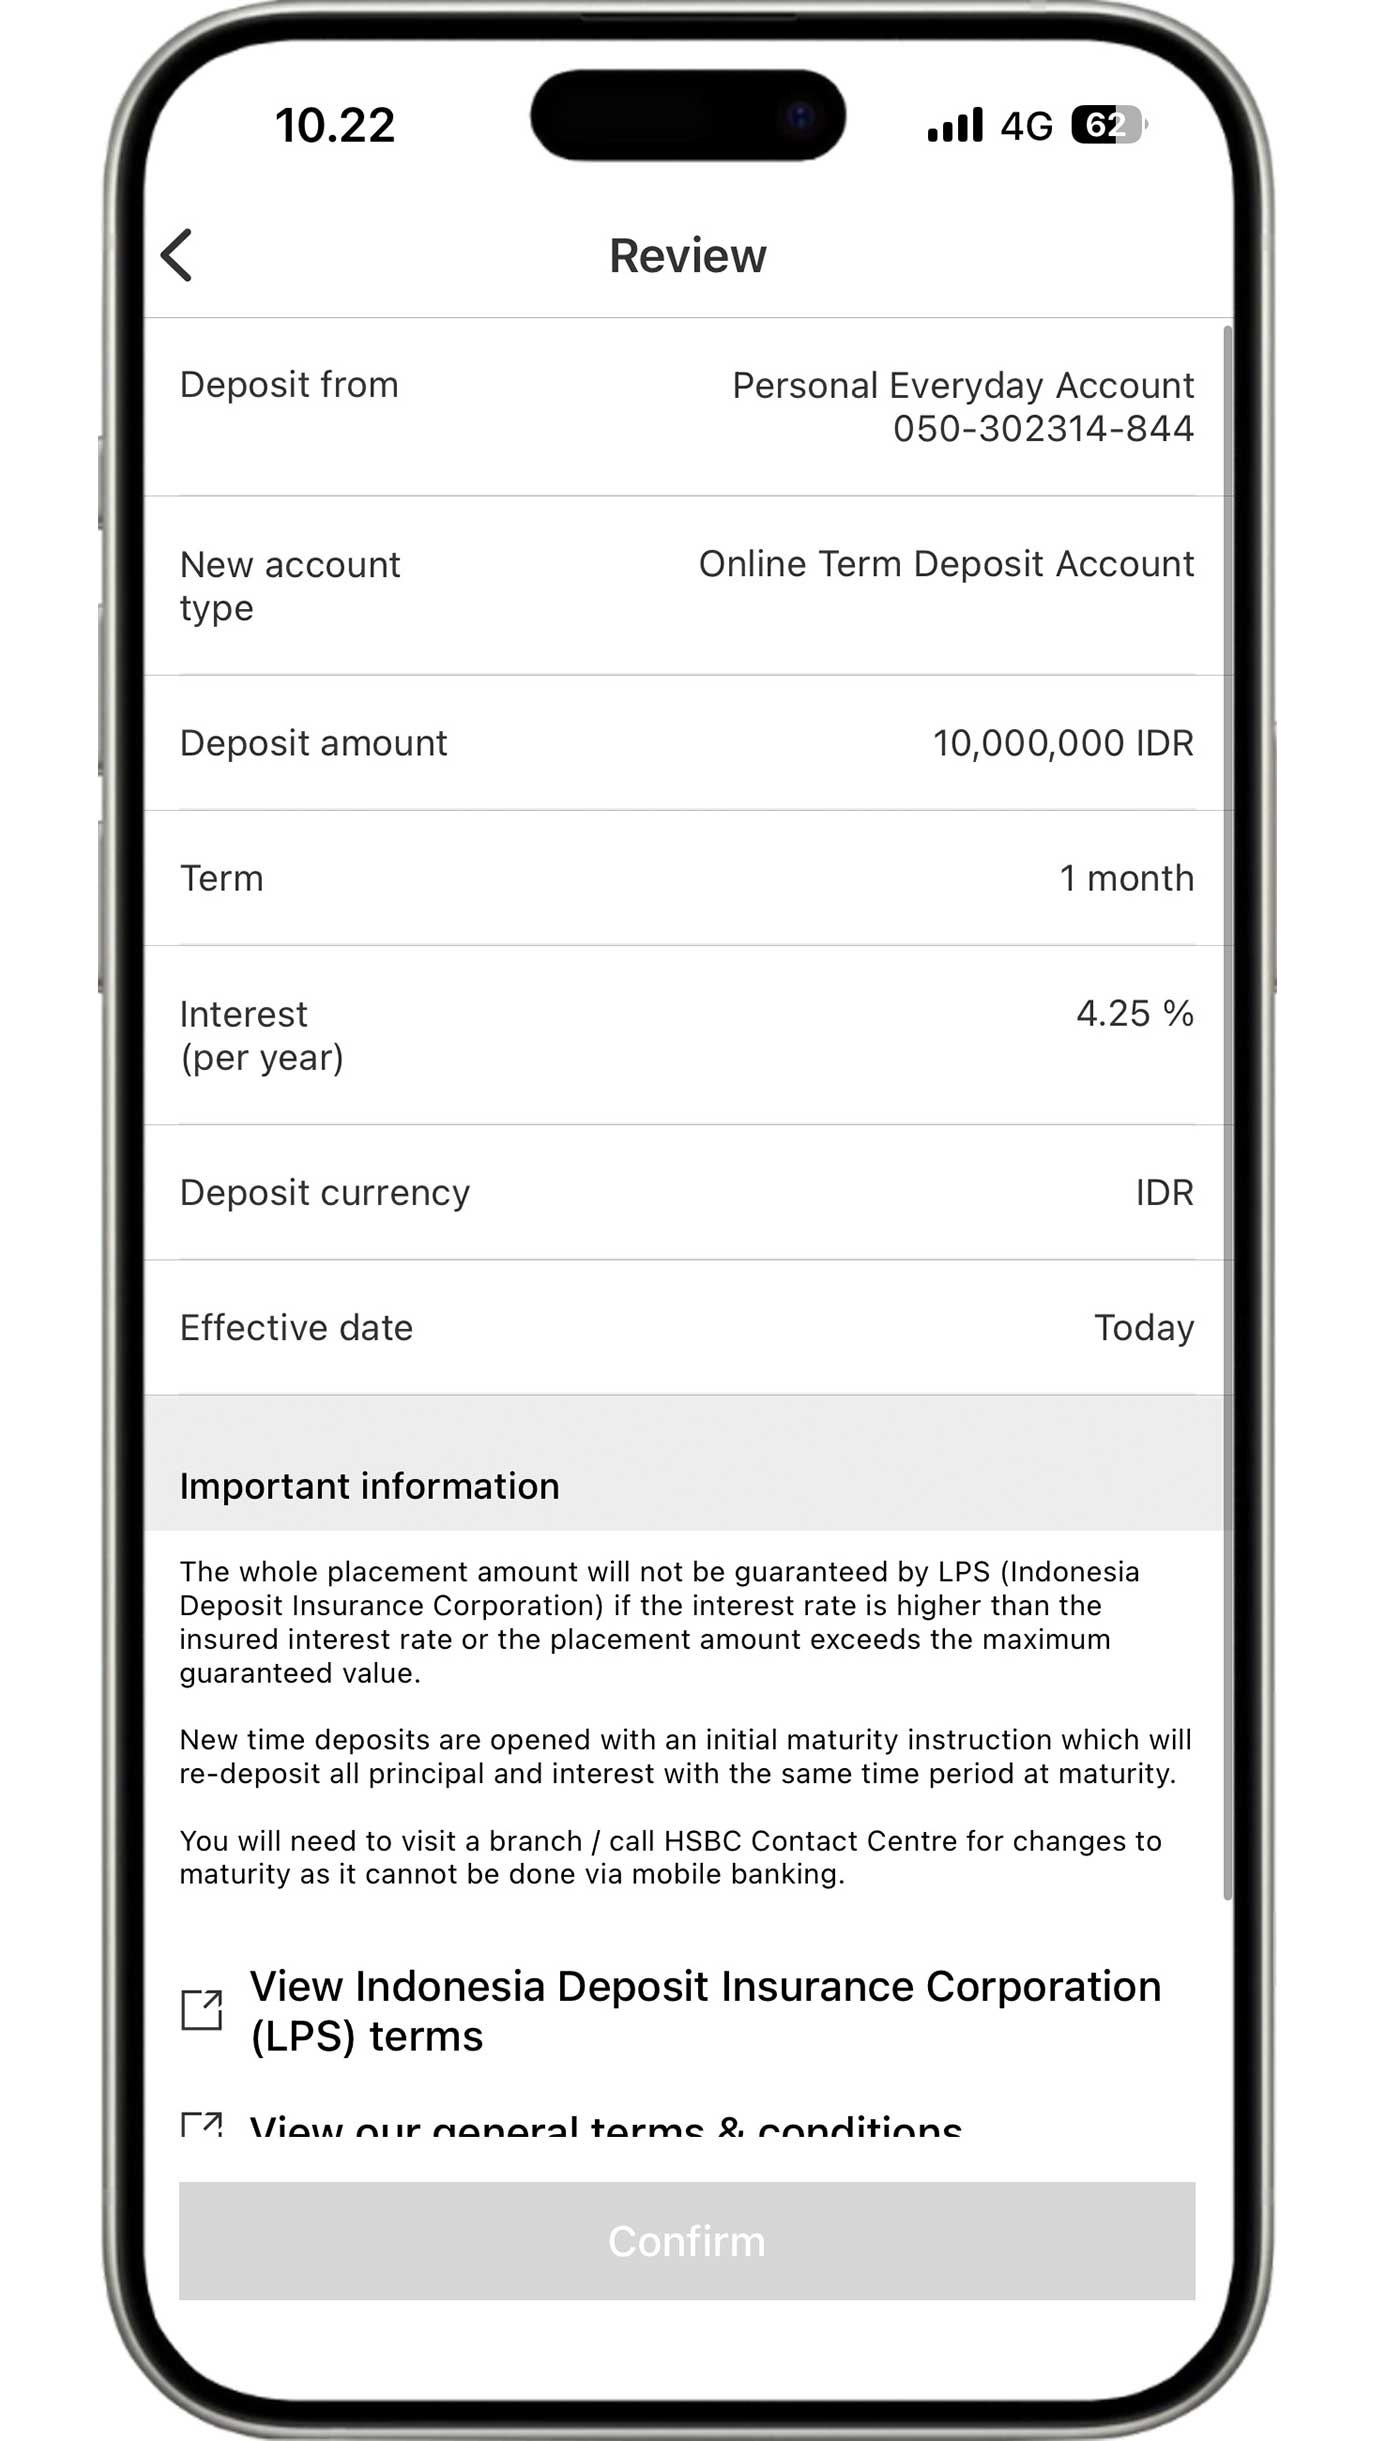
Review your deposit details as well as read and agree to the
applicable terms and conditions.
If all the information is accurate, click the "Confirm"
button to
complete the deposit account opening process.
Open multicurrency account
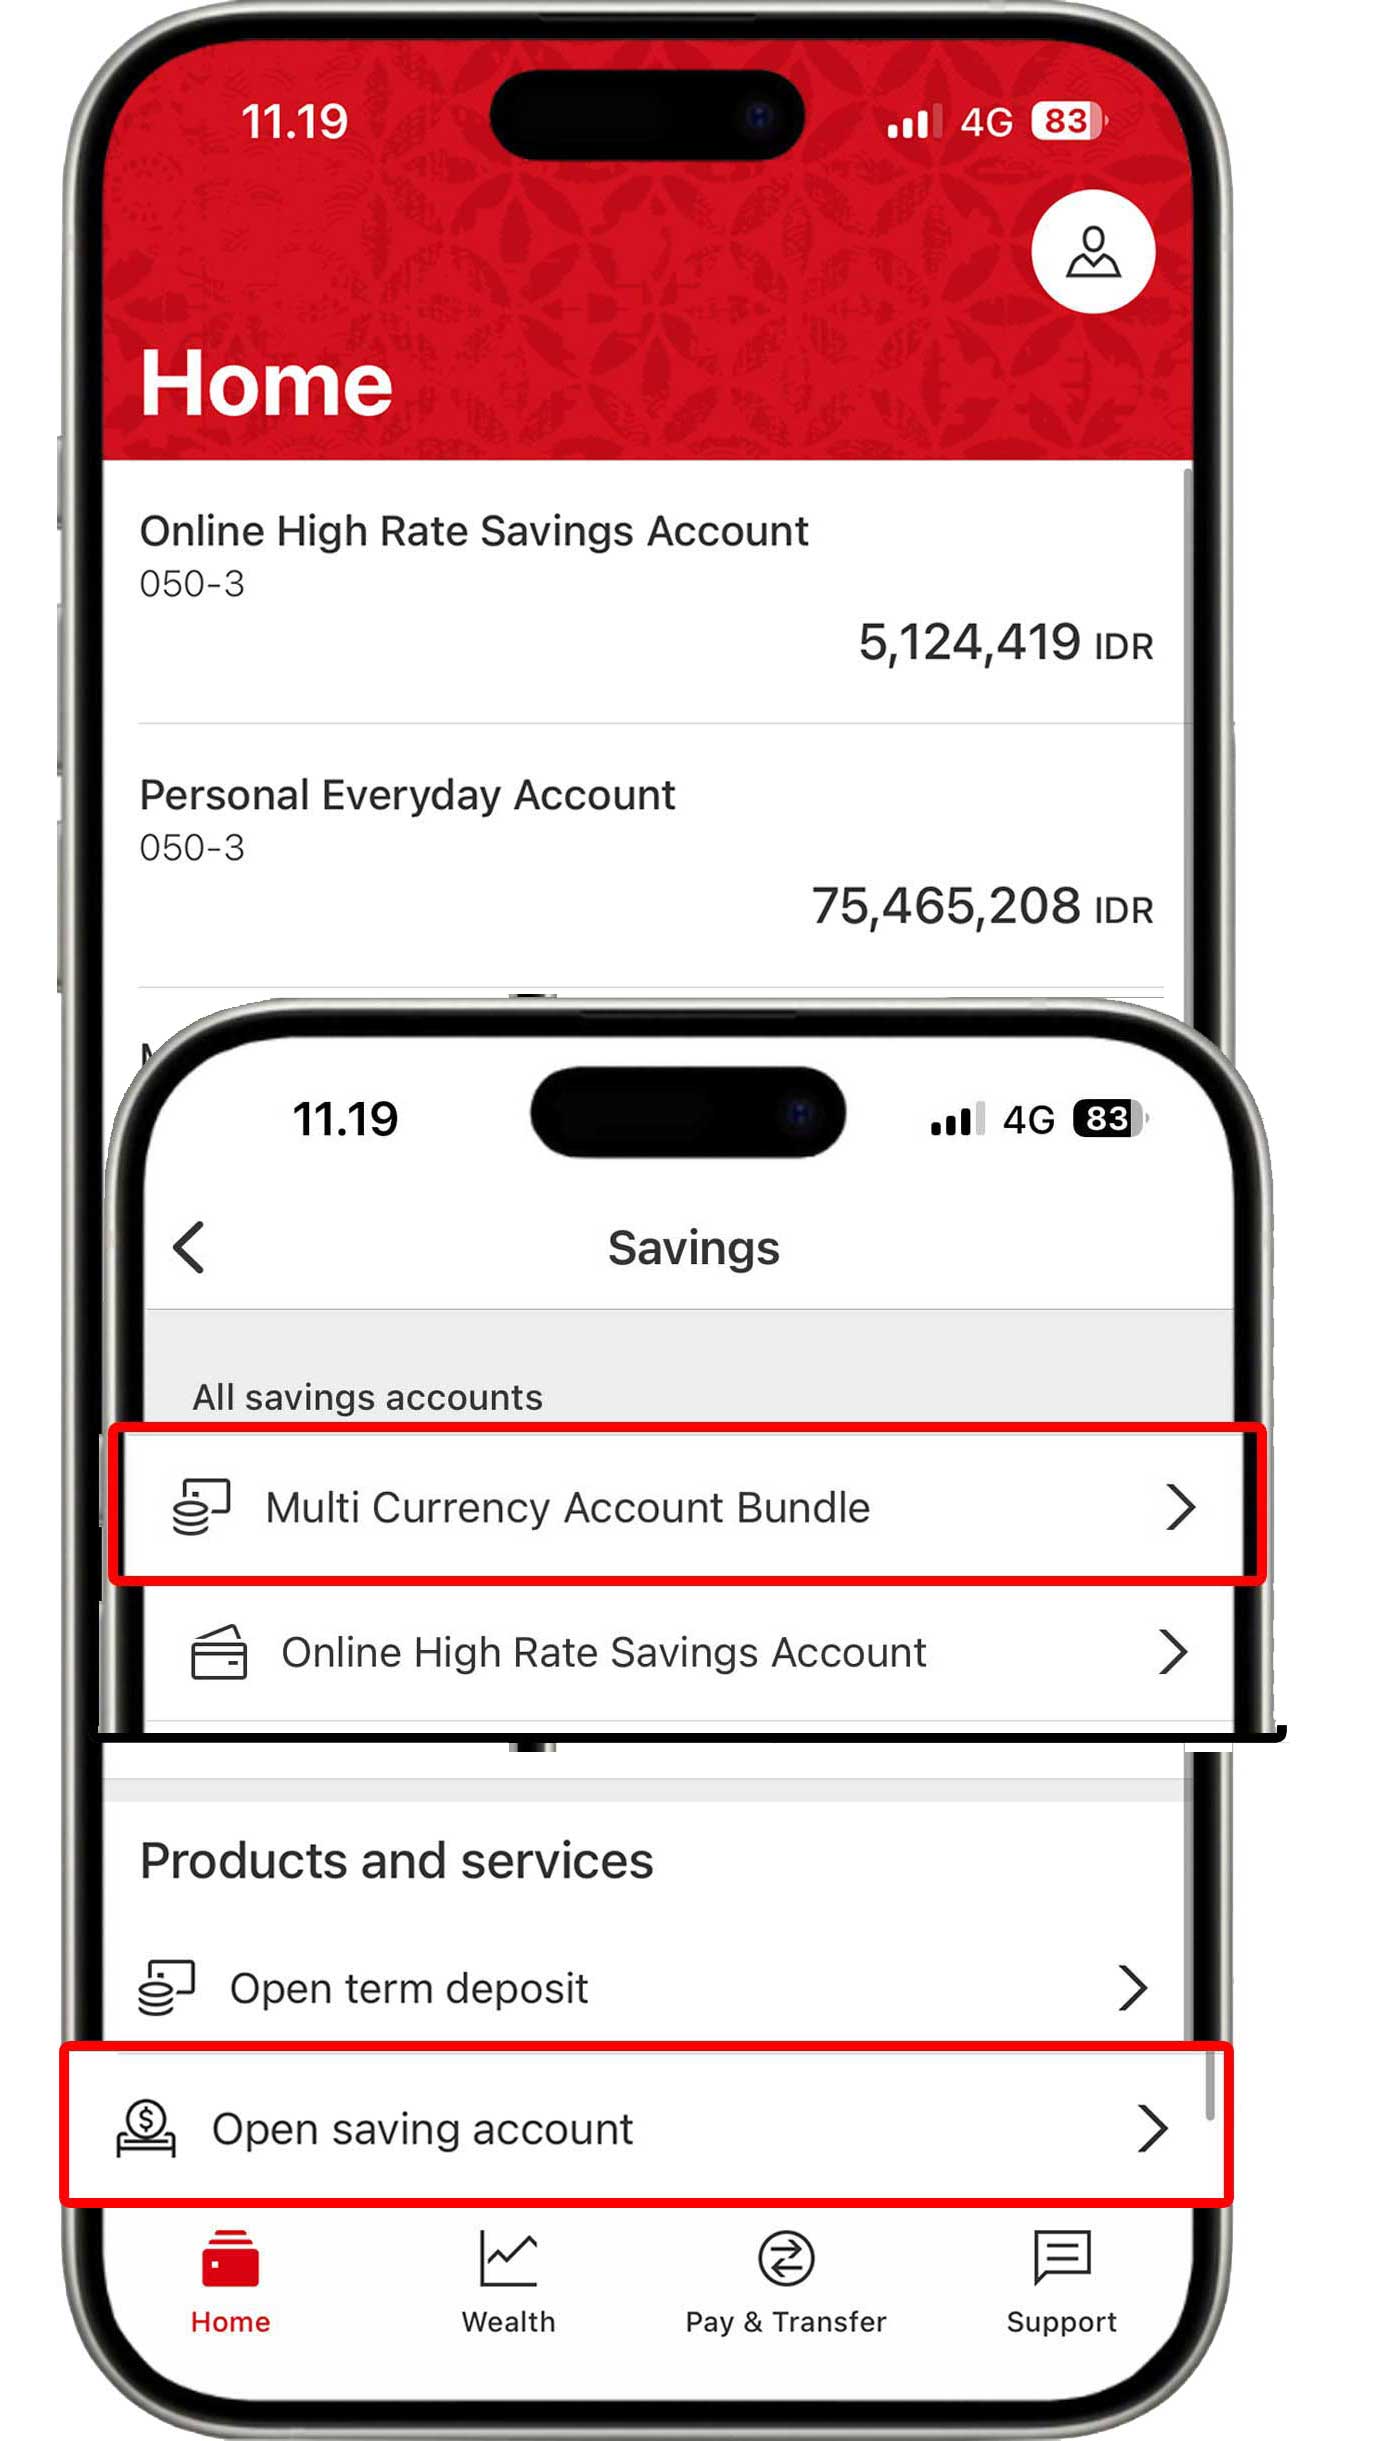
On the Home menu, click "Open saving account" and select "Multi Currency Account Bundle".

Before clicking the "Continue" button, ensure you have read the information in "Check interest rate and minimum deposit amount".
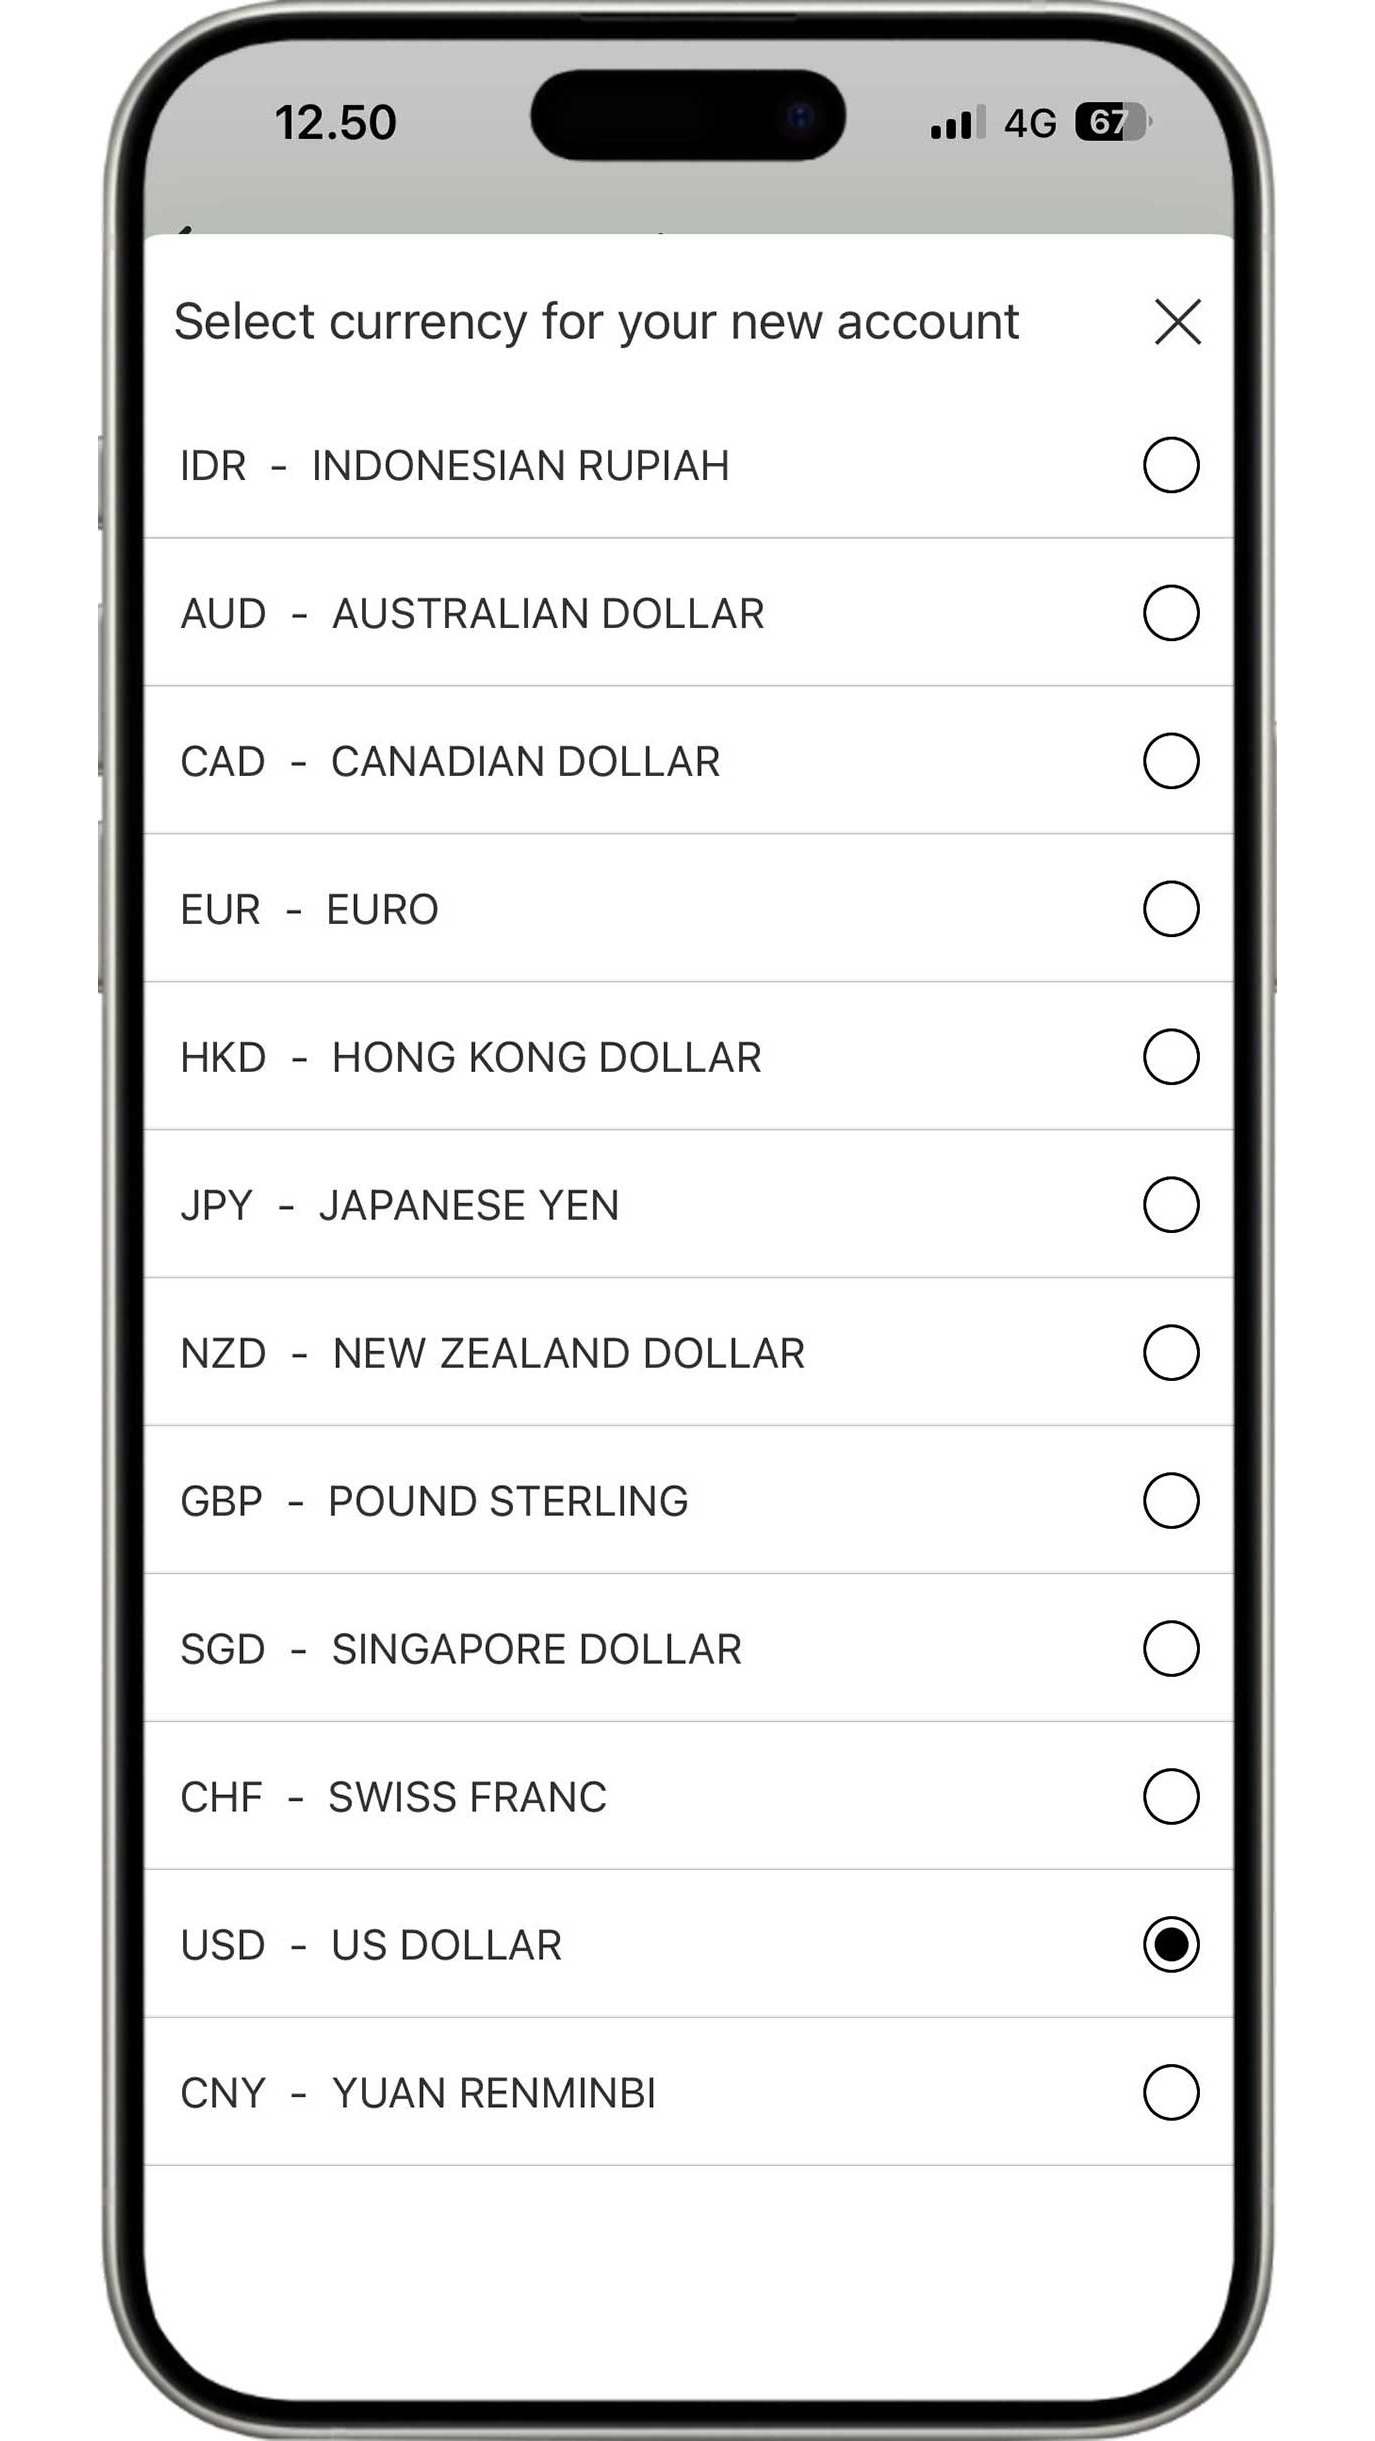
There are 12 currencies available that can be selected depending on your needs.
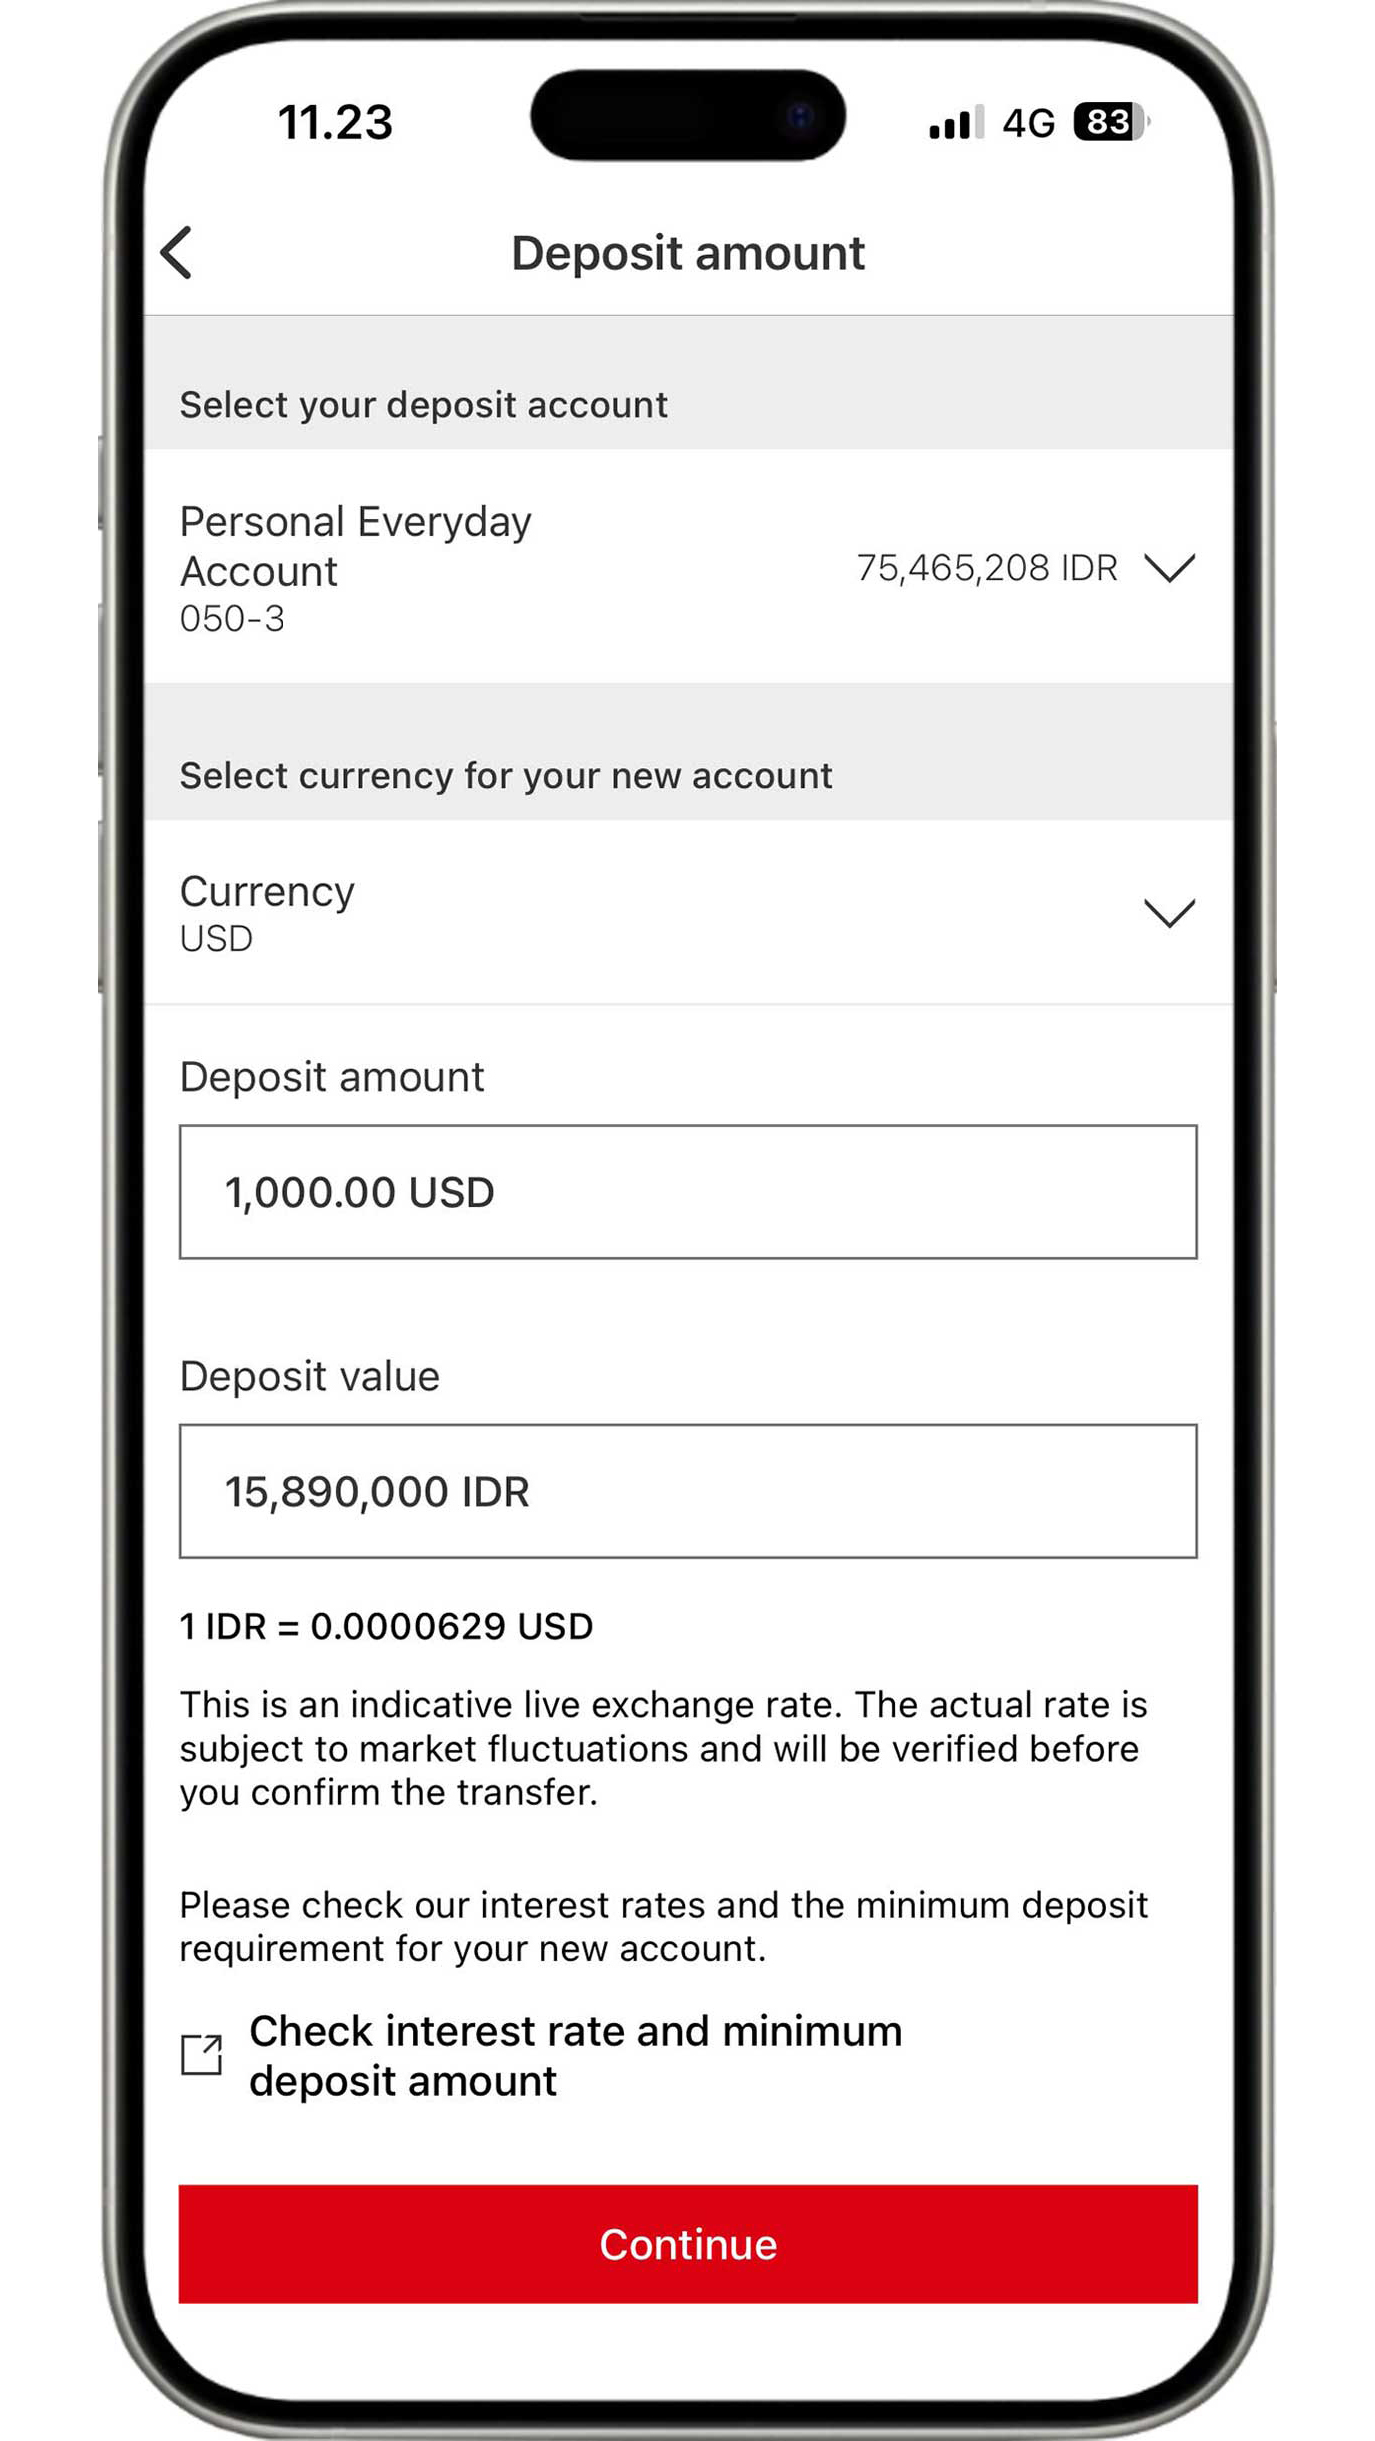
Select the currency and complete the nominal according to your needs. Next, click the "Continue" button.
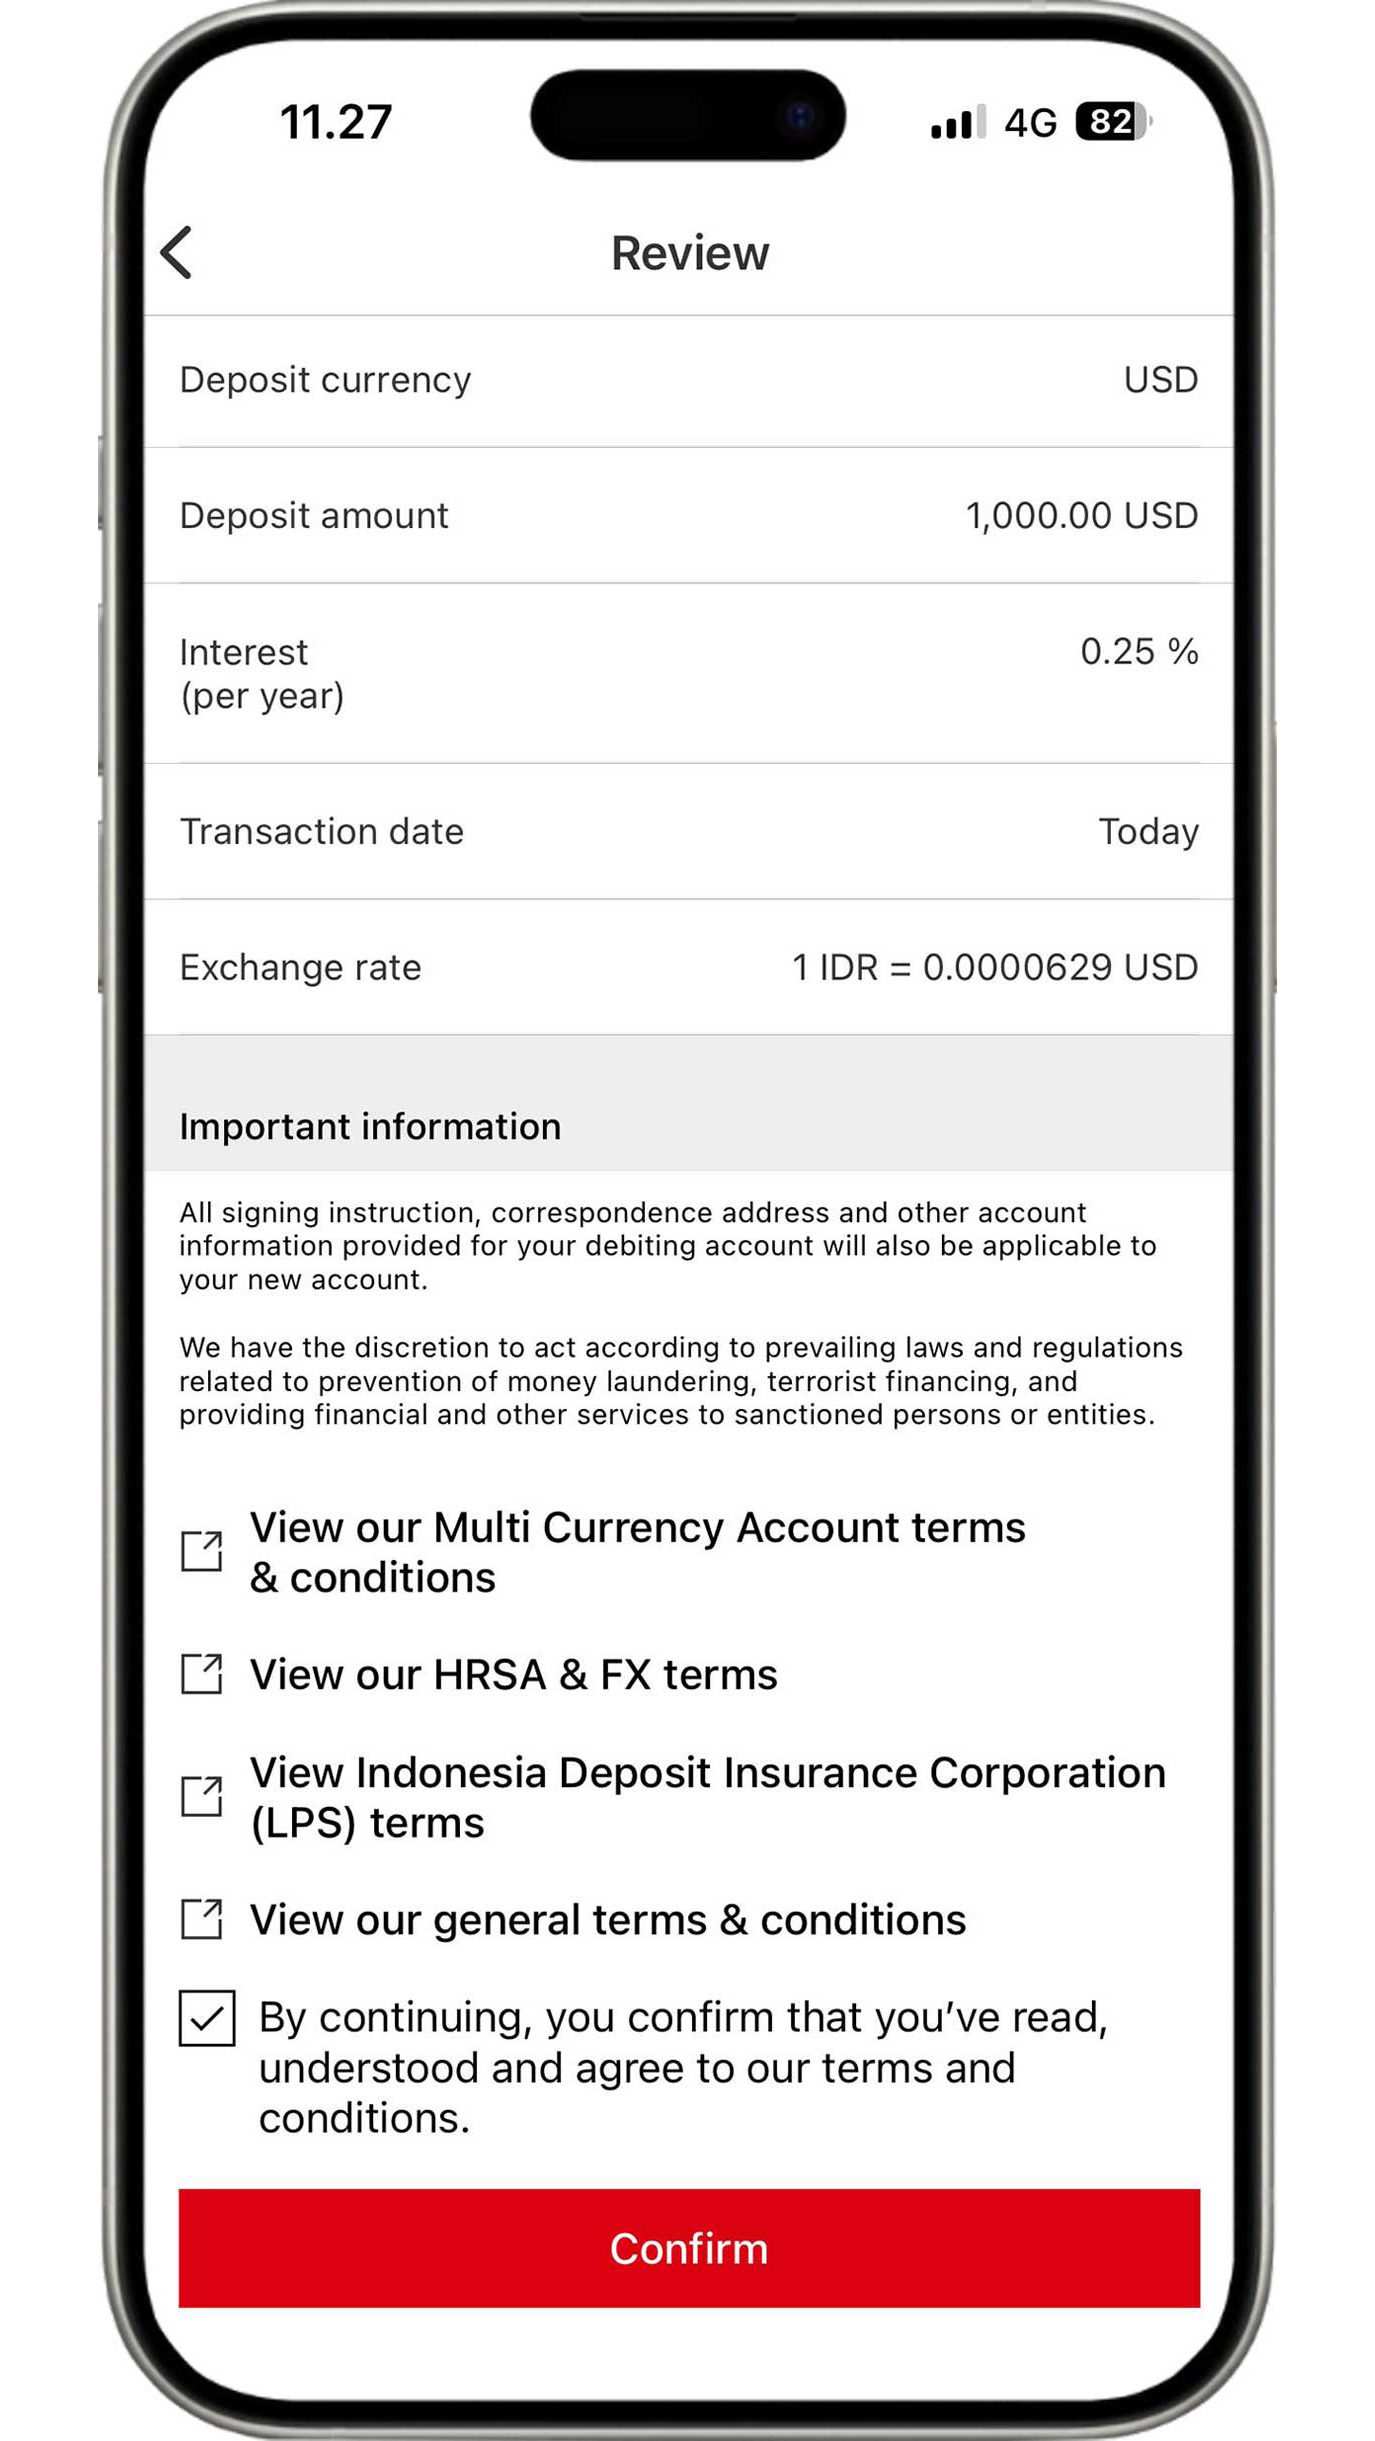
Review the information you have input as well as read and agree to the applicable terms and conditions. If all the information is accurate, click the "Confirm" button to complete the multi currency account opening process.
Steps for Transfers and Check Account Transactions
Domestic Transfer
BI-FAST
Enjoy free transfers with transaction limit of up to IDR 1 billion per day to any account and at any time with BI-FAST. Follow these steps:

On the Pay & Transfer menu, click the "Pay & transfer" button. Then, select the account you would like to use.

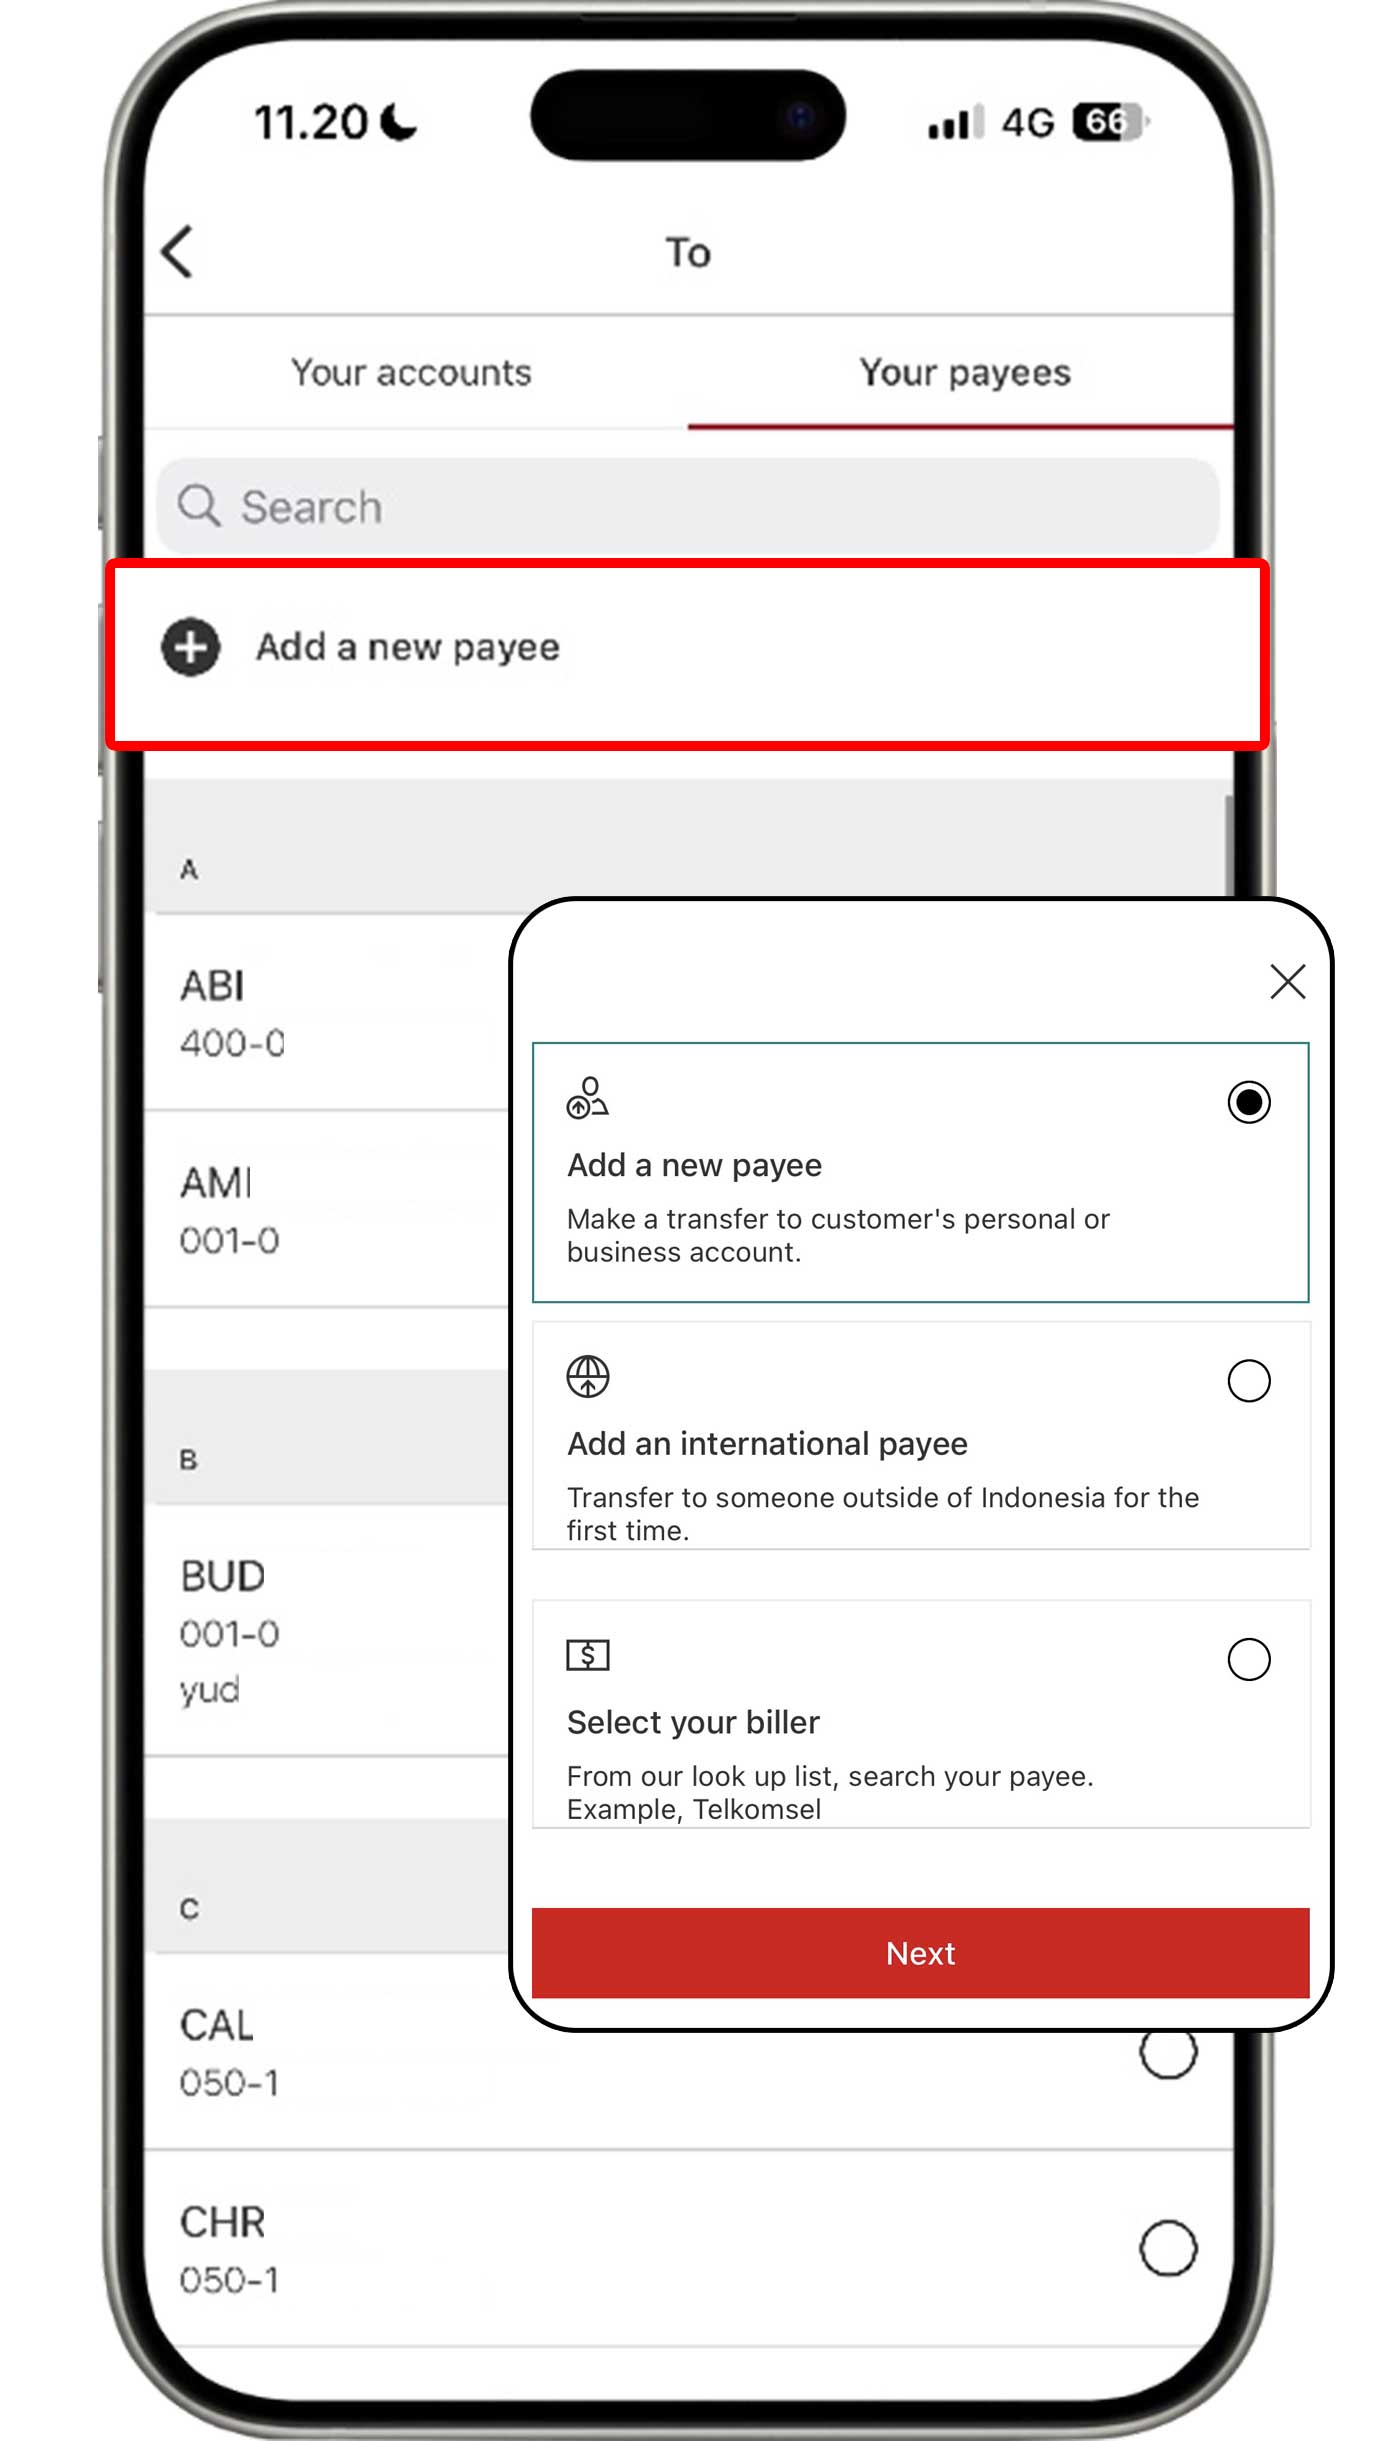
Select the Your payees tab and click the "Add a new
payee" button.
Then, select "Add a new payee" to continue the transaction.
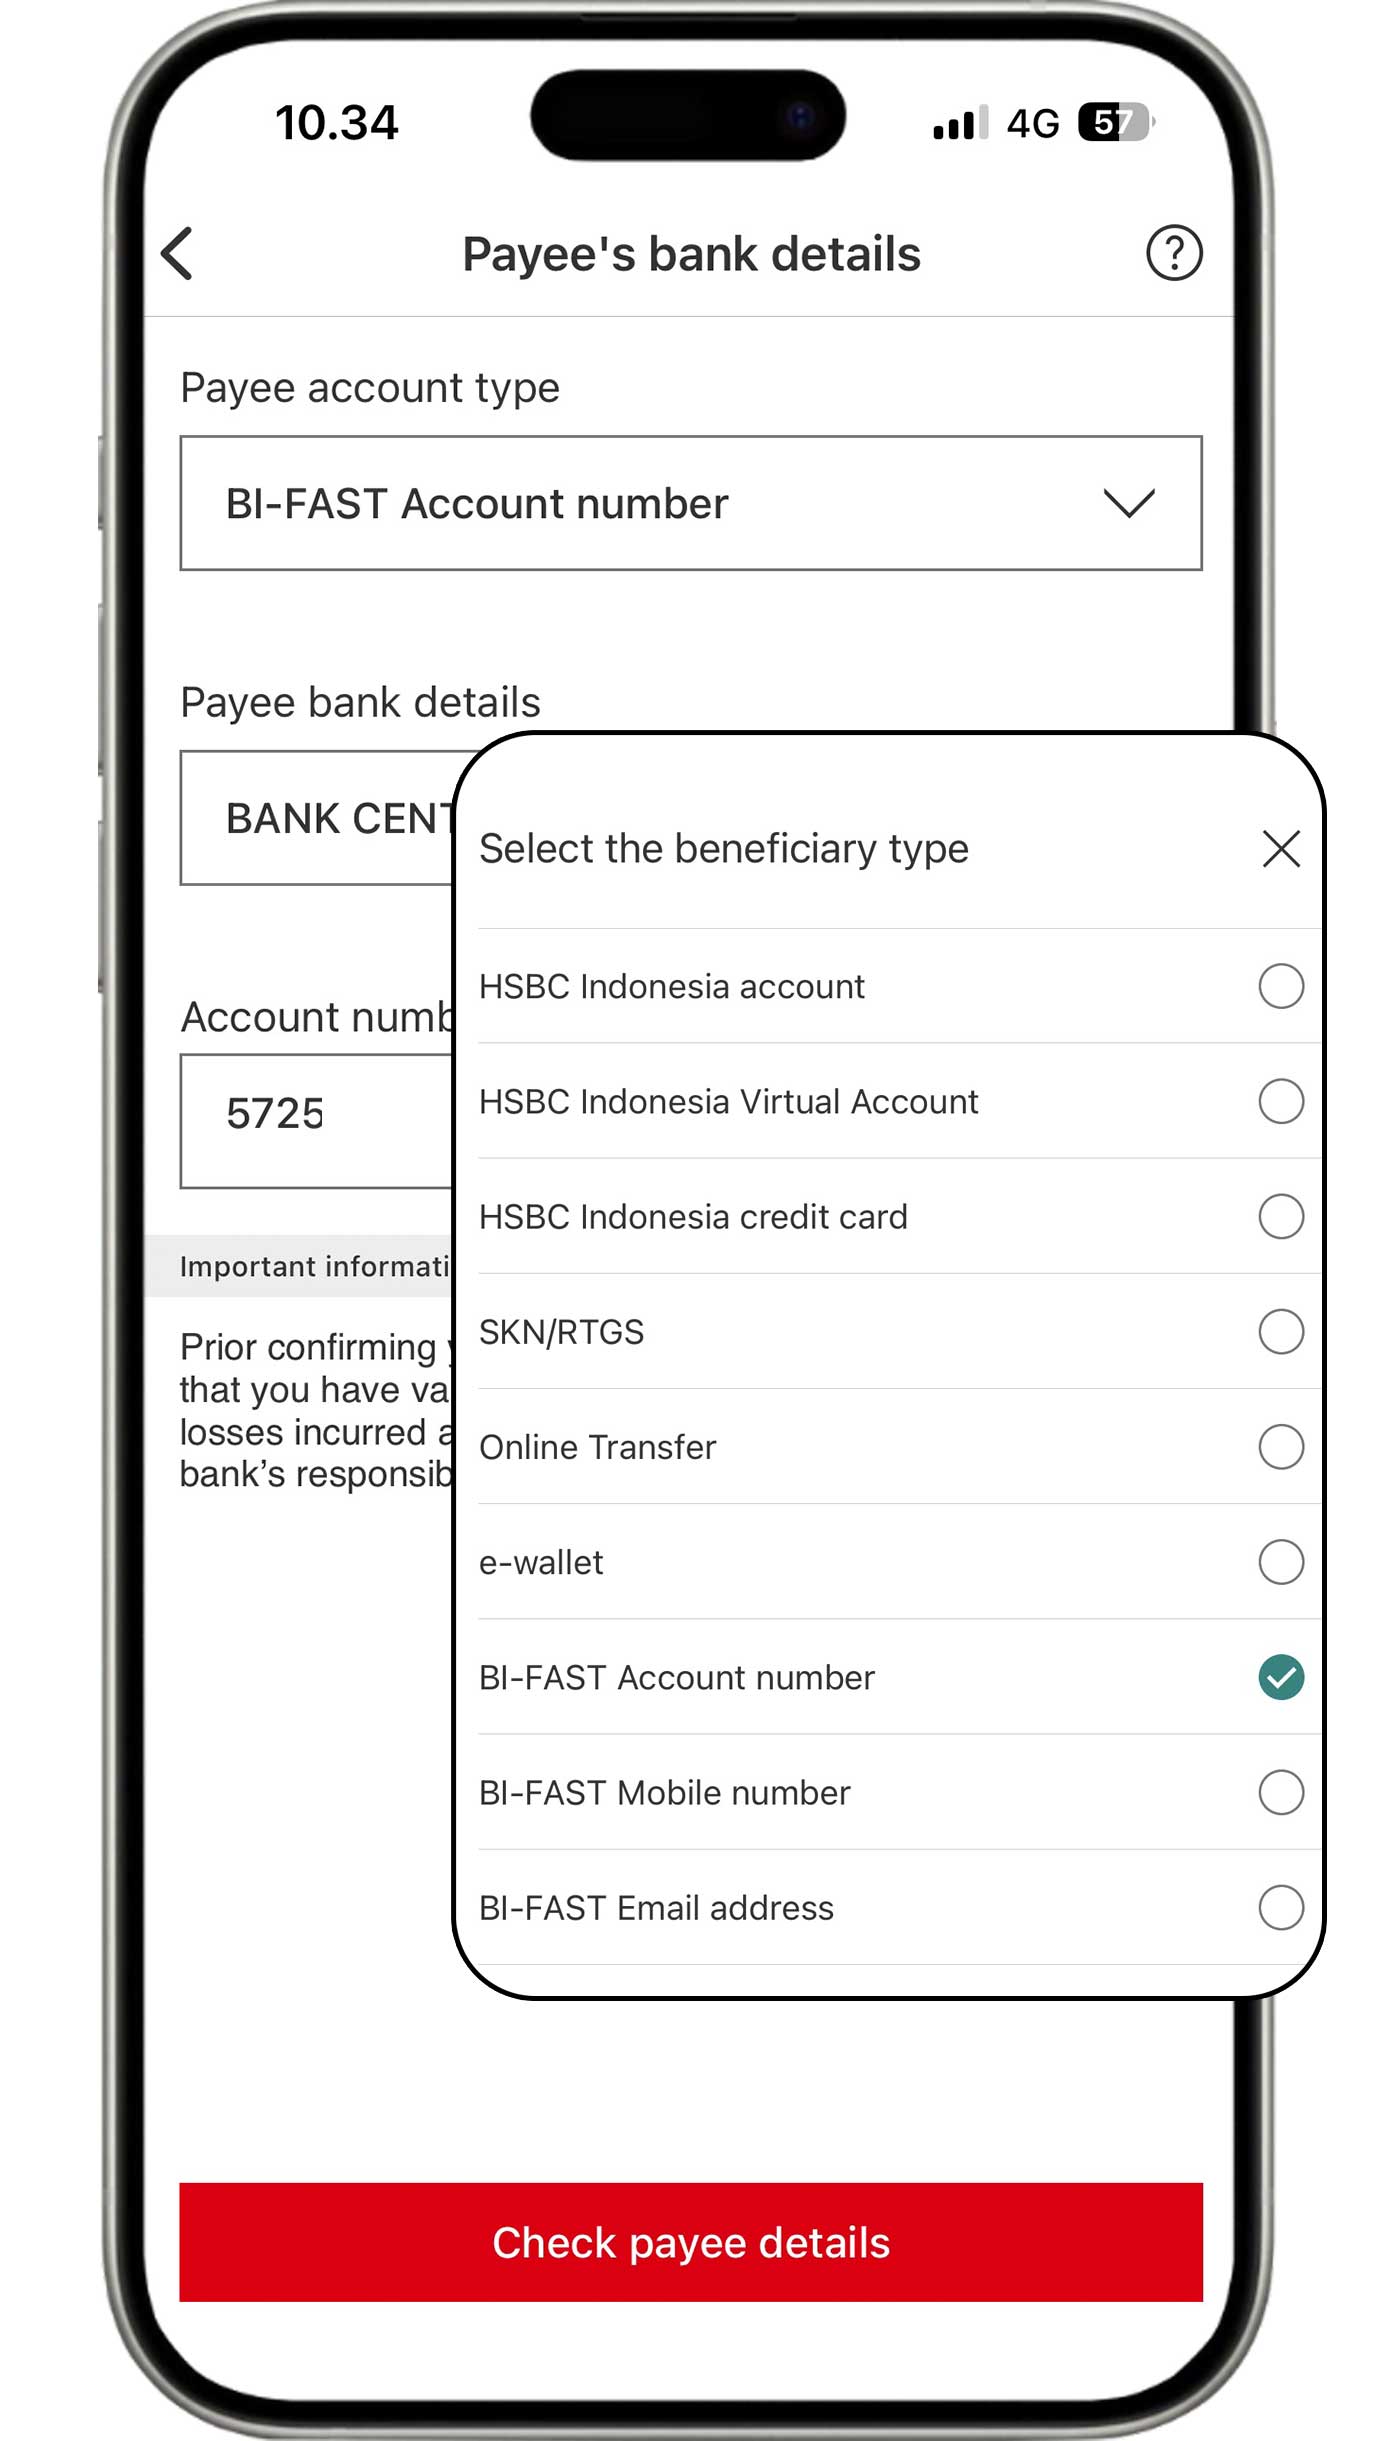
Select BI-FAST. You can choose the BI-FAST account type depending on the account for your transfers. Then, complete the information and click the "Check payee details" button.
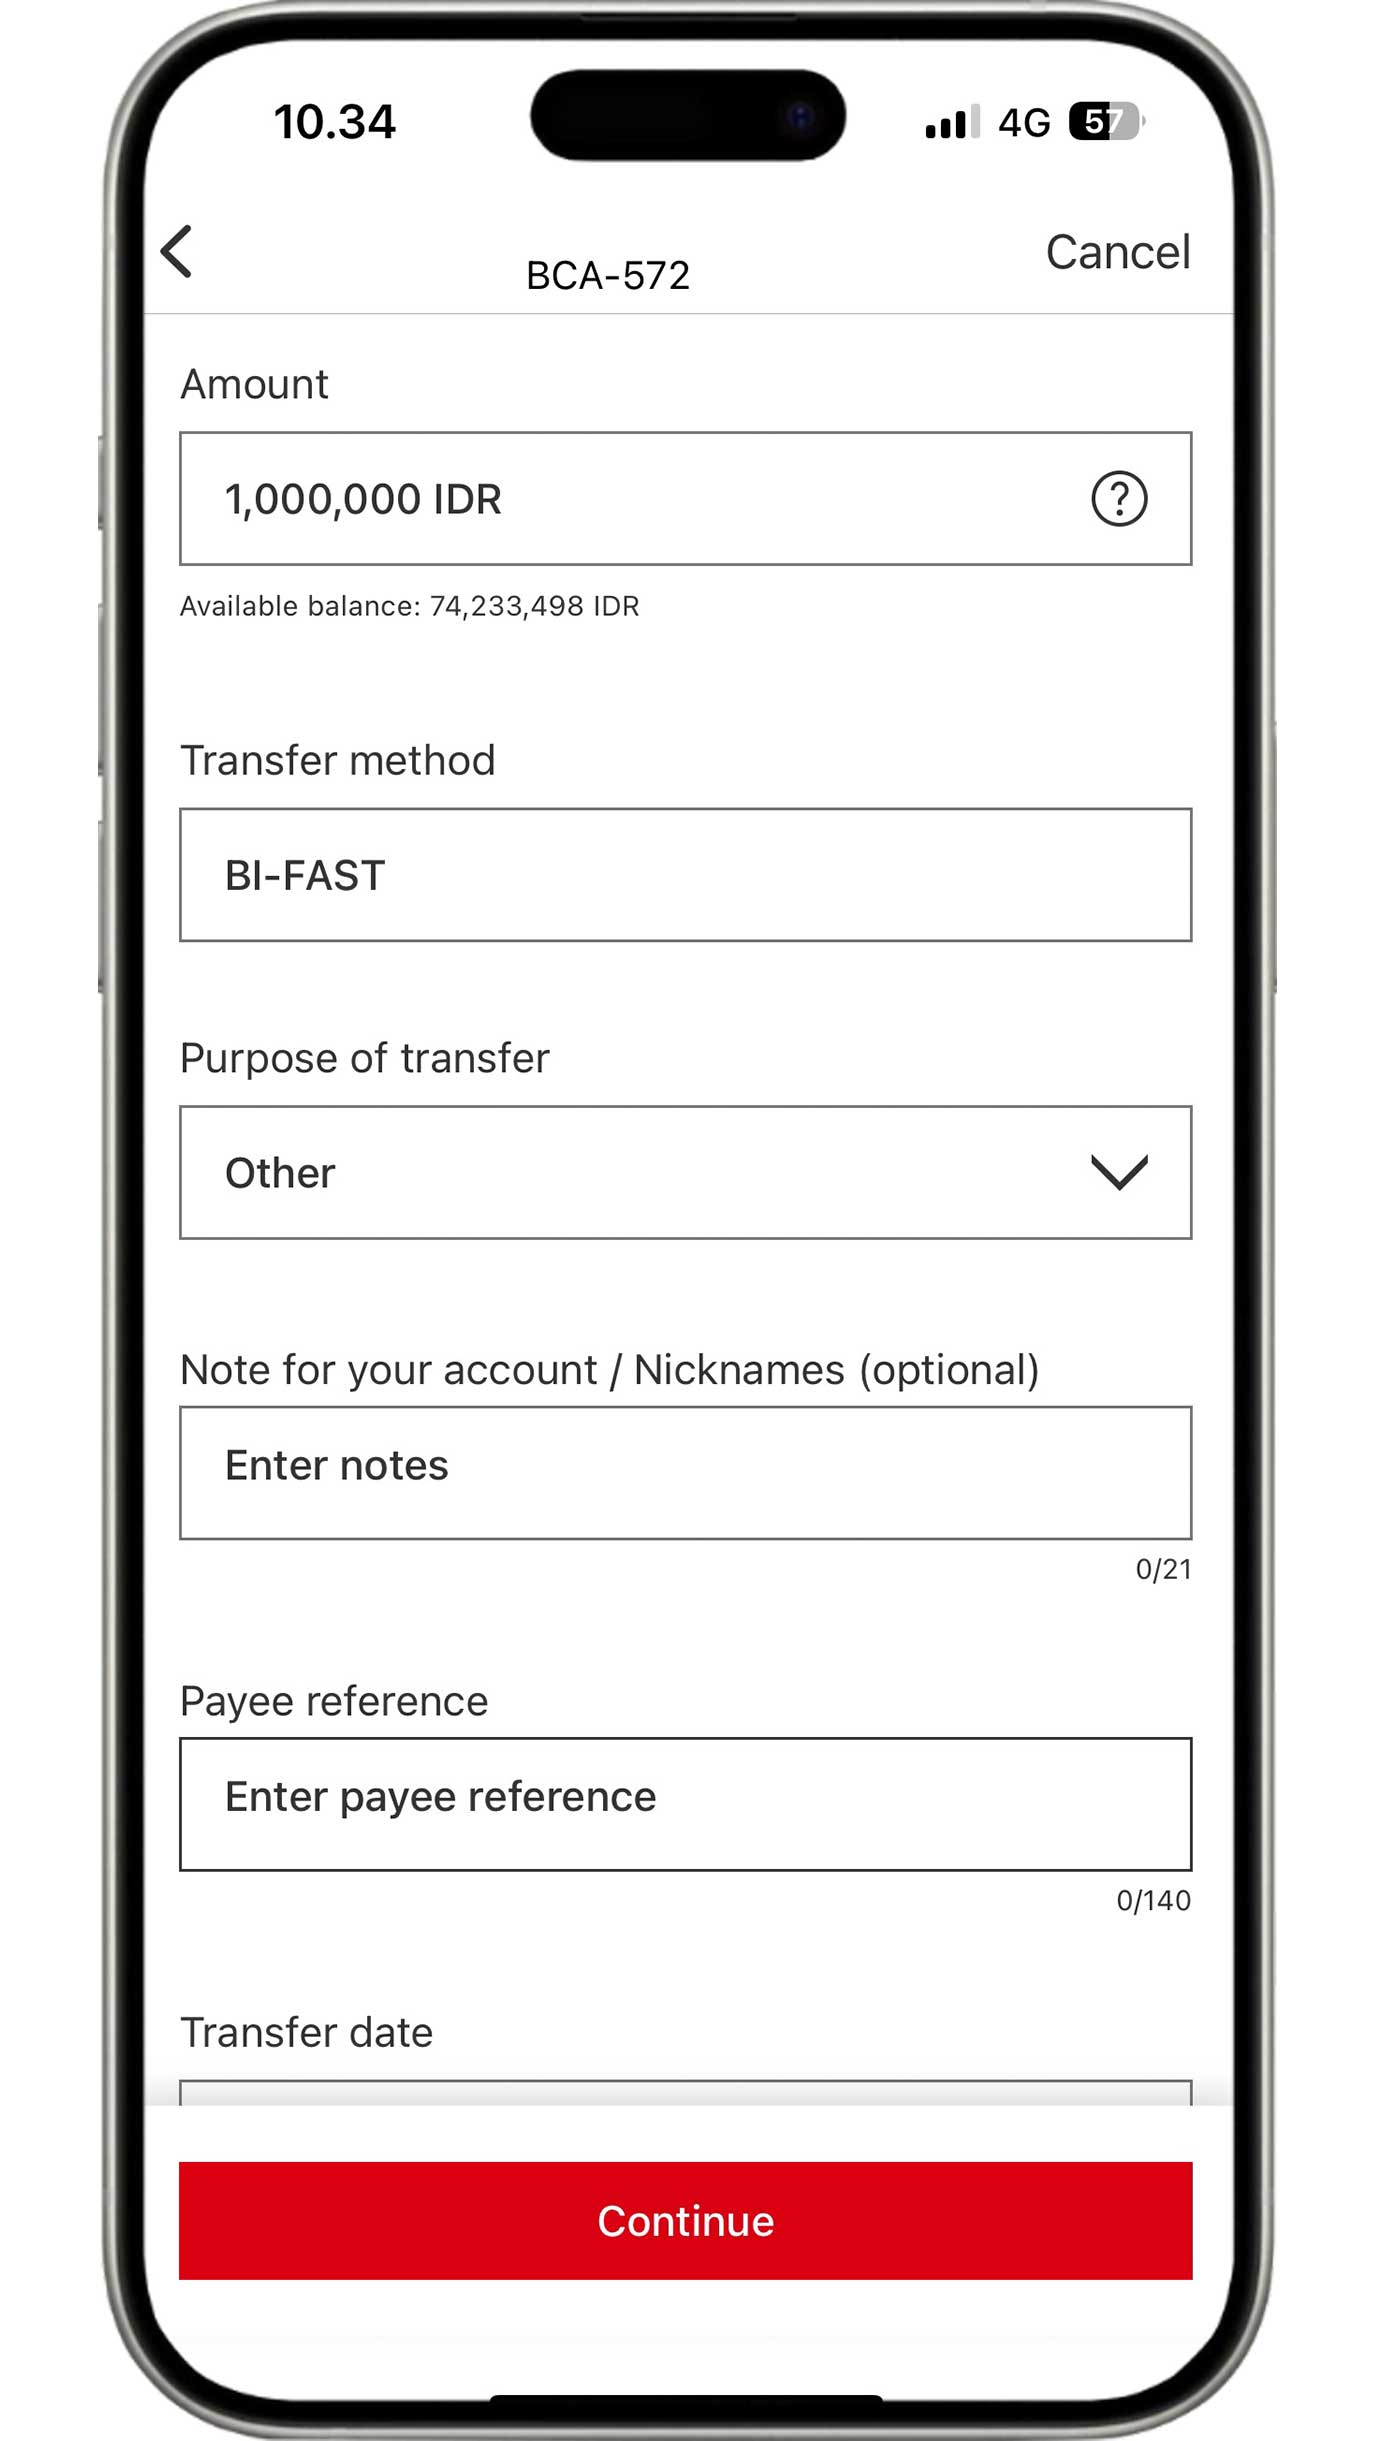
Complete the information based on your requirements, then click the "Continue" button.
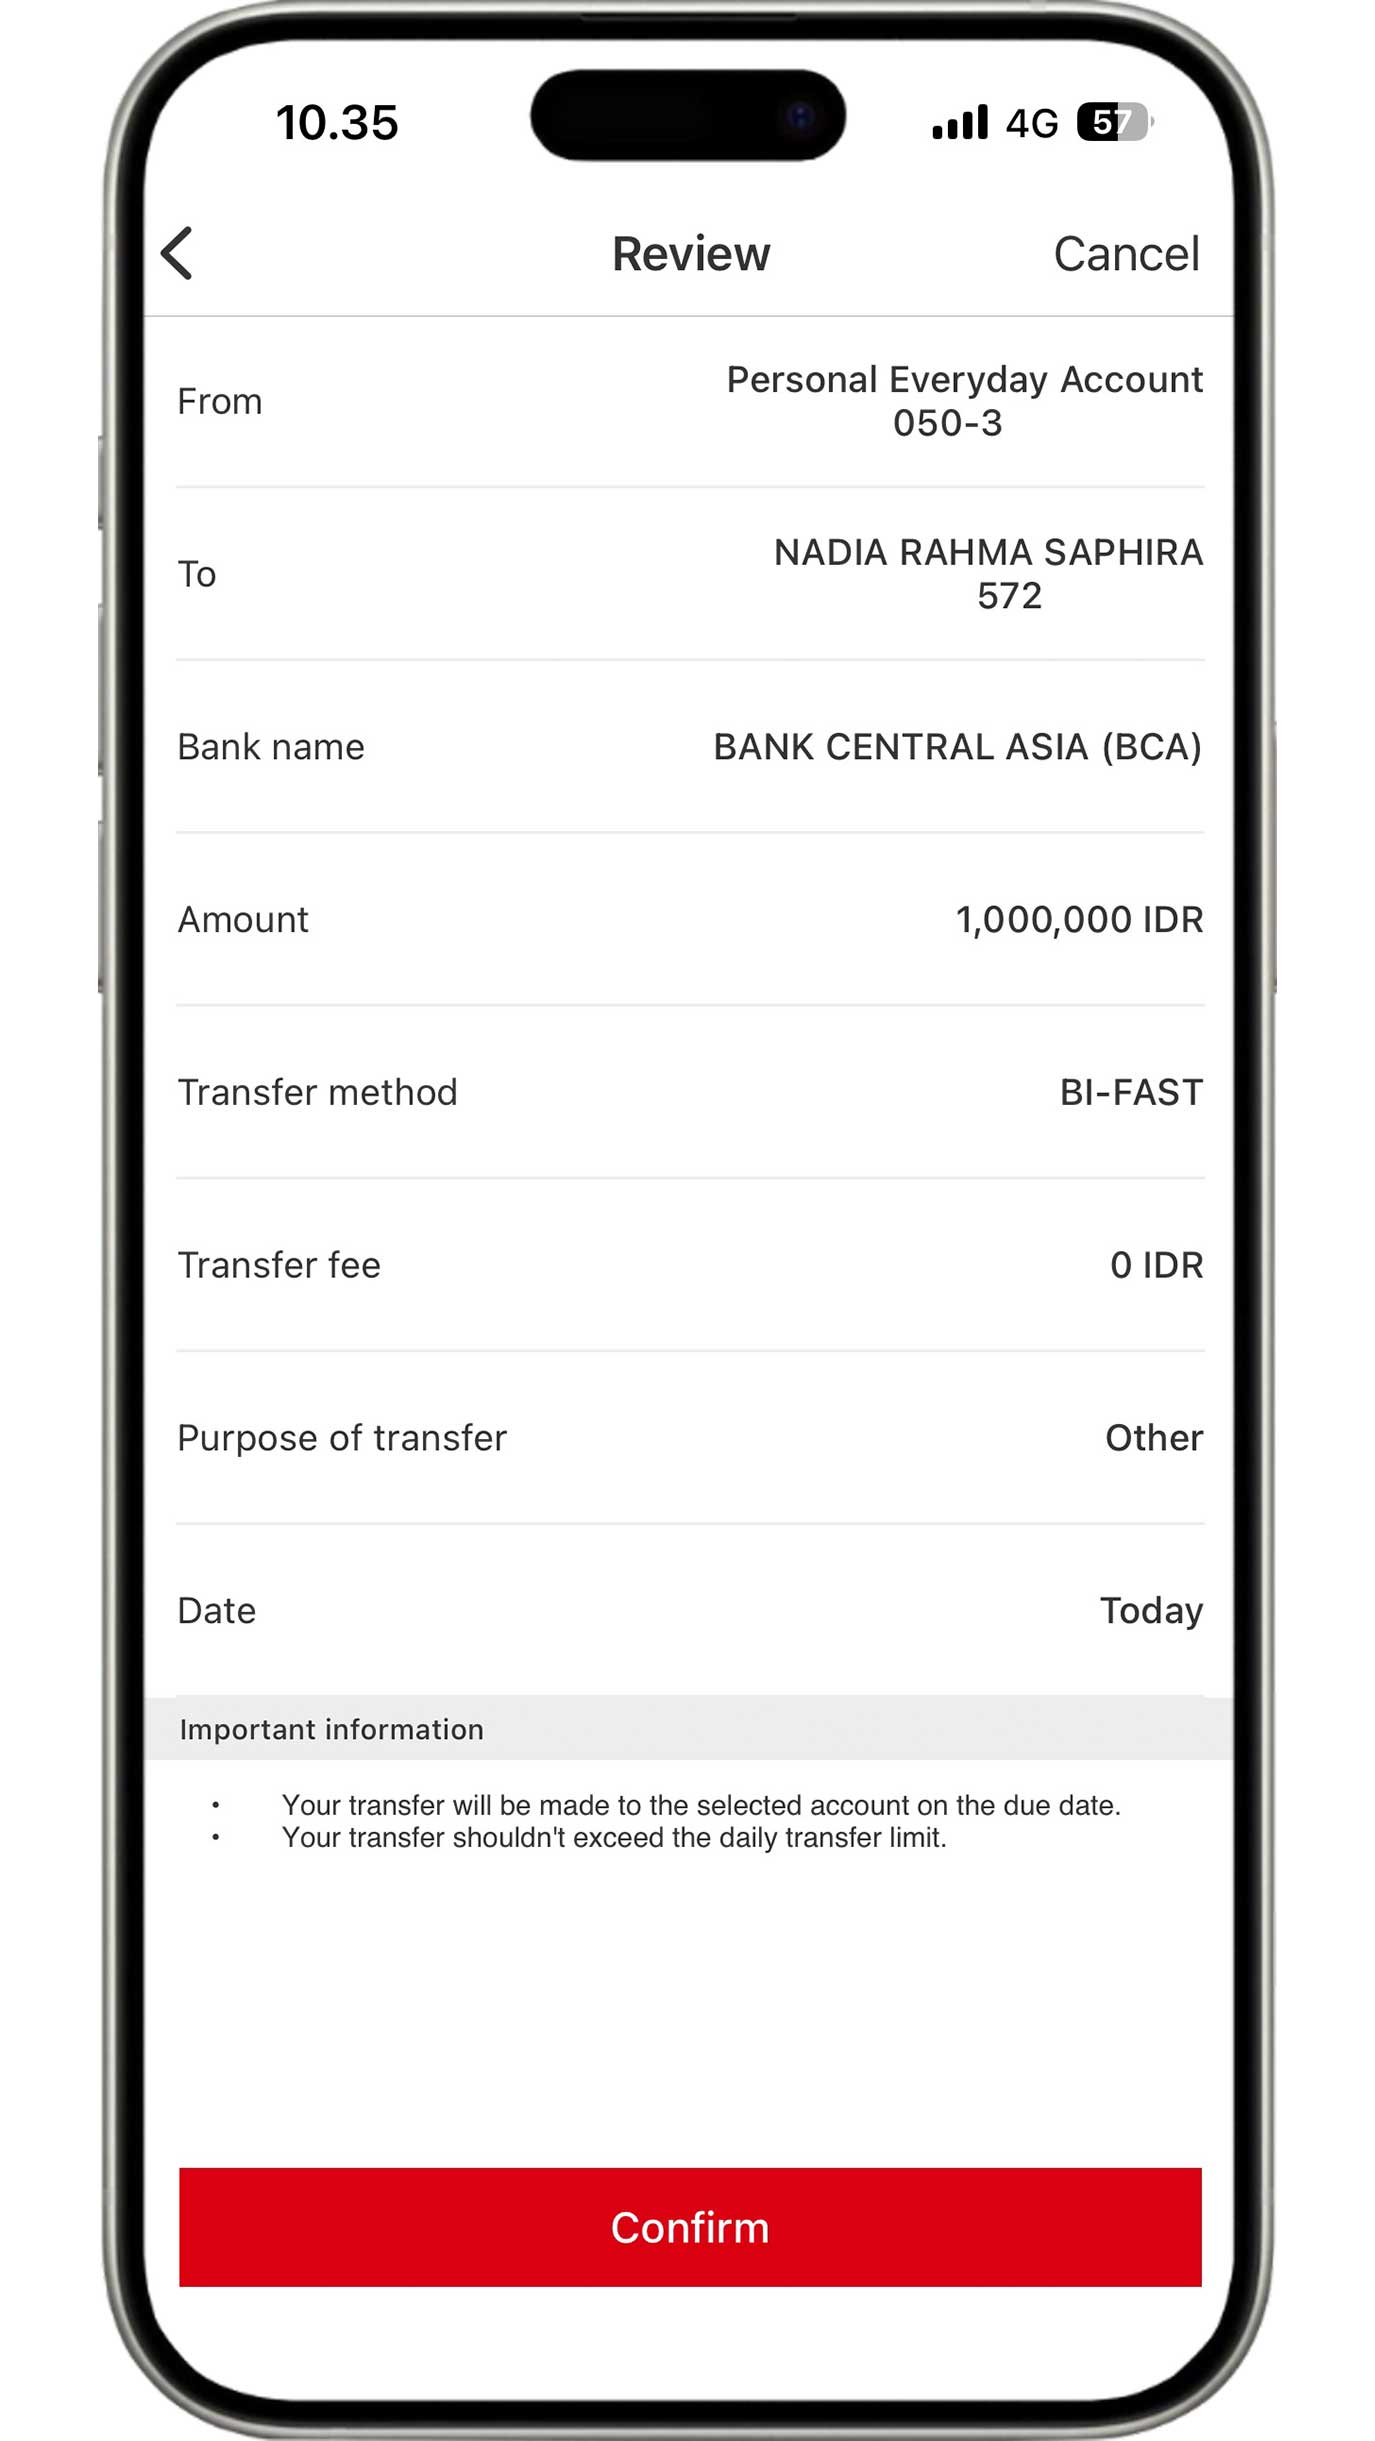
Review the information that you have input. If all the information is accurate, click the "Confirm" button to complete transfer process using BI-FAST.
SKN/RTGS
Enjoy transfers with transaction limits of up to IDR 1 billion per day to any account with SKN/RTGS. Please note that transfer fees per transaction and cut-off time for making transfers apply. More information here

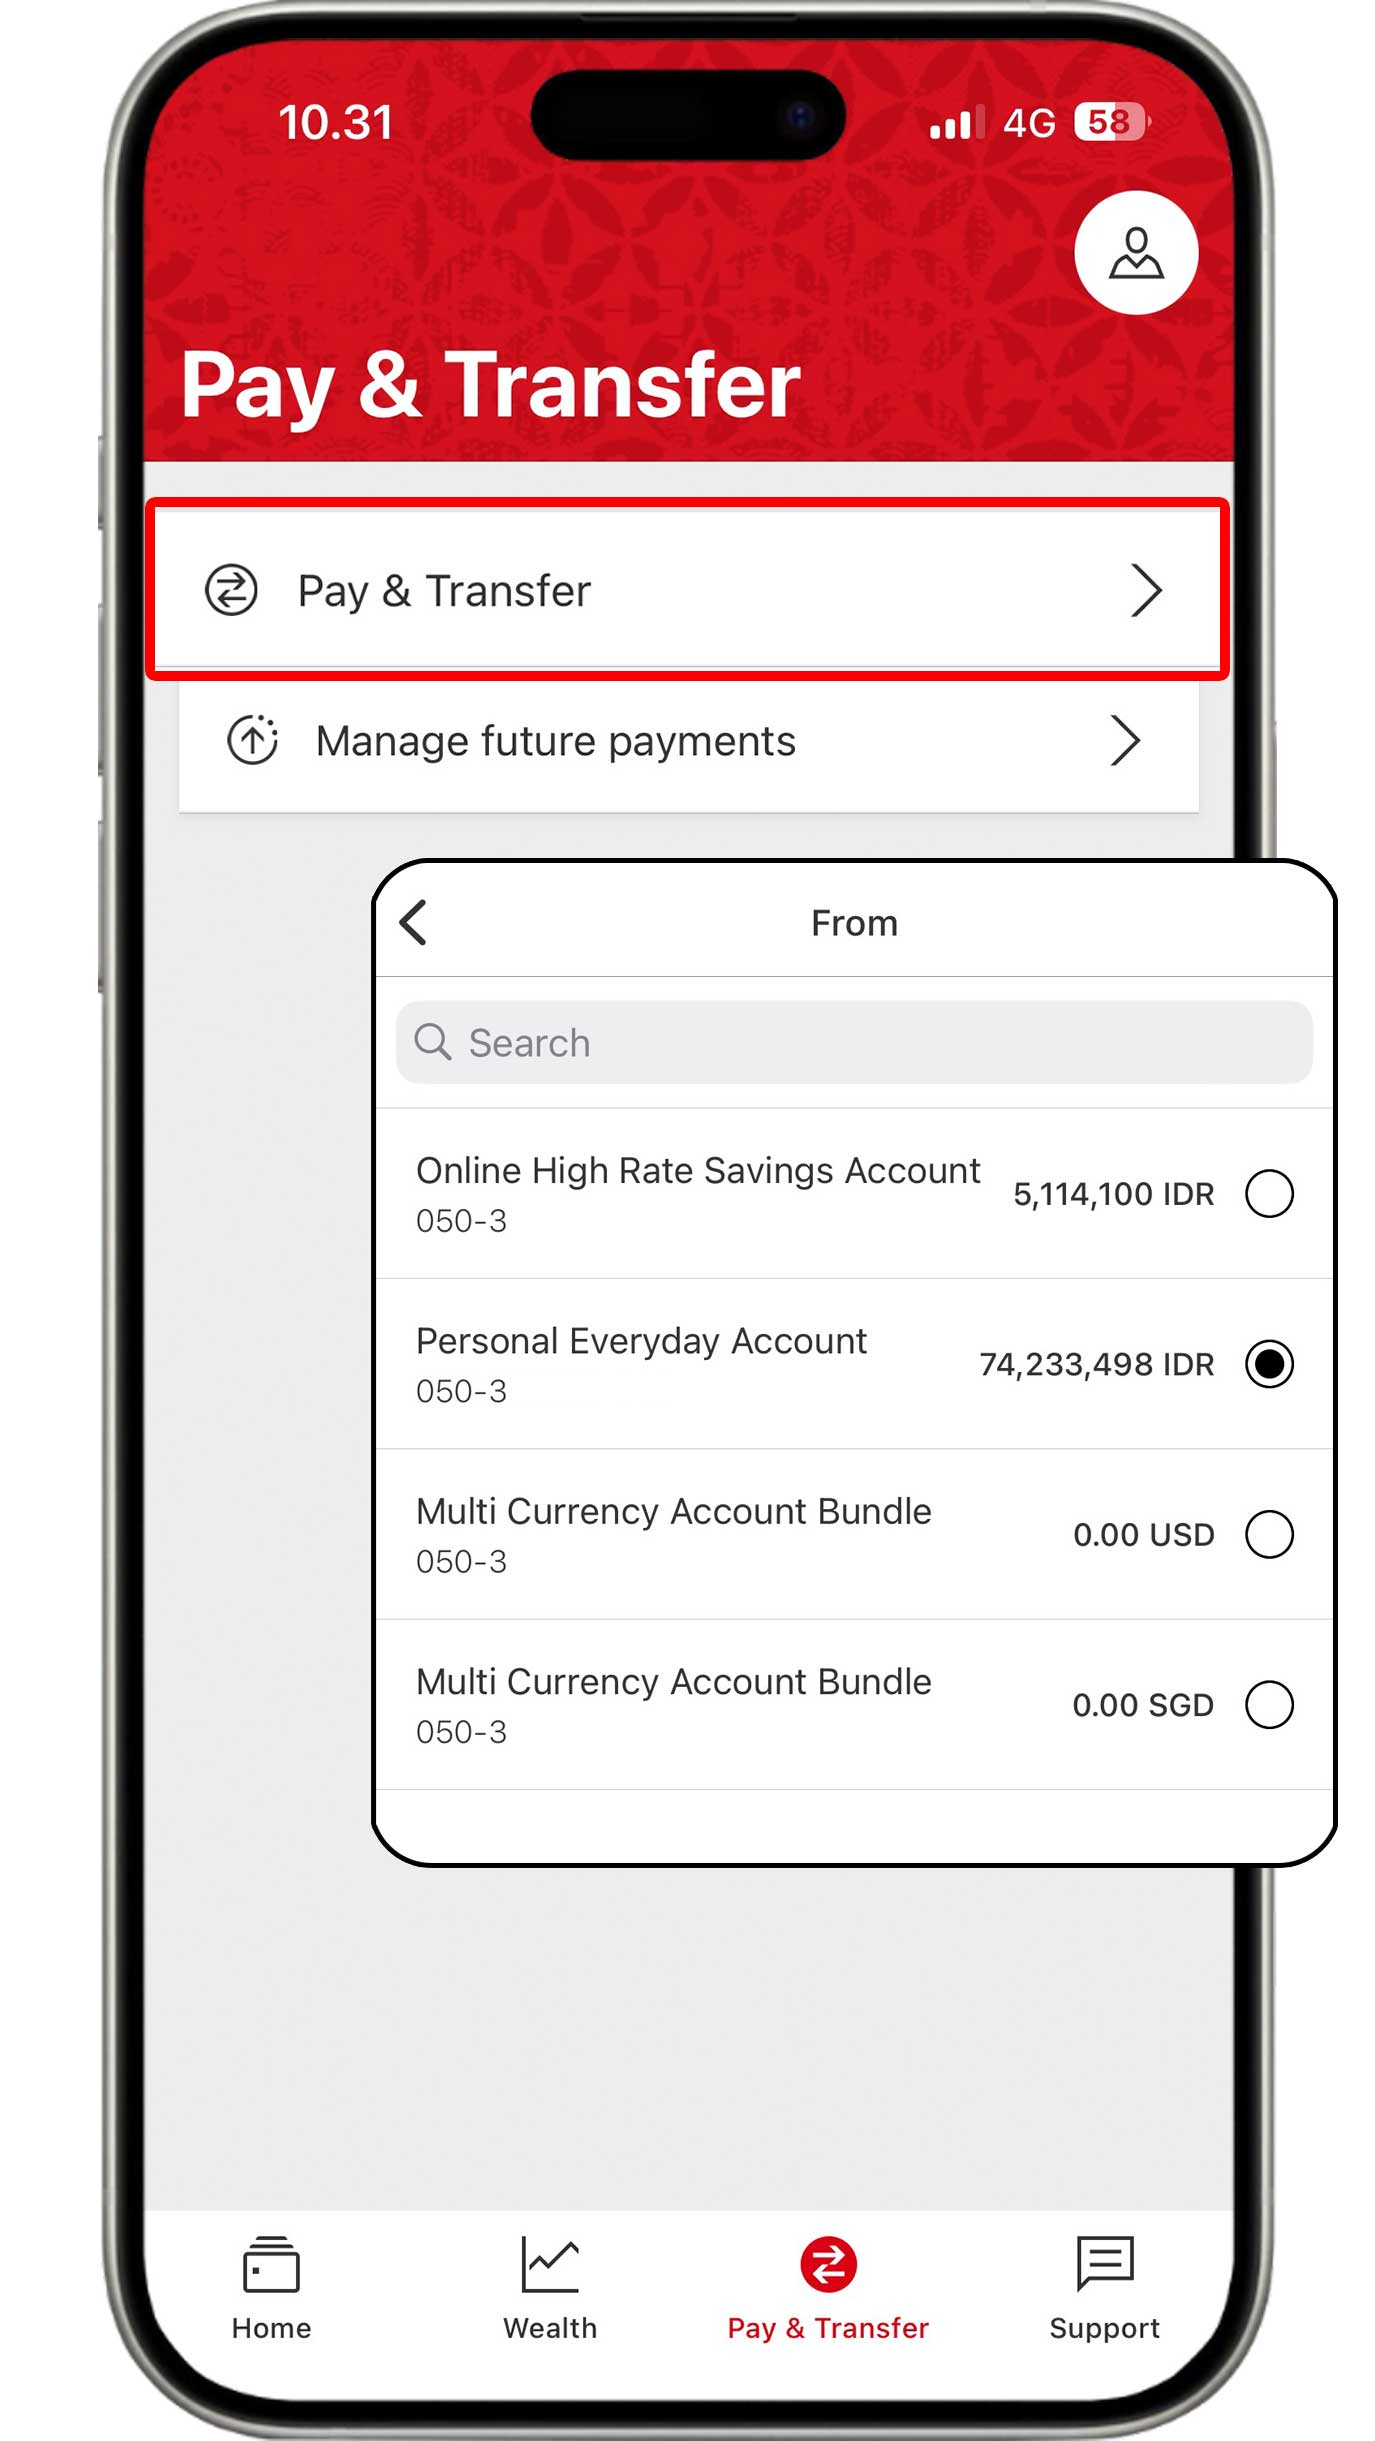
On the Pay & Transfer menu, click the "Pay & transfer" button. Then, select the account you would like to use.
Select the Your payees tab and click the "Add a new
payee"
button.
Then, select "Add a new payee" to continue the transaction.
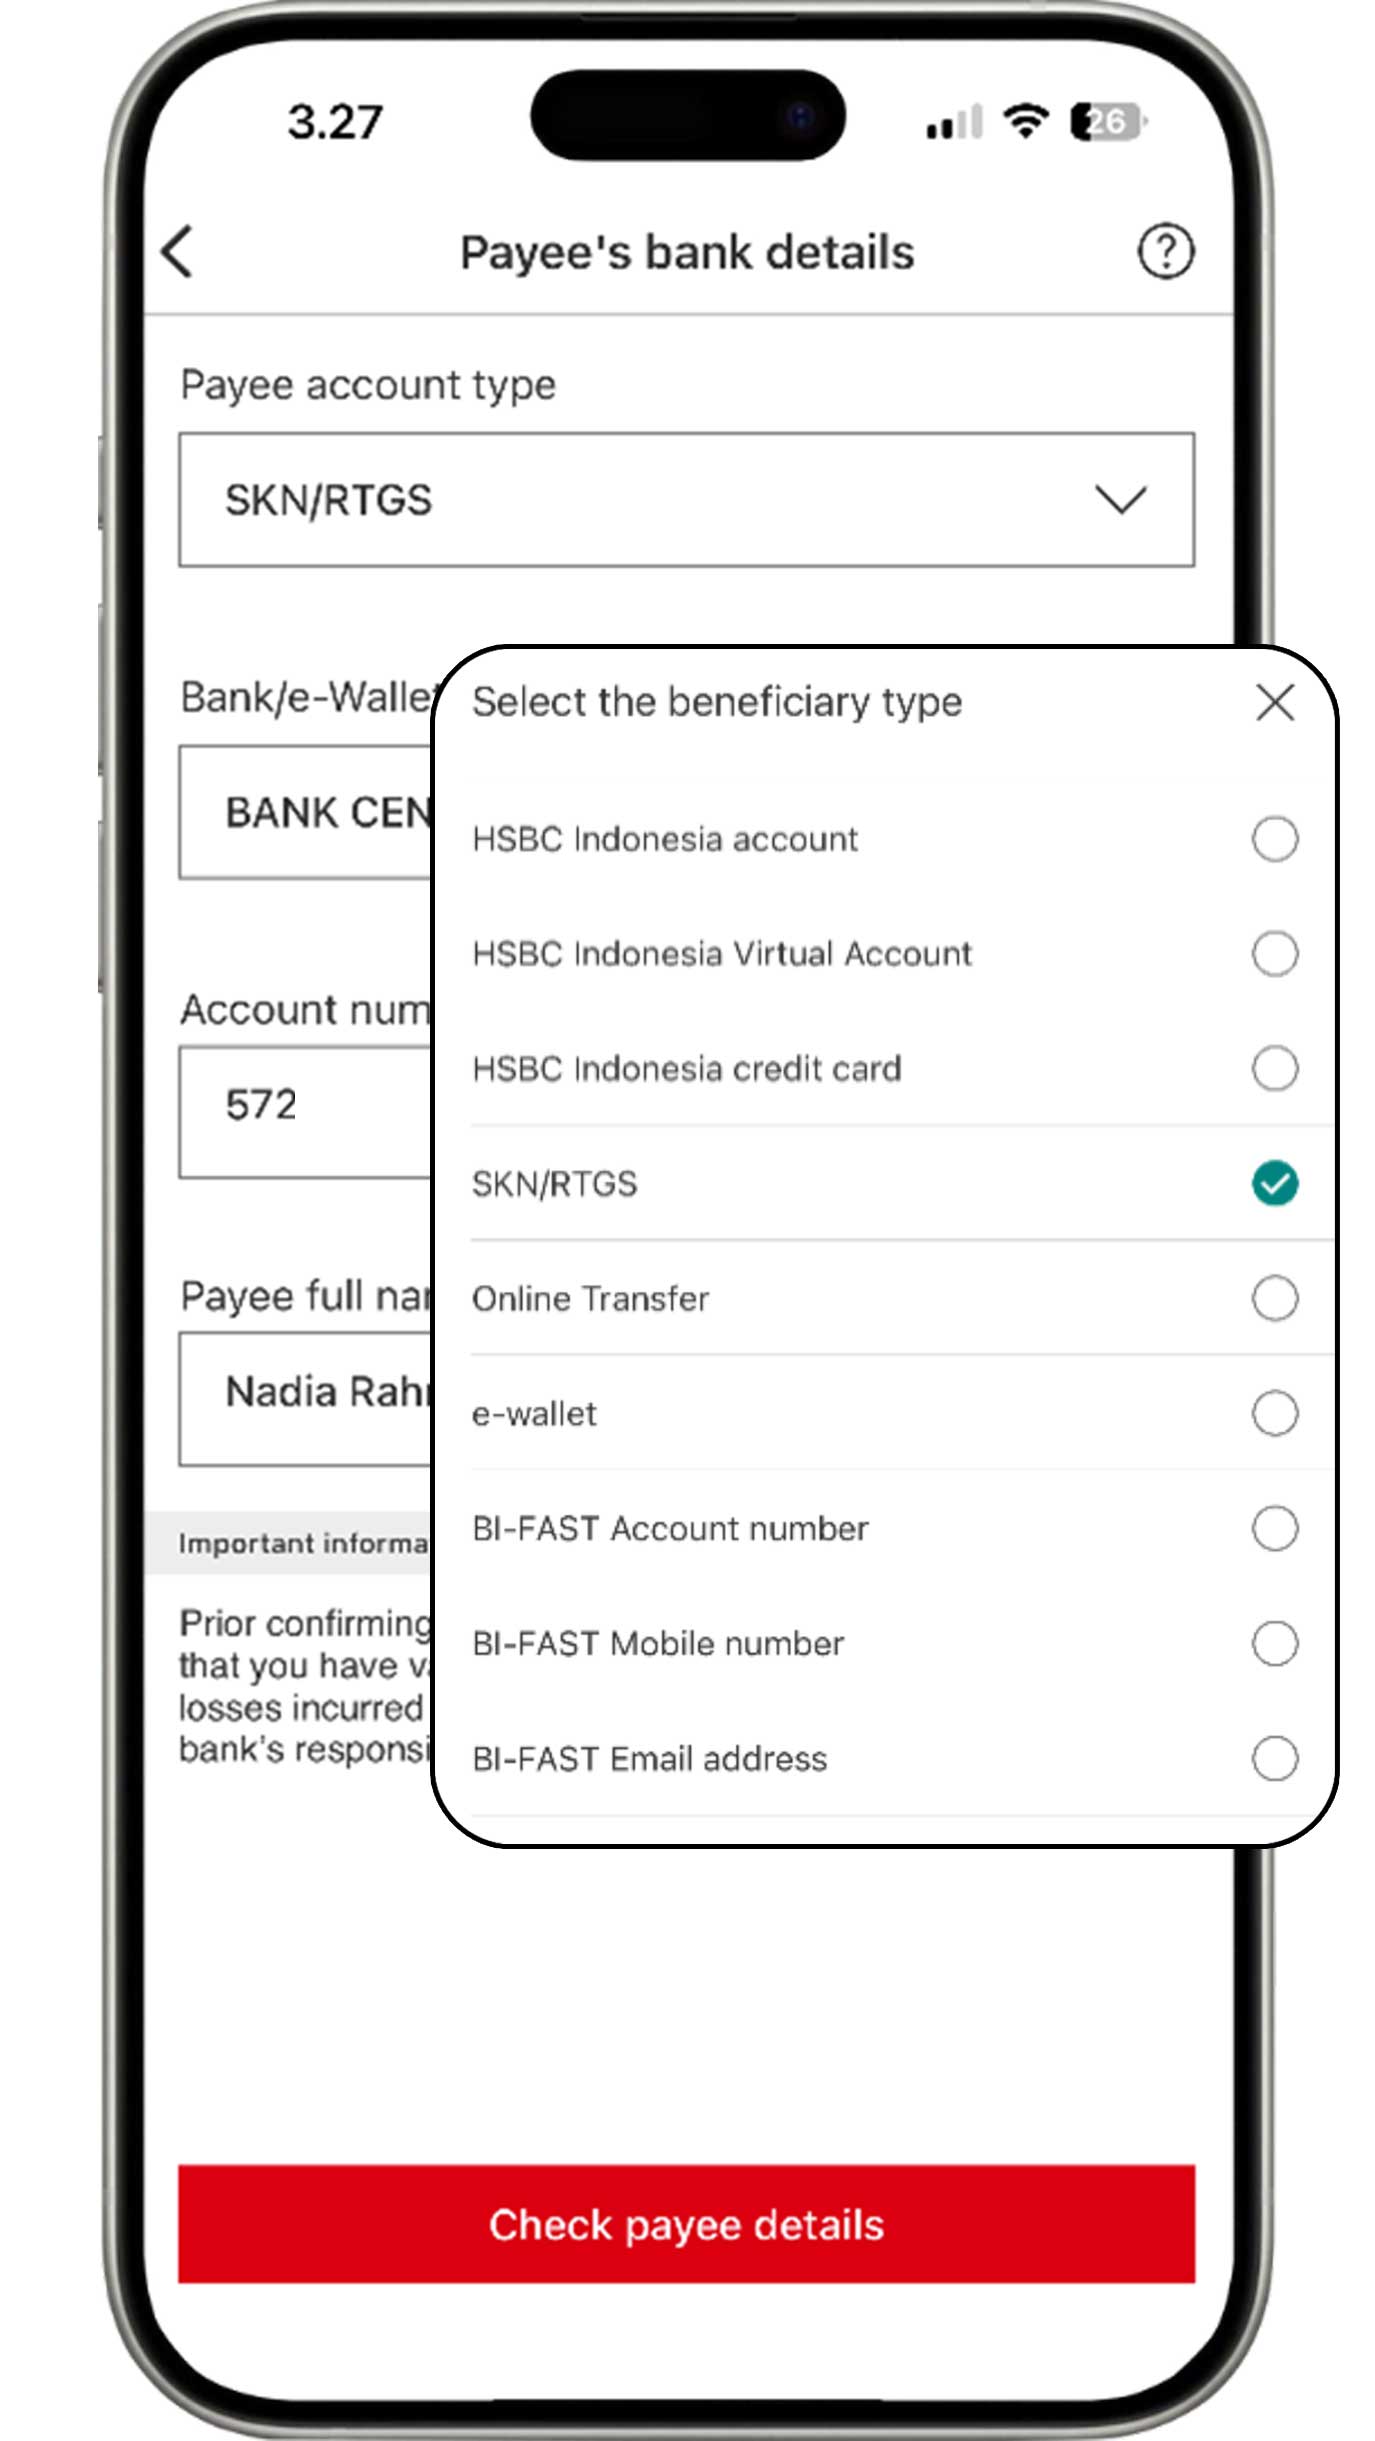
Select SKN/RTGS, then complete the information of the account for your transfers and click the "Check payee details" button.
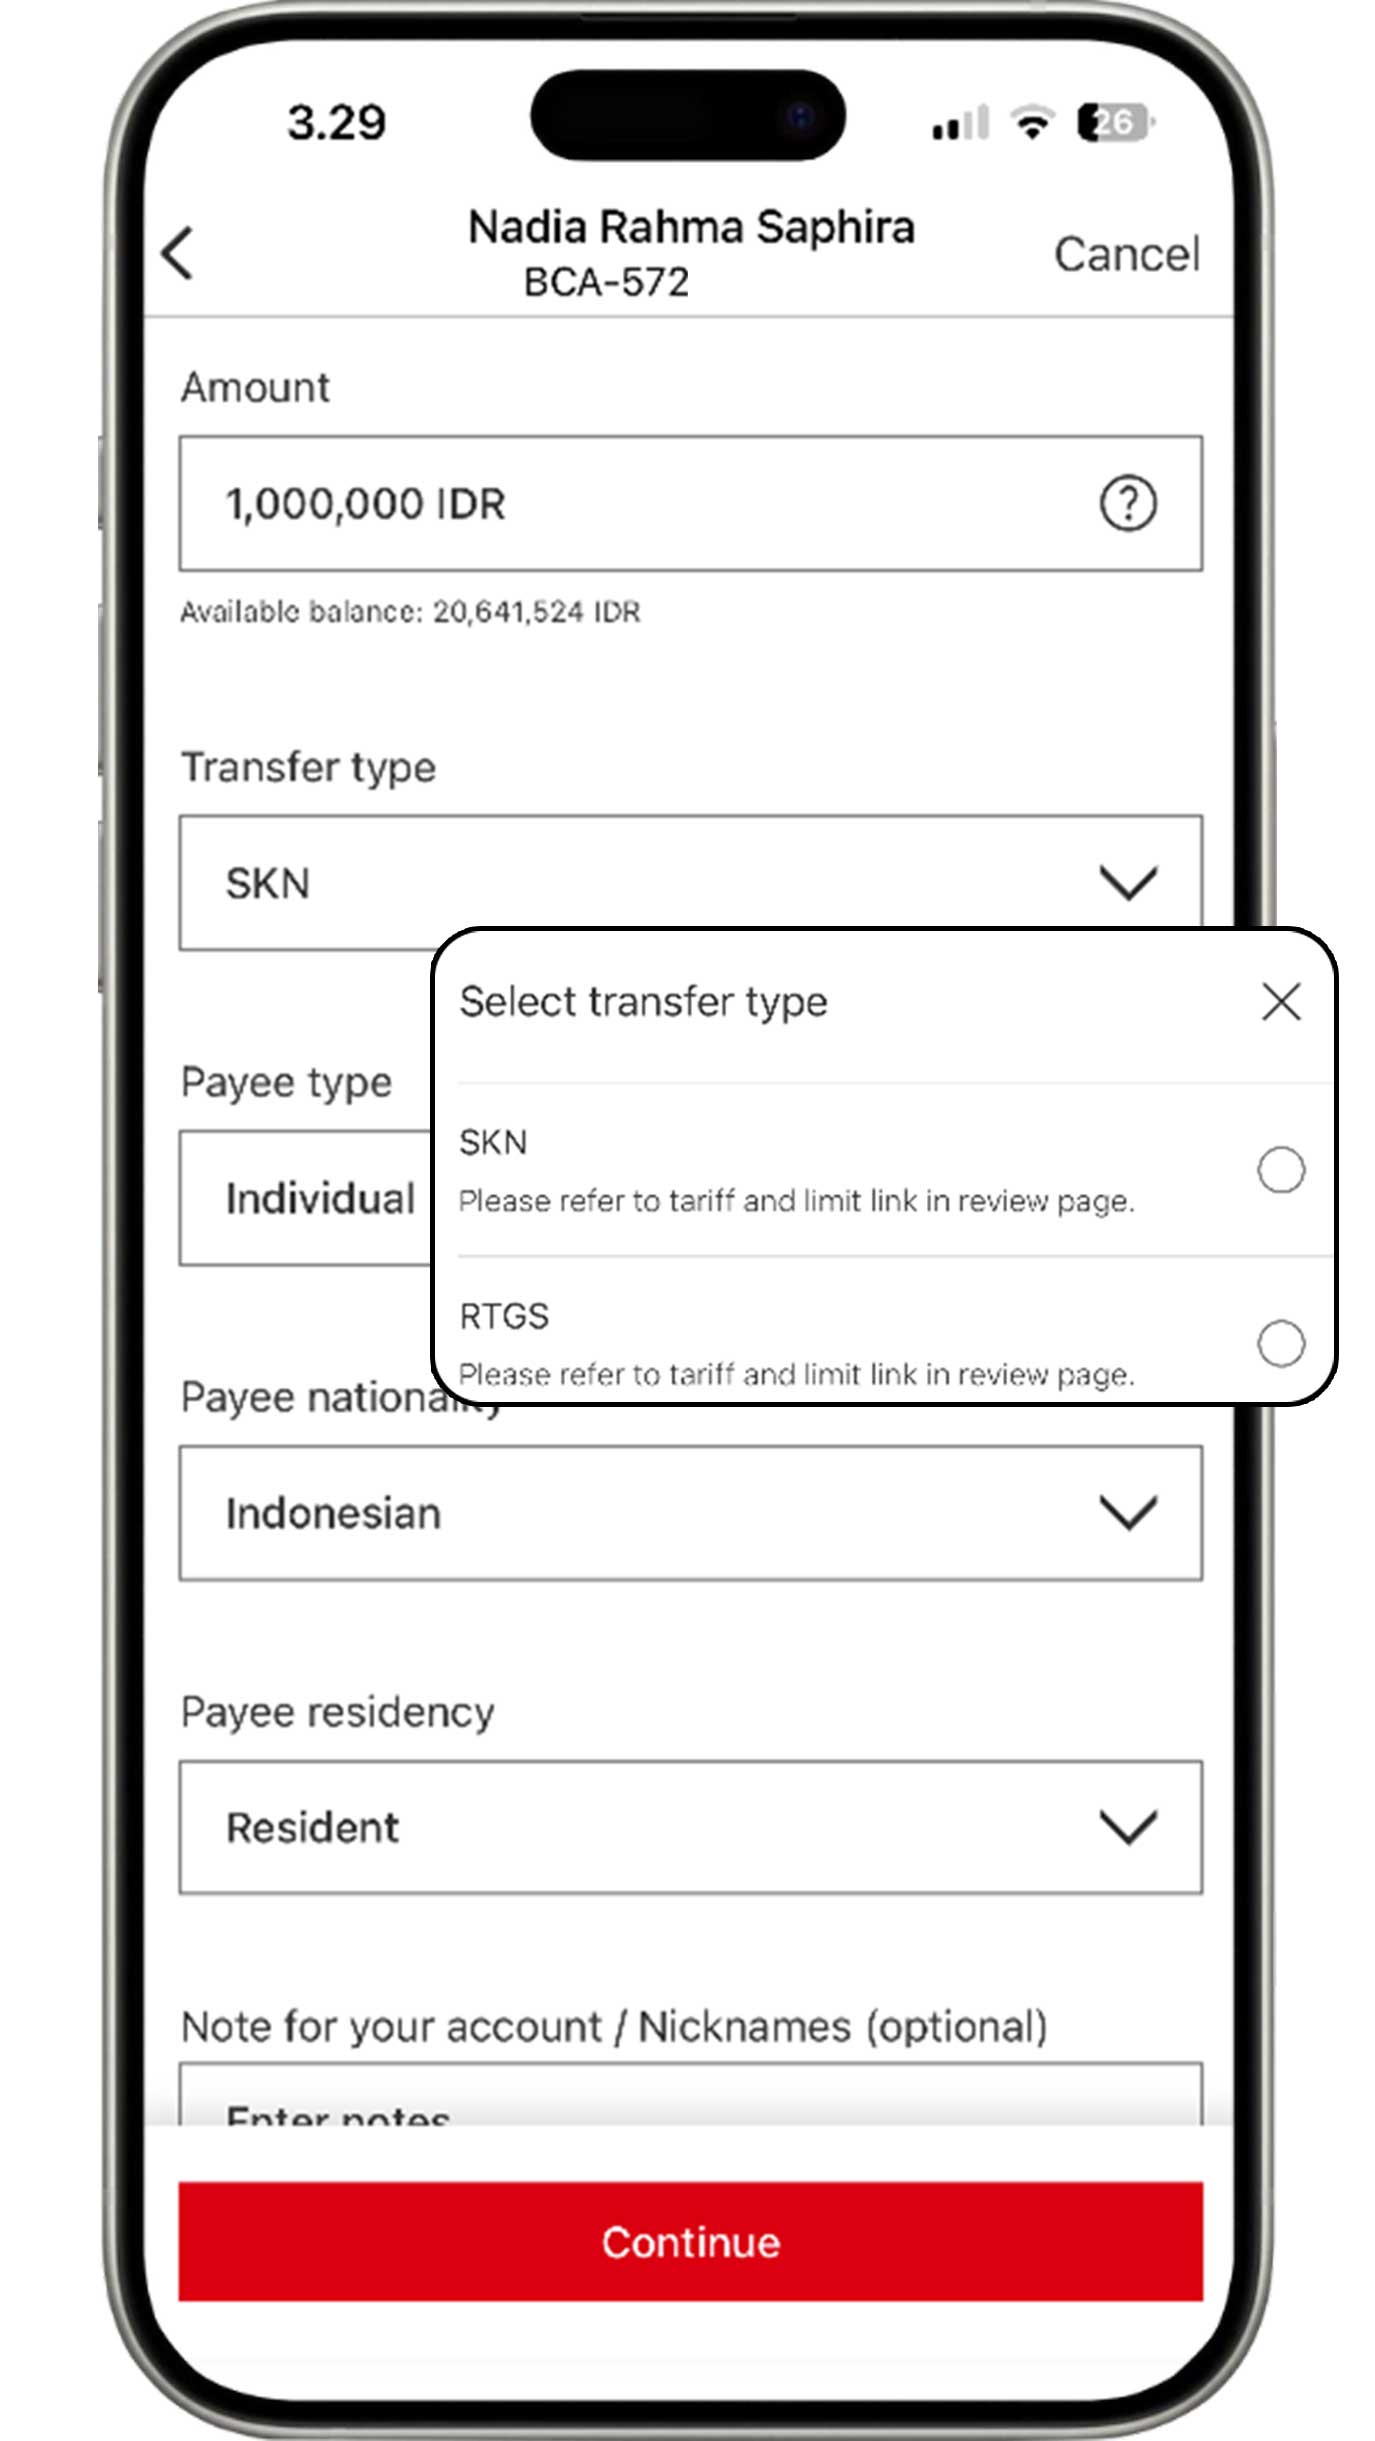
Complete the information based on your requirements.
then click the "Continue" button.
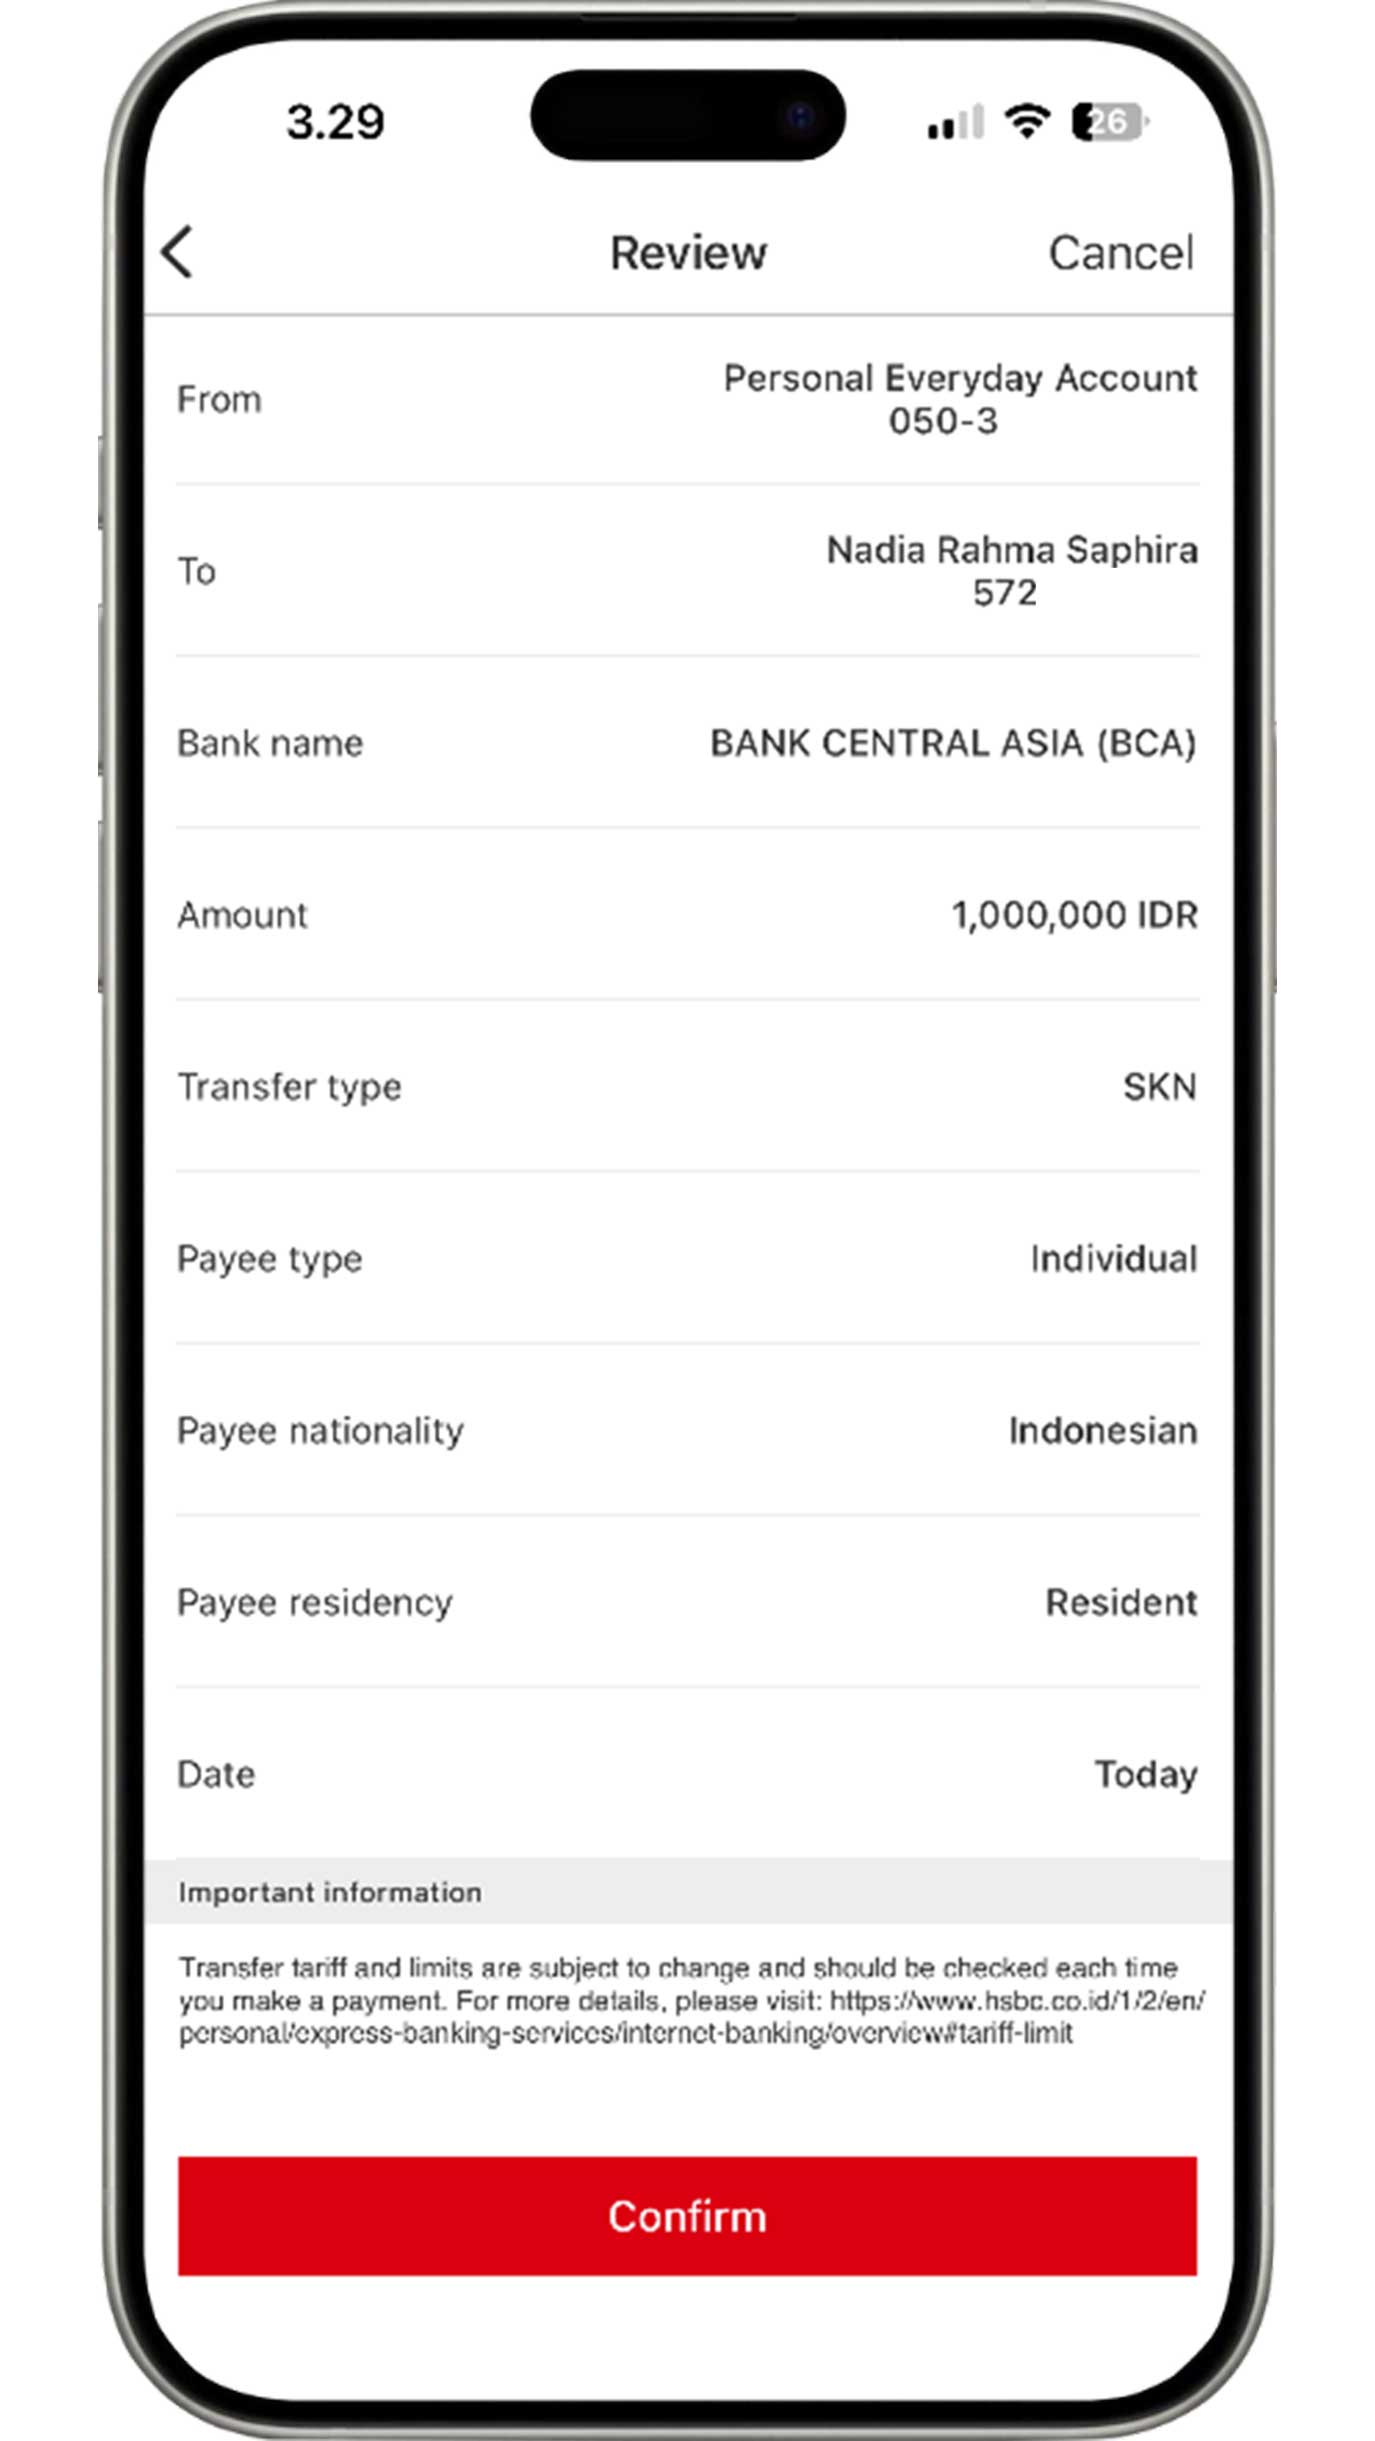
Review the information that you have input. If all the information is accurate, click the "Confirm" button to complete transfer process using SKN/RTGS.
e-Wallet
On the Pay & Transfer menu, click the "Pay & transfer" button. Then, select the account you would like to use.

Select the Your payees tab and click the "Add a new payee"
button.
Then, select "Add a new payee" to continue the transaction.
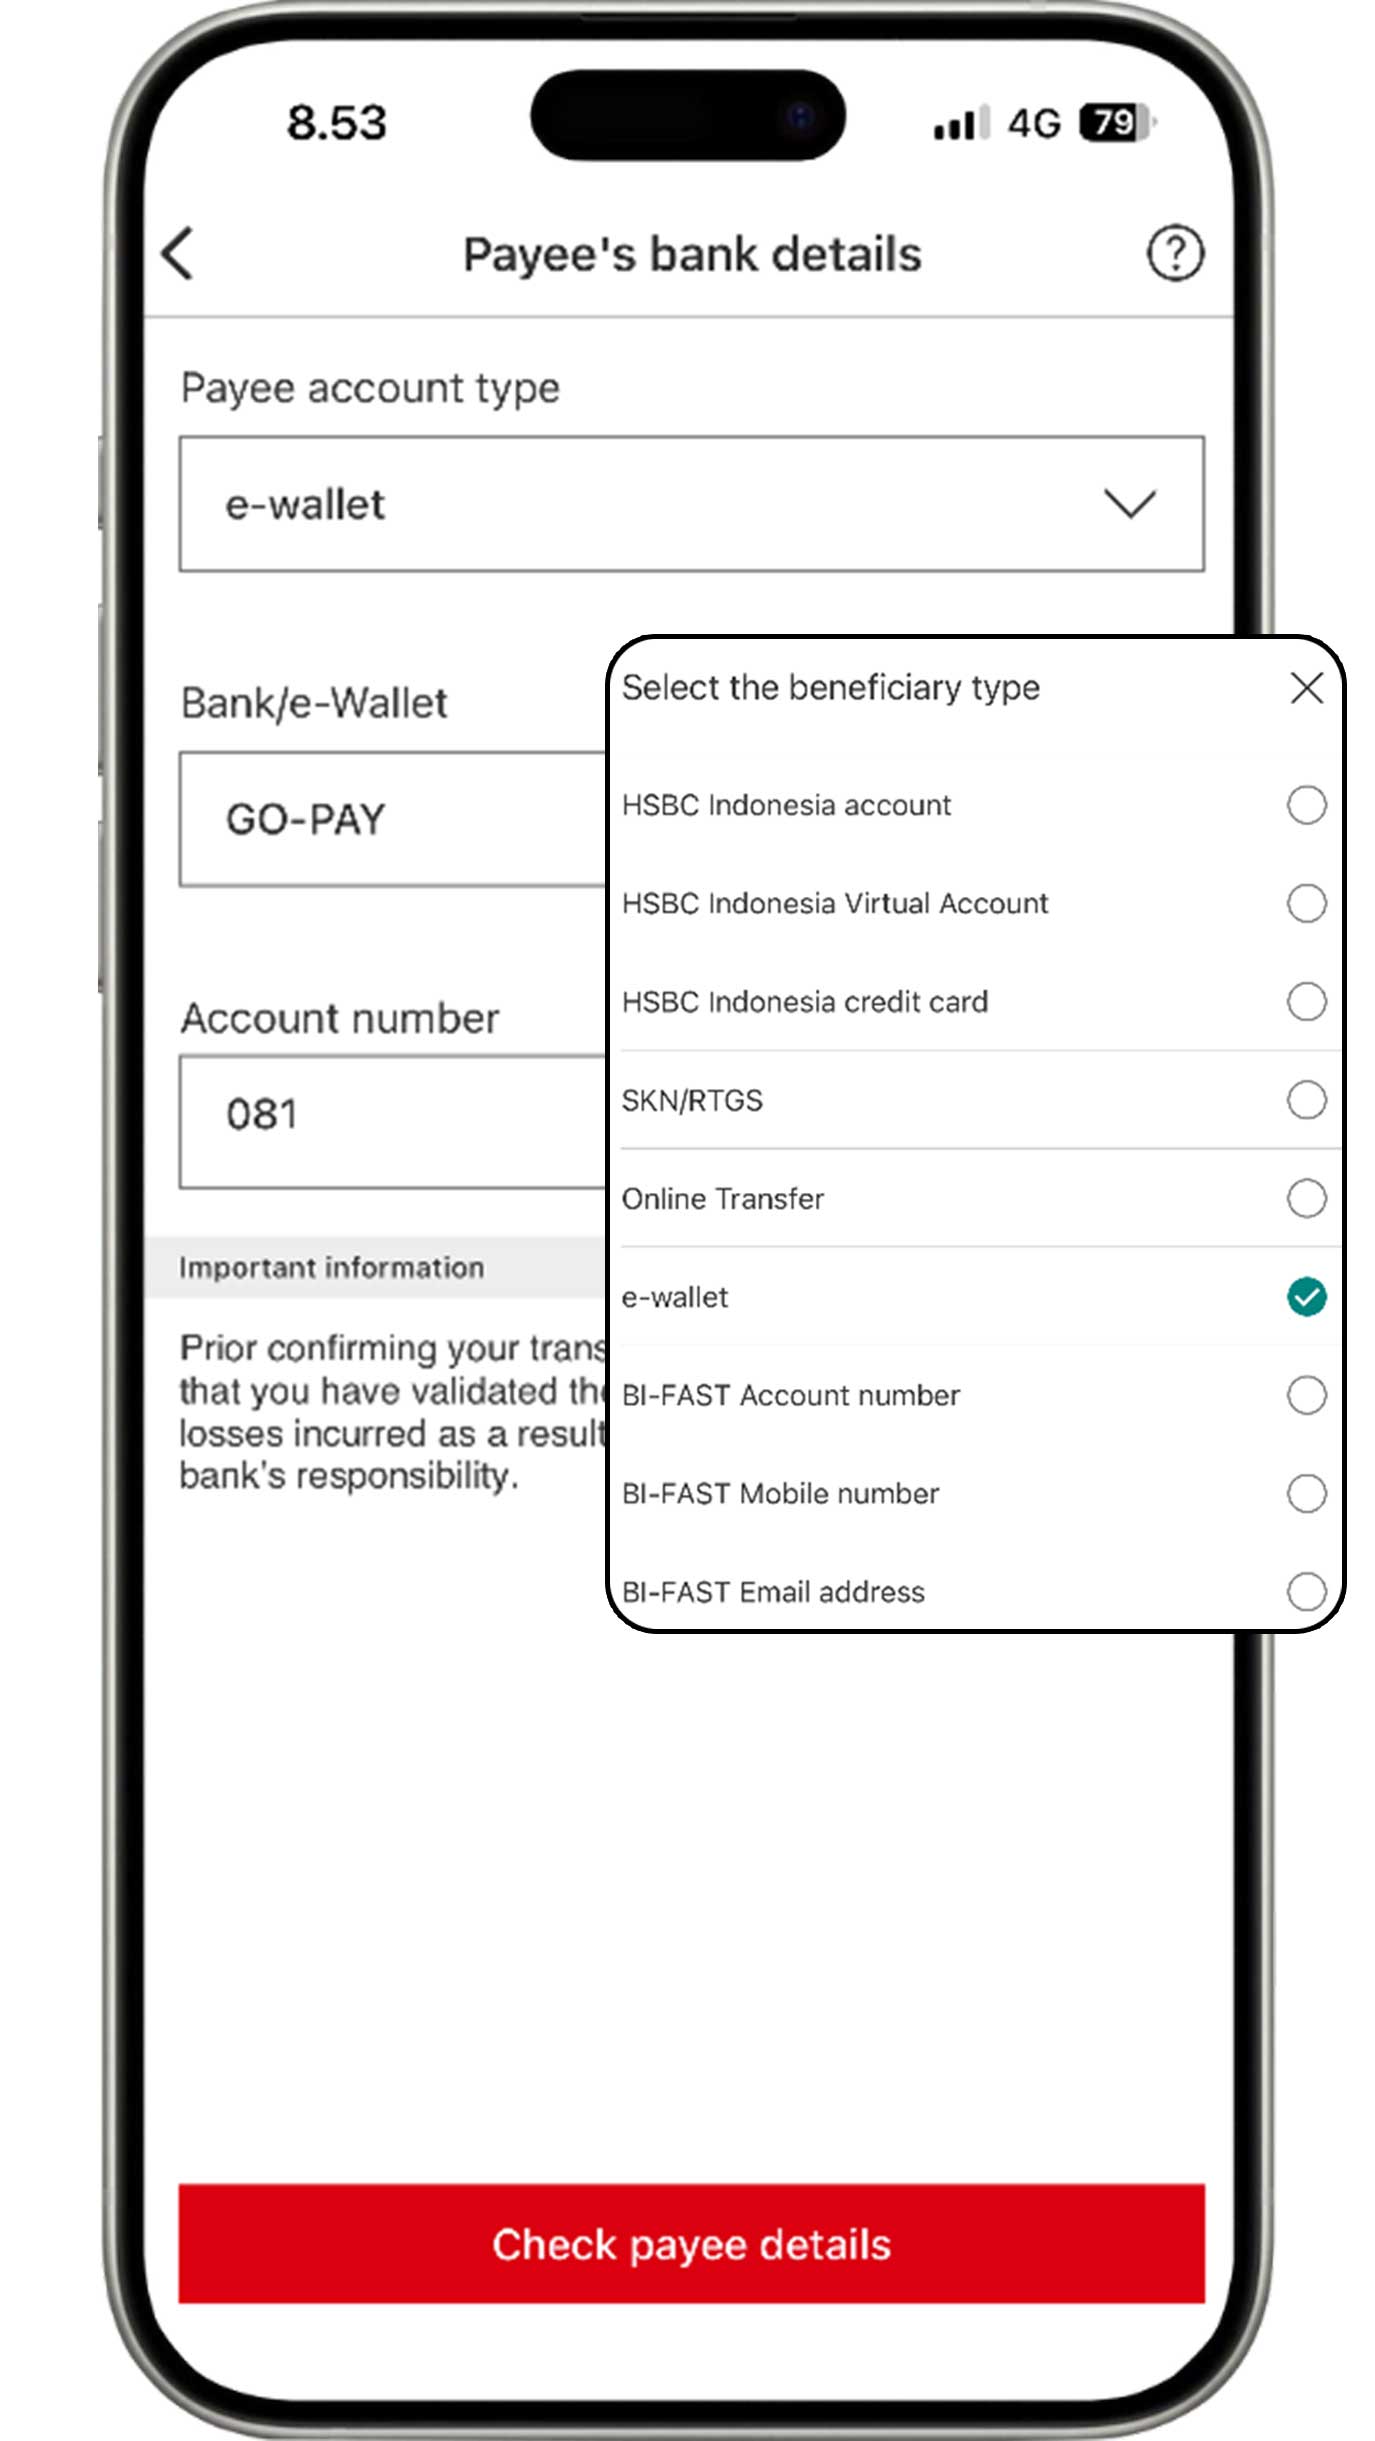
Select e-wallet, then complete the information of the account for your transfers and click the "Check payee details" button.
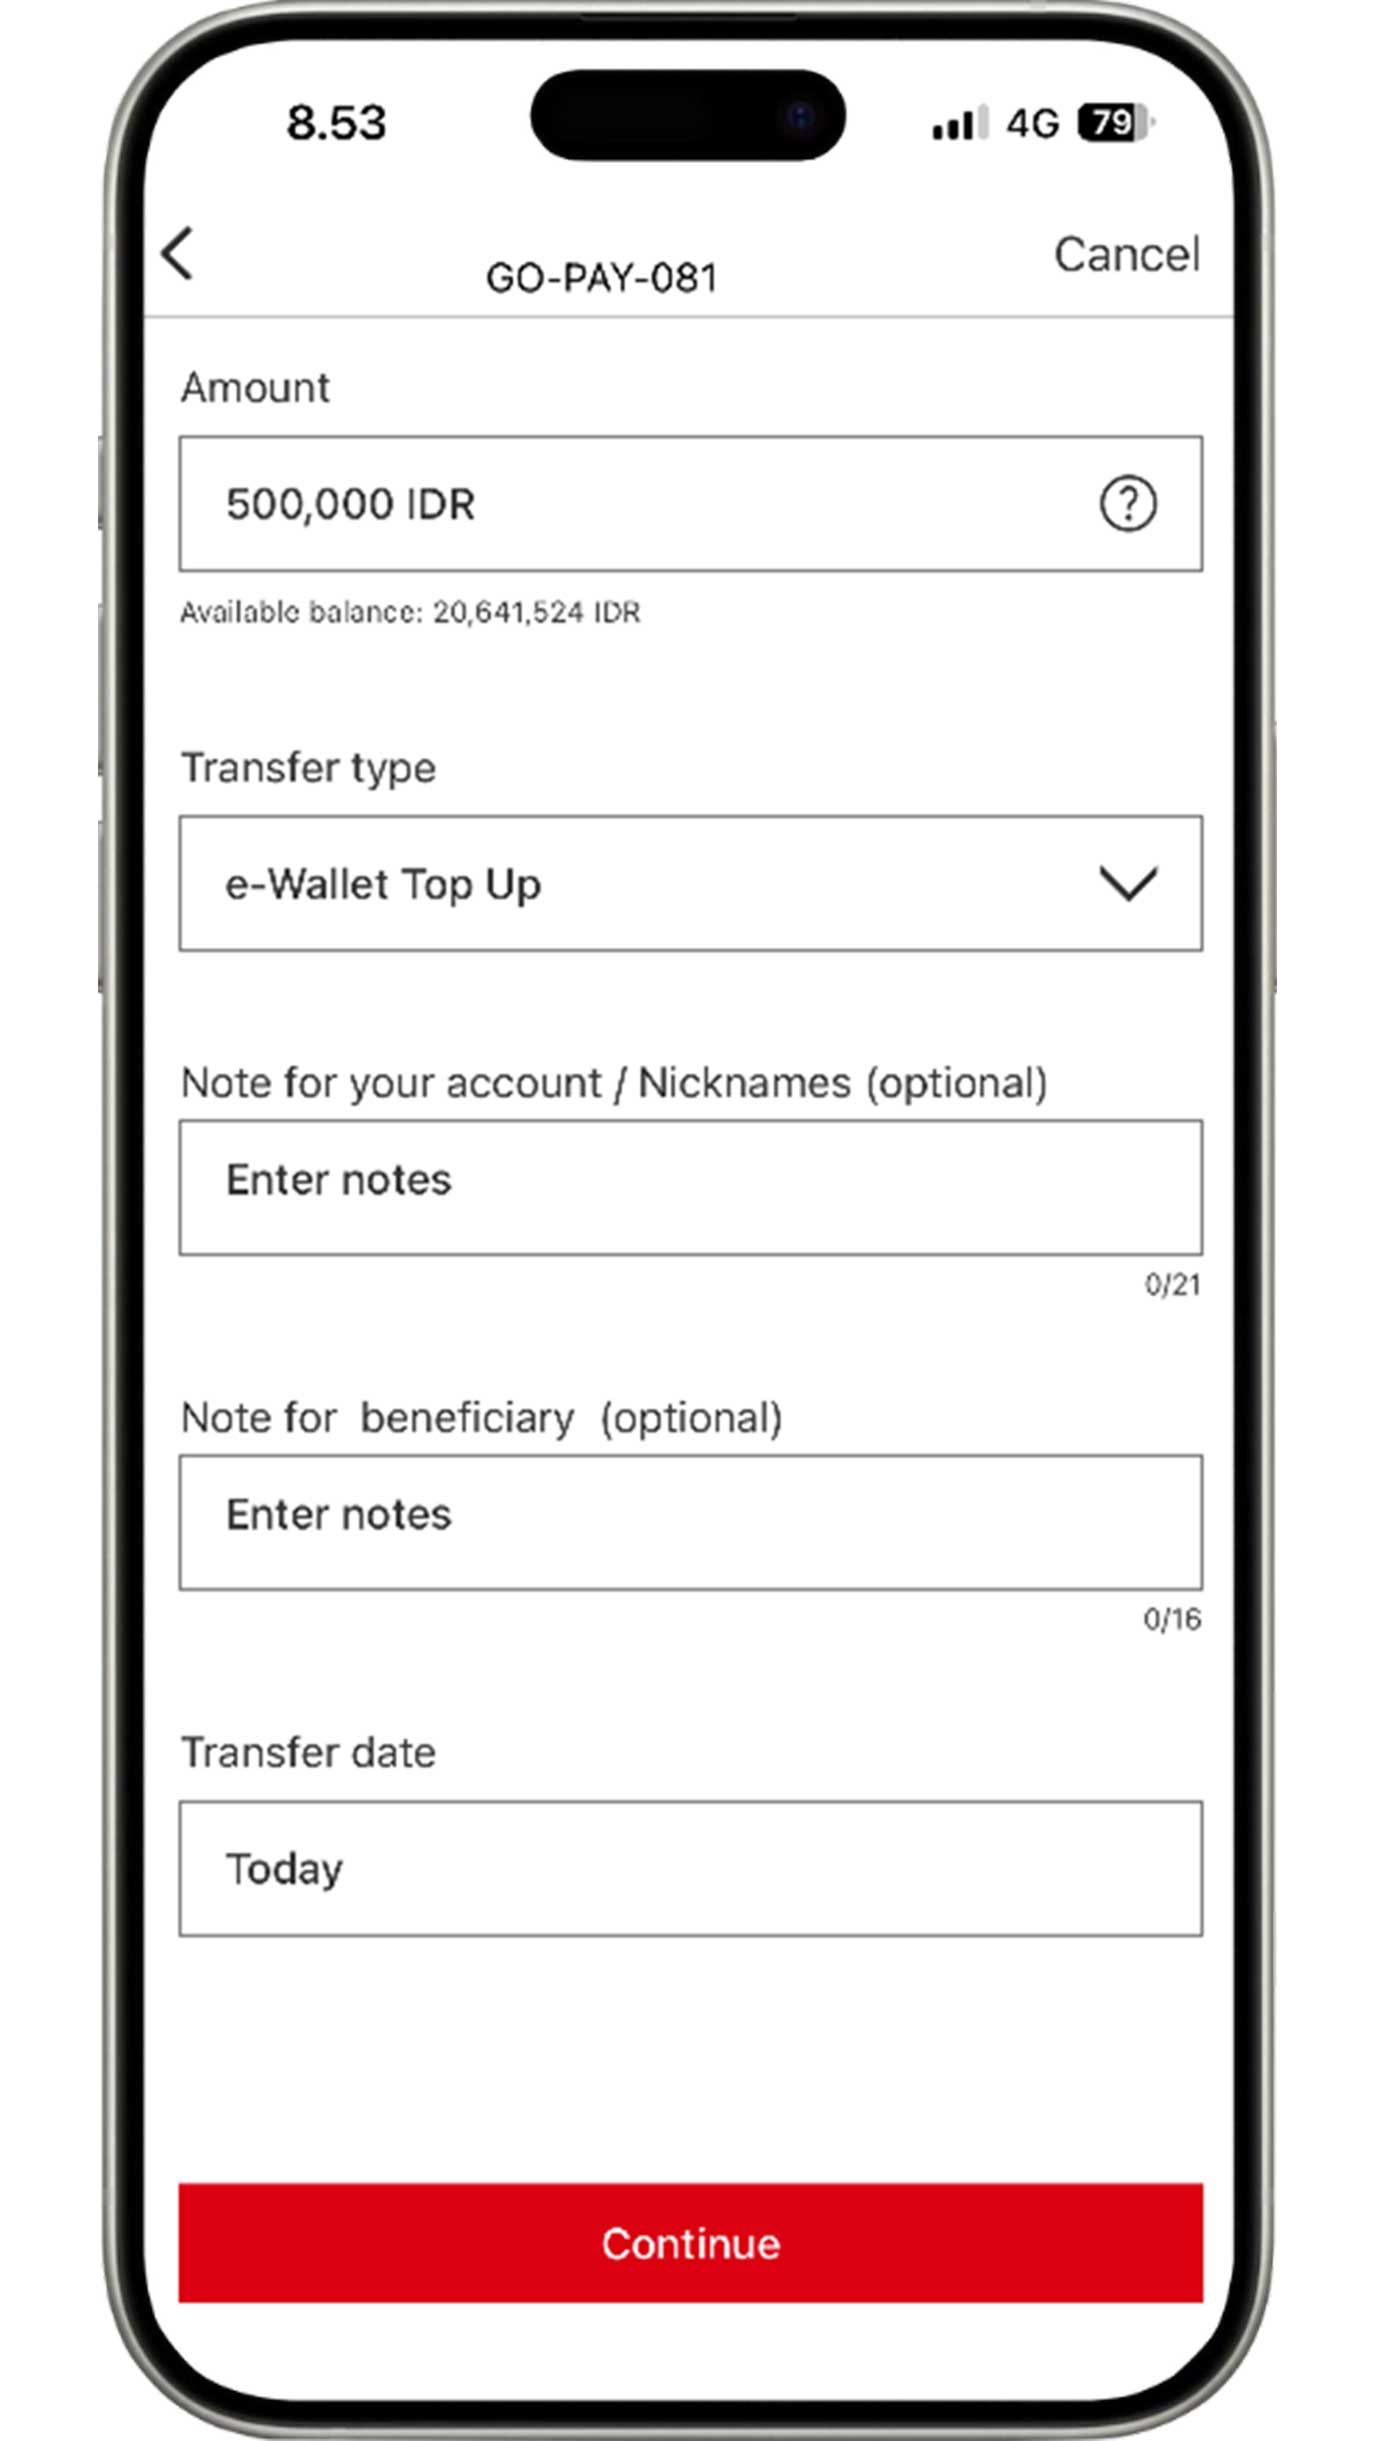
Complete the information based on your requirements, then click the "Continue" button.
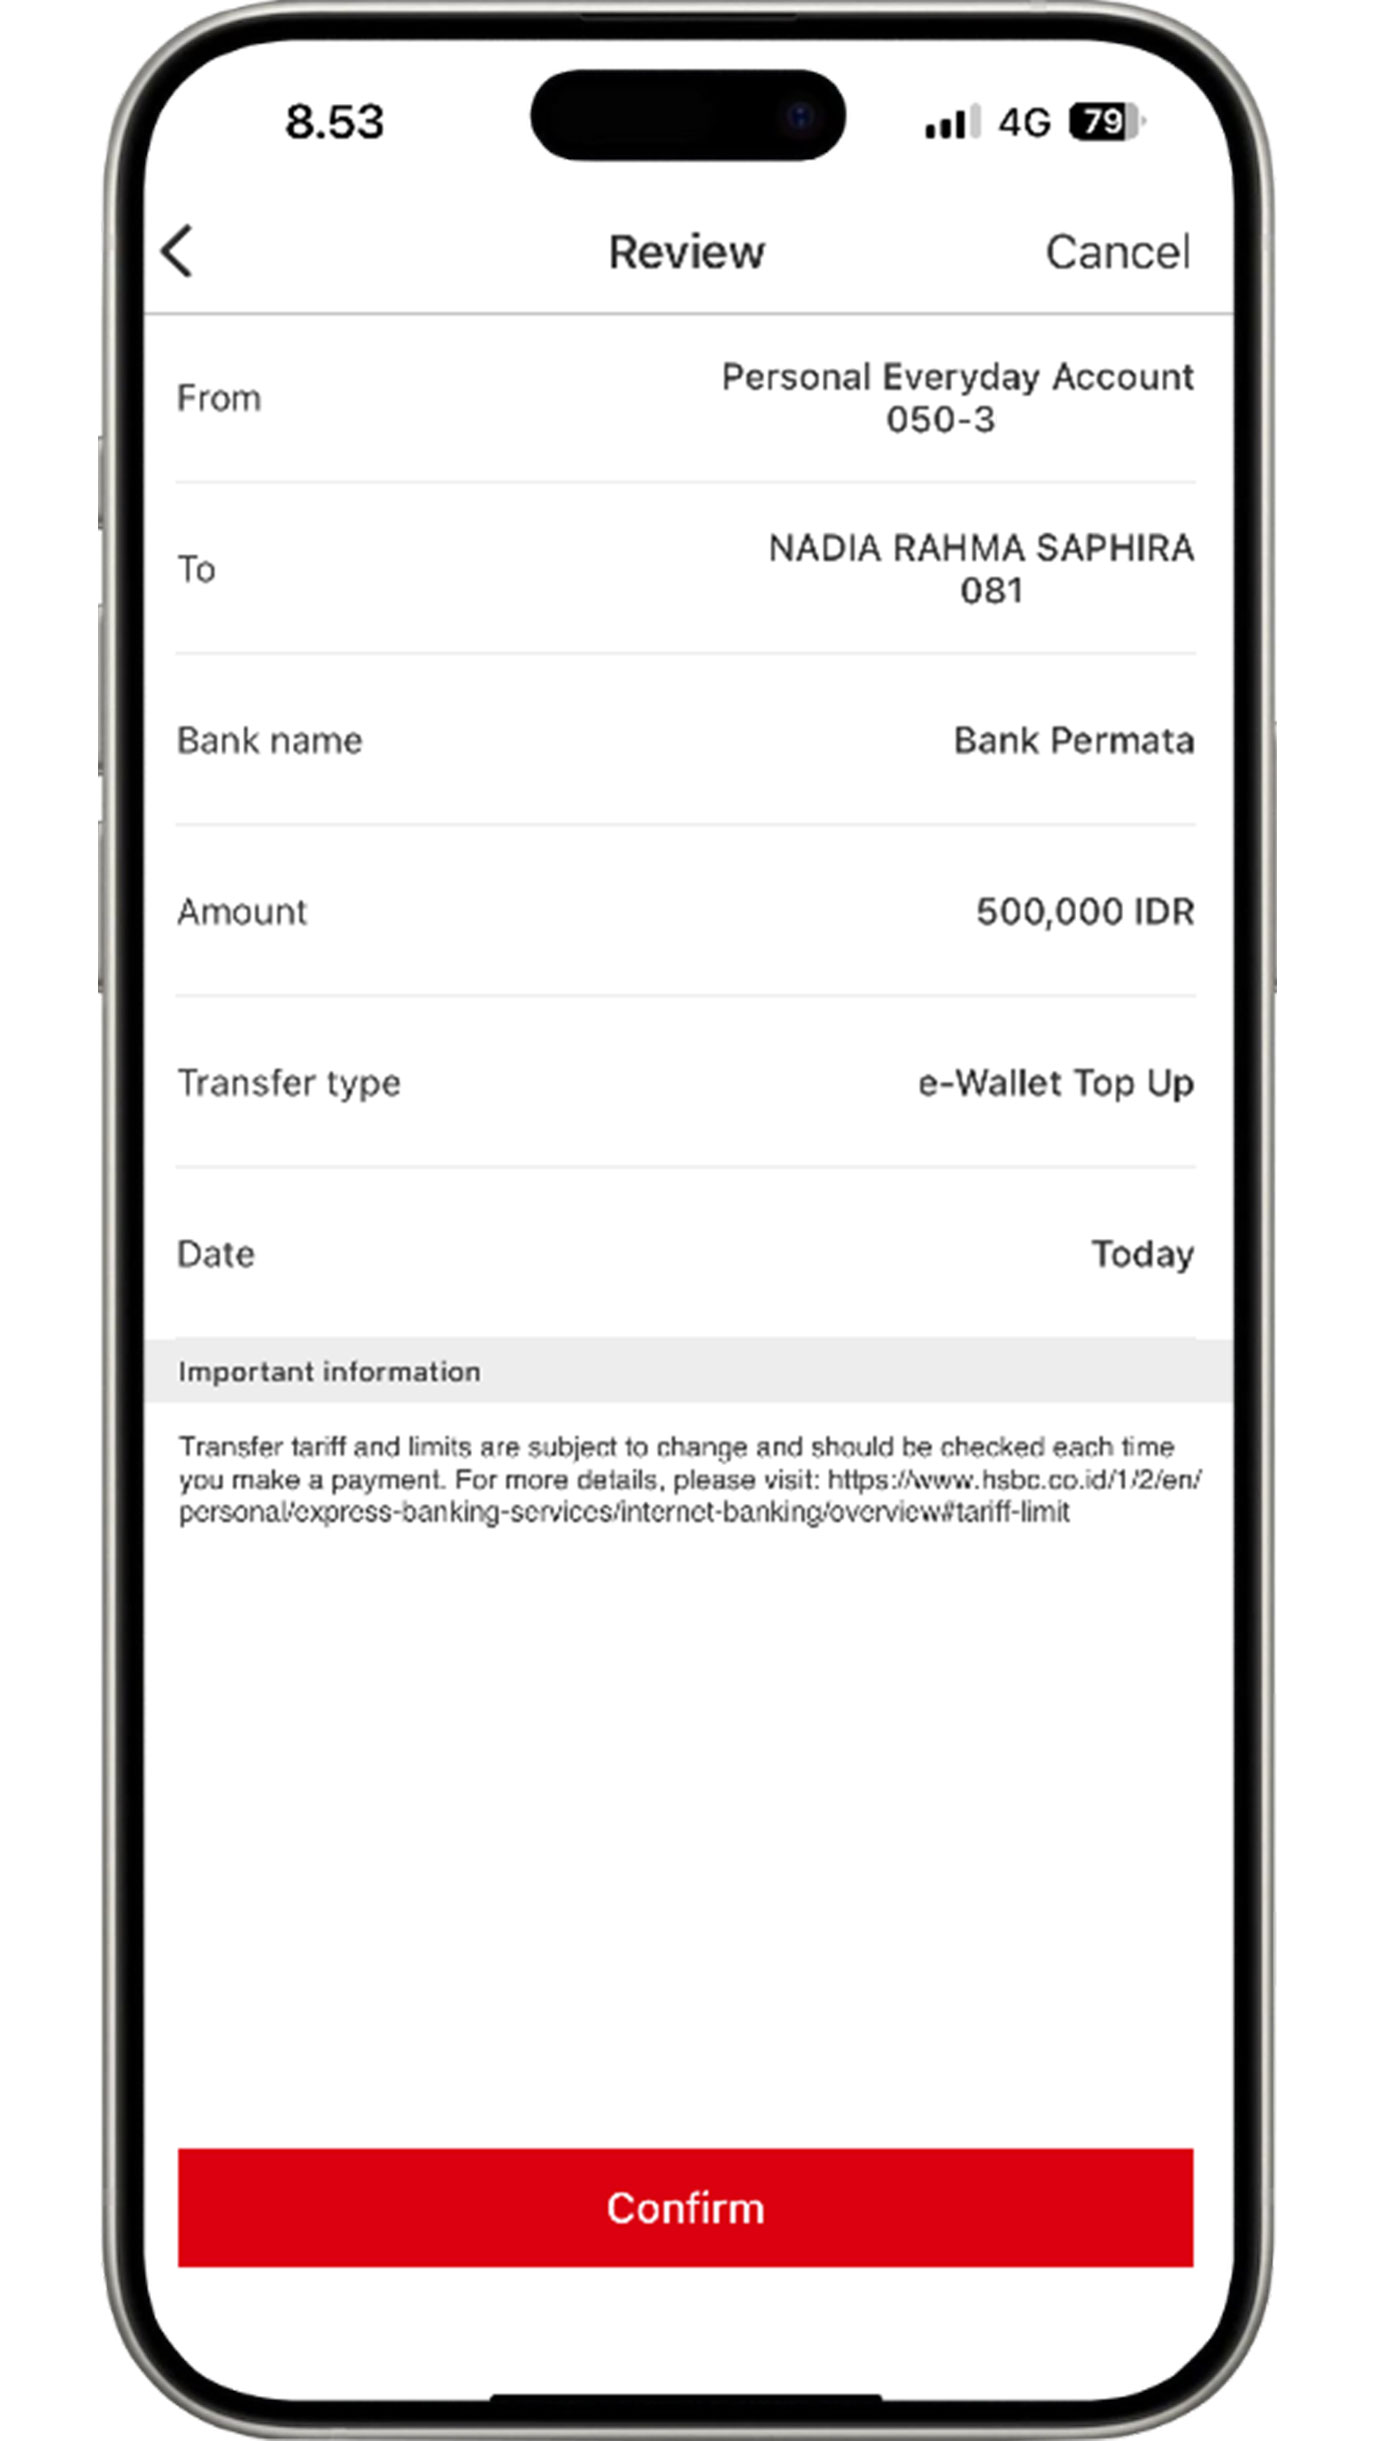
Review the information that you have input. If all the information is accurate, click the "Confirm" button to complete transfer process to e-wallet.
More about E-wallet
International Transfer
Global view linking
Monitor your HSBC accounts across countries conveniently. Follow these steps to link your accounts:
Login to other country's HSBC Internet Banking to start.
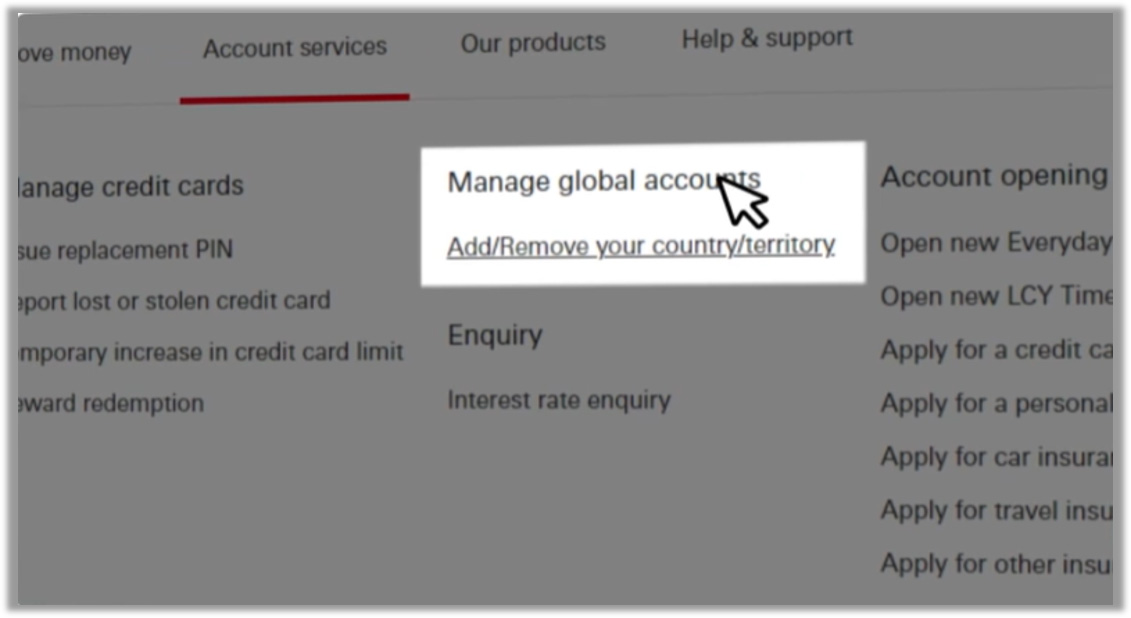
In the Account Service menu, select "Manage global
accounts" and click "Add/Remove your
country/territory".
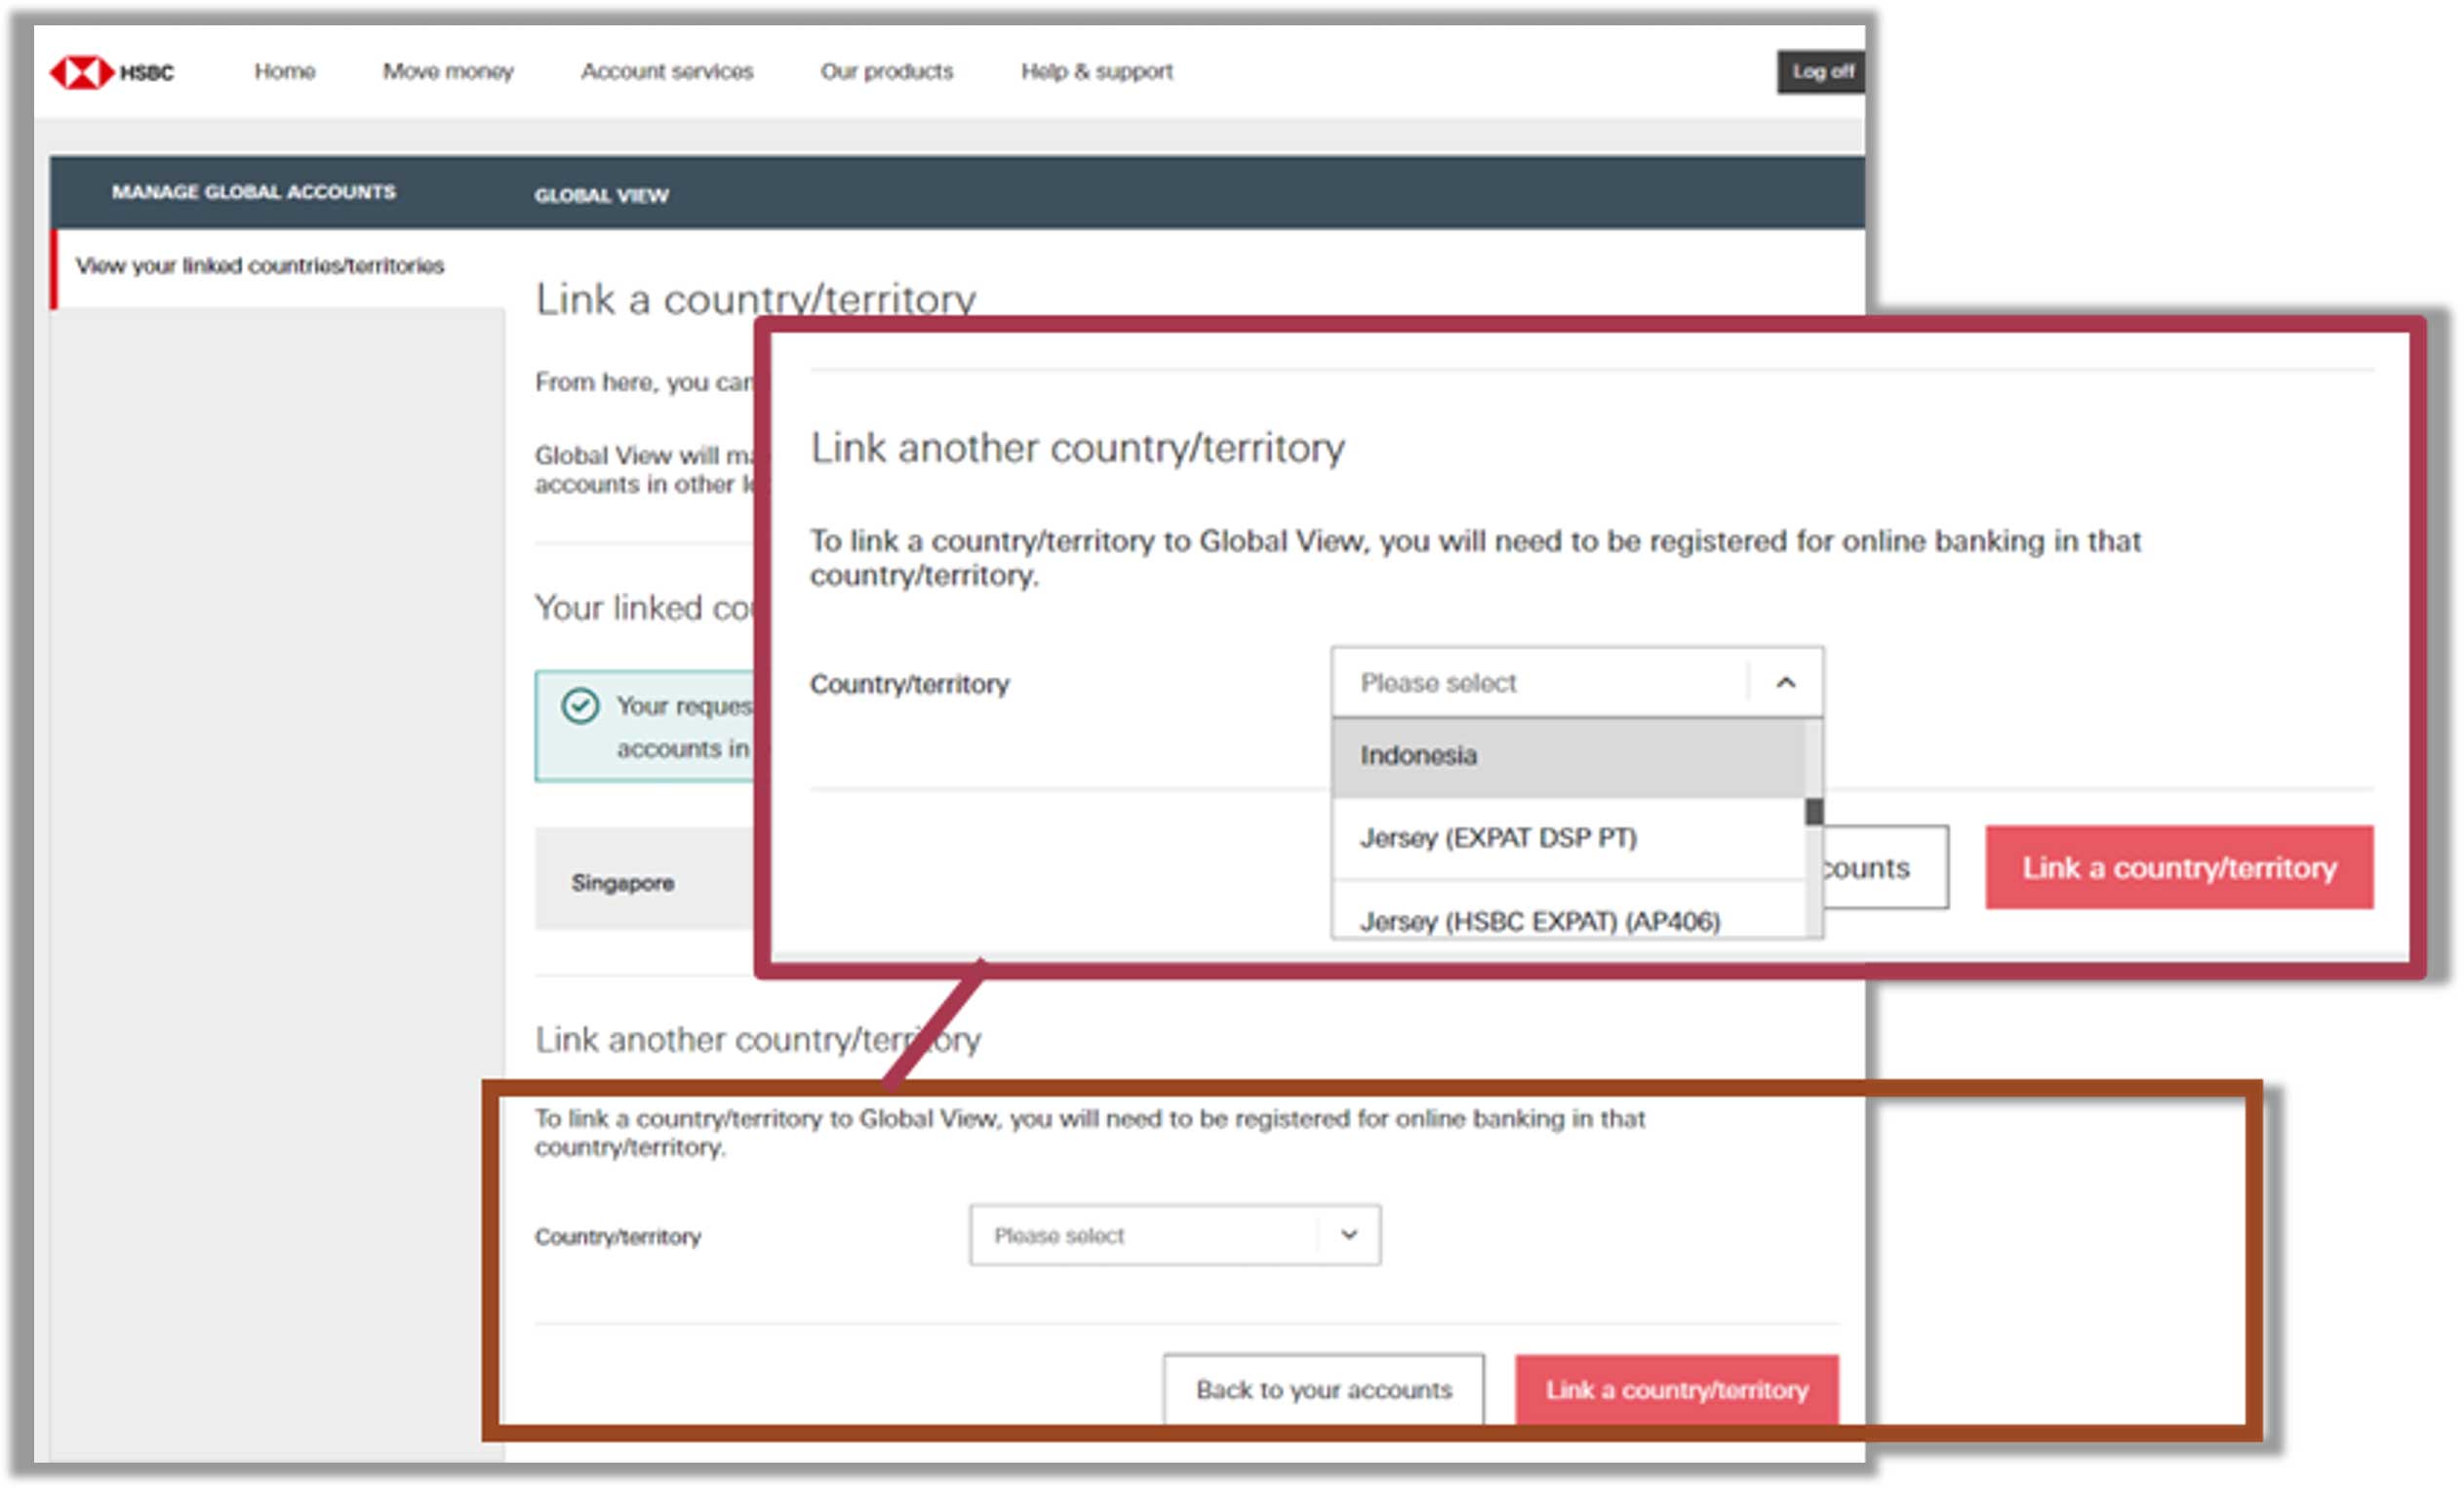
Select "Indonesia" as the destination country for linking, then click the "Link a country/territory" button.

After reading and agreeing to the applicable terms and conditions, other country's HSBC Internet Banking will display a QR code.
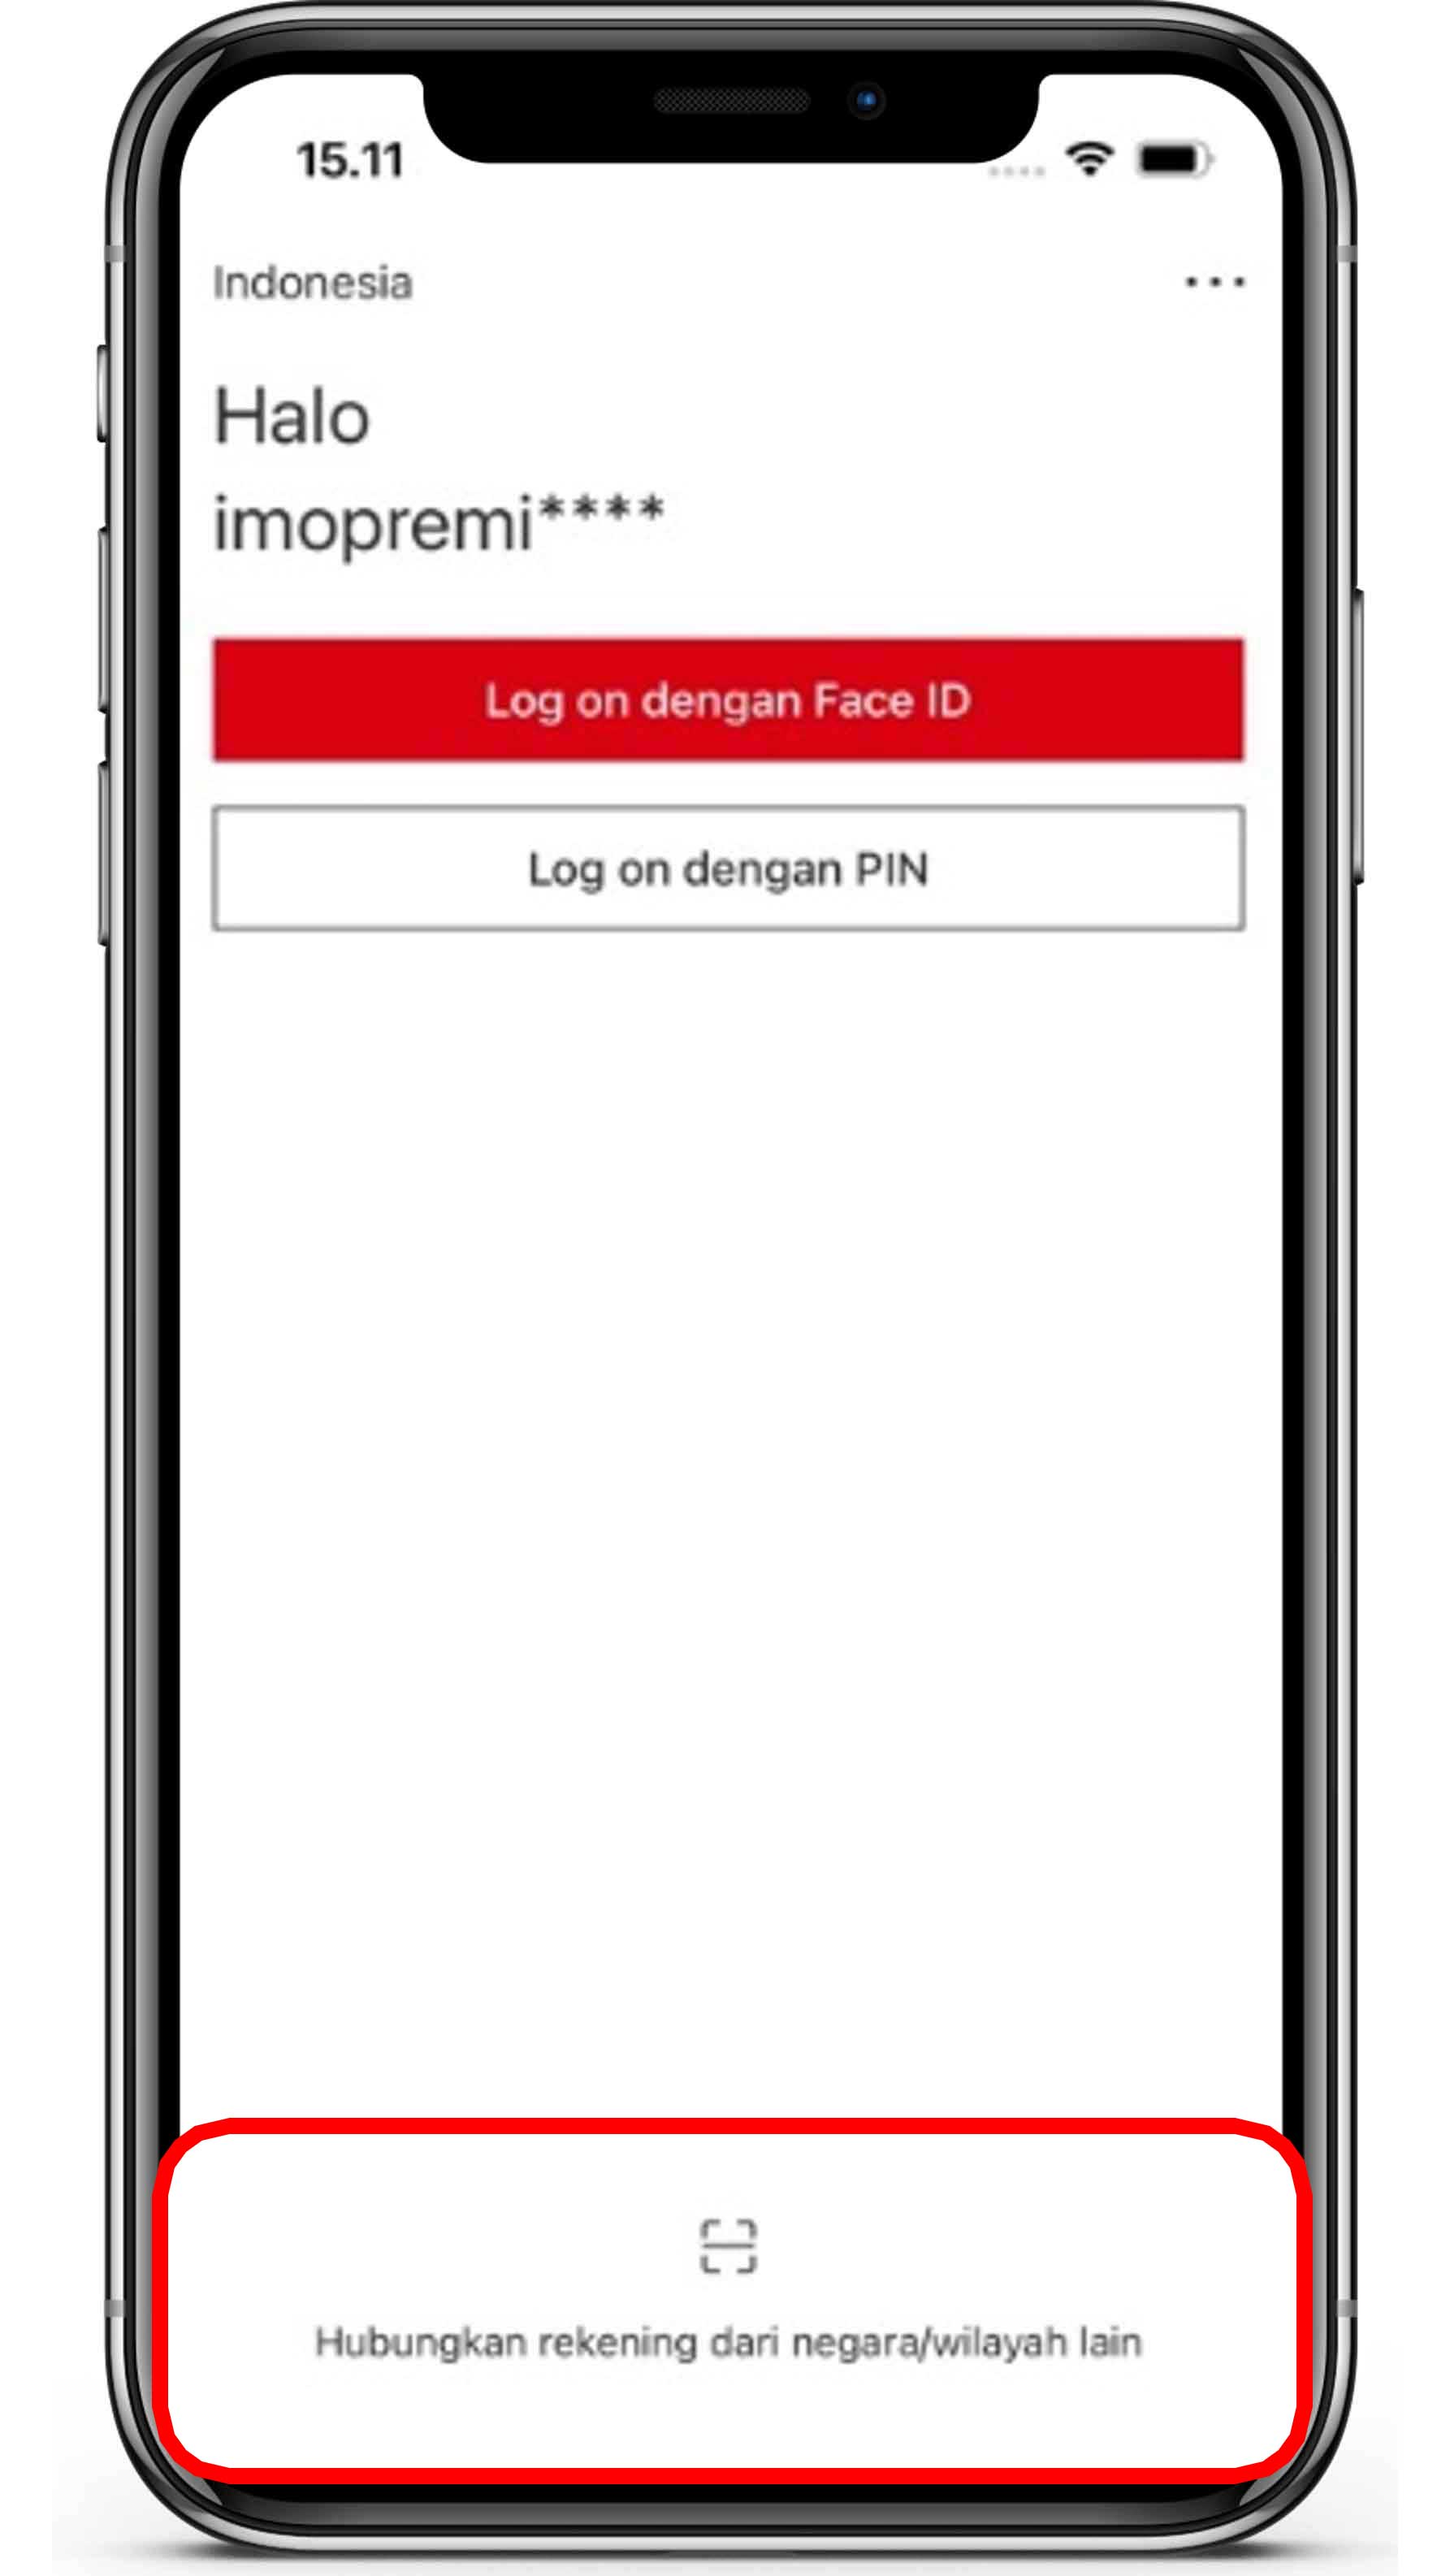
Go to HSBC Mobile Banking on your device and select "Link an account from other country/territory" that is located at the bottom of HSBC Mobile Banking screen before logging on to the app.
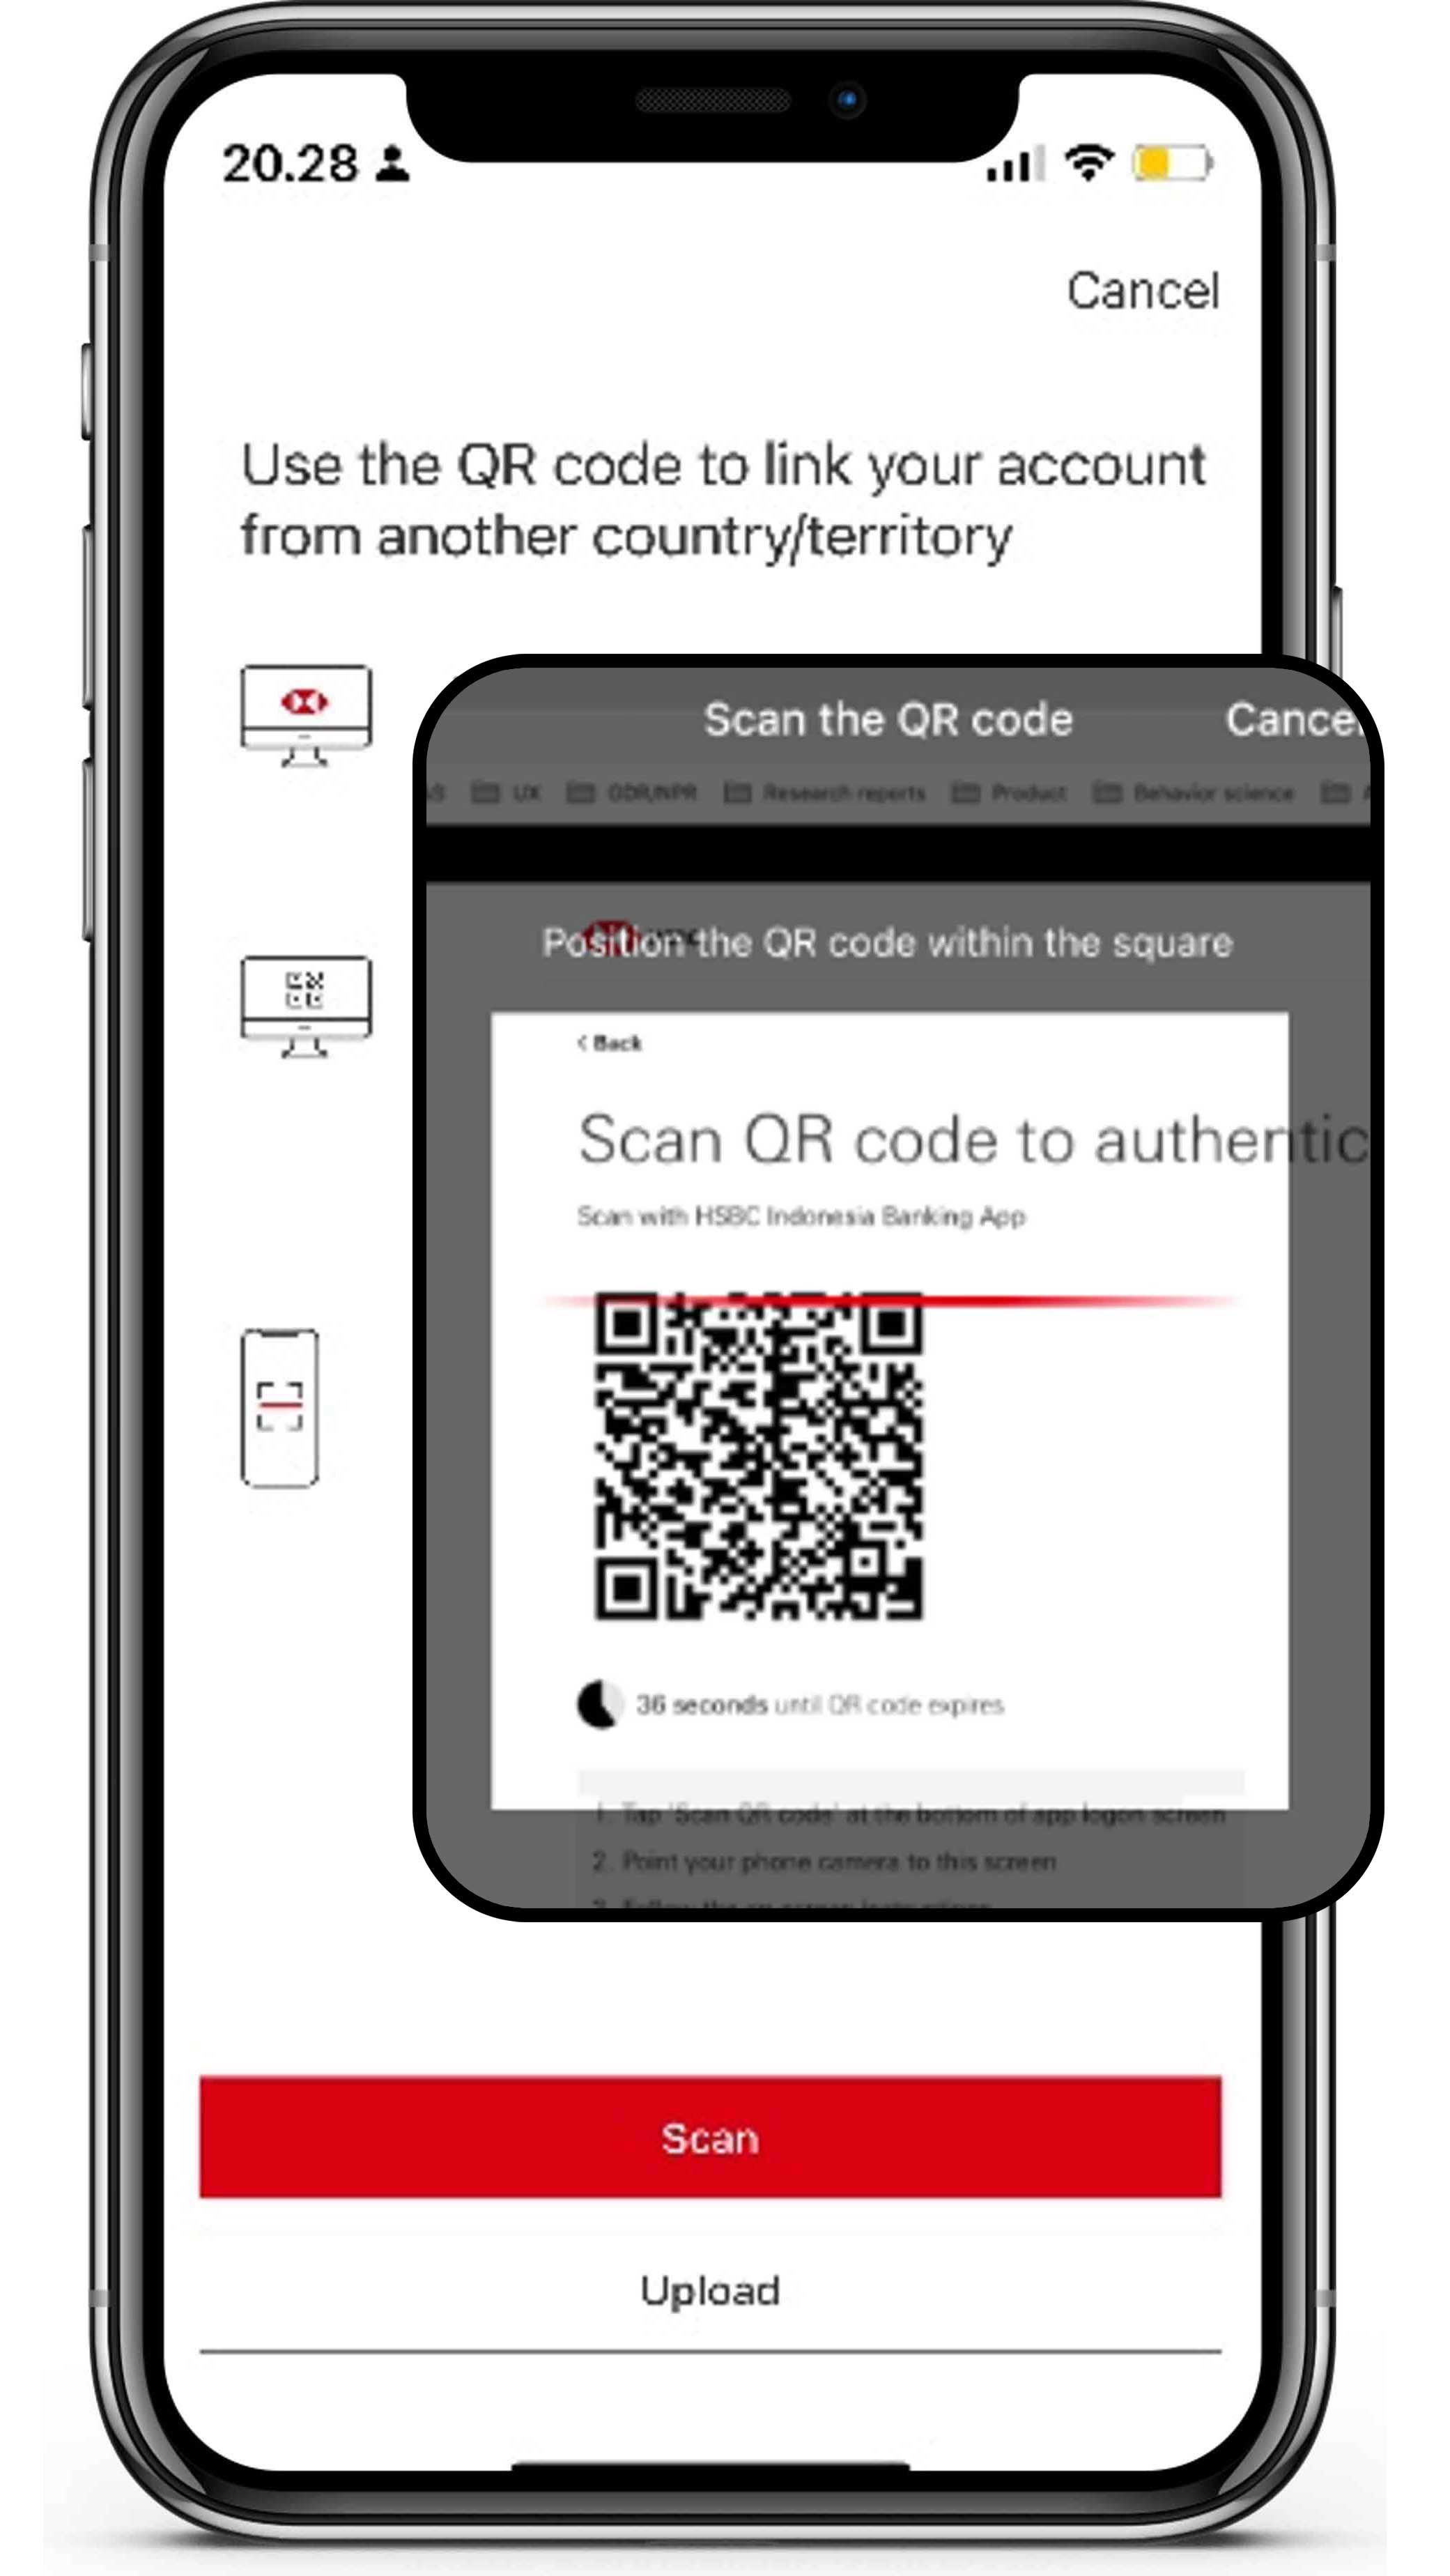
Click the "Scan" button and scan the QR code displayed by other country's HSBC Internet Banking or upload the QR code that you have previously saved on your device.
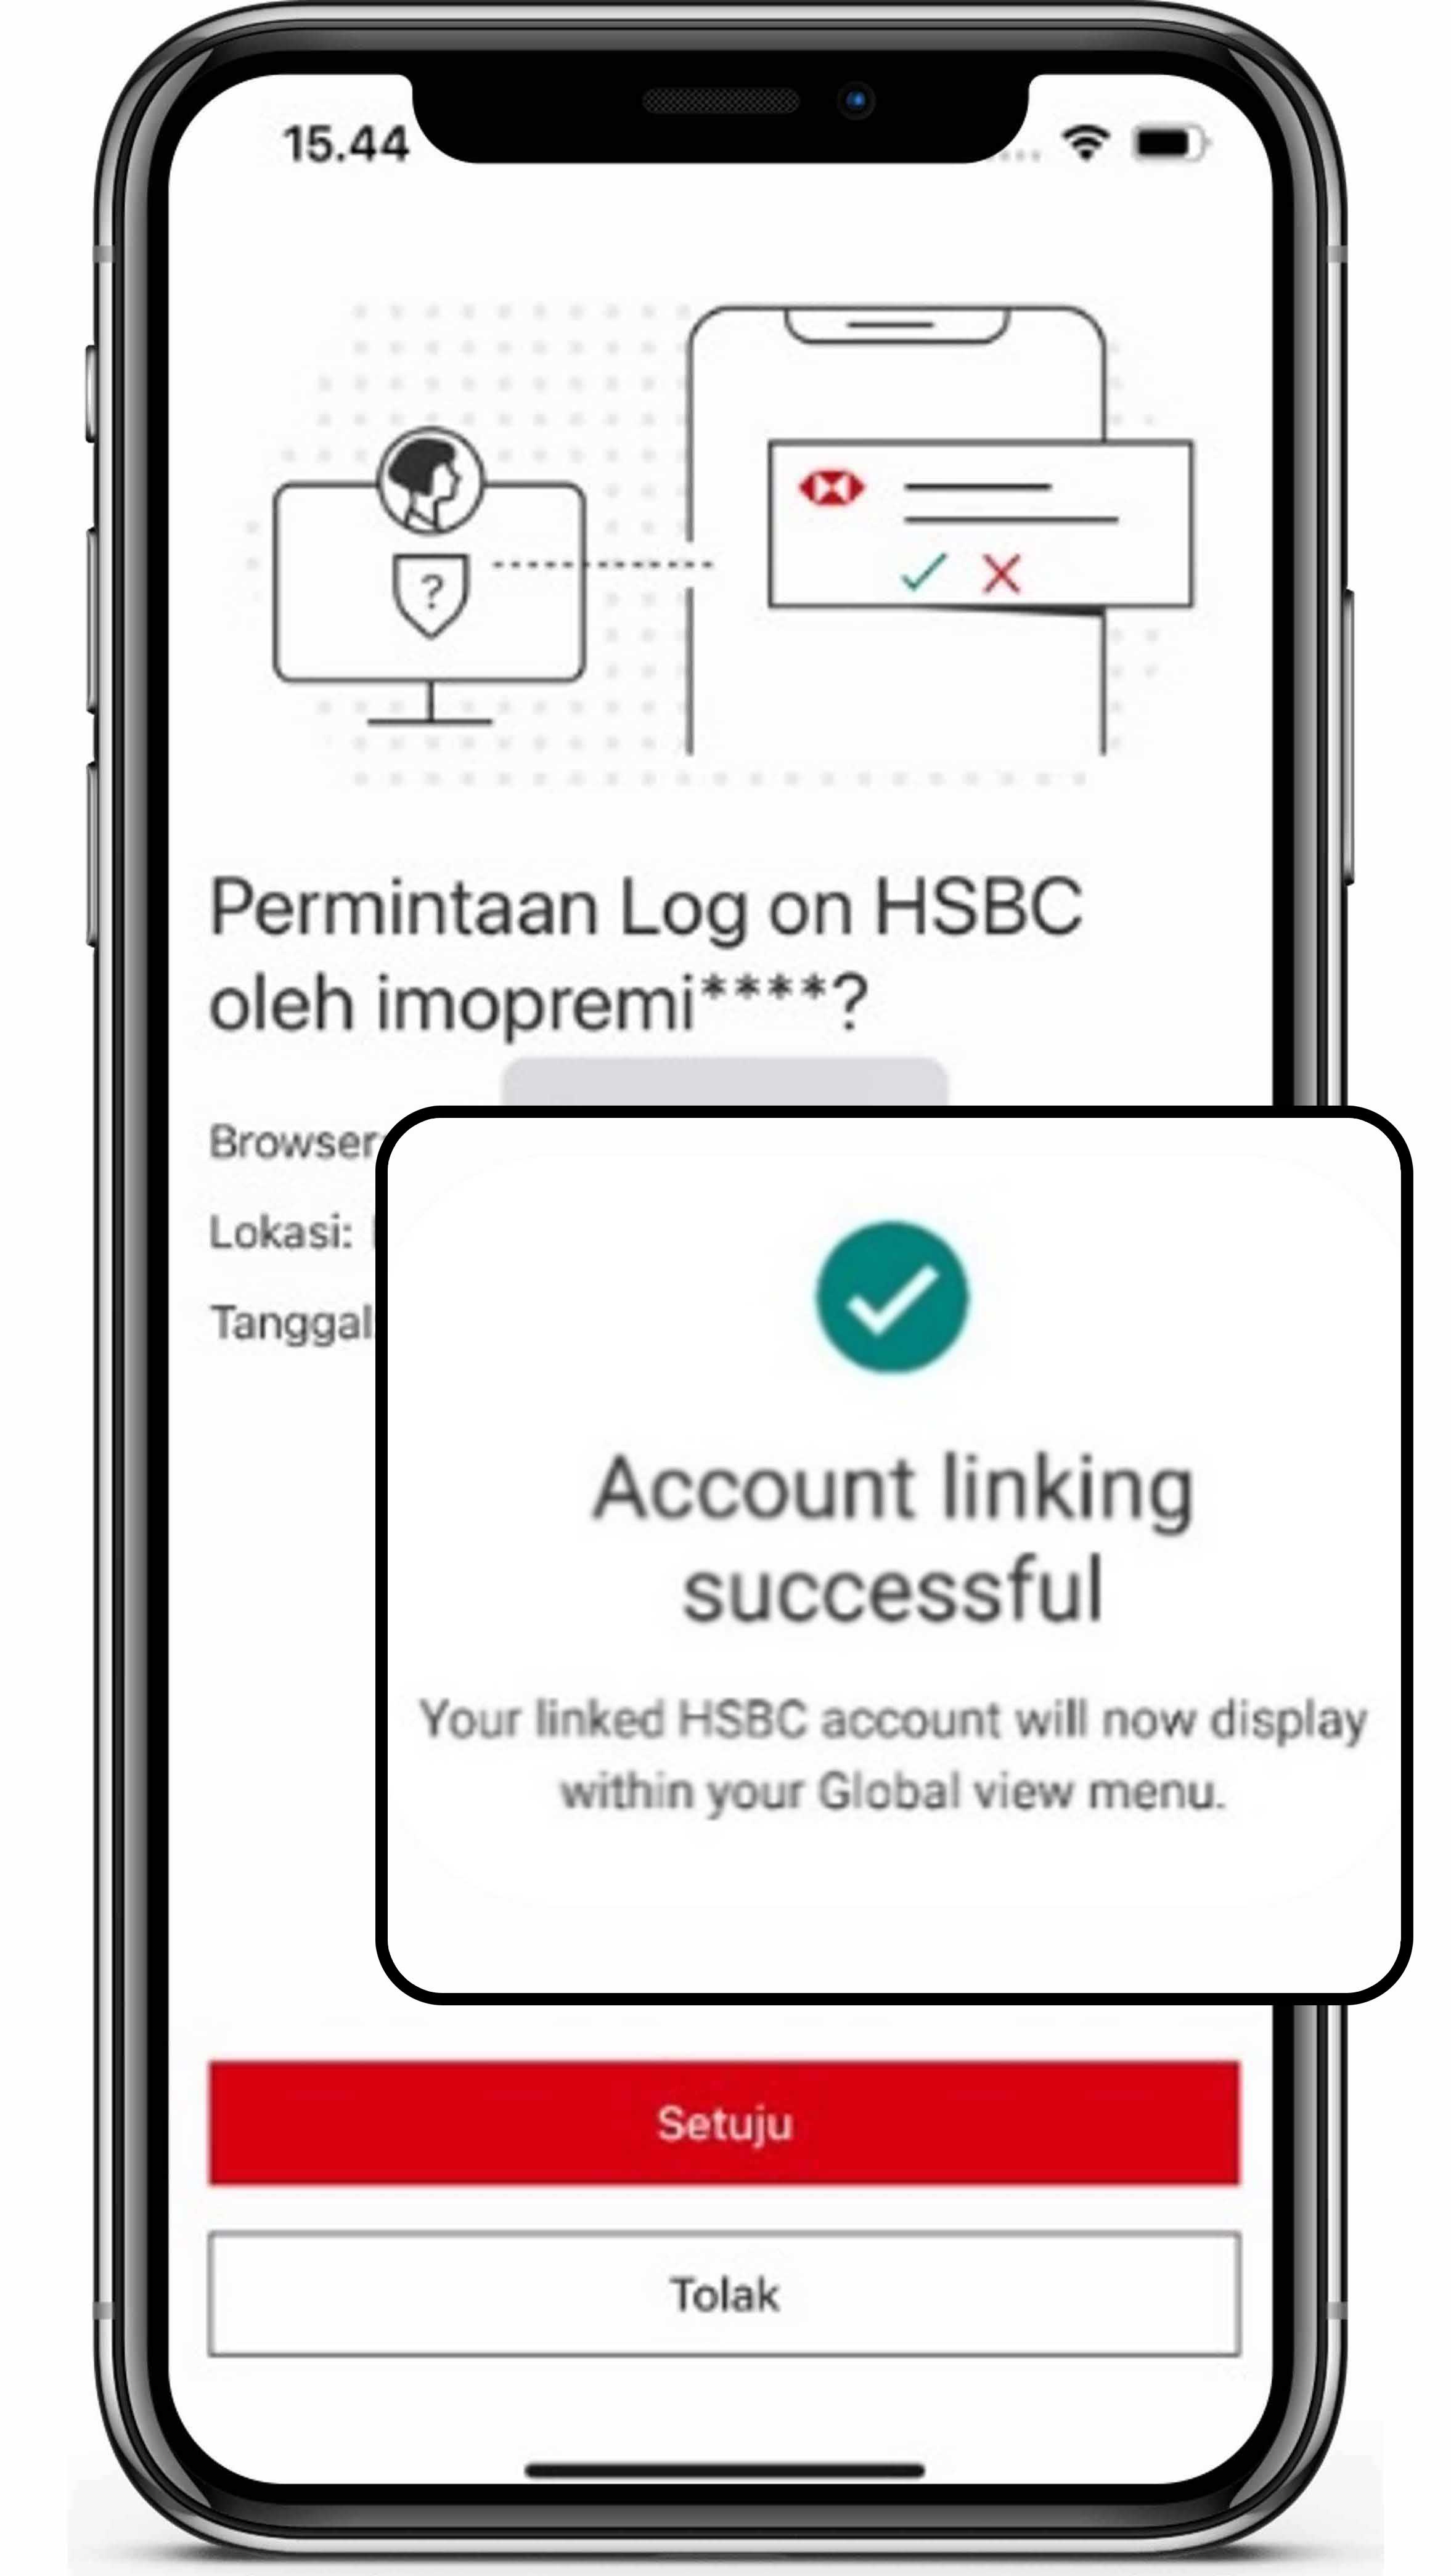
Continue by reading and agreeing to the applicable terms and
conditions, confirming the linking, and verifying your HSBC Mobile
Banking PIN/biometrics.
Your other country's HSBC account will be displayed on the HSBC
Mobile Banking Home menu.
Global transfer
Enjoy free transfers to your HSBC accounts in other countries with the Global Transfer feature. Follow these steps:
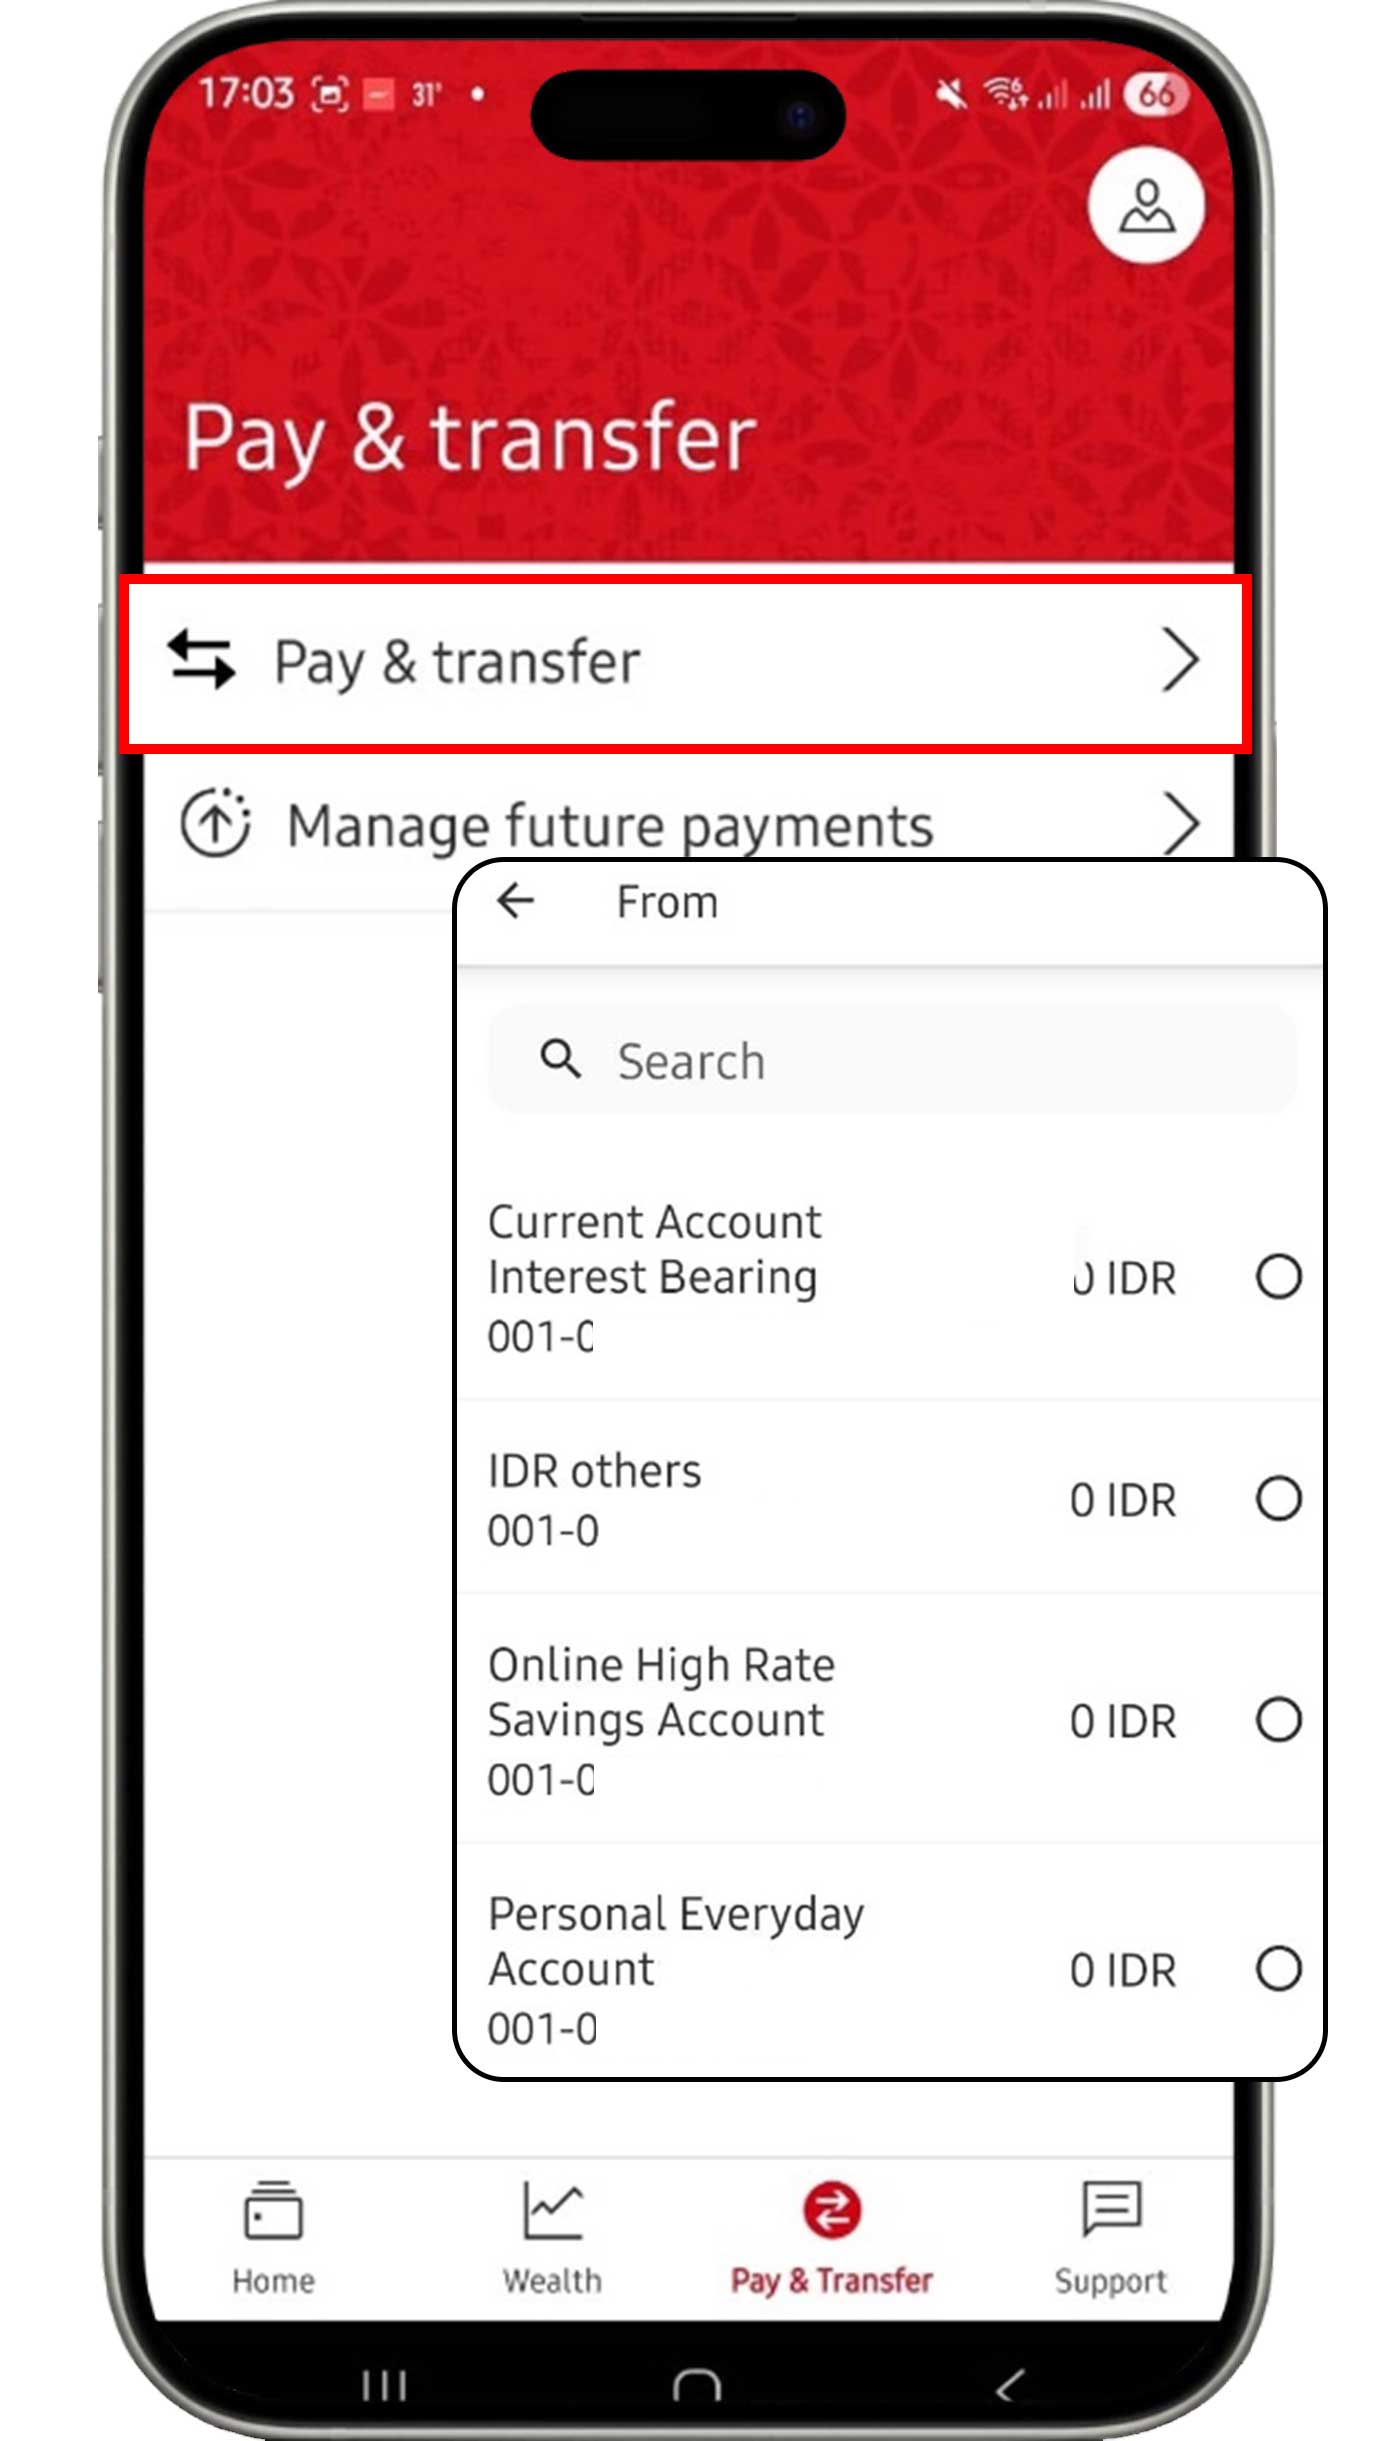
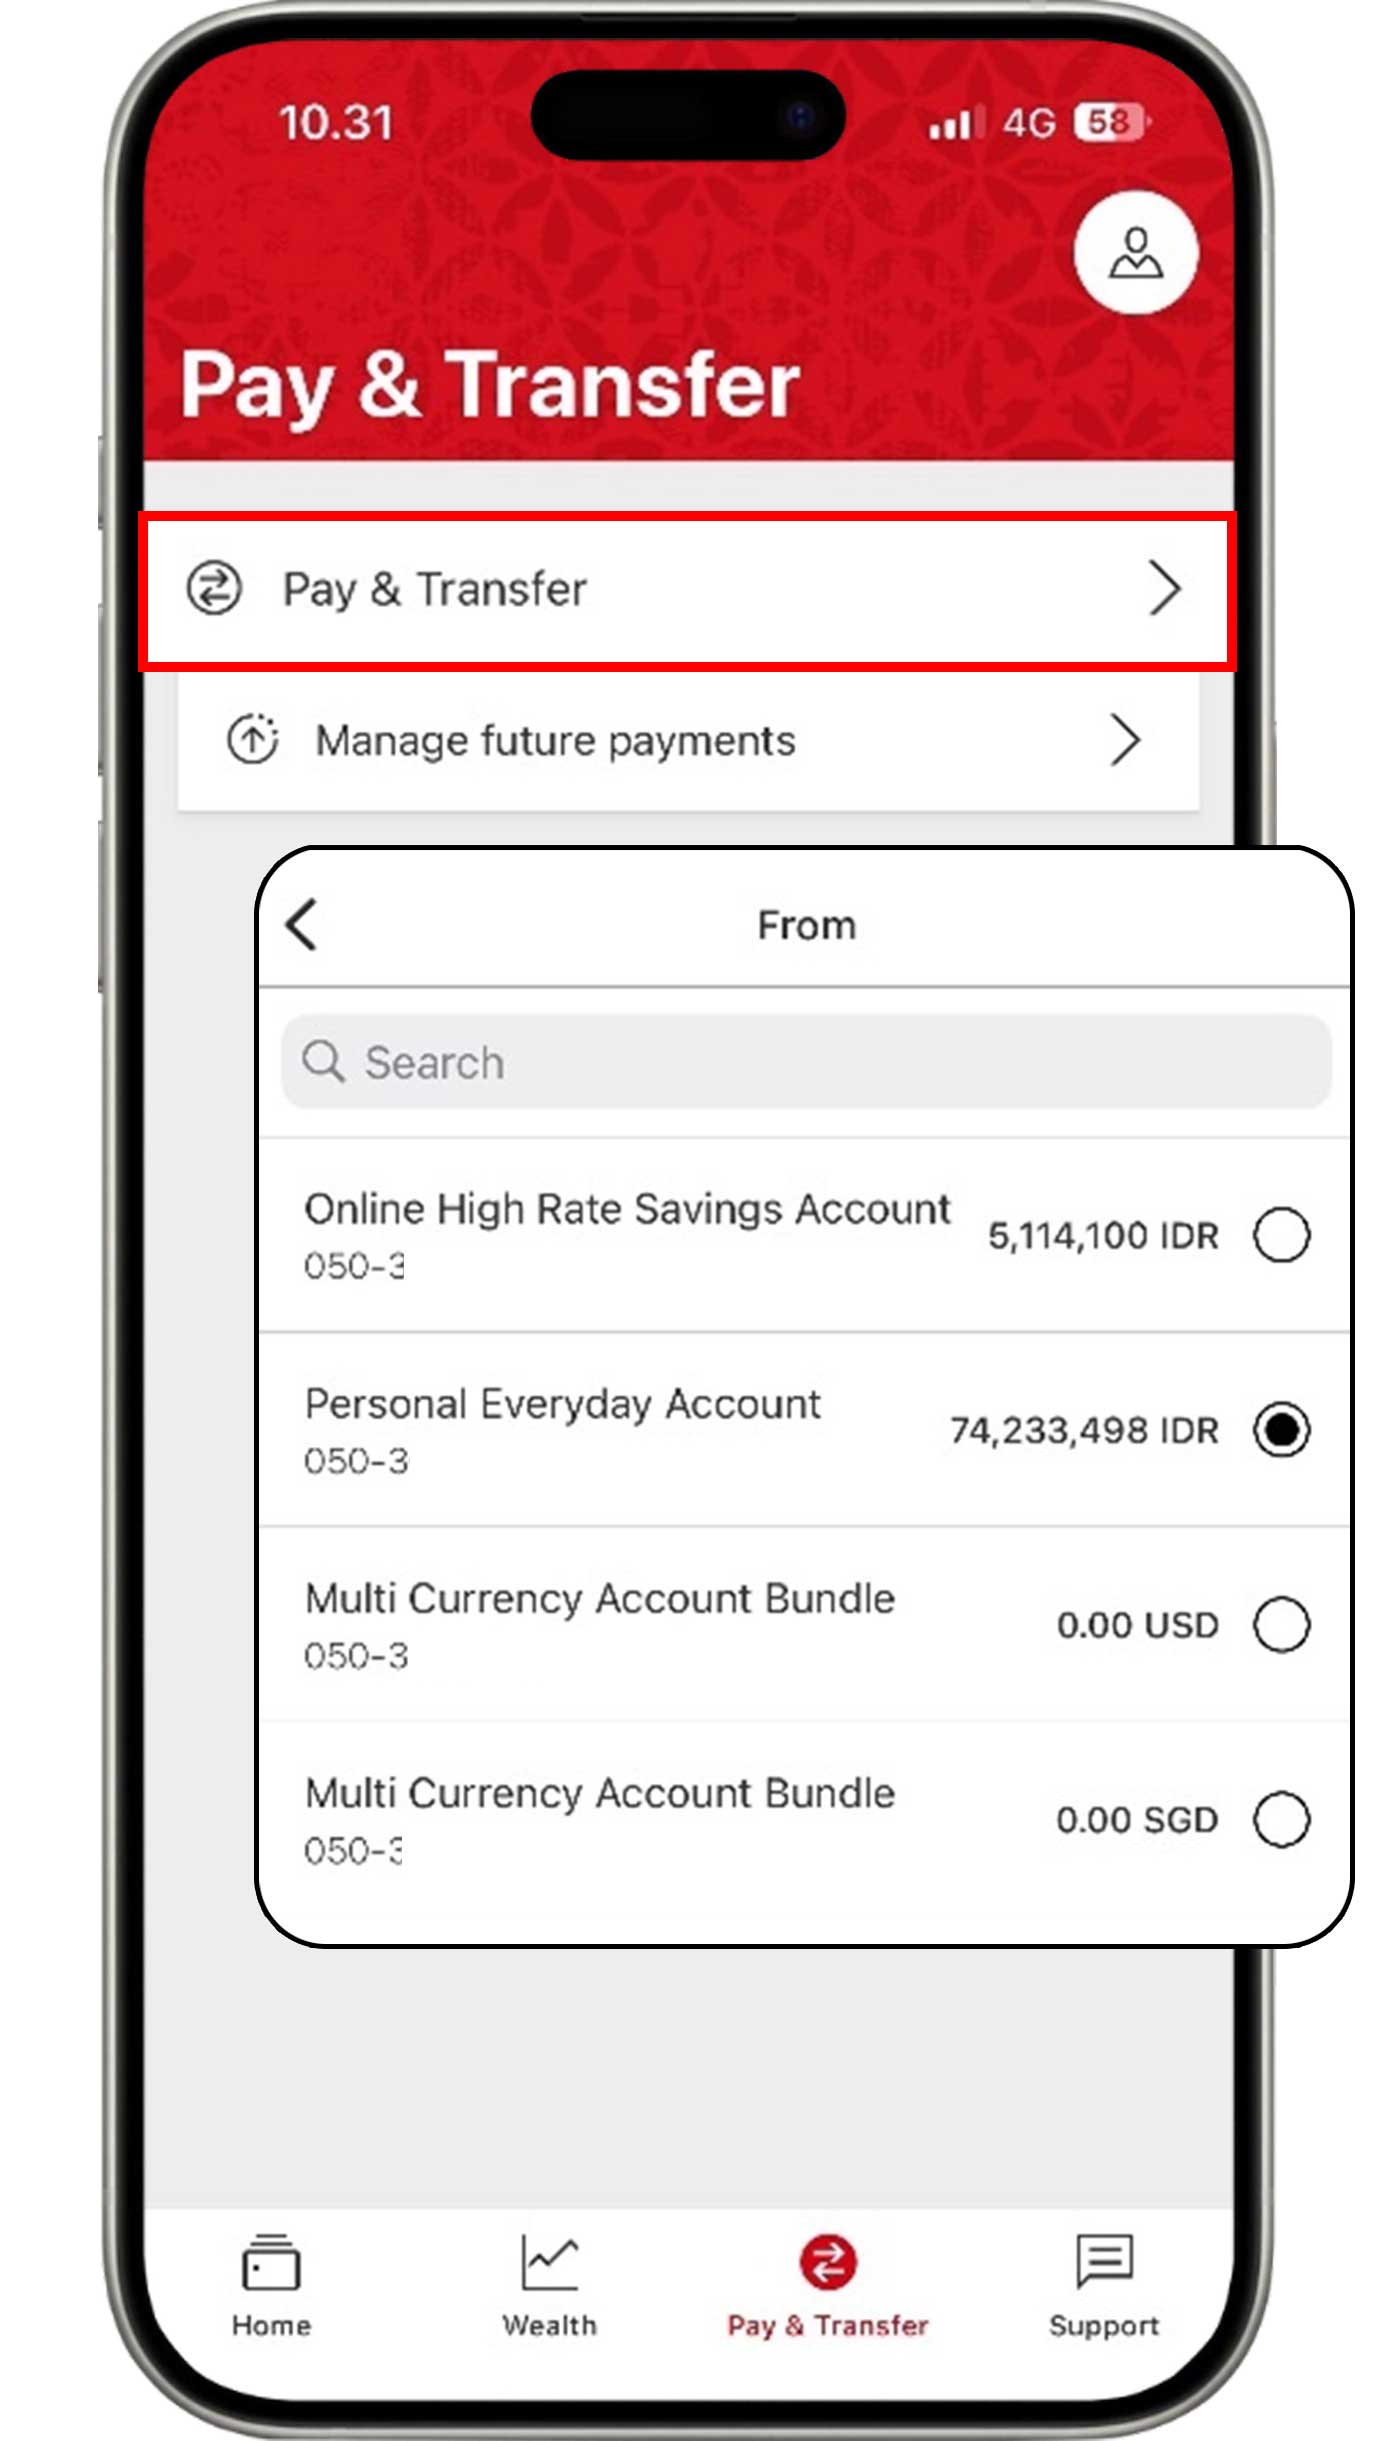
On the Pay & Transfer menu, click the "Pay & transfer" button. Then, select the account you would like to use.

Select the Your accounts tab, then select the account for your transfers.
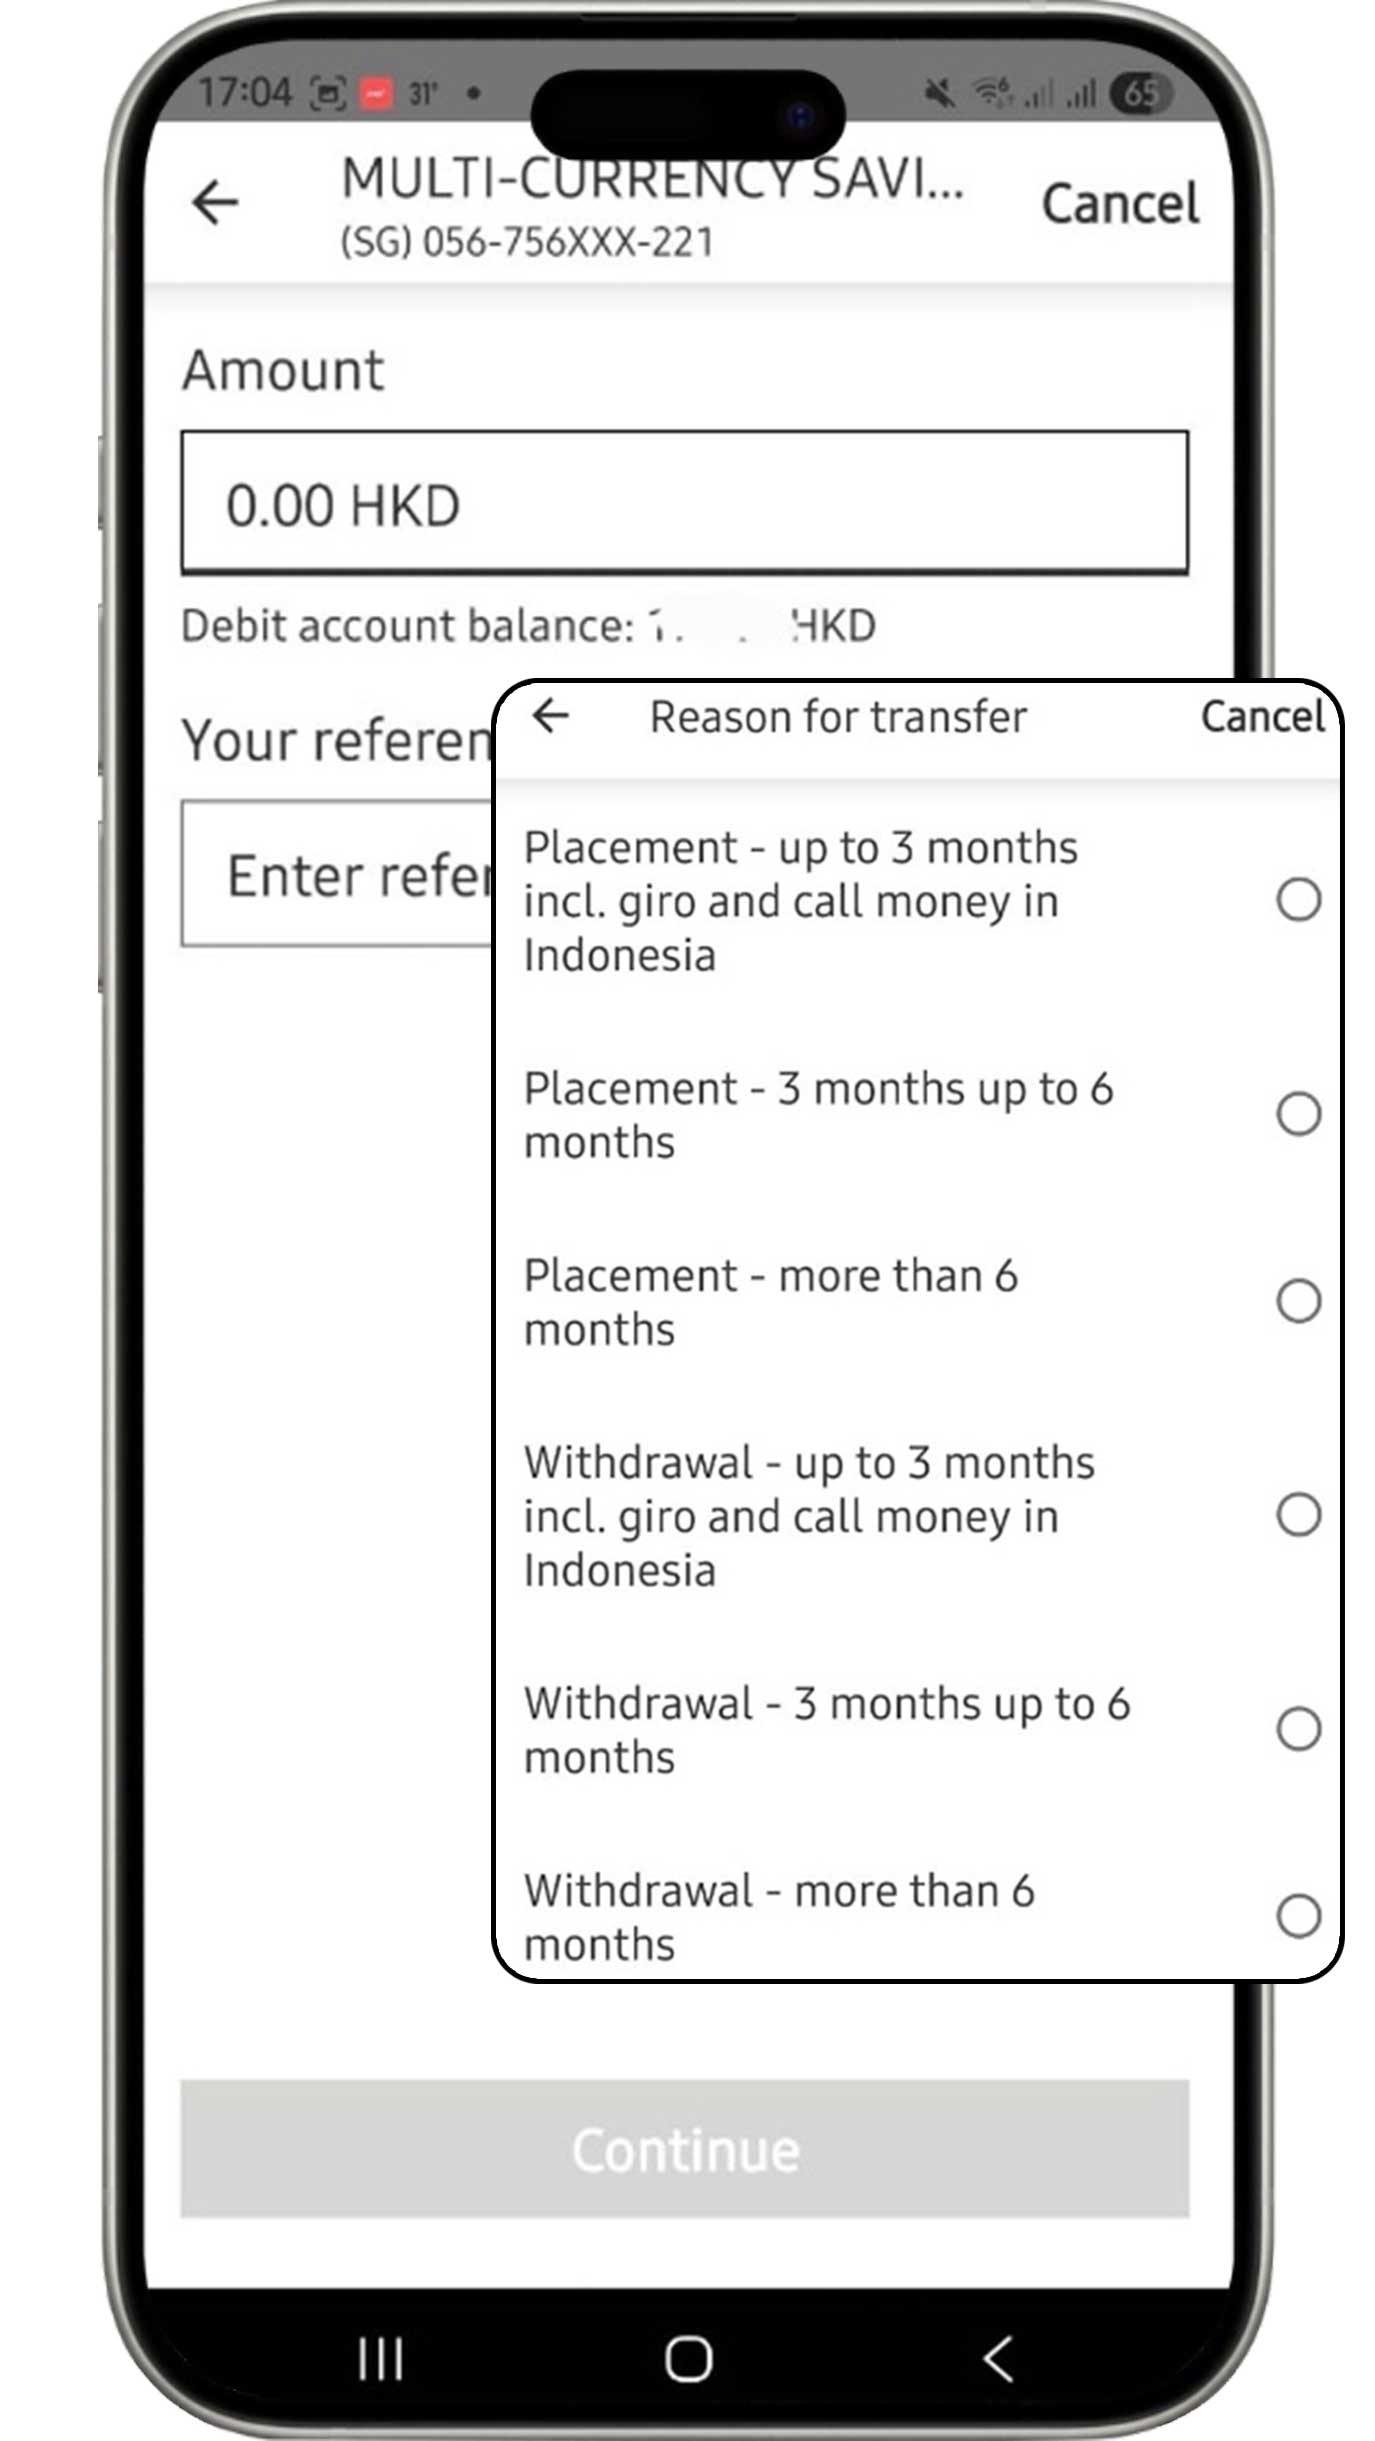
Complete the information based on your requirements, select the reason for transfer, then click the "Continue" button.
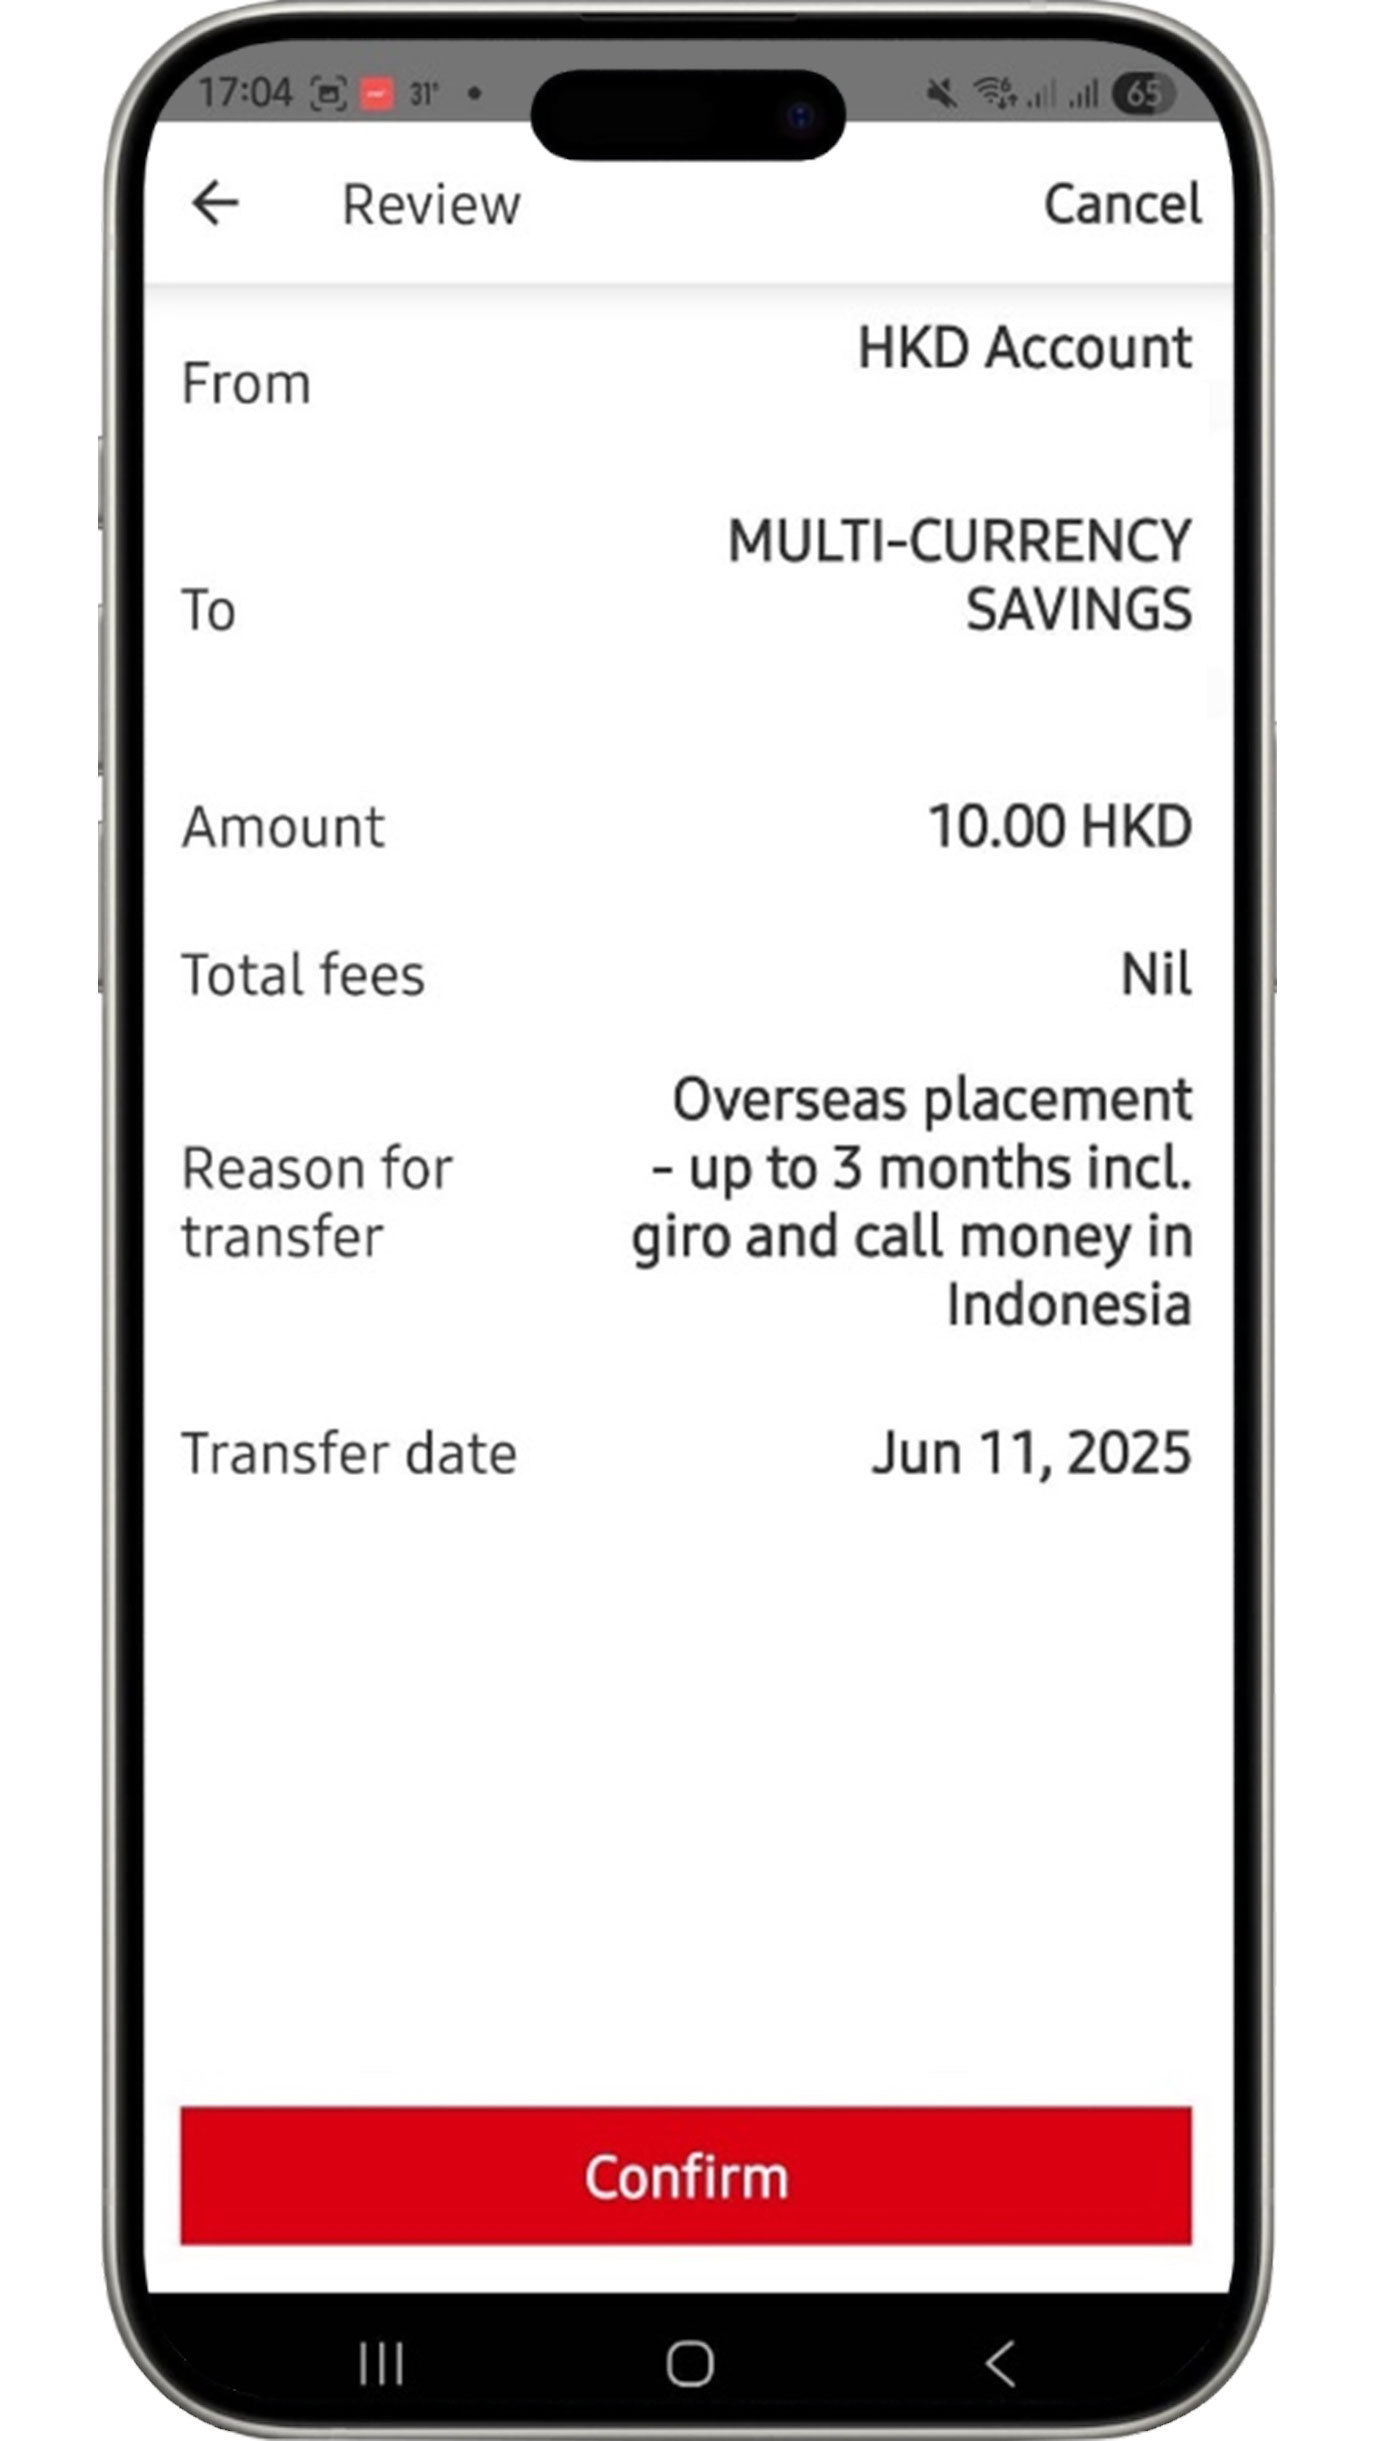
Review the information that you have input. If all the information is accurate, click the "Confirm" button to complete Global Transfer process.
Telegraphic transfer
Enjoy easy transfers to overseas accounts. Transfer fees per transaction apply. More information here
On the Pay & Transfer menu, click the "Pay & transfer" button. Then, select the account you would like to use.
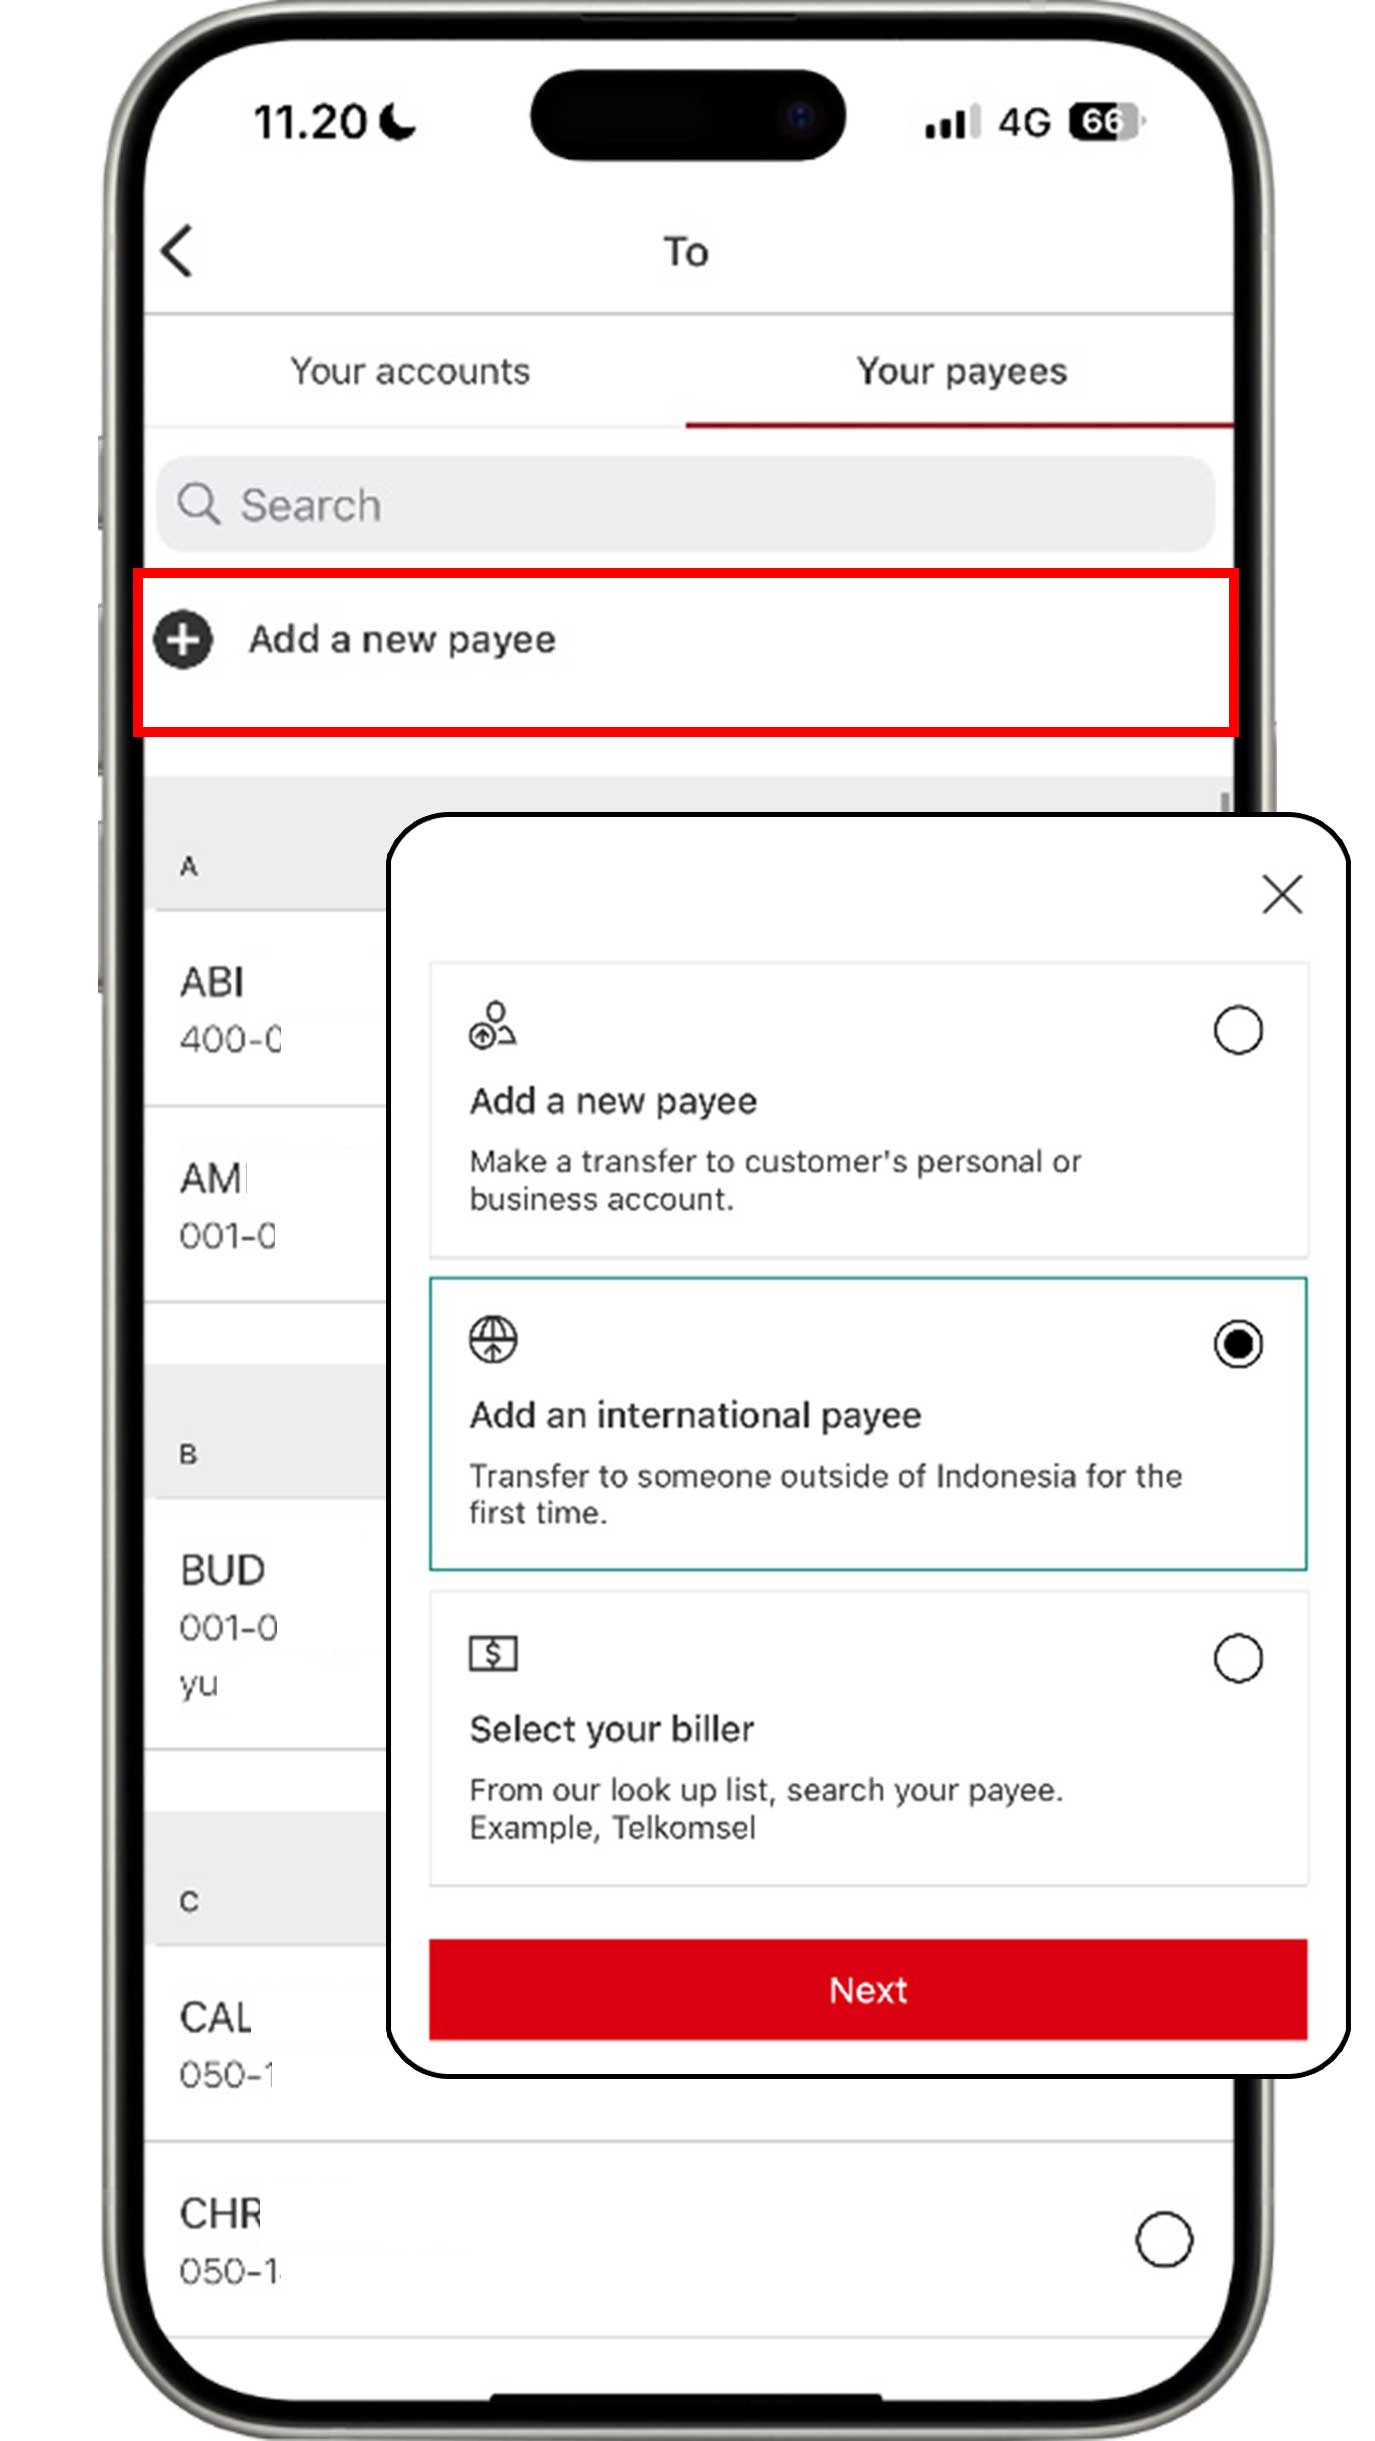
Select the Your payees tab and click the "Add a new payee"
button.
Then, select "Add an international payee" to continue the
transaction.
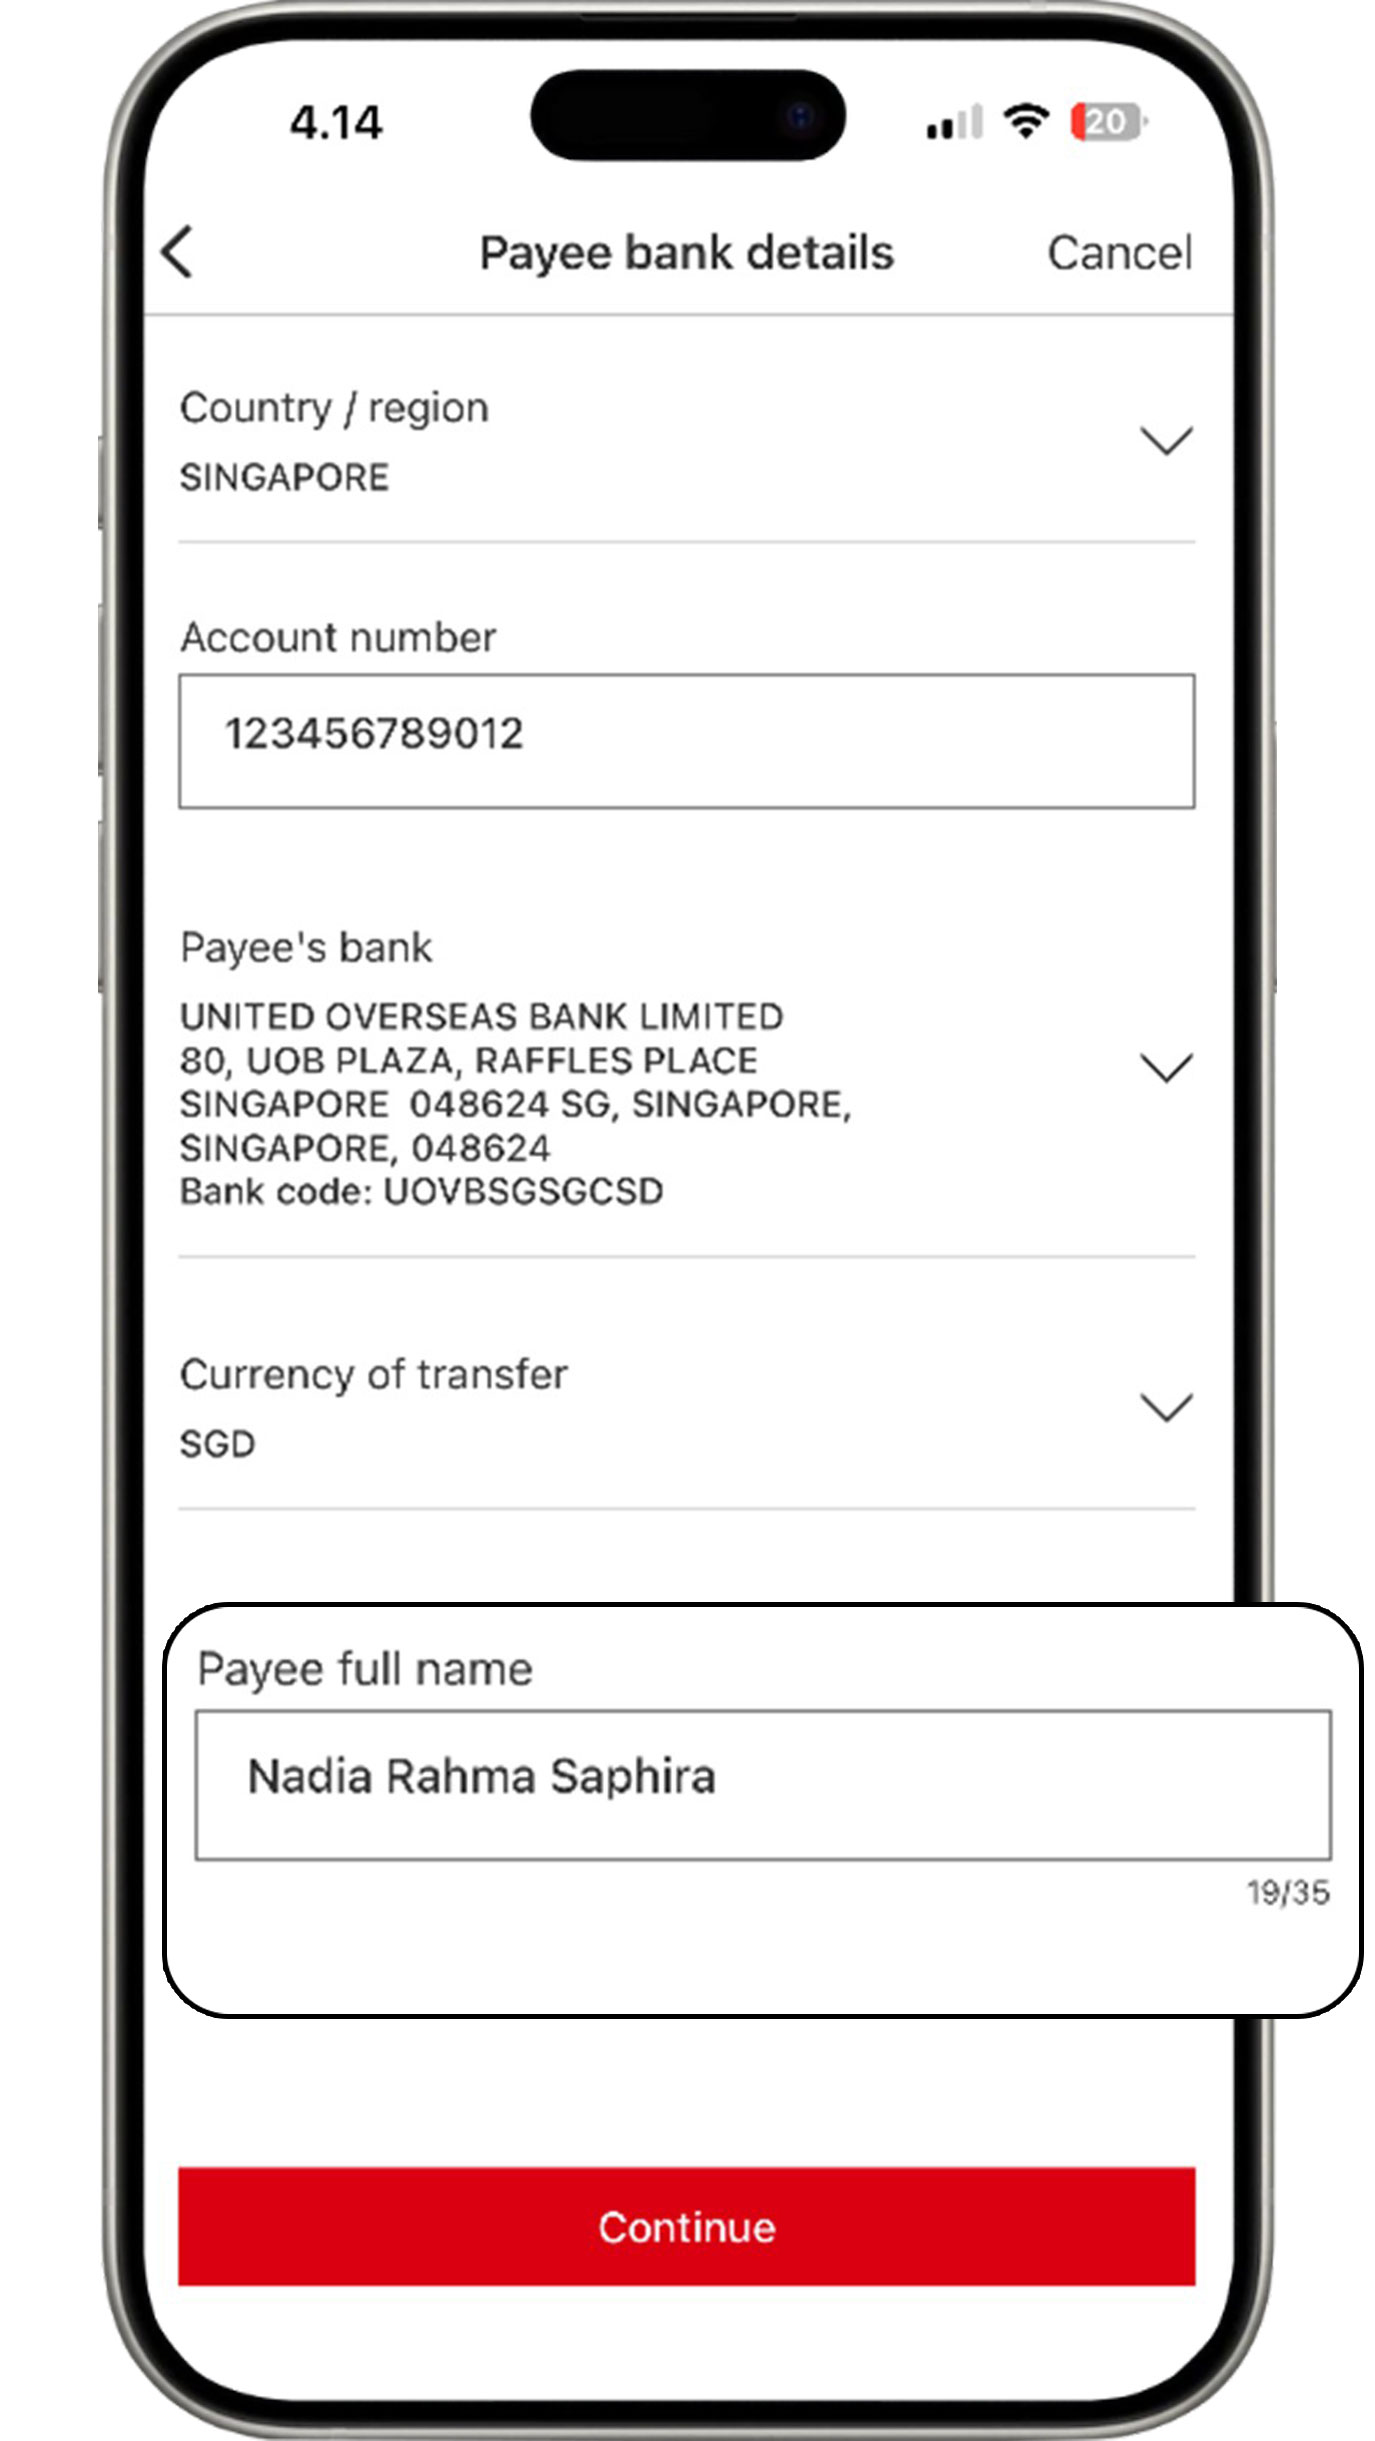
Complete the information of the account for your transfers and click the "Continue" button.
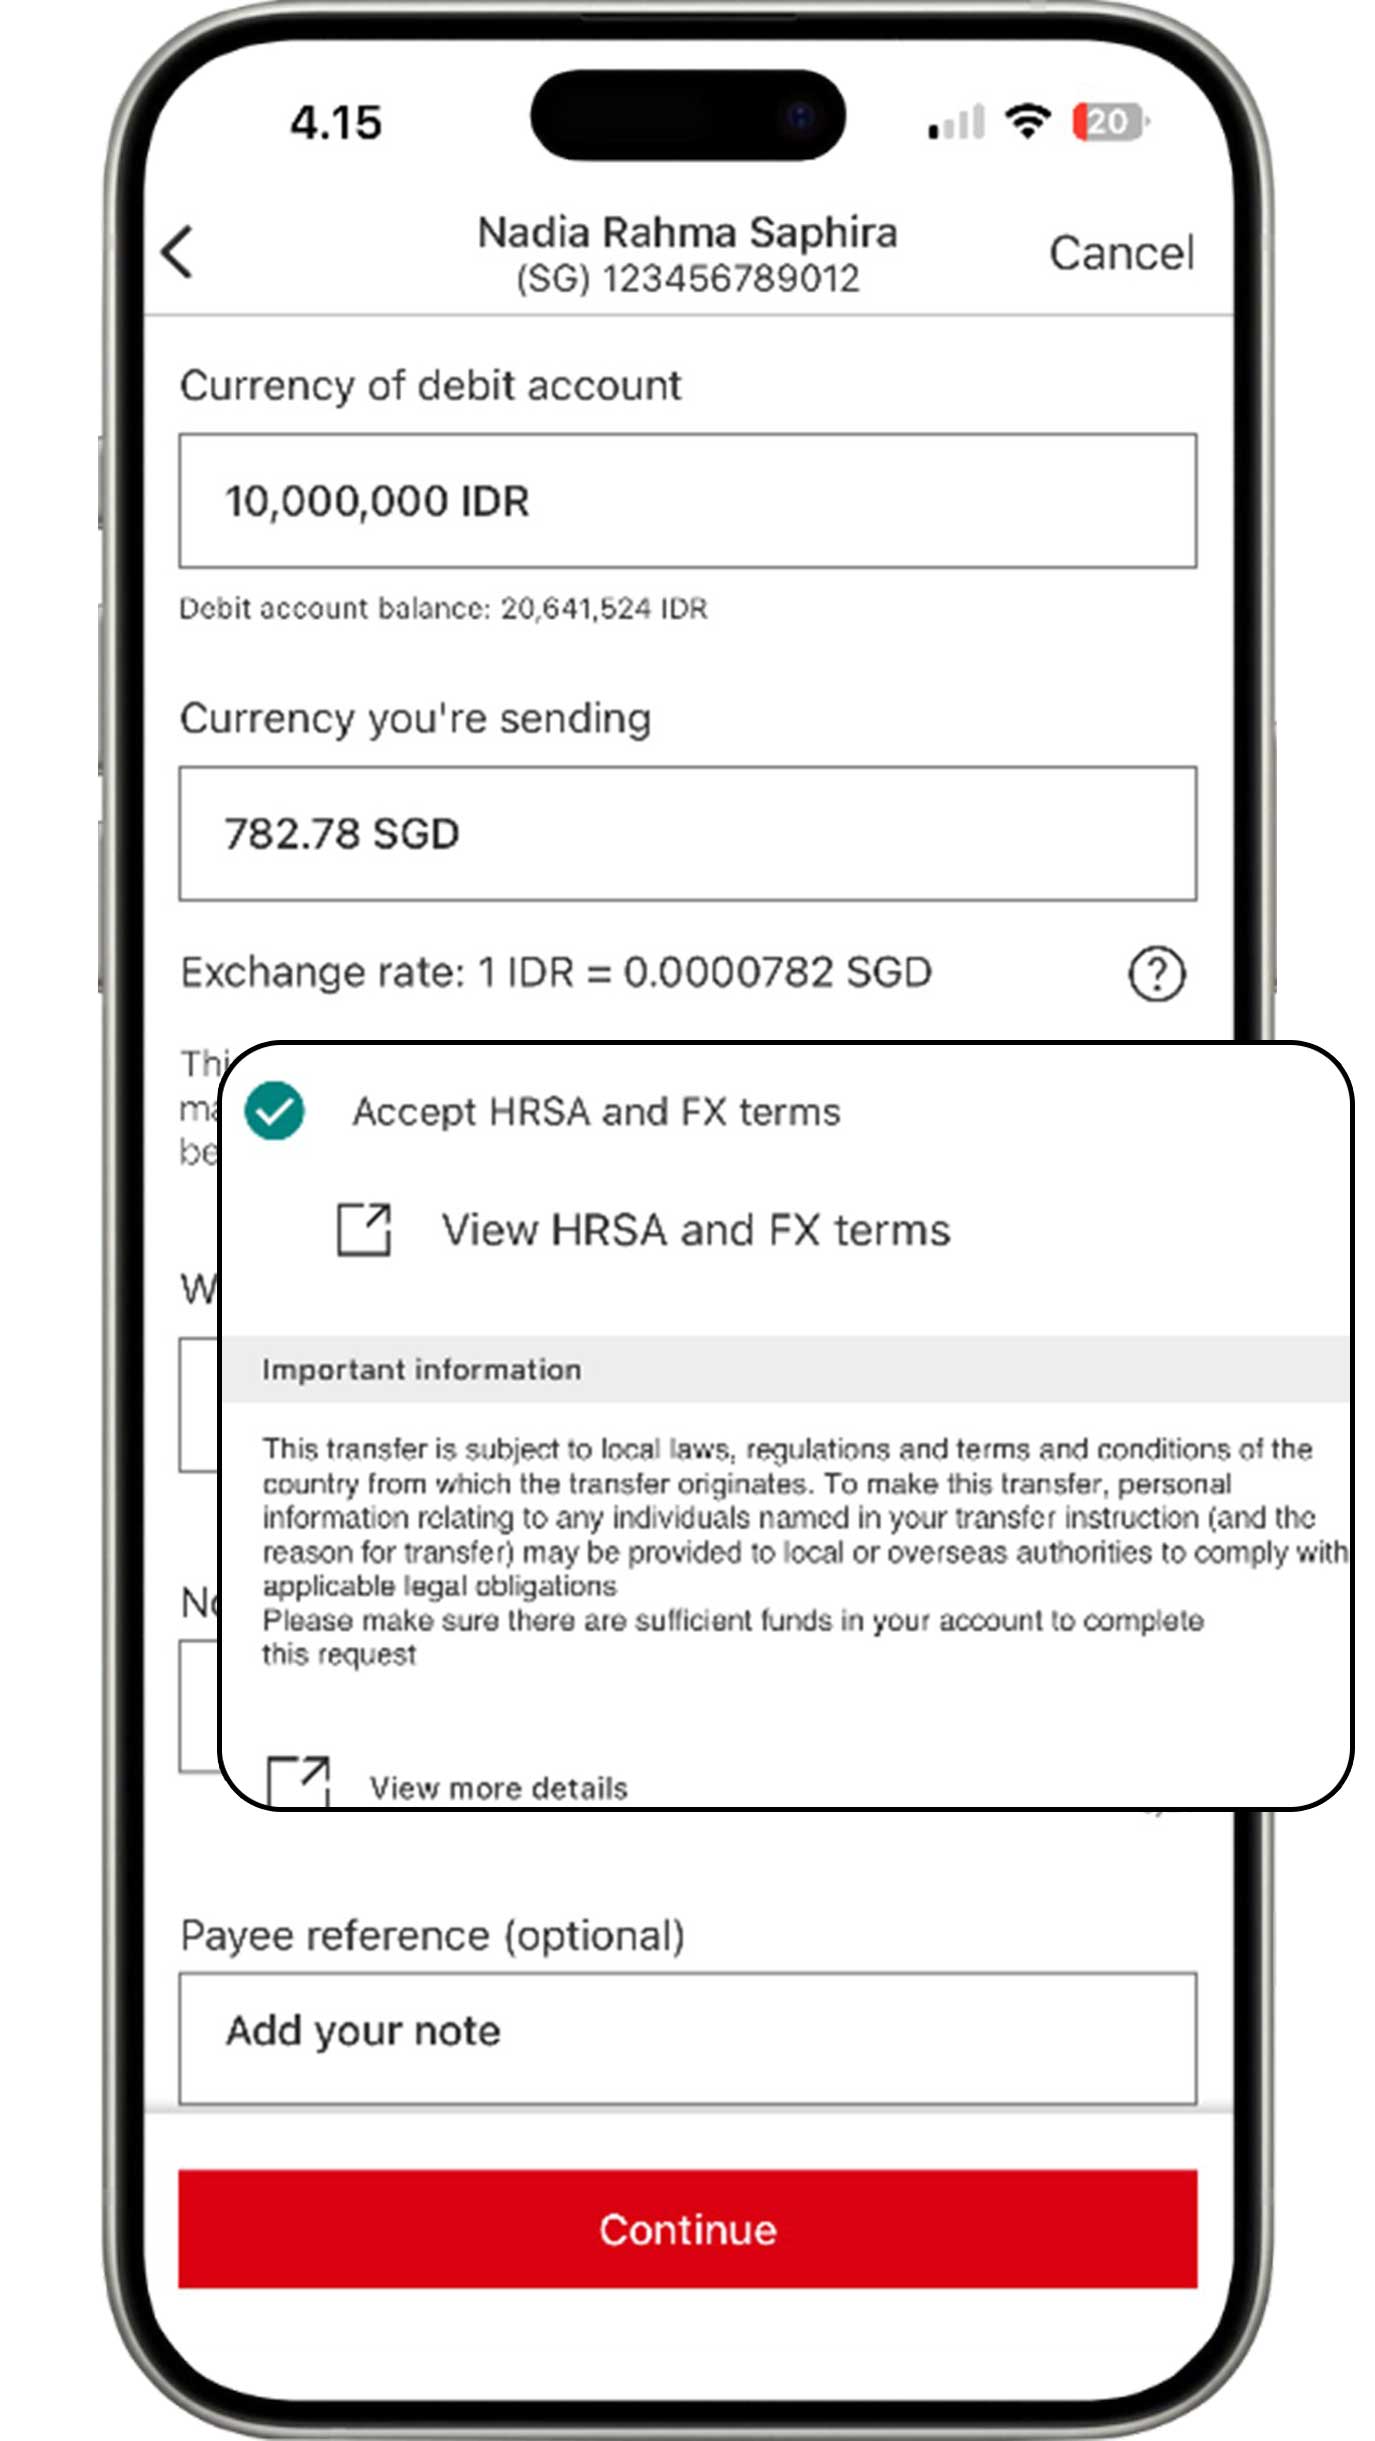
Complete the information based on your requirements. Ensure that you have read and agree to the applicable terms and conditions before clicking the "Continue" button.
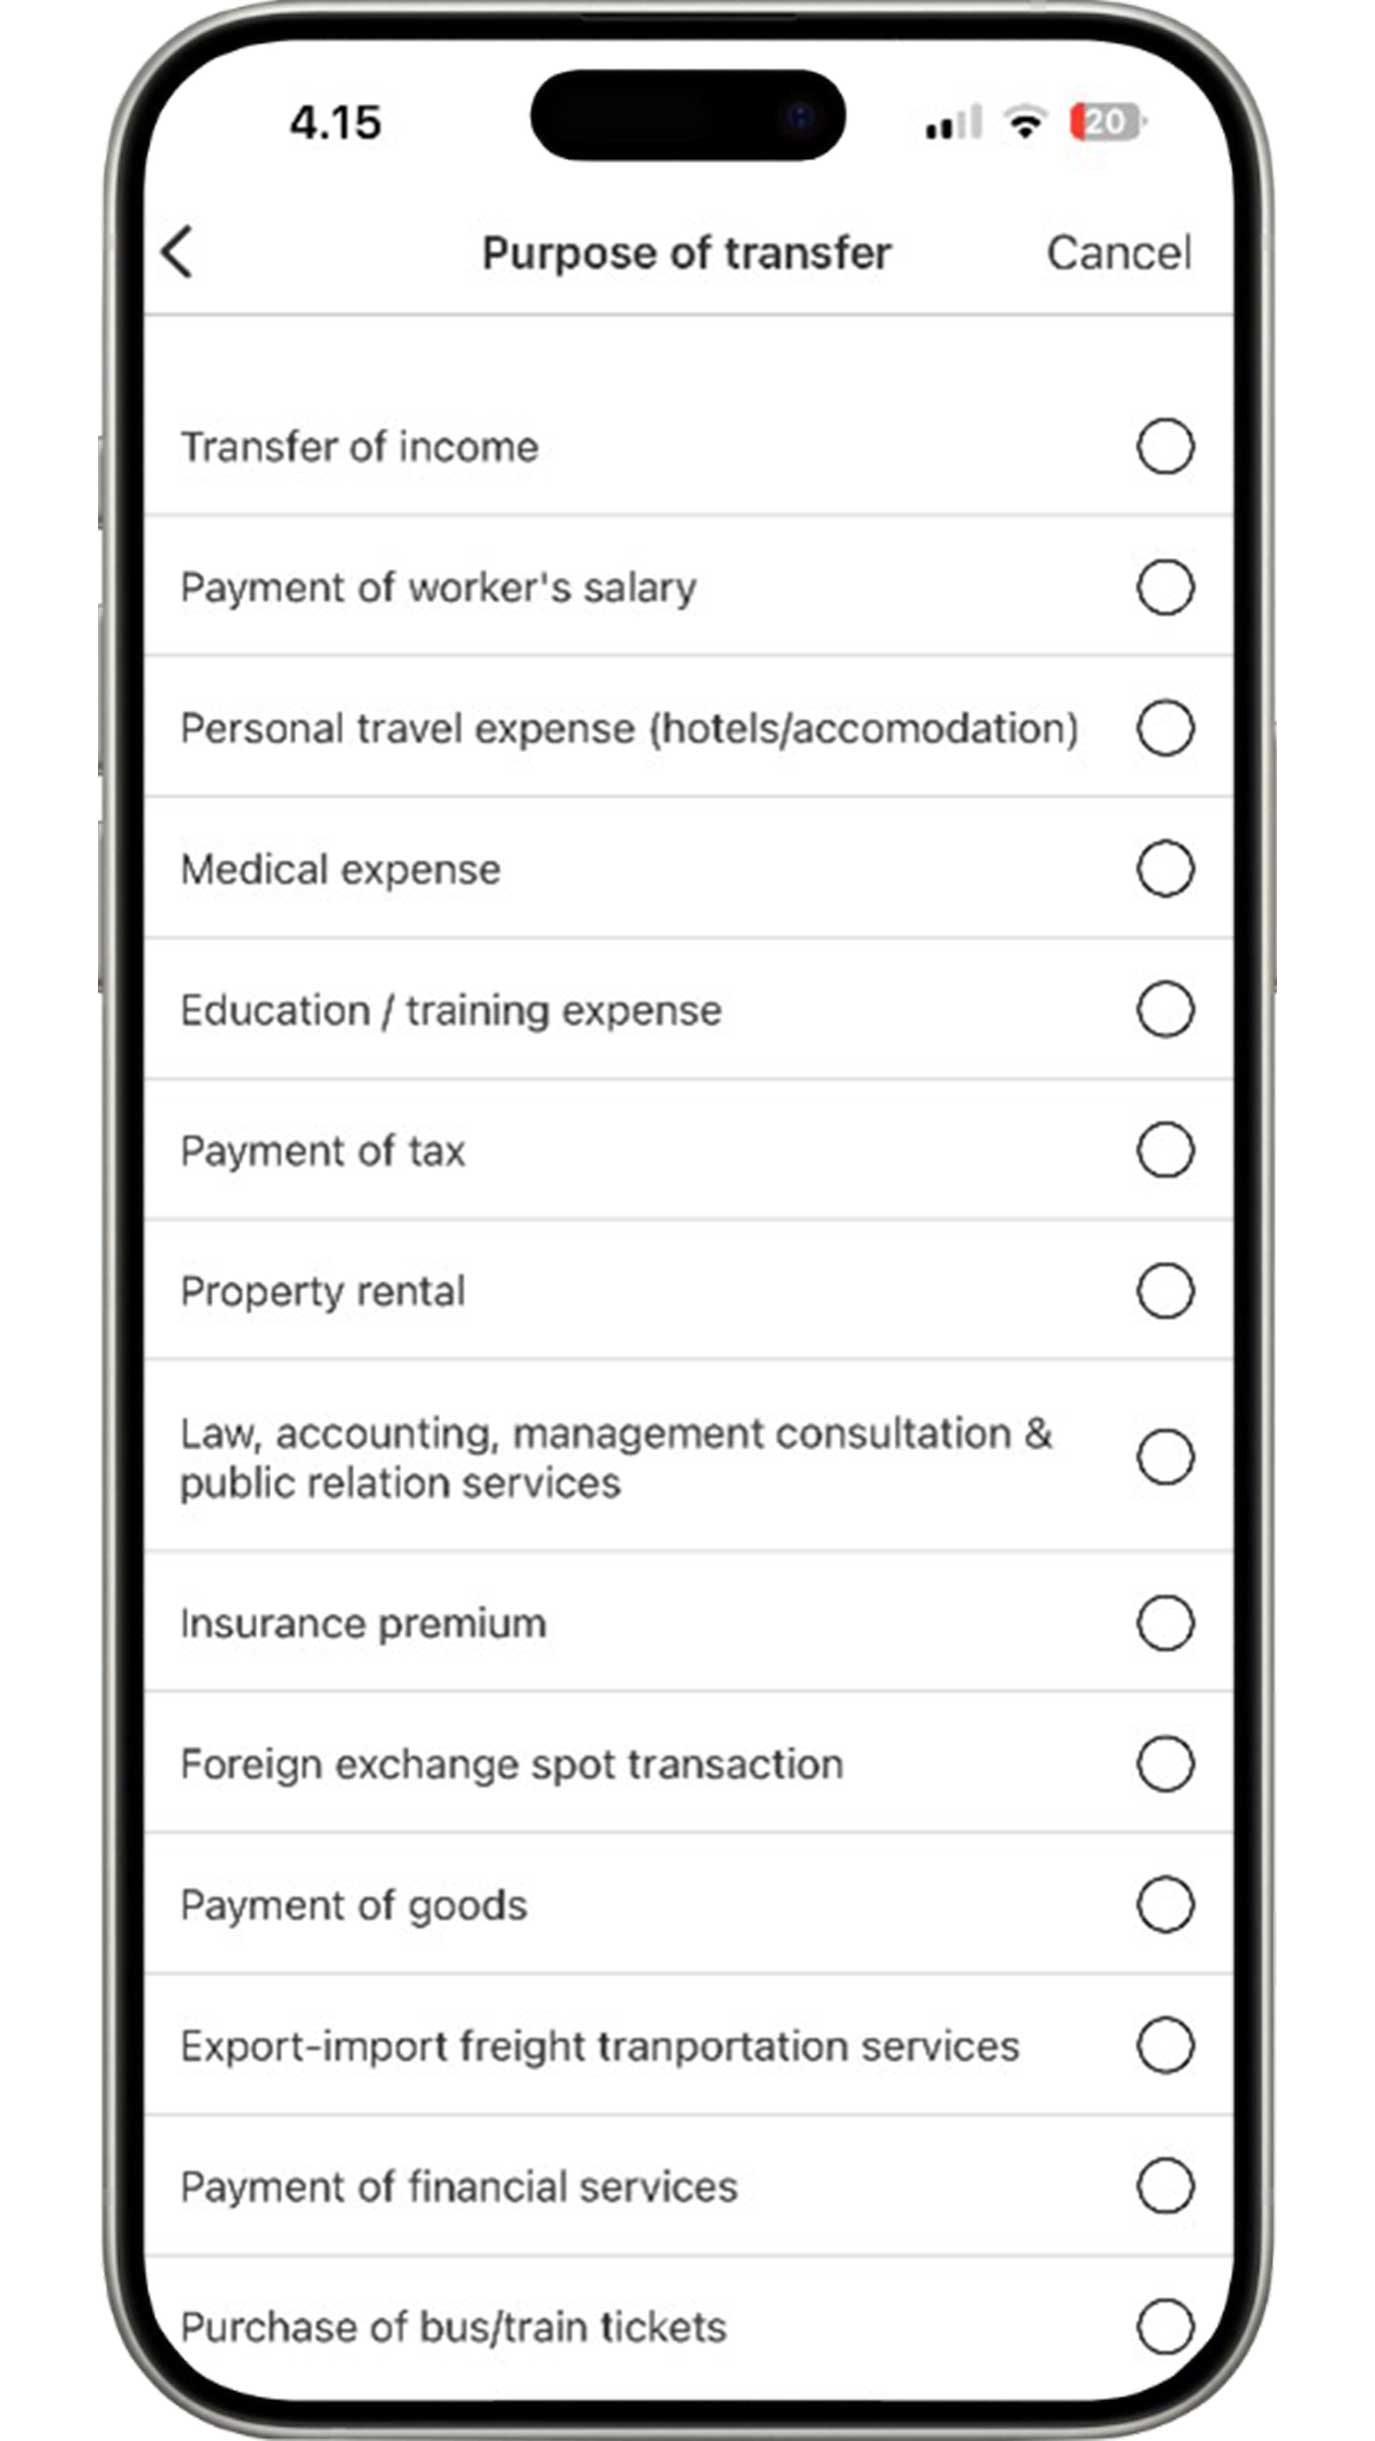
Select the purpose of transfer to continue your transaction.
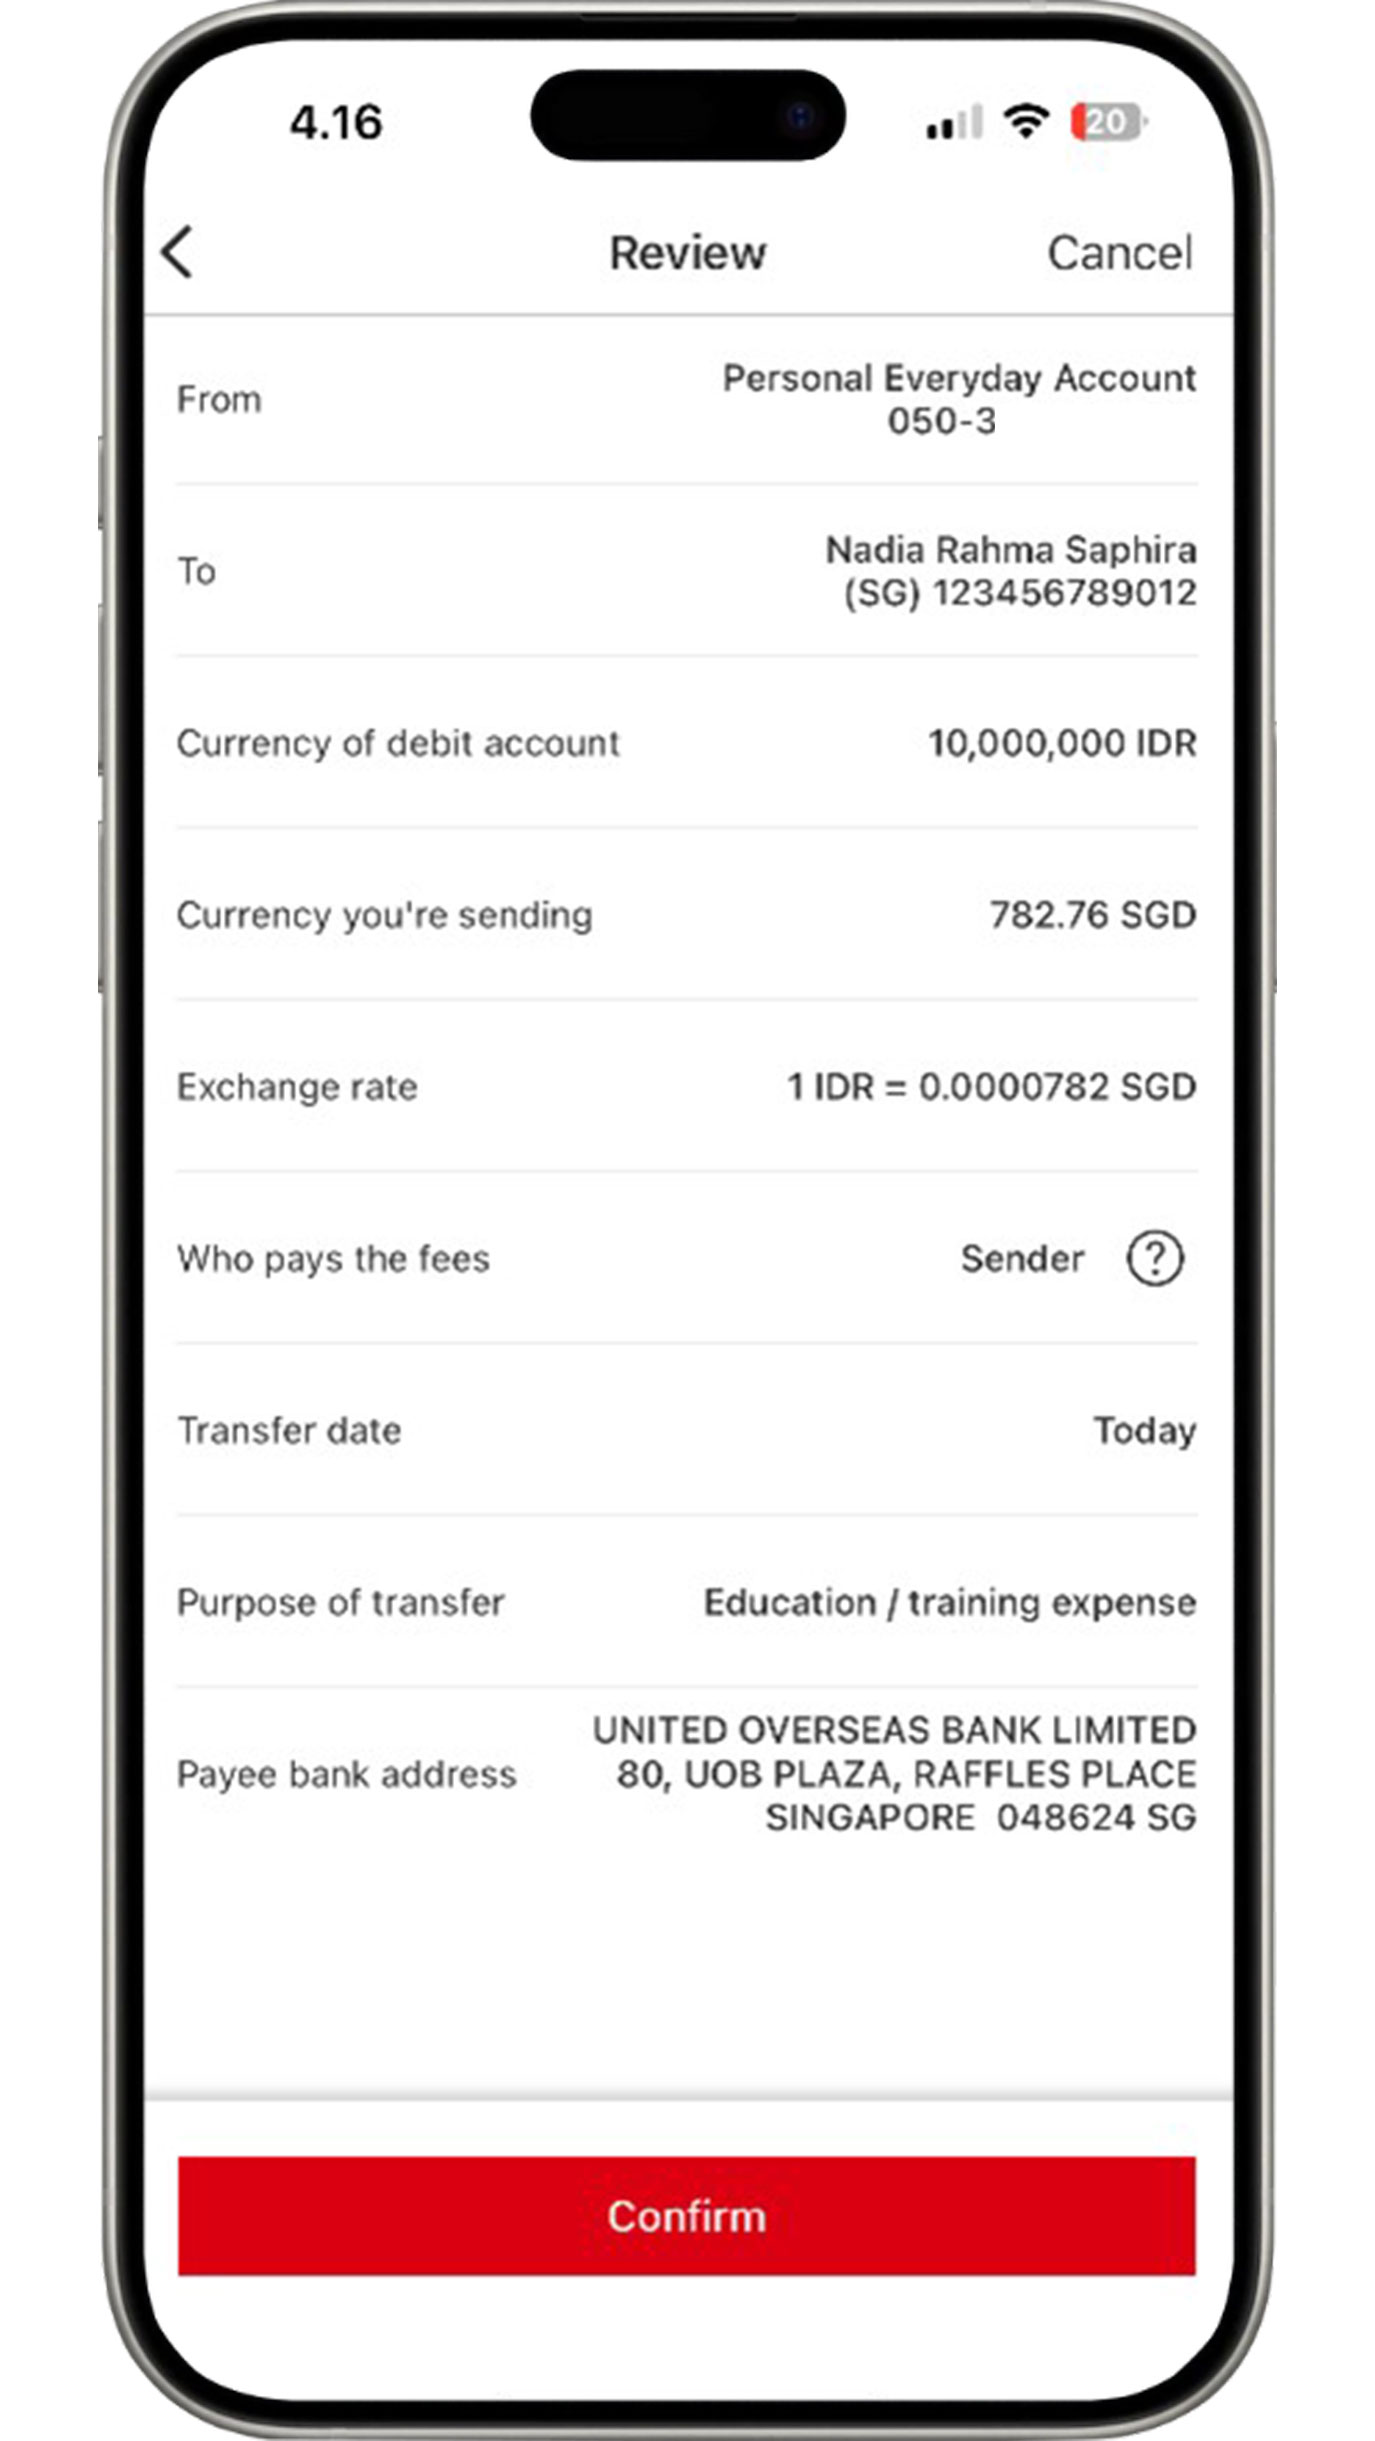
Review the information that you have input.
If all the information is accurate, click the "Confirm"
button to complete Telegraphic Transfer process.
Check Account Transactions
View account statement
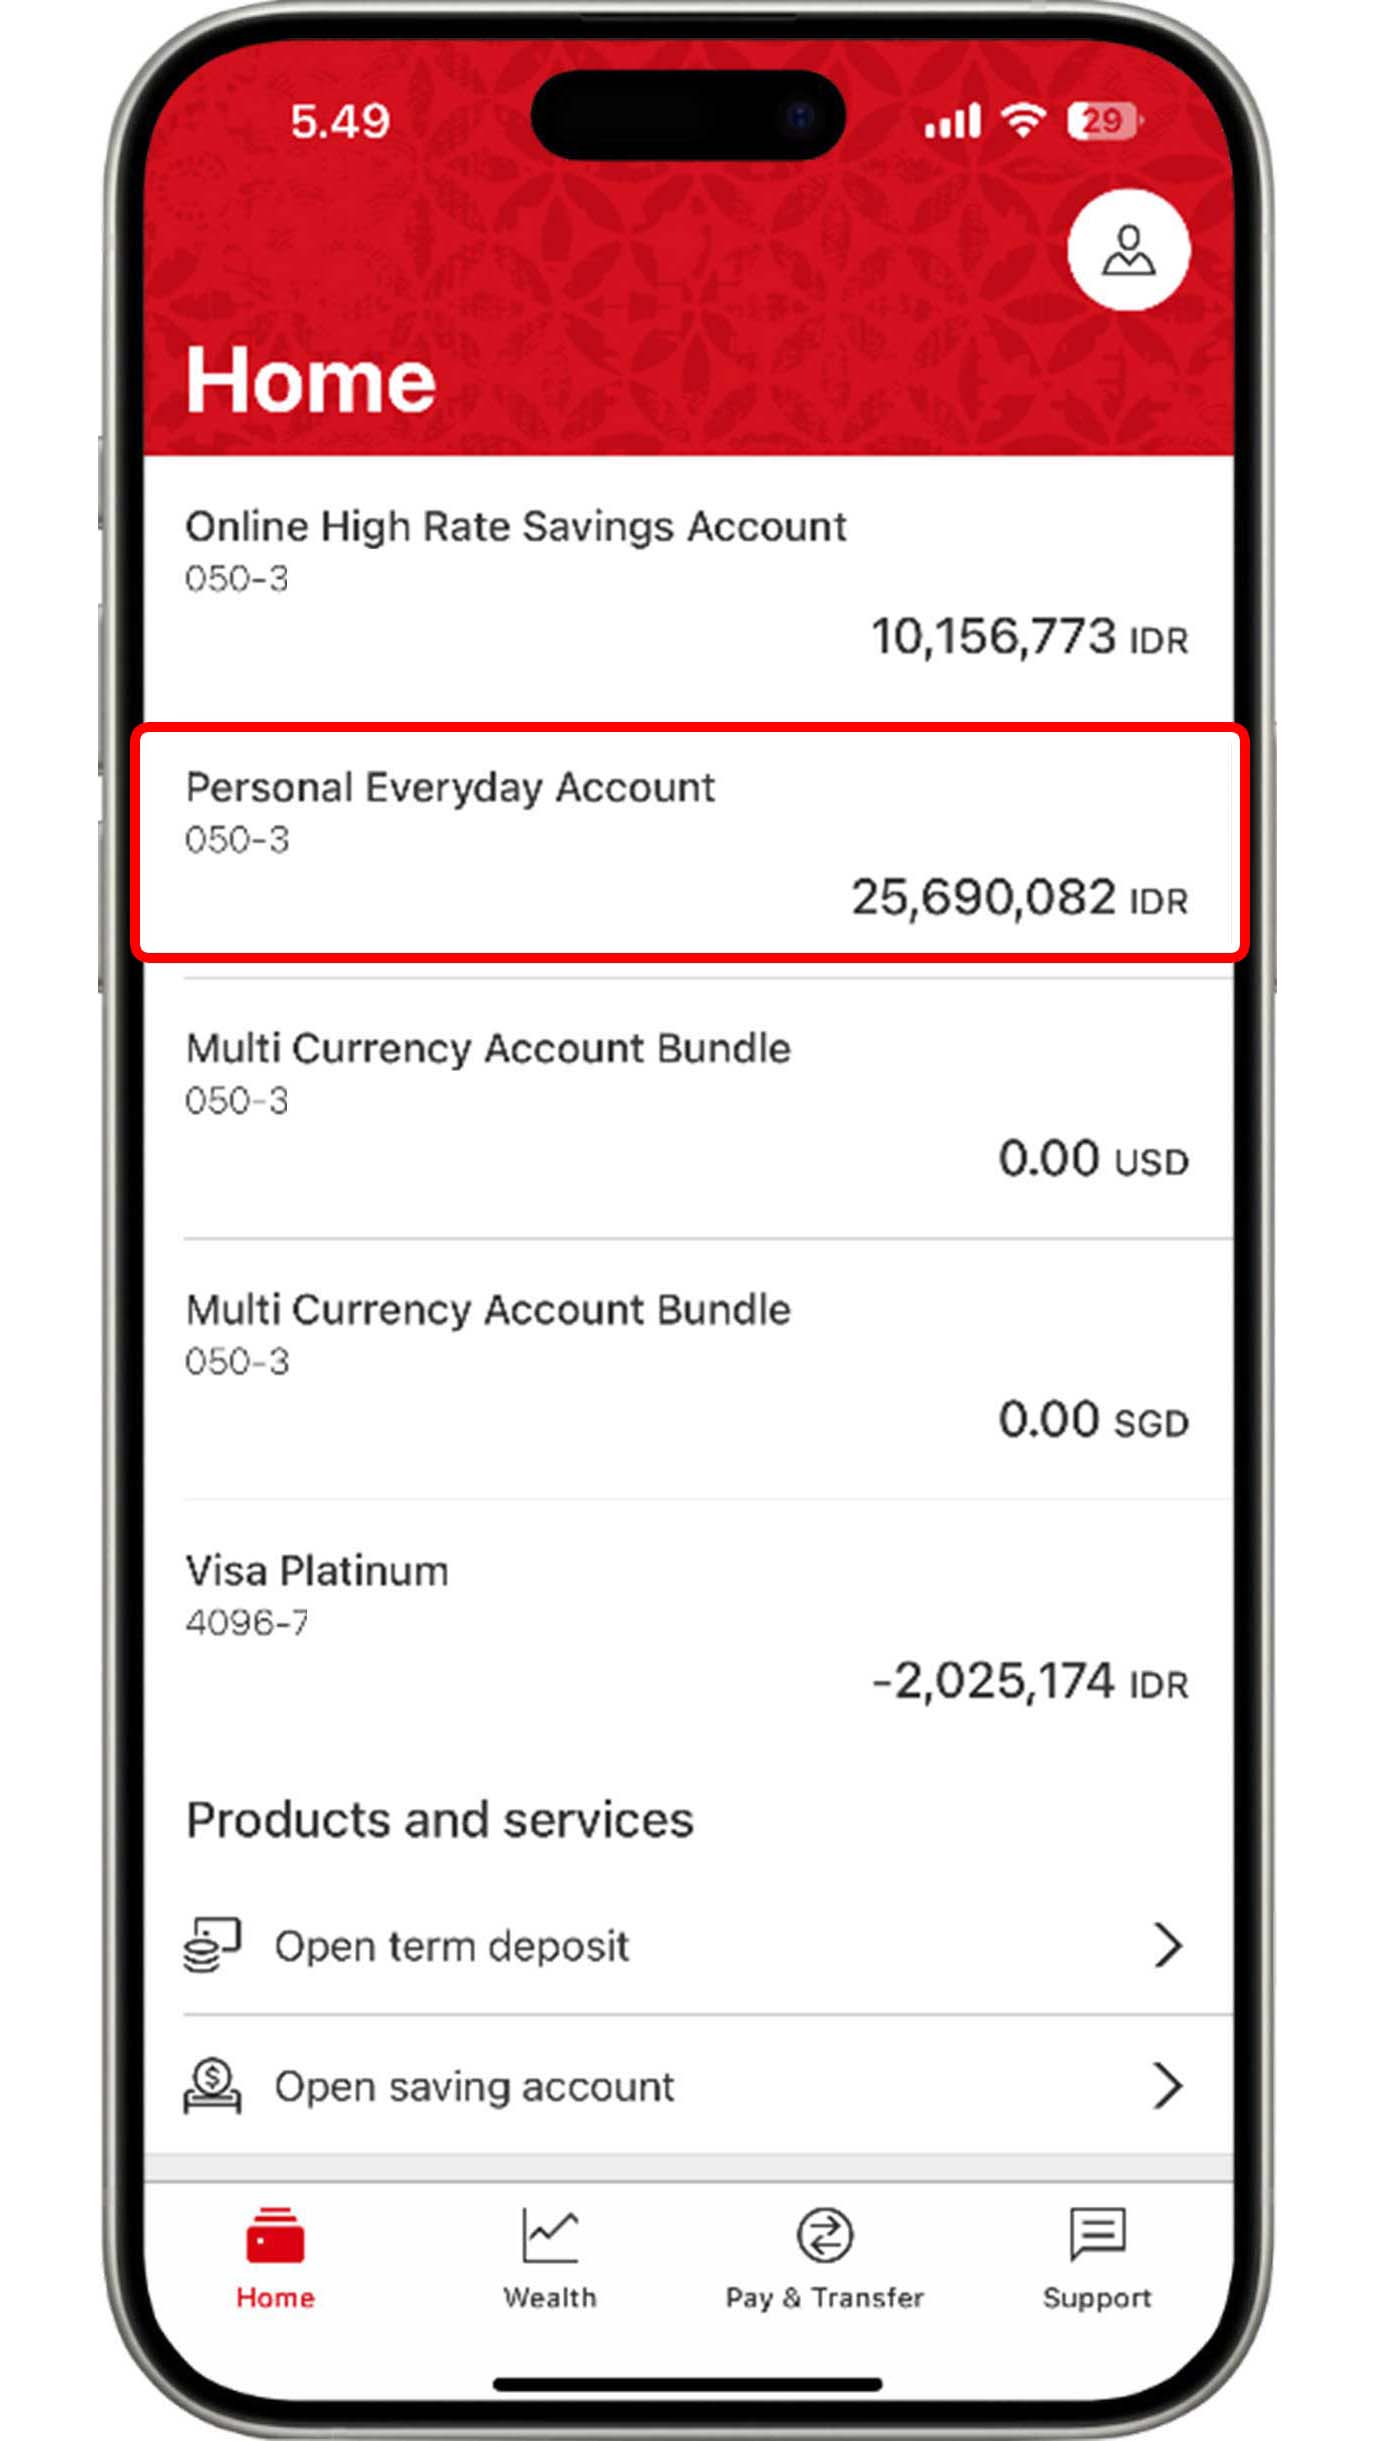
On the Home menu, choose the account that you would like to view.
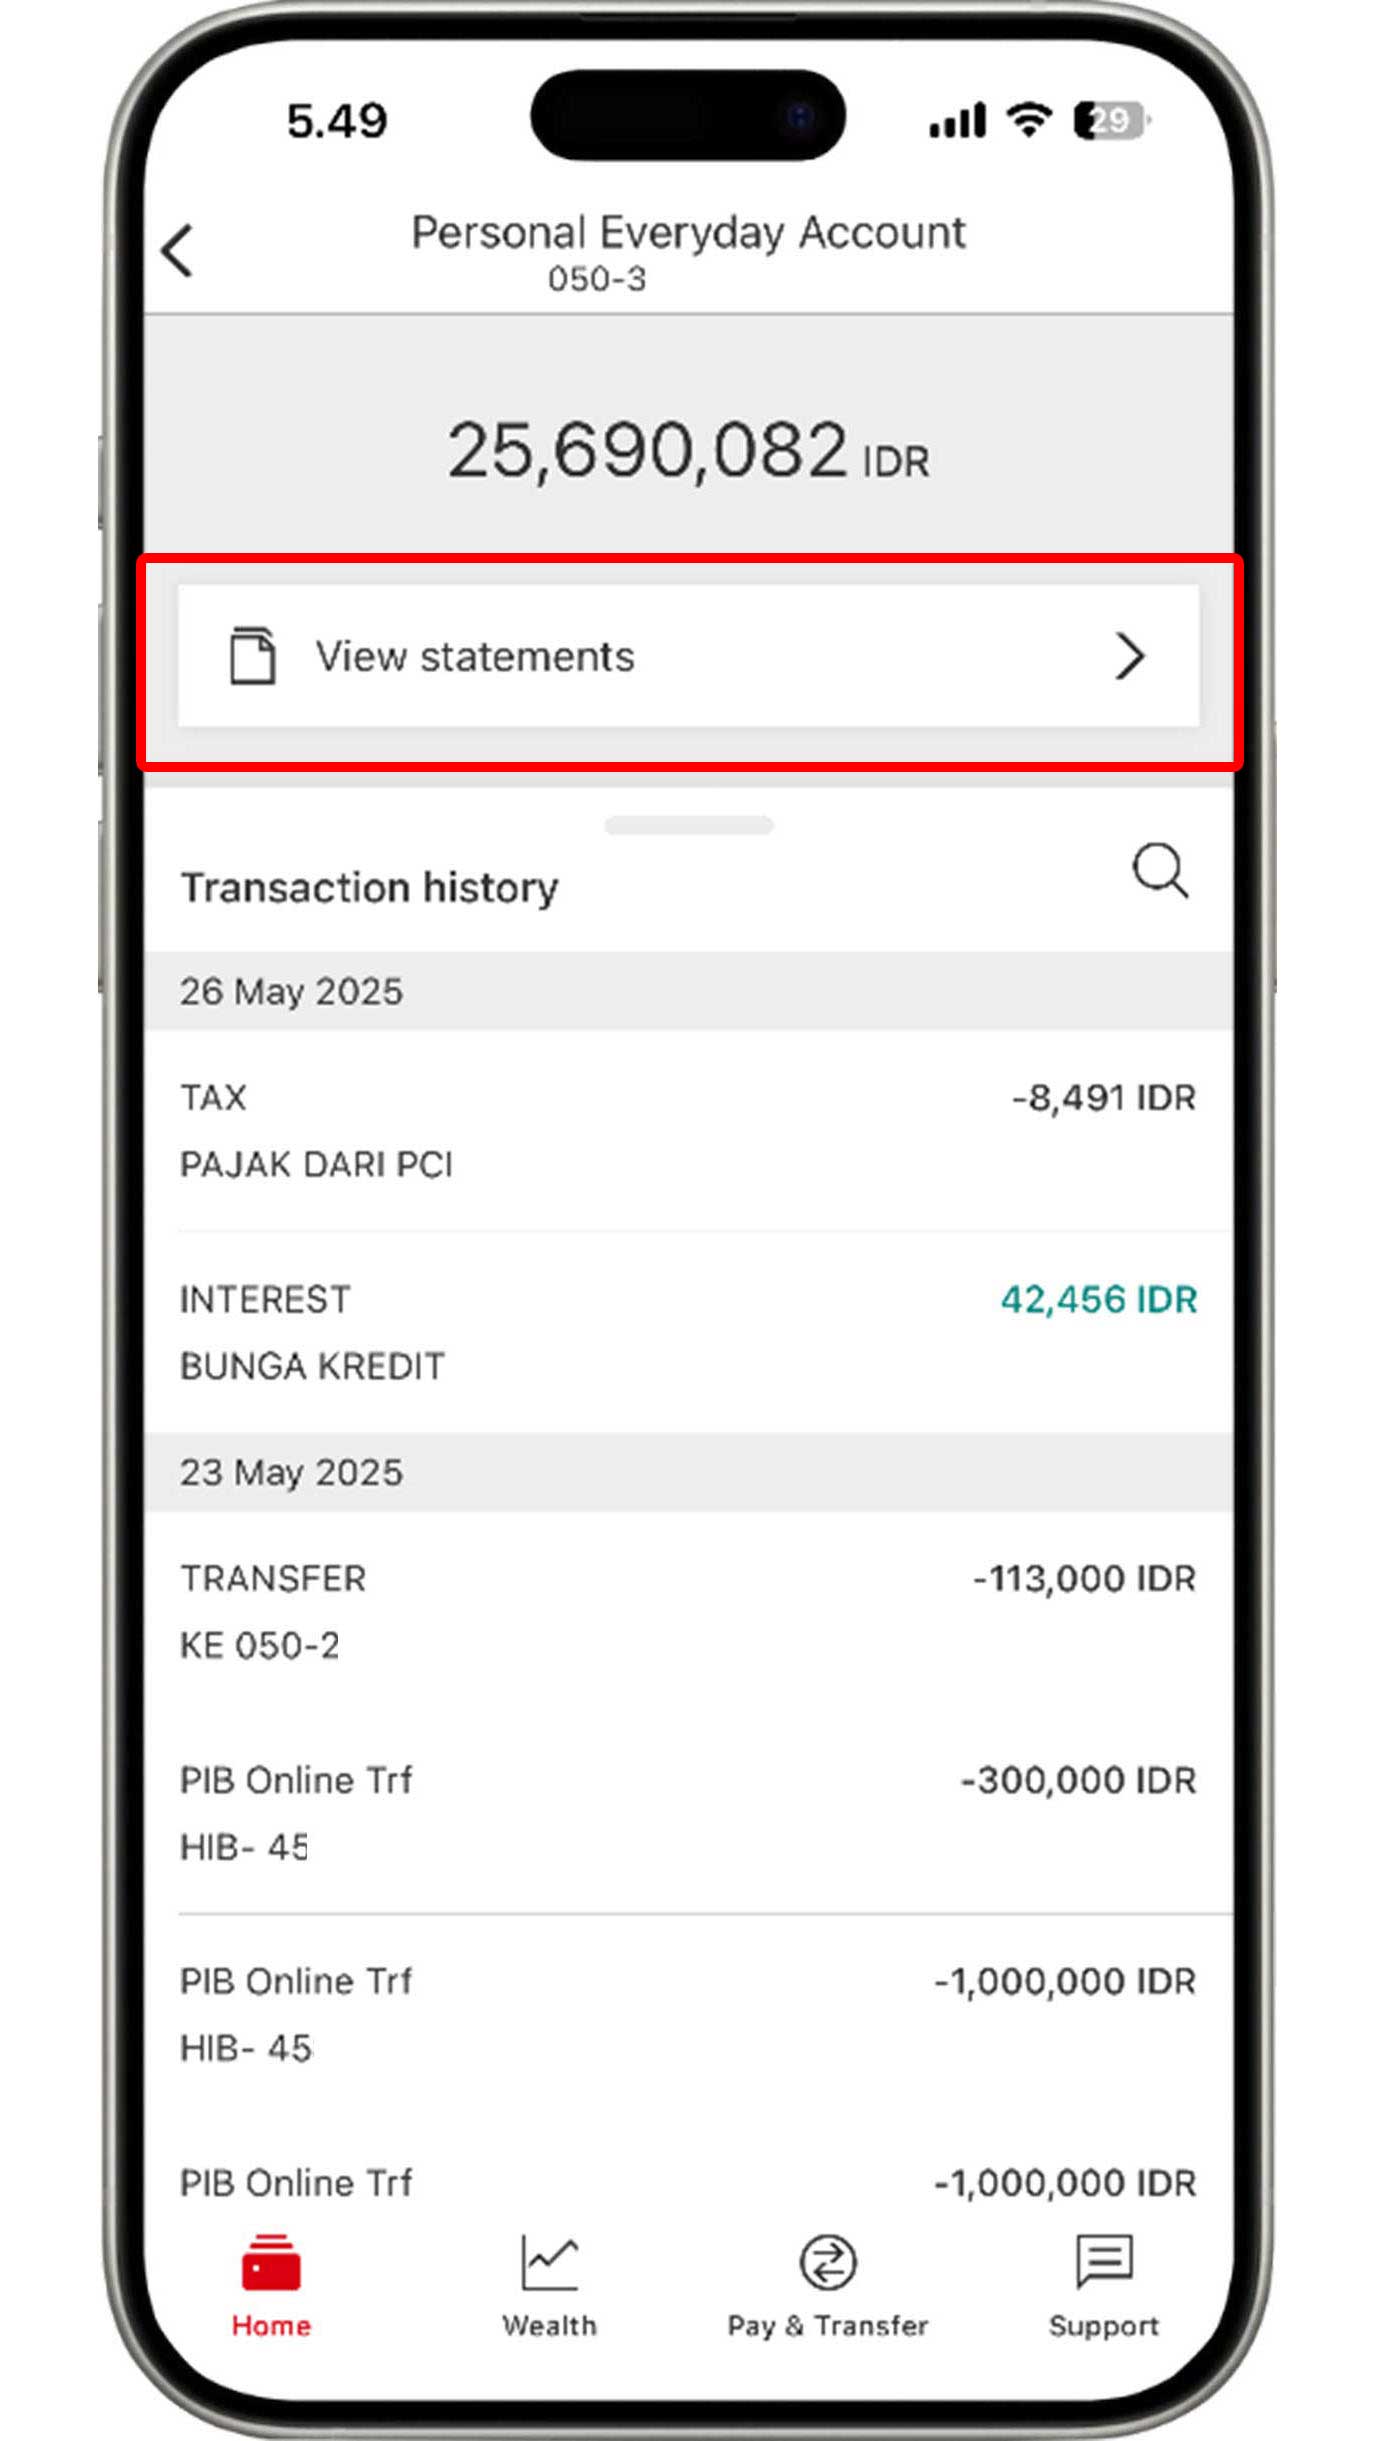
Select "View Statement"to view the summary of your account balance and transactions.

Select the month that you would like to view.
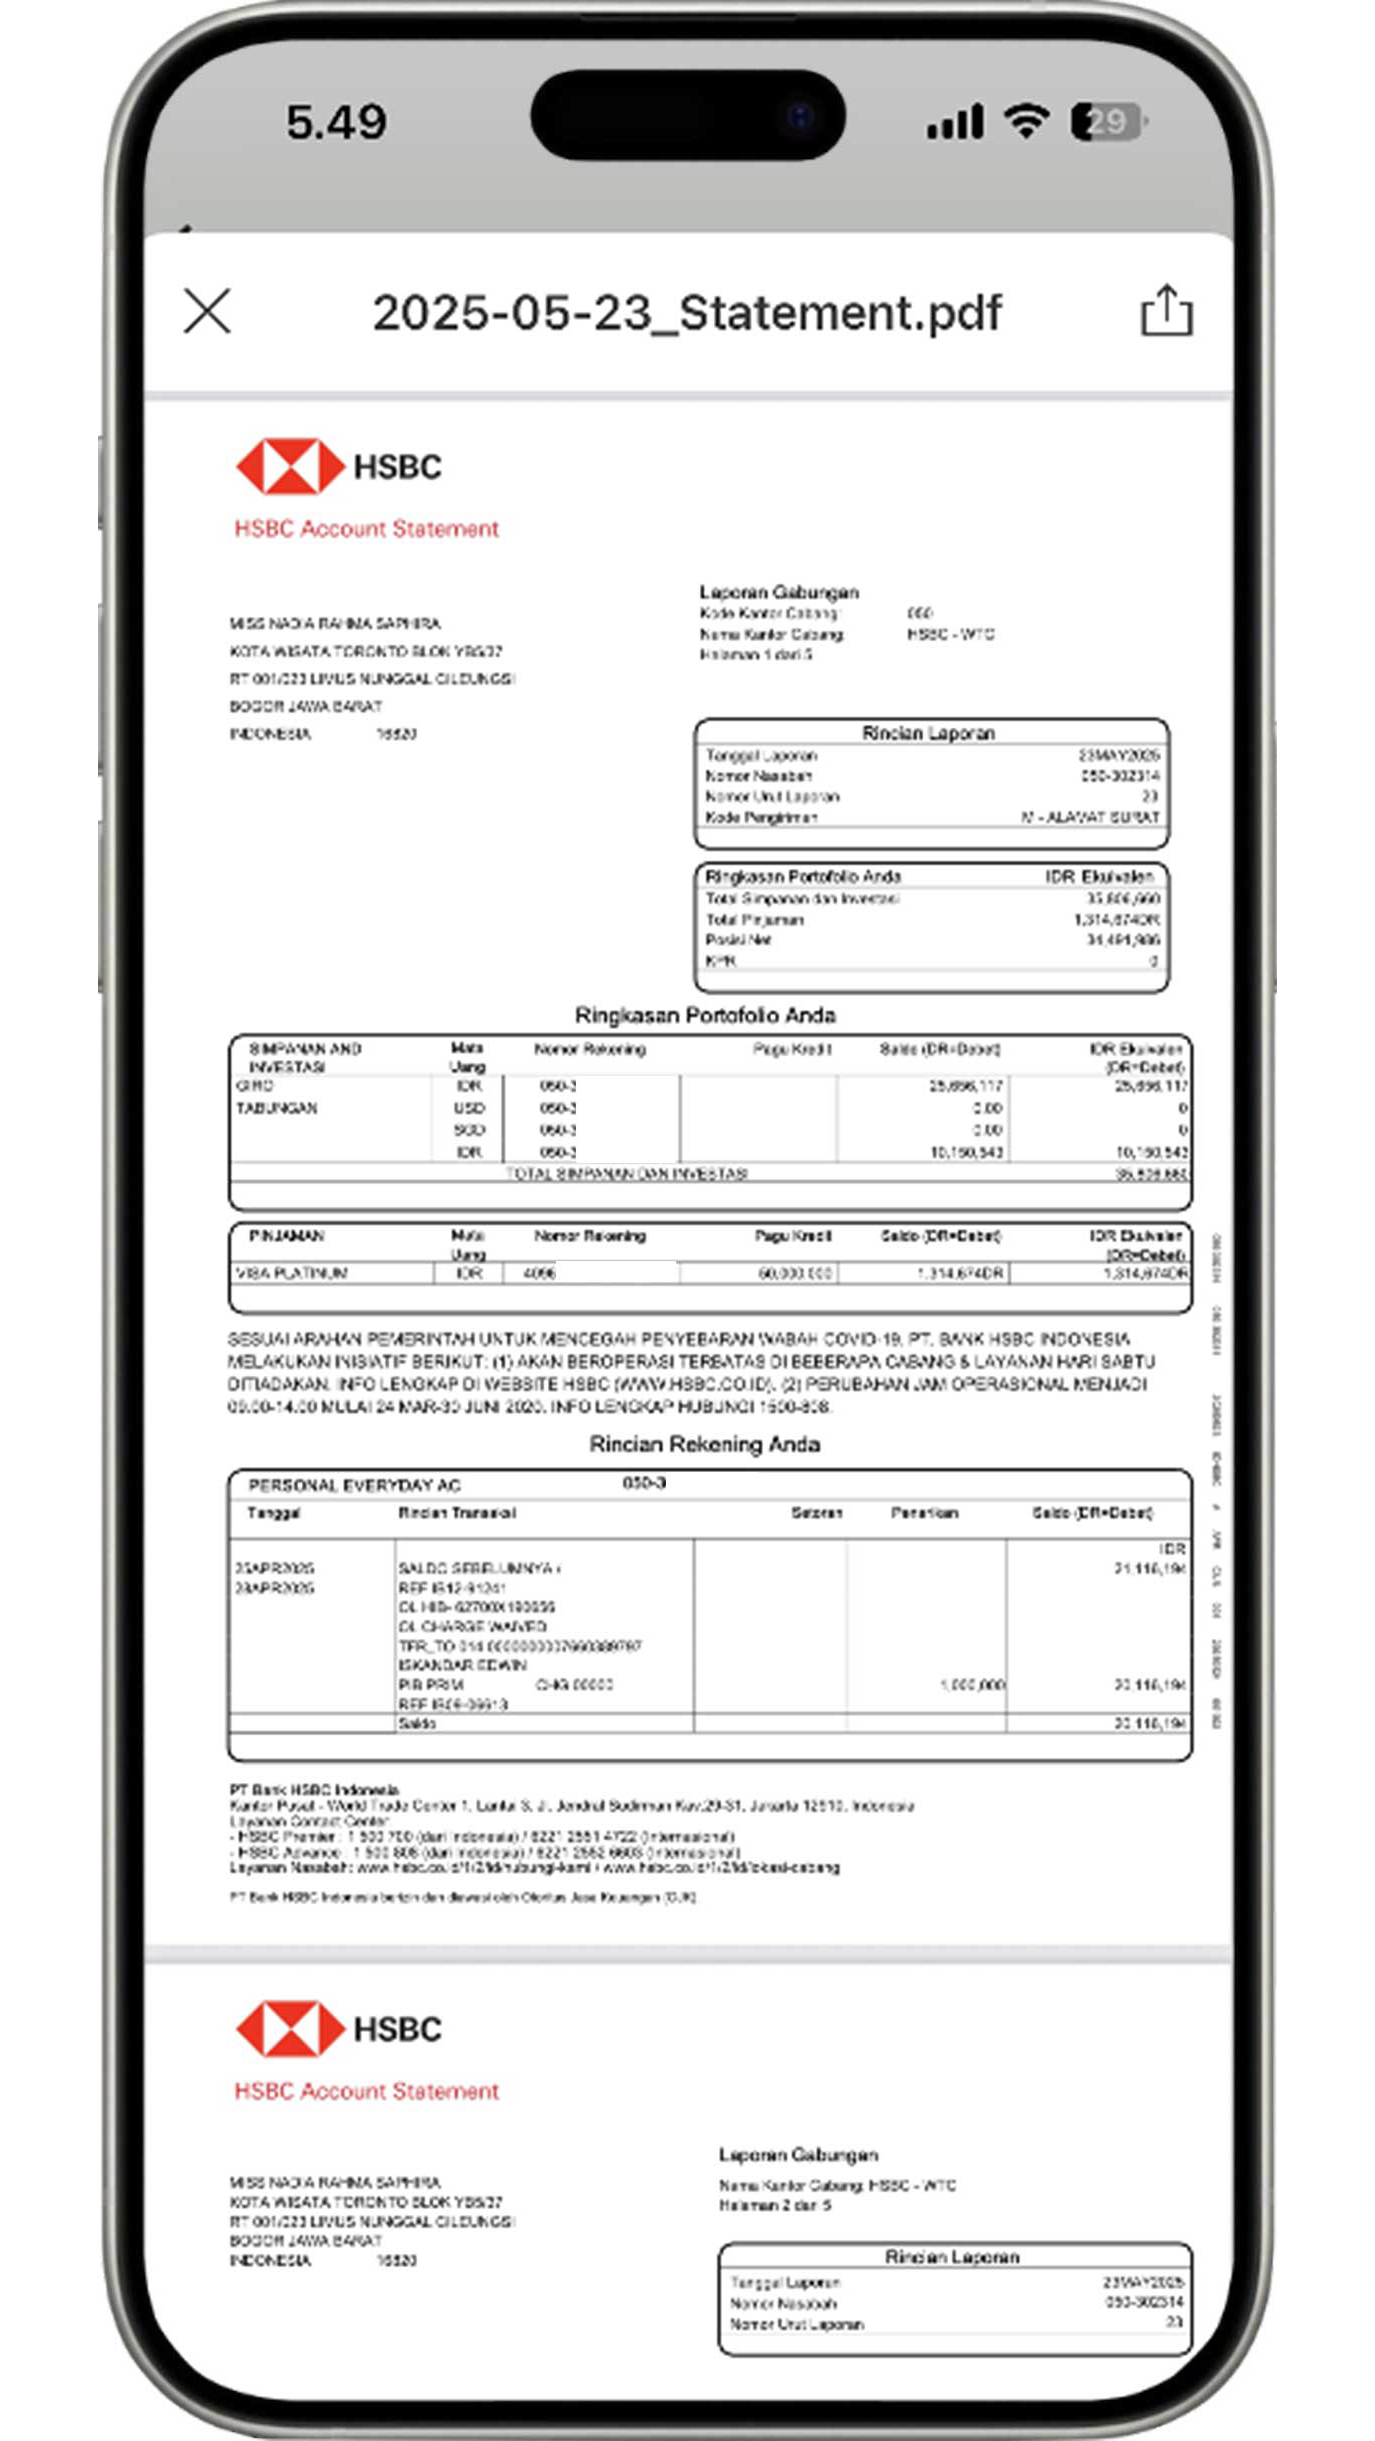
Account statement will appear on your screen with balances and transactions summary from all of your banking accounts.
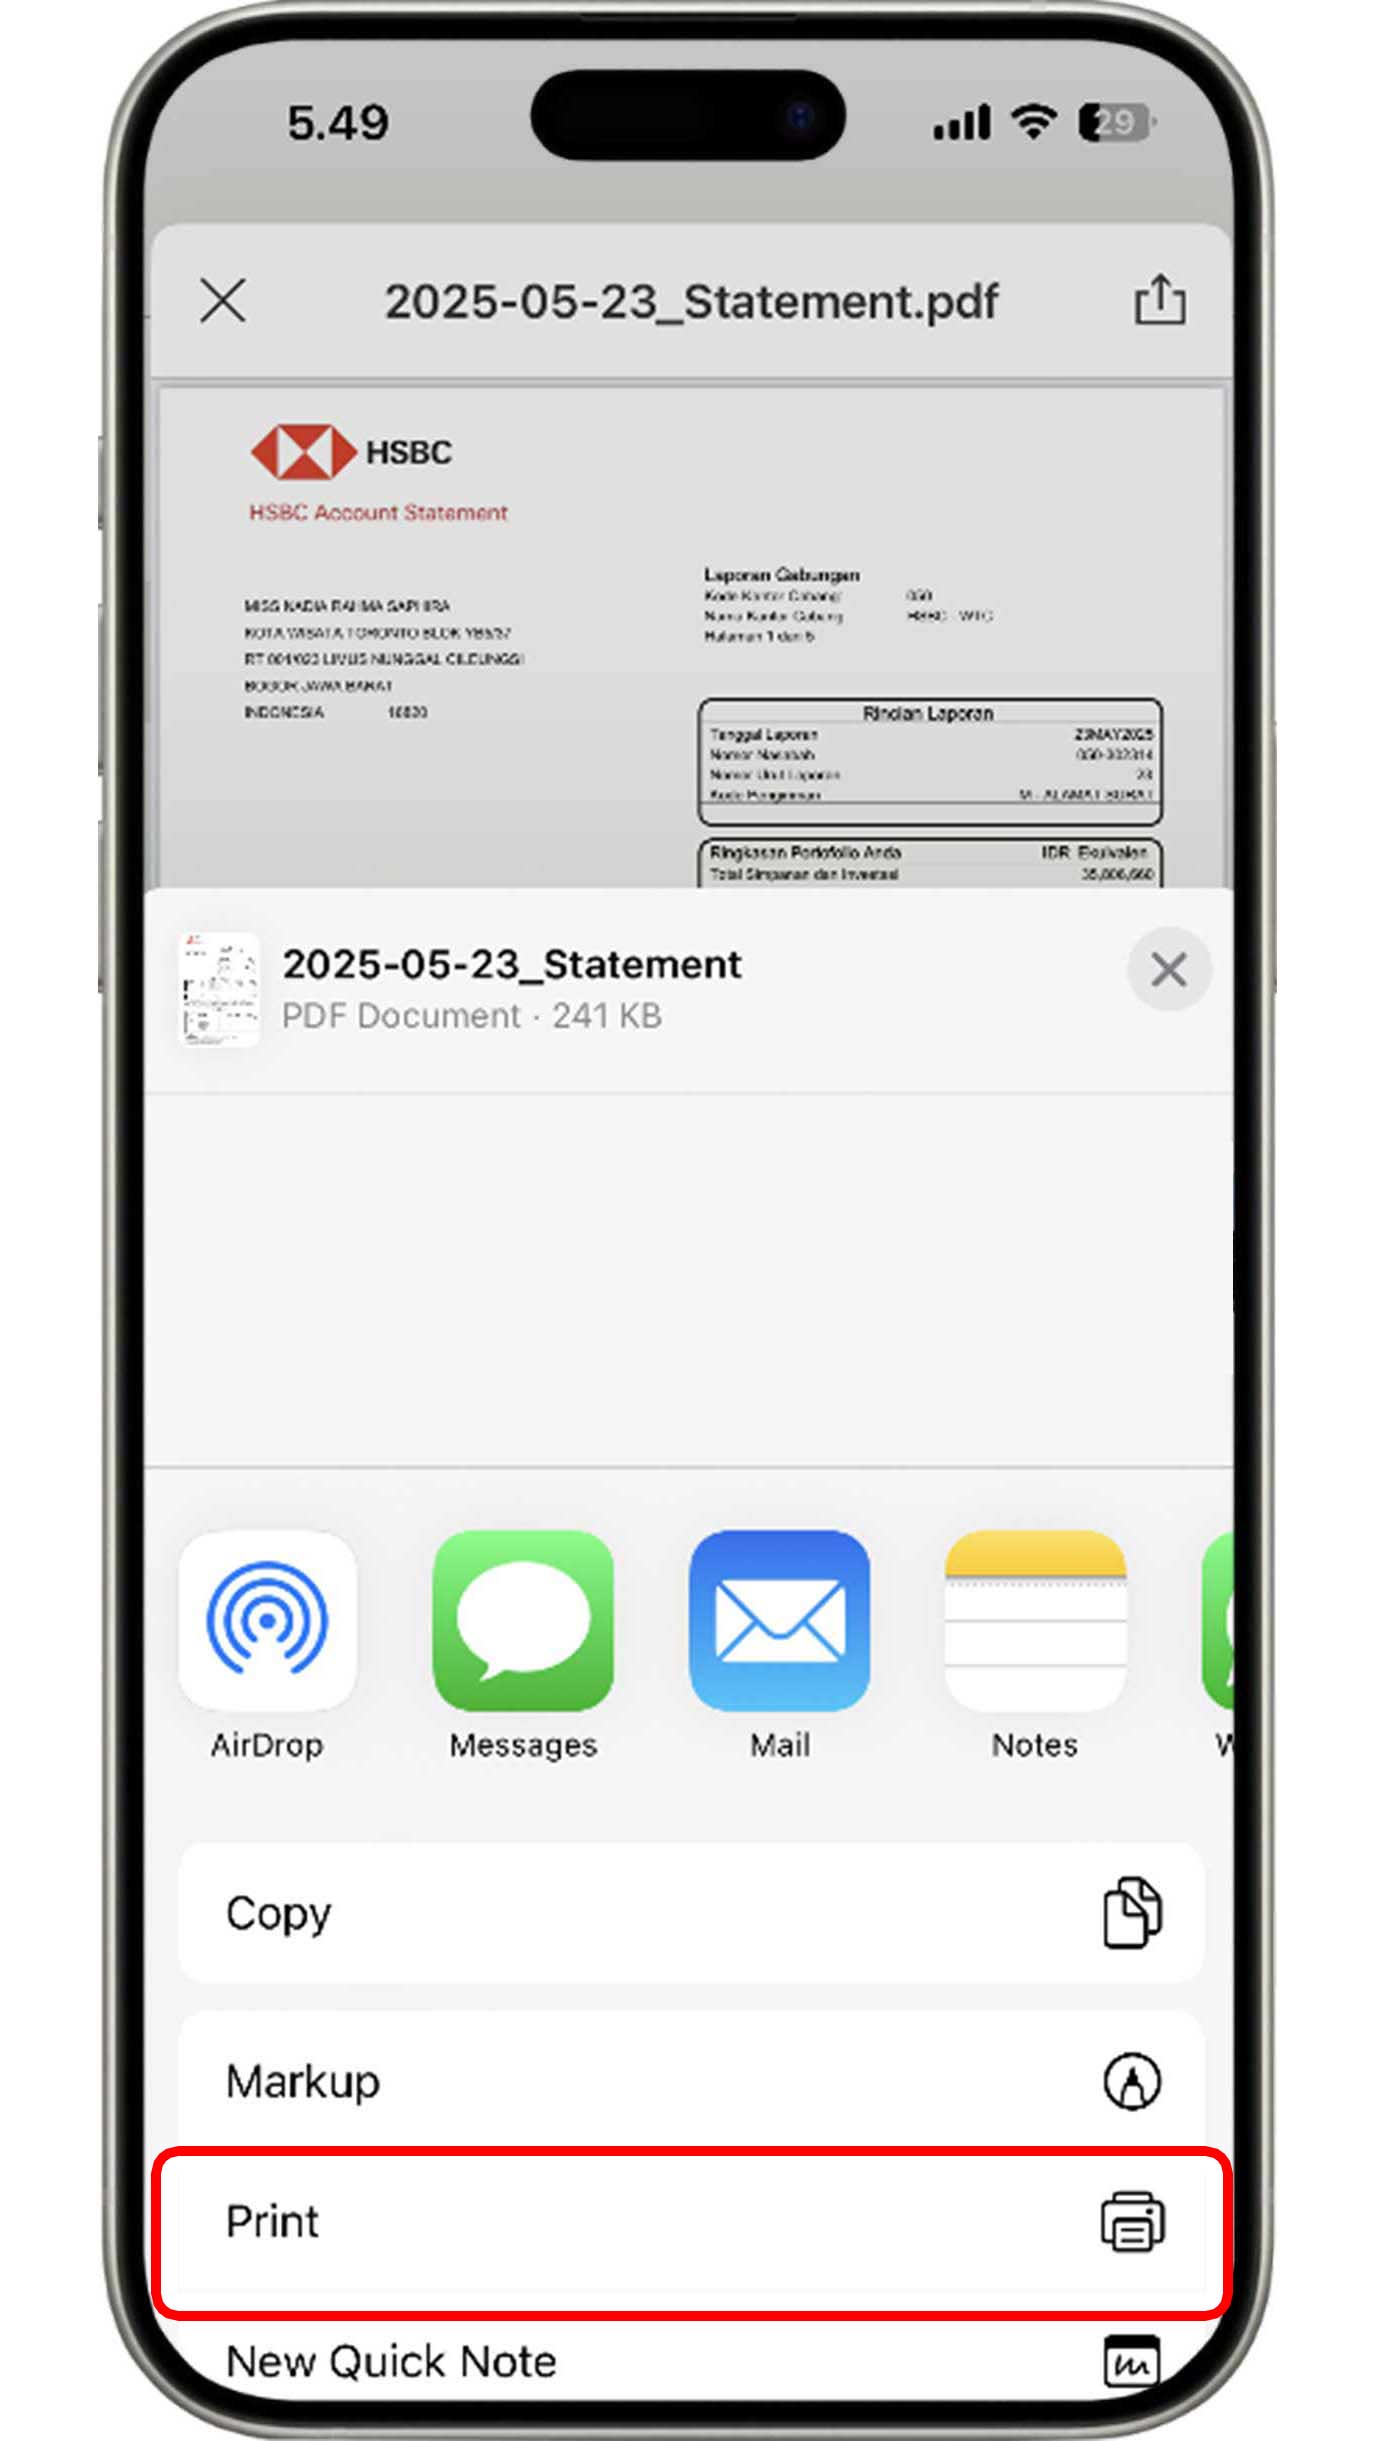
Click the "Share" icon to download or print your account statement.
View account transaction history
On the Home menu, choose the account that you would like to view.
Your account transaction history will immediately appear on the screen. If you would like to view the transaction history on a specific date, click the "Search" icon.
Click the "Period" button and select the period you would
like to
review. Then, click the "Search" button.
You can browse transaction history up to the last 90 days.
The transaction history will appear on your screen according to the period you have selected.
Steps on Credit Card Features
Activate credit card
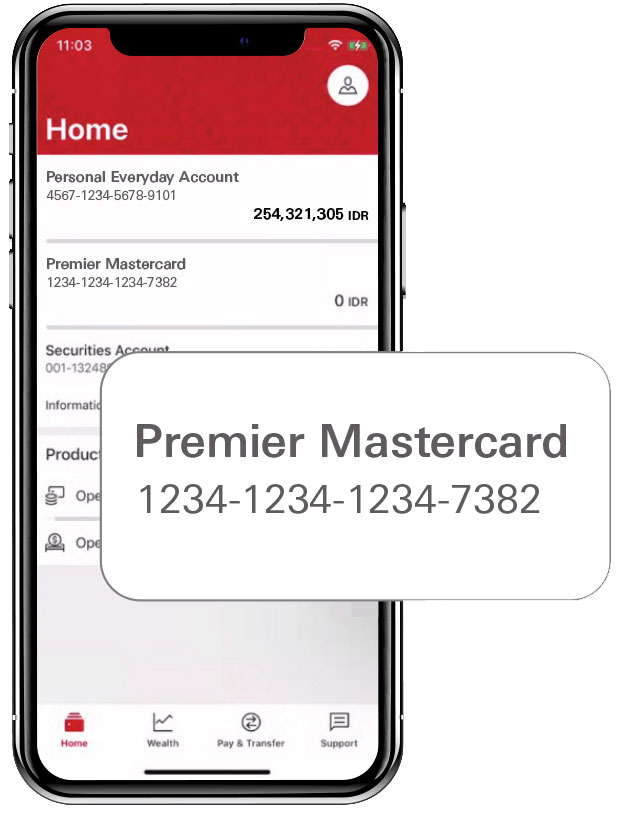
On the Home menu, select the HSBC credit card that you would like to activate.
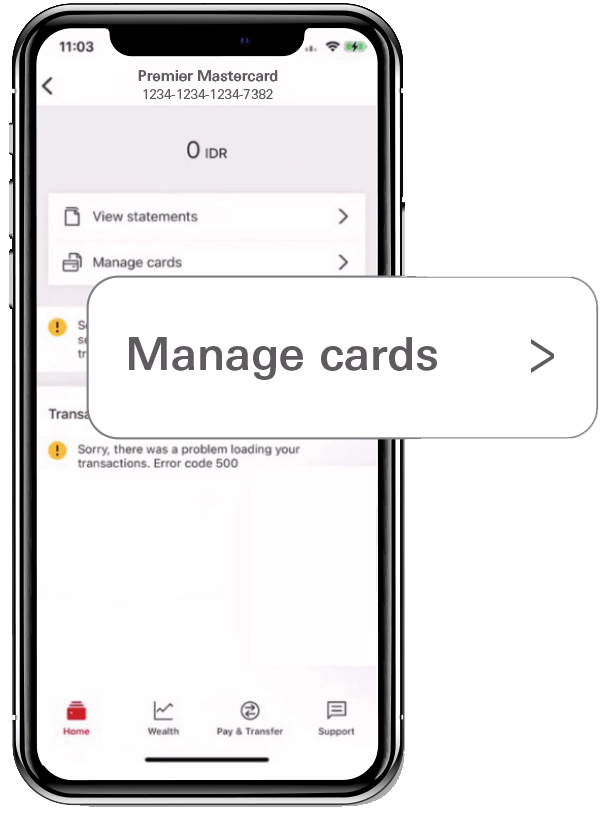
Choose "Manage cards".
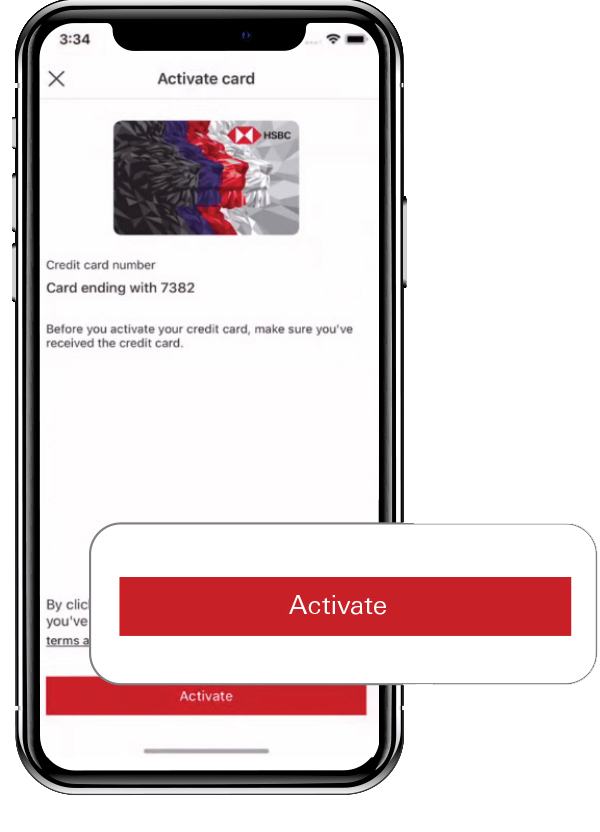
Click "Activate" button to continue the process.
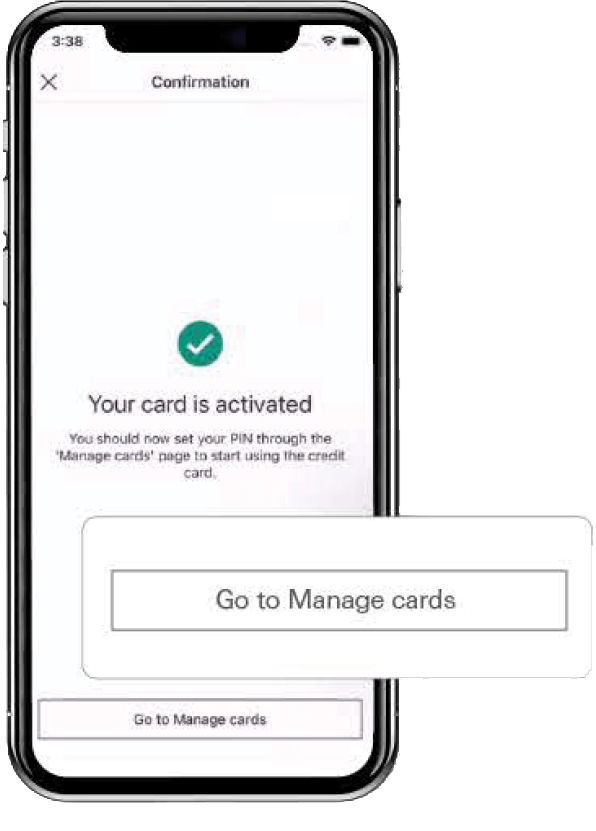
Screen like this will appear if the activation process has been successful. You can click "Go to Manage Cards" to set your credit card PIN.
Set/Reset credit card PIN
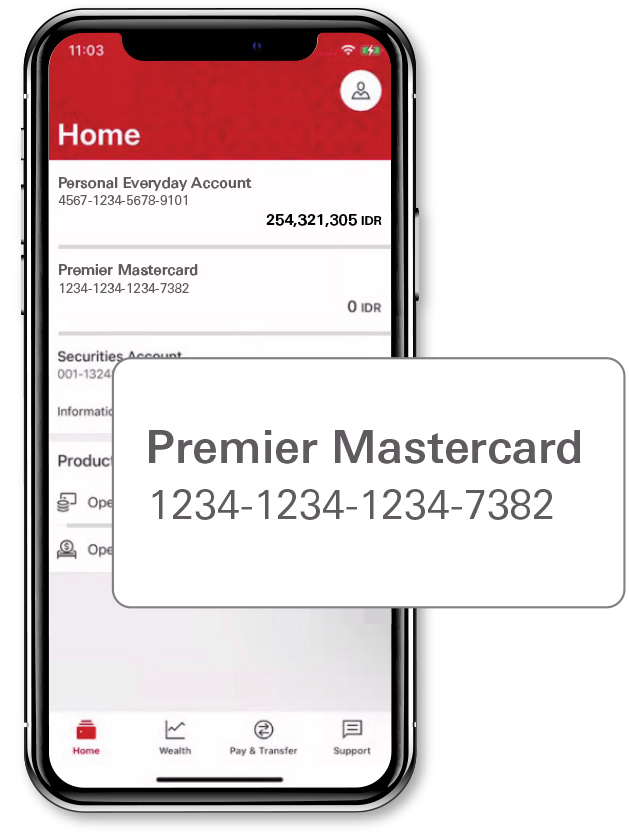
On the Home menu, select the HSBC credit card that you would like to set/reset PIN.
Choose "Manage cards".
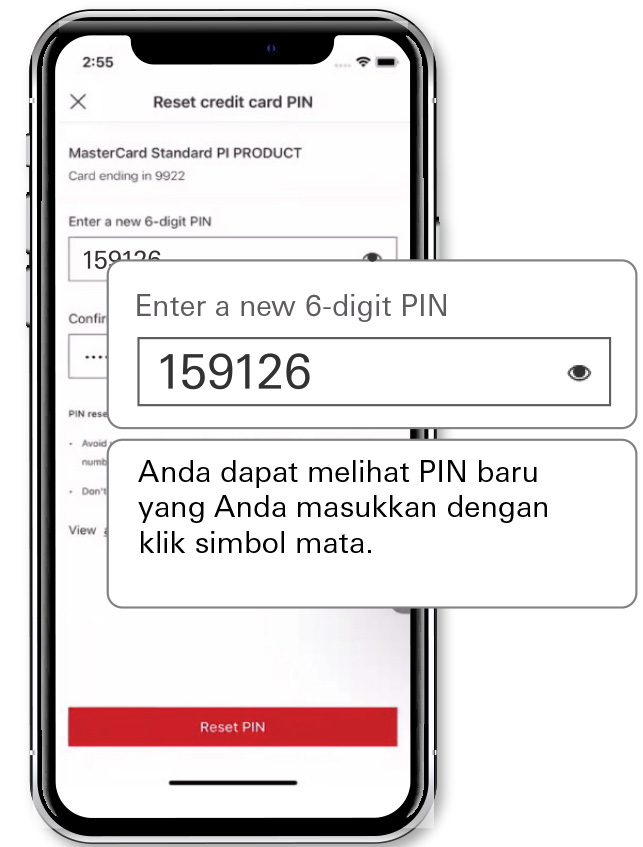
Select "Set PIN" and create your new credit card PIN. Retype the PIN for confirmation and click the "Set PIN" button.
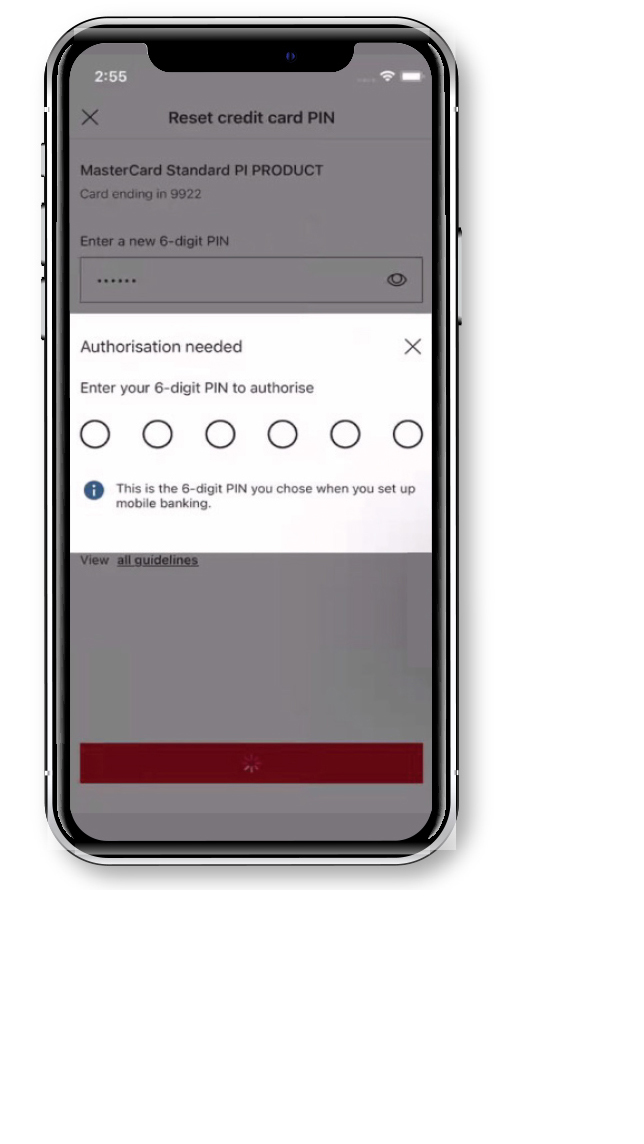
You will be asked to complete the authorization process by:
-
Entering your 6-digit HSBC Indonesia Mobile Banking access PIN or
-
Using biometrics.
View credit card billing statement
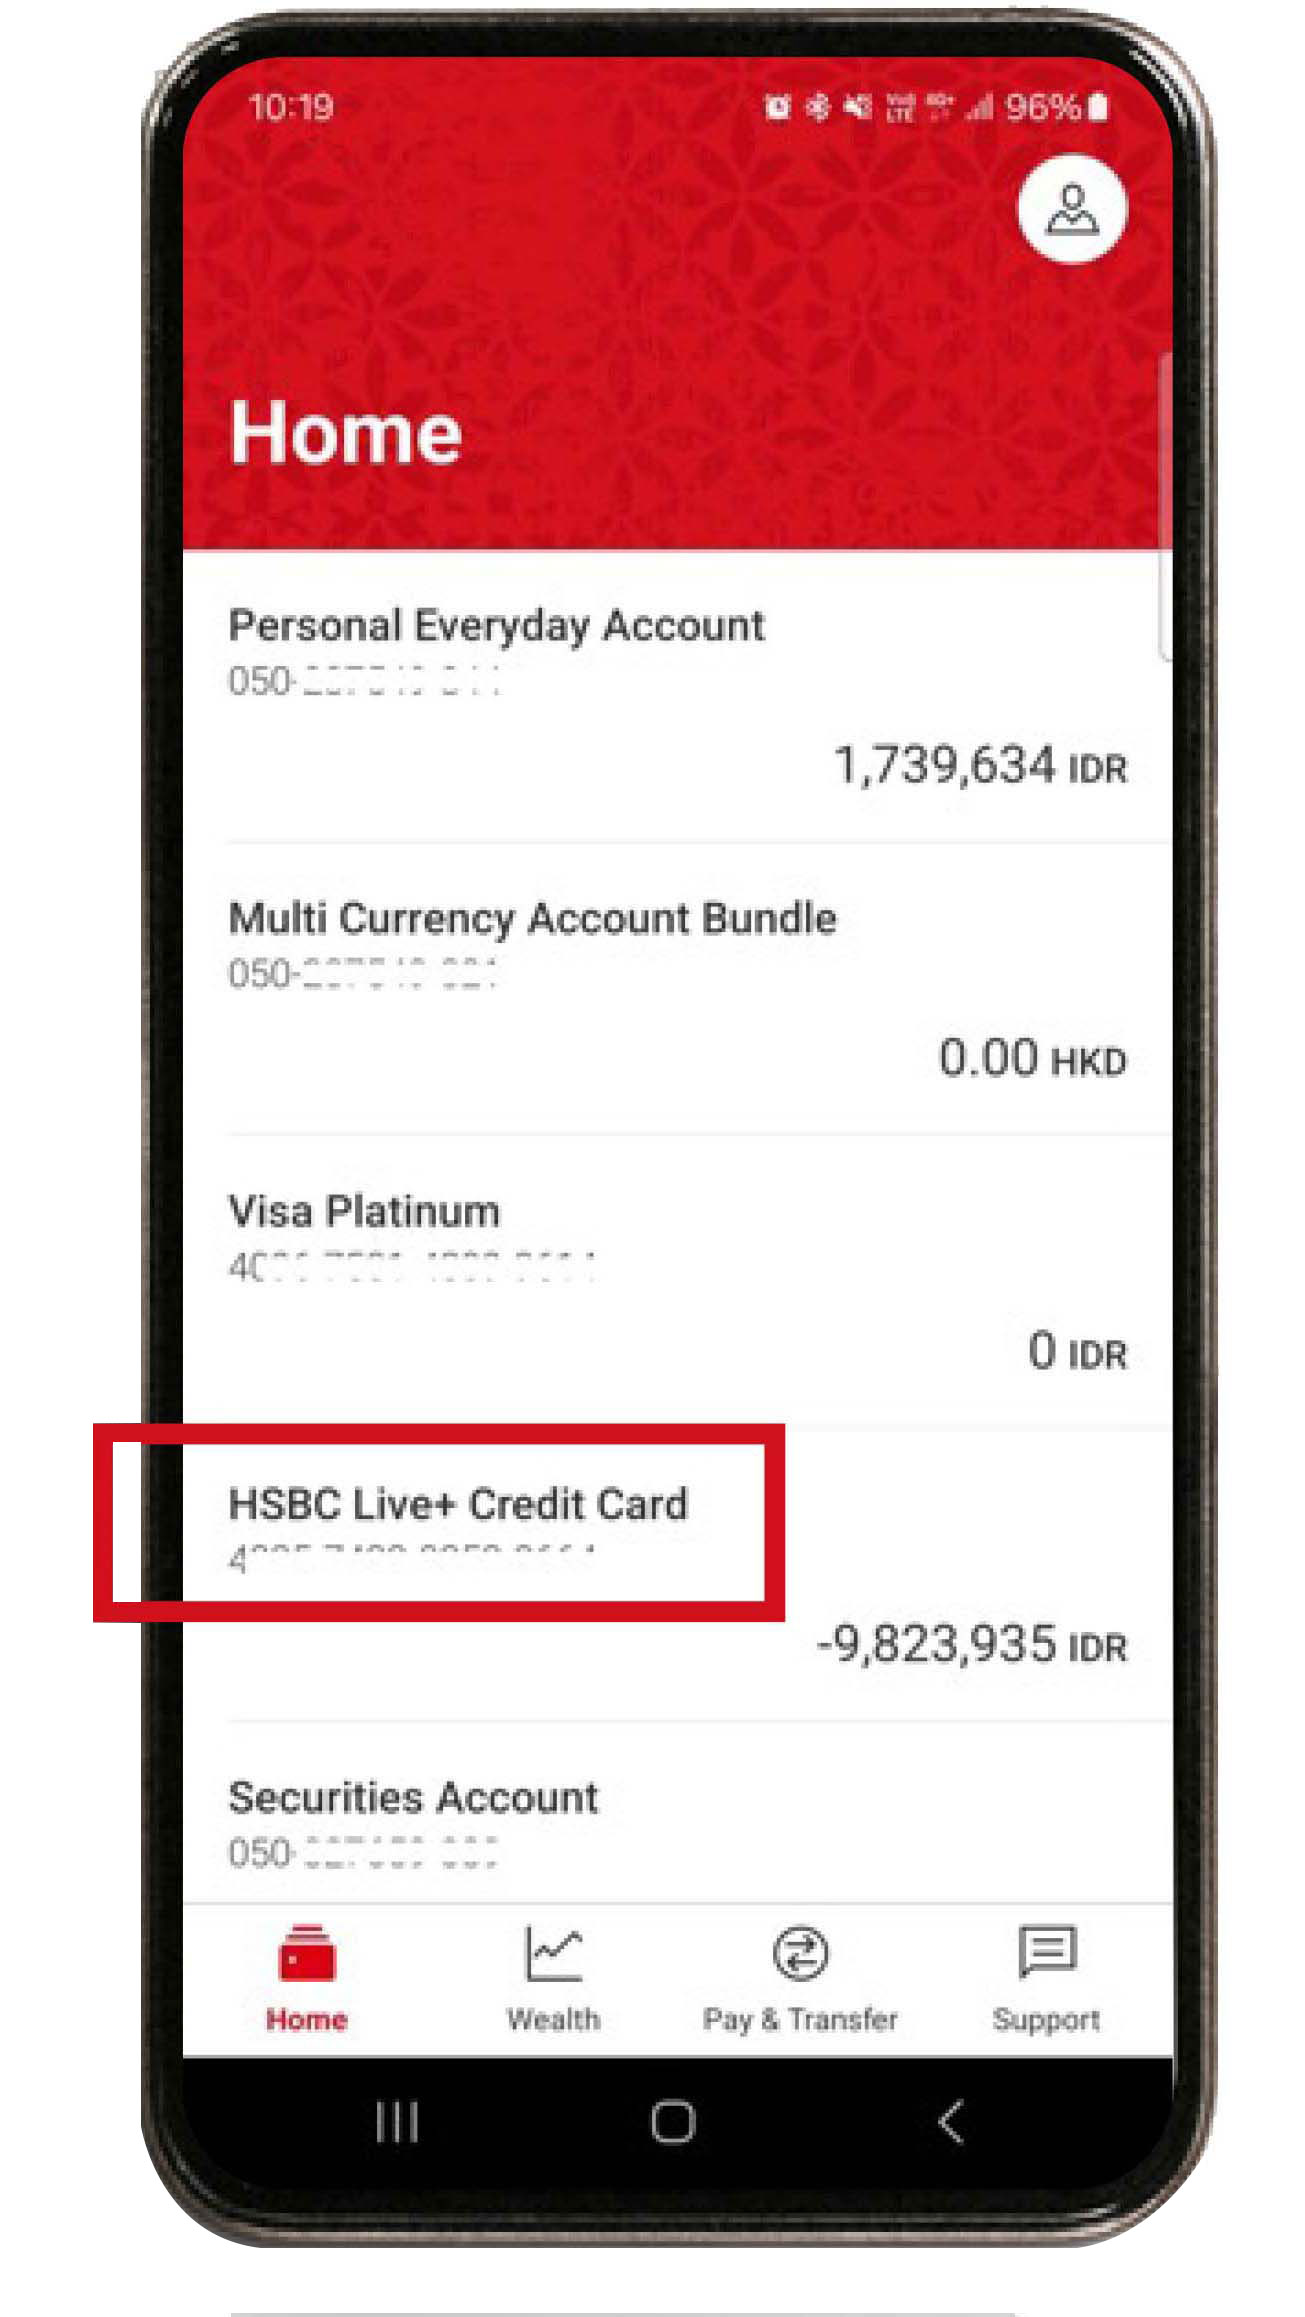
On the Home menu, select your HSBC credit card.
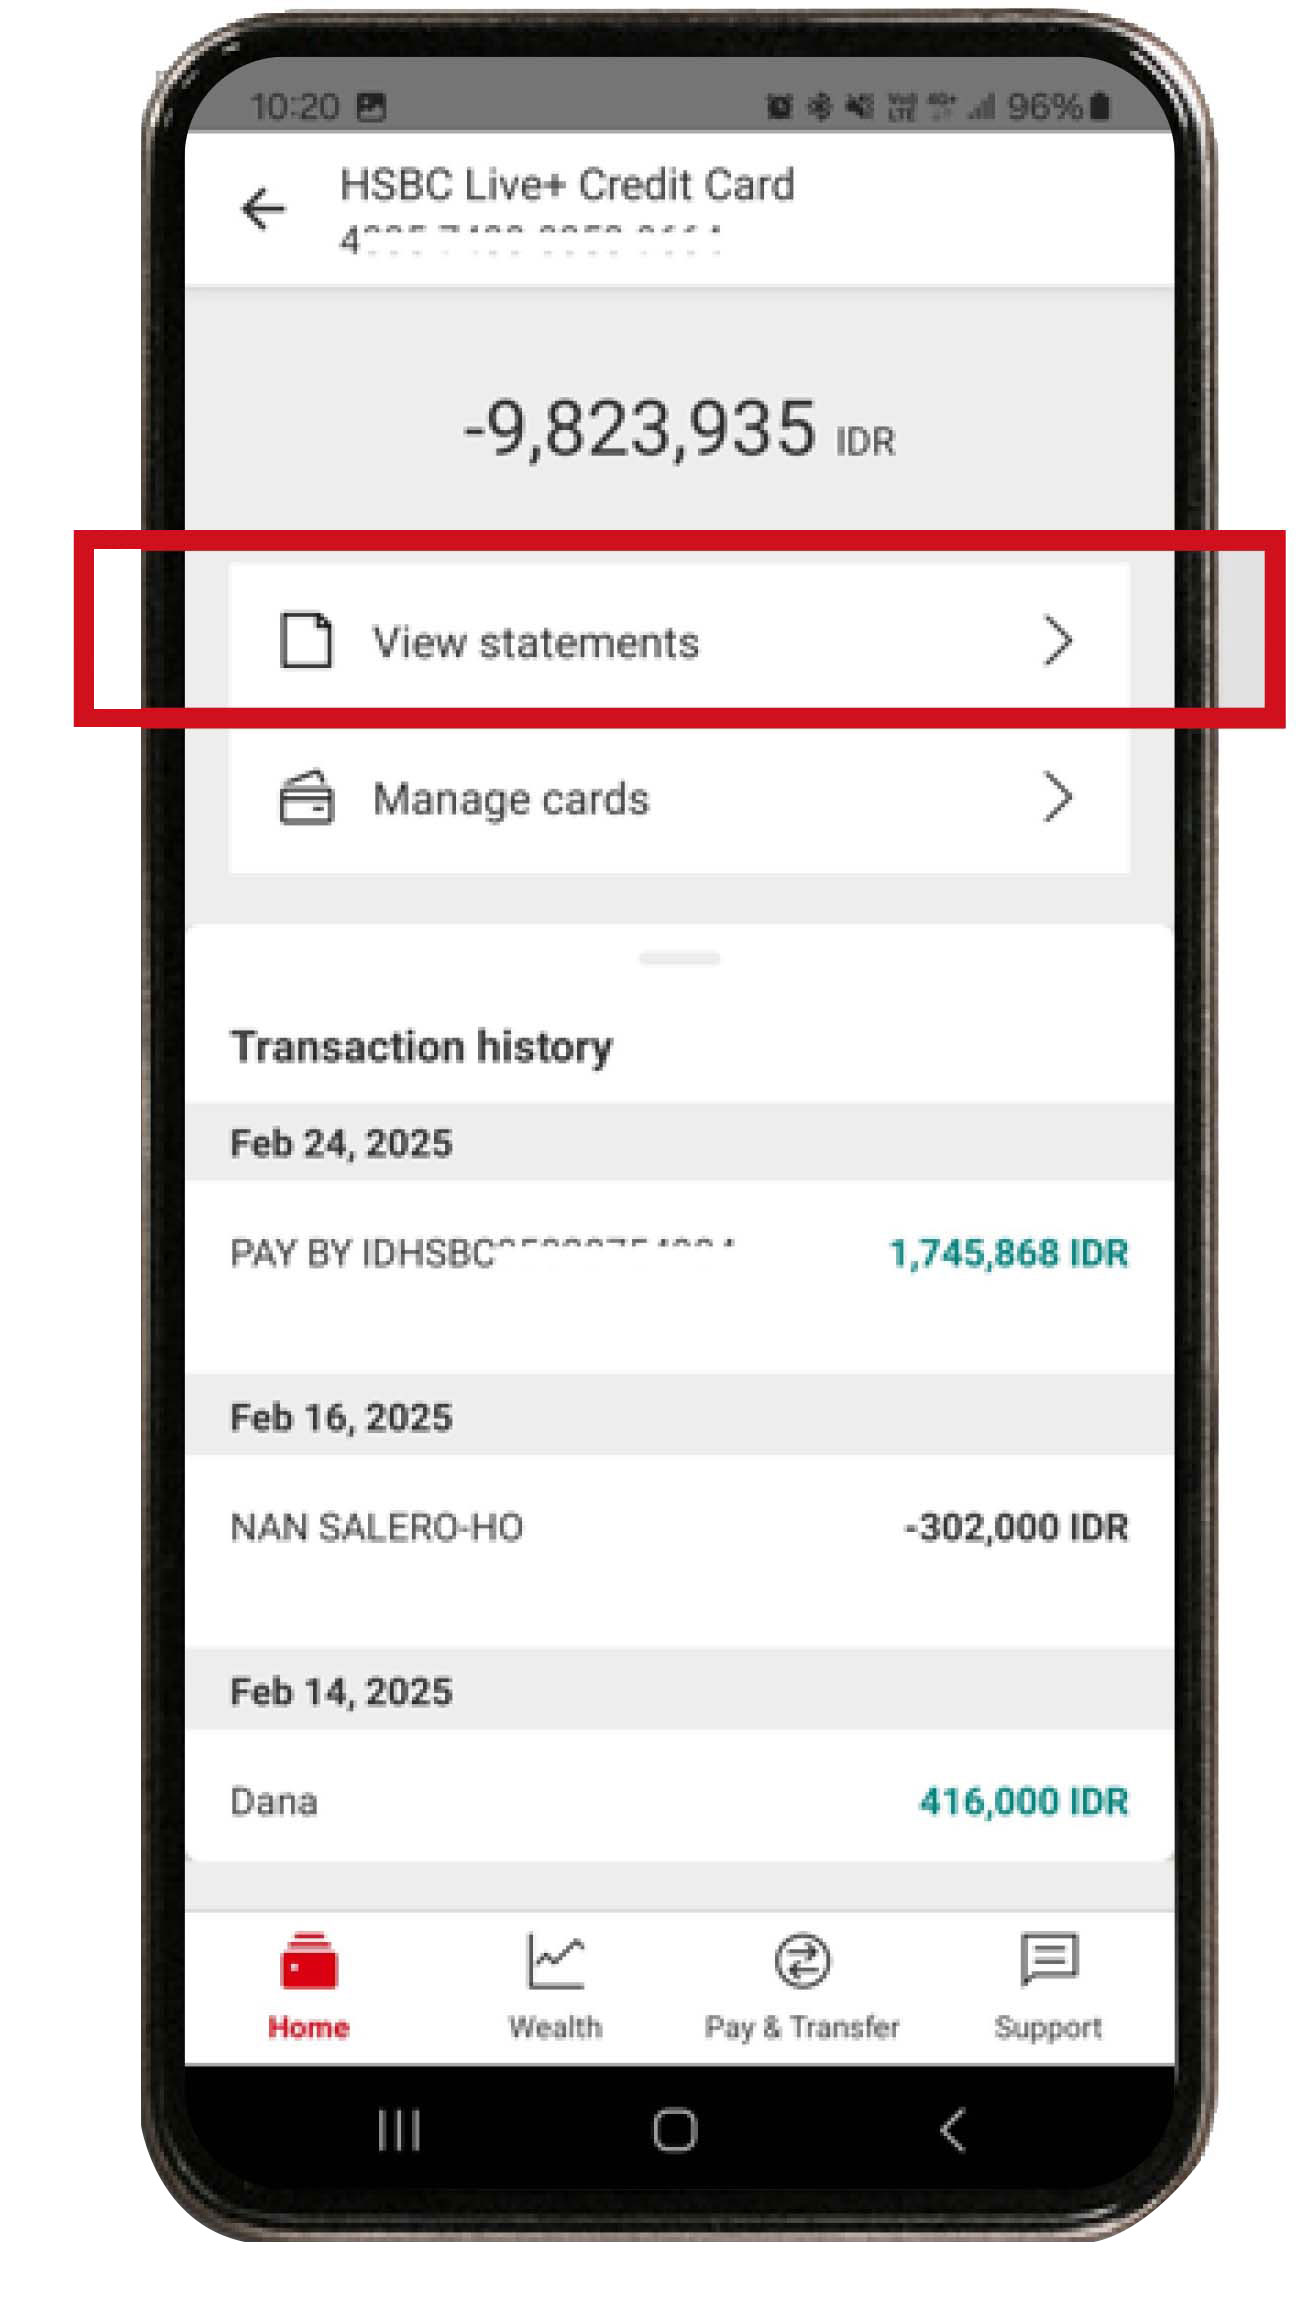
Select "View Statement" to view the summary of credit card transactions and billing statement.
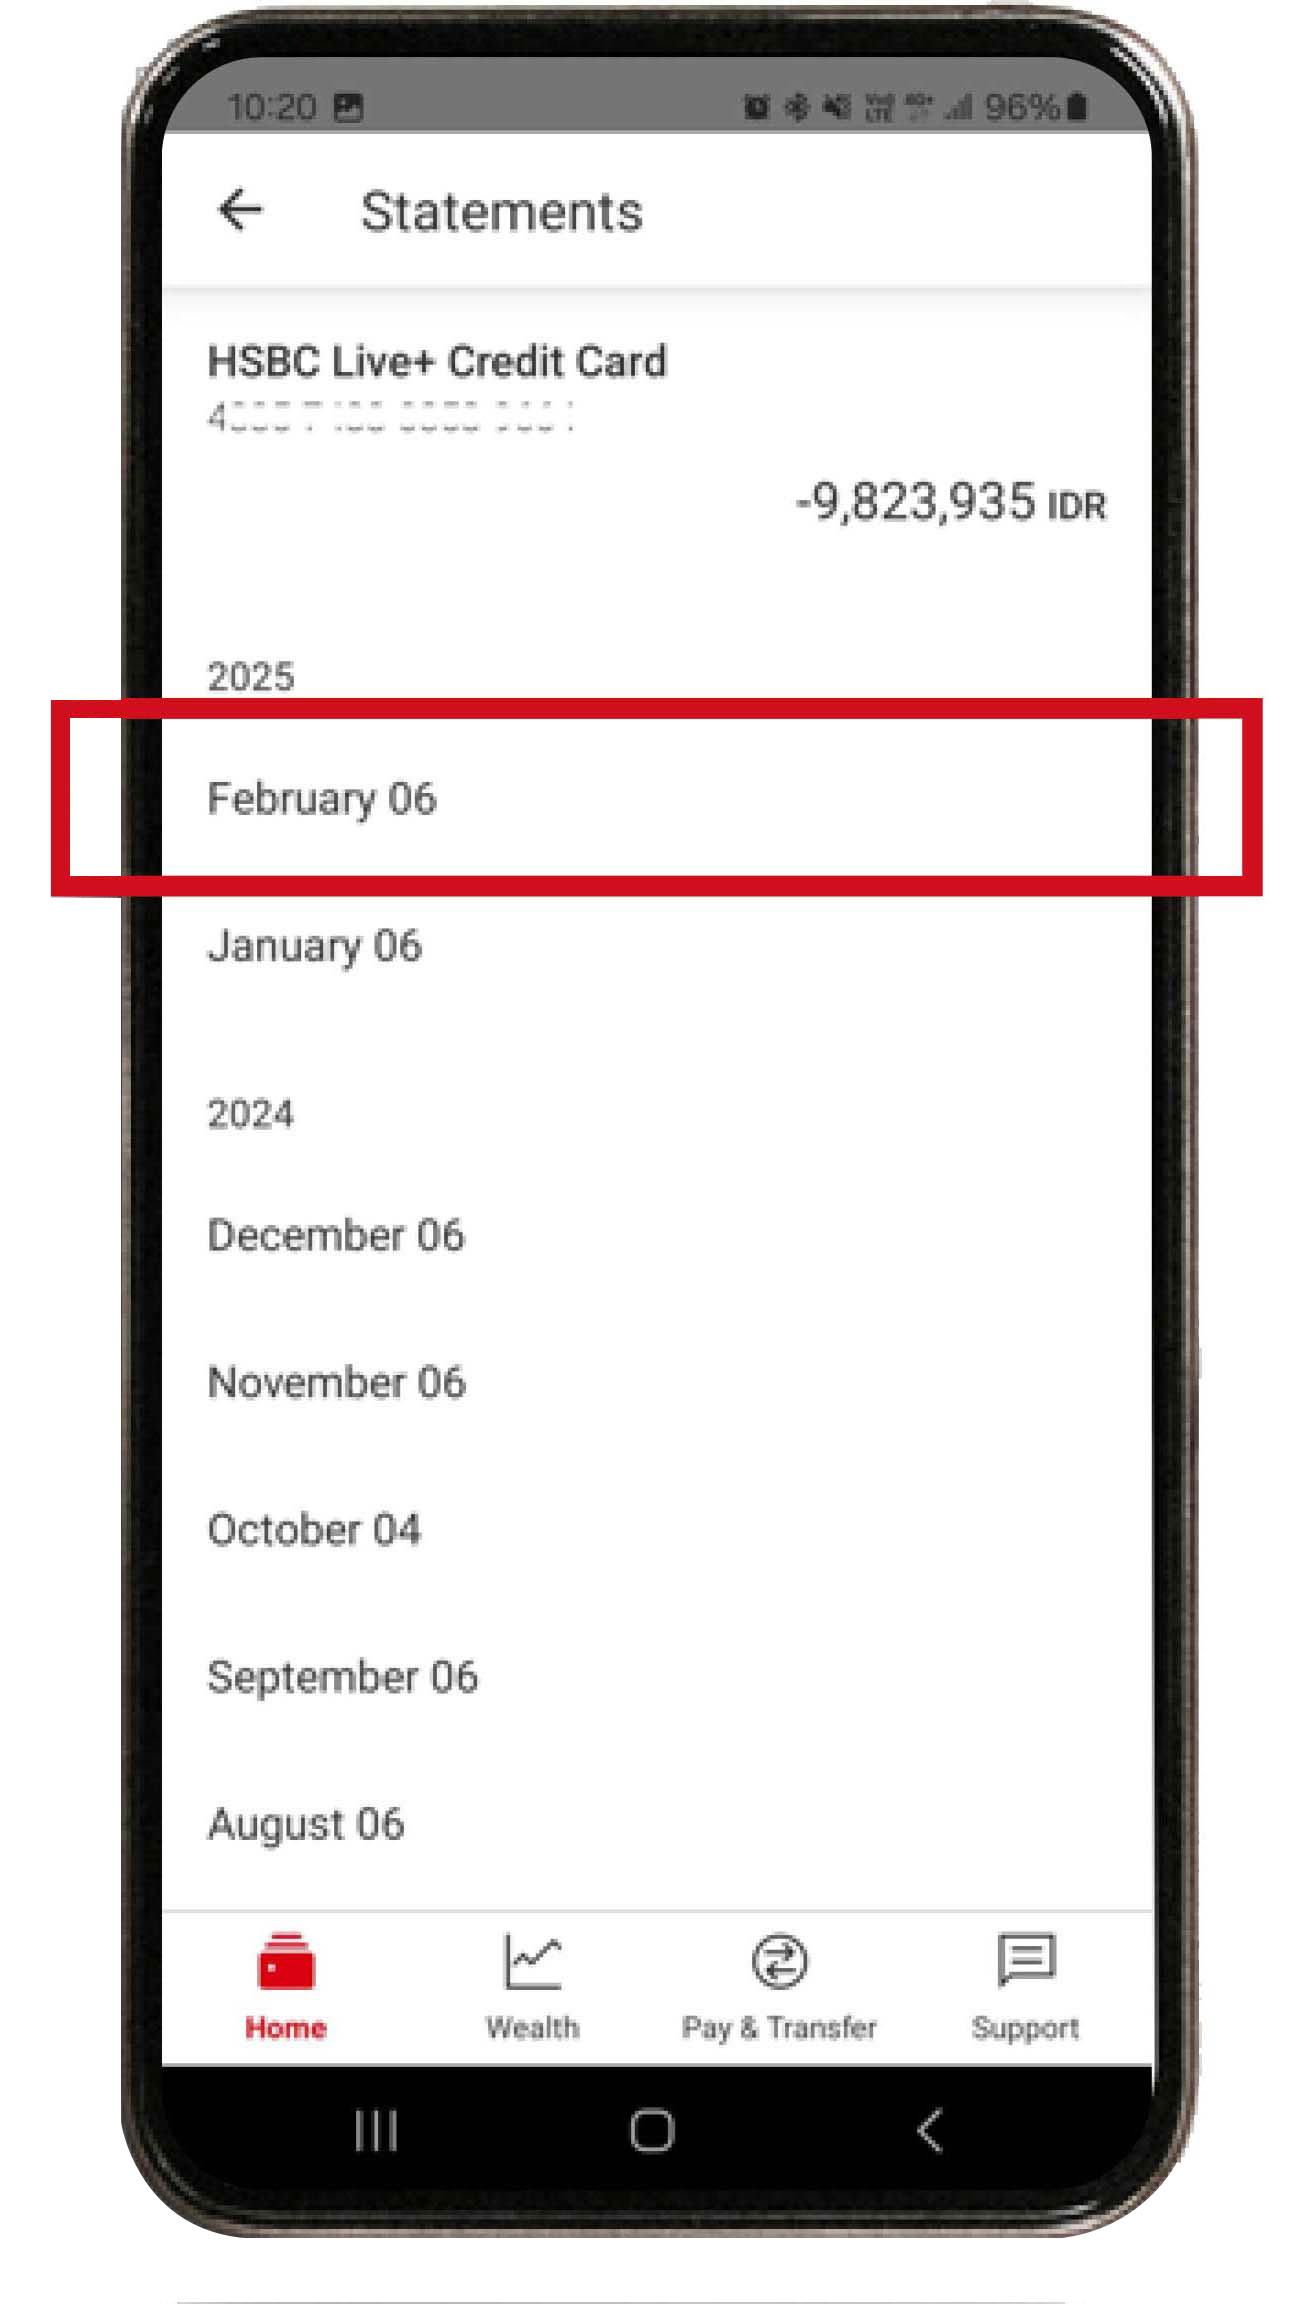
Select the month that you would like to view.

Billing Statement will appear on your screen with credit card transactions summary as well as total and due date of your credit card bill.
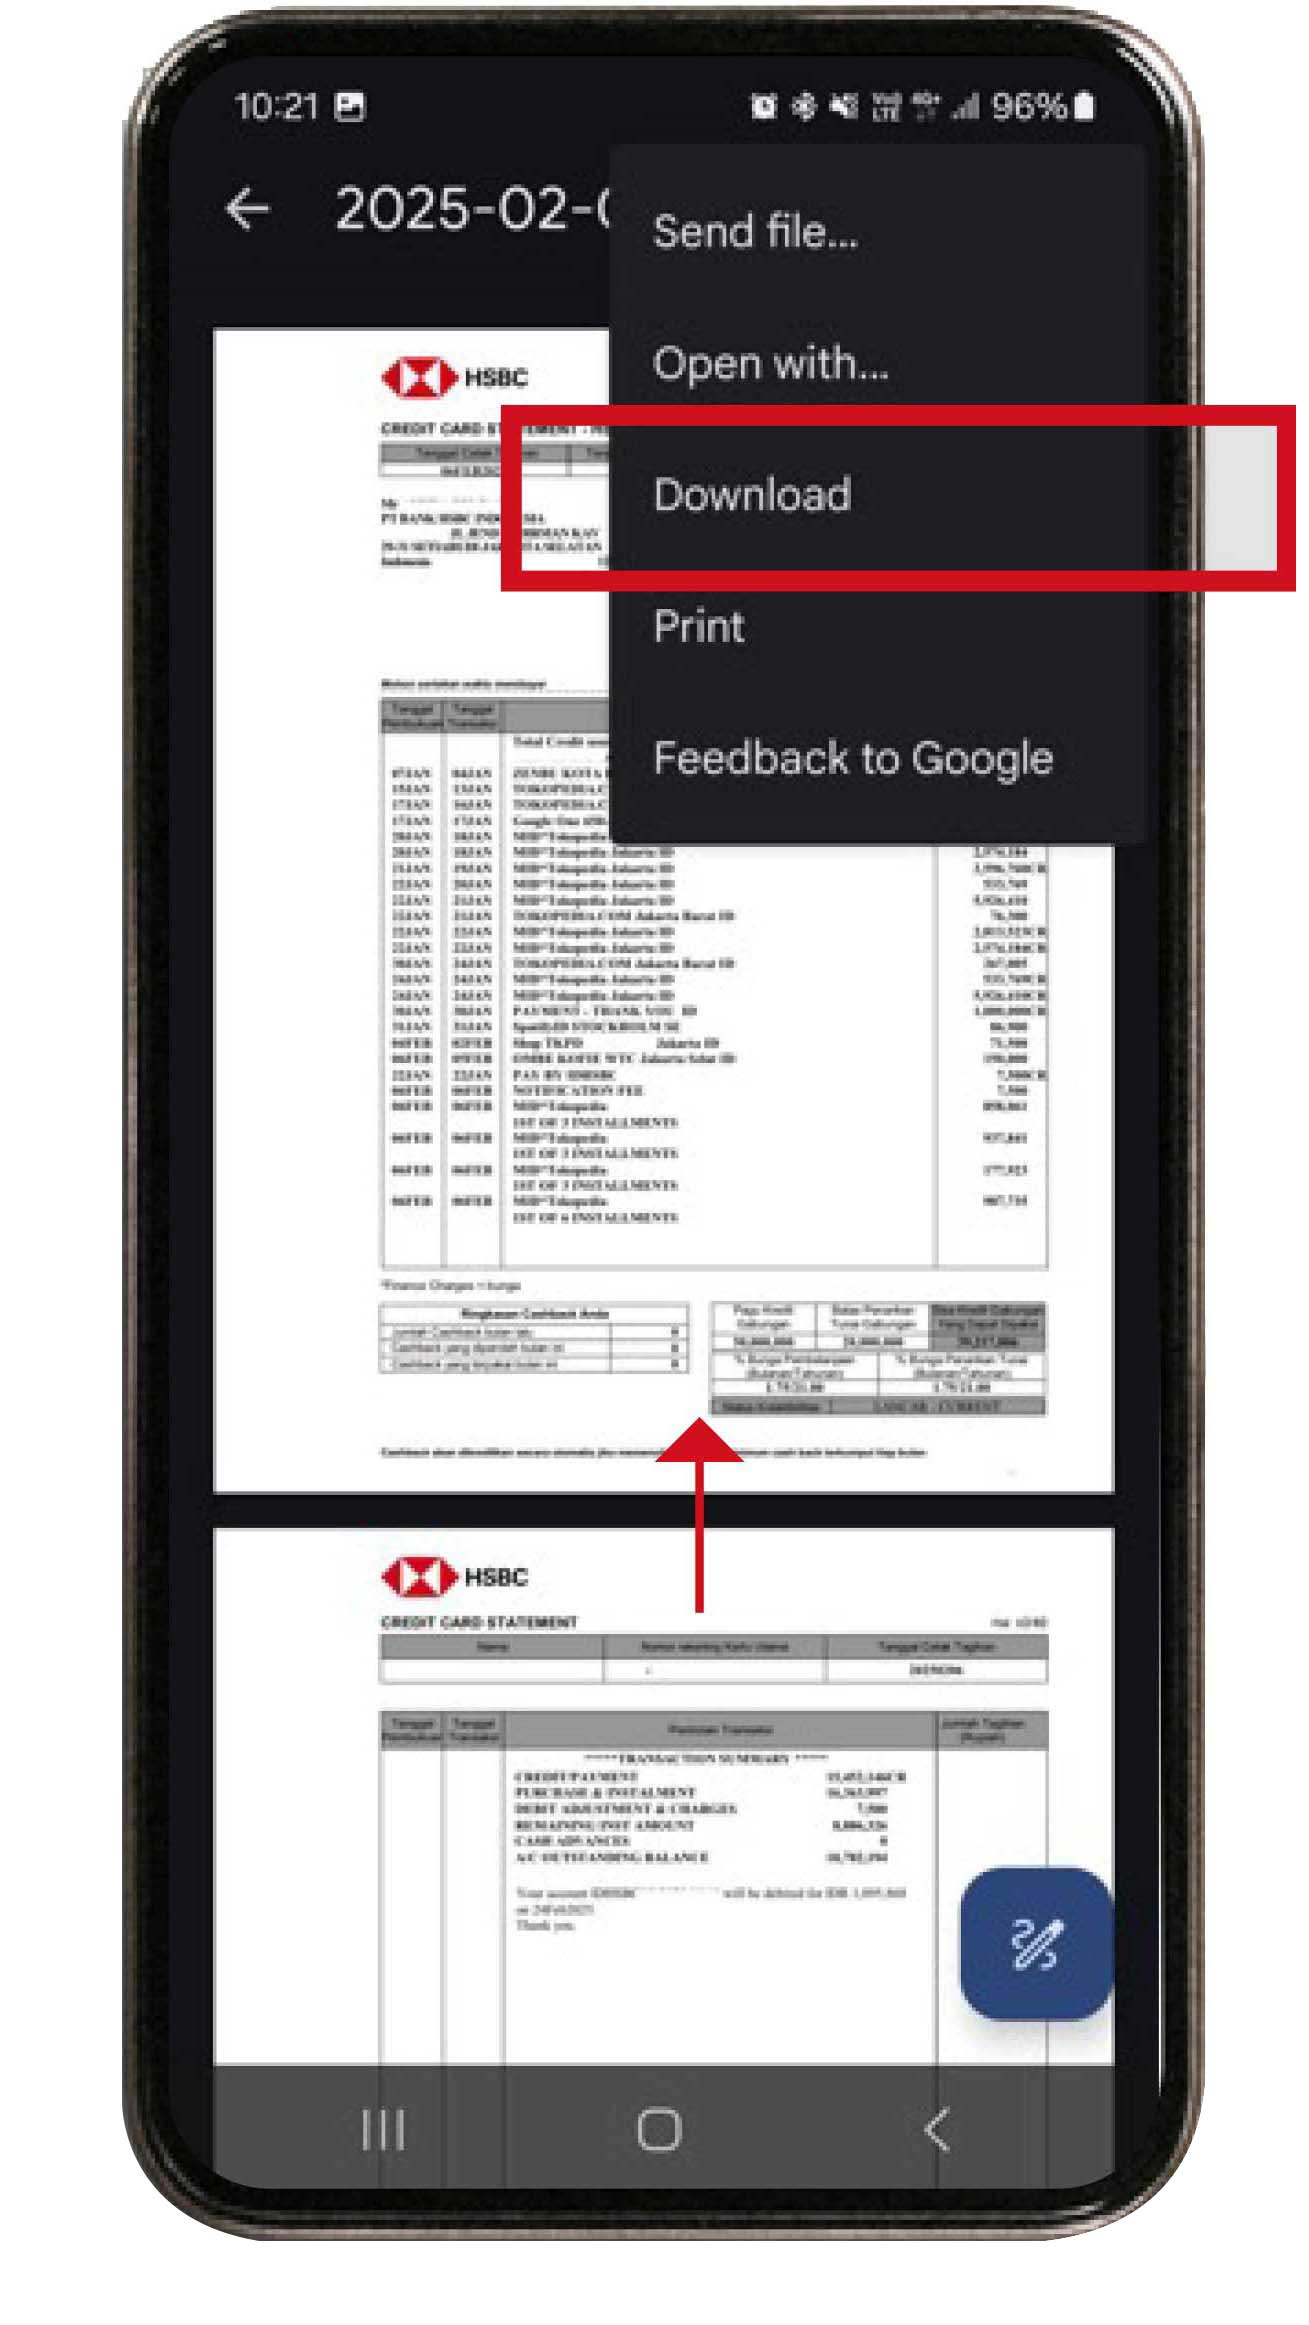
Click the "Share" icon to download or print your credit card billing statement.
View credit card transaction history and limit
On the Home menu, select your HSBC credit card.
Your credit card transaction history will immediately appear on the screen.
To view your credit card limit, you can swipe down "Transaction History". All the details about your credit card will be visible.
Steps on Investment Features
Open investment account
Enjoy the convenience of opening an investment account with HSBC Mobile Banking. Follow these steps:
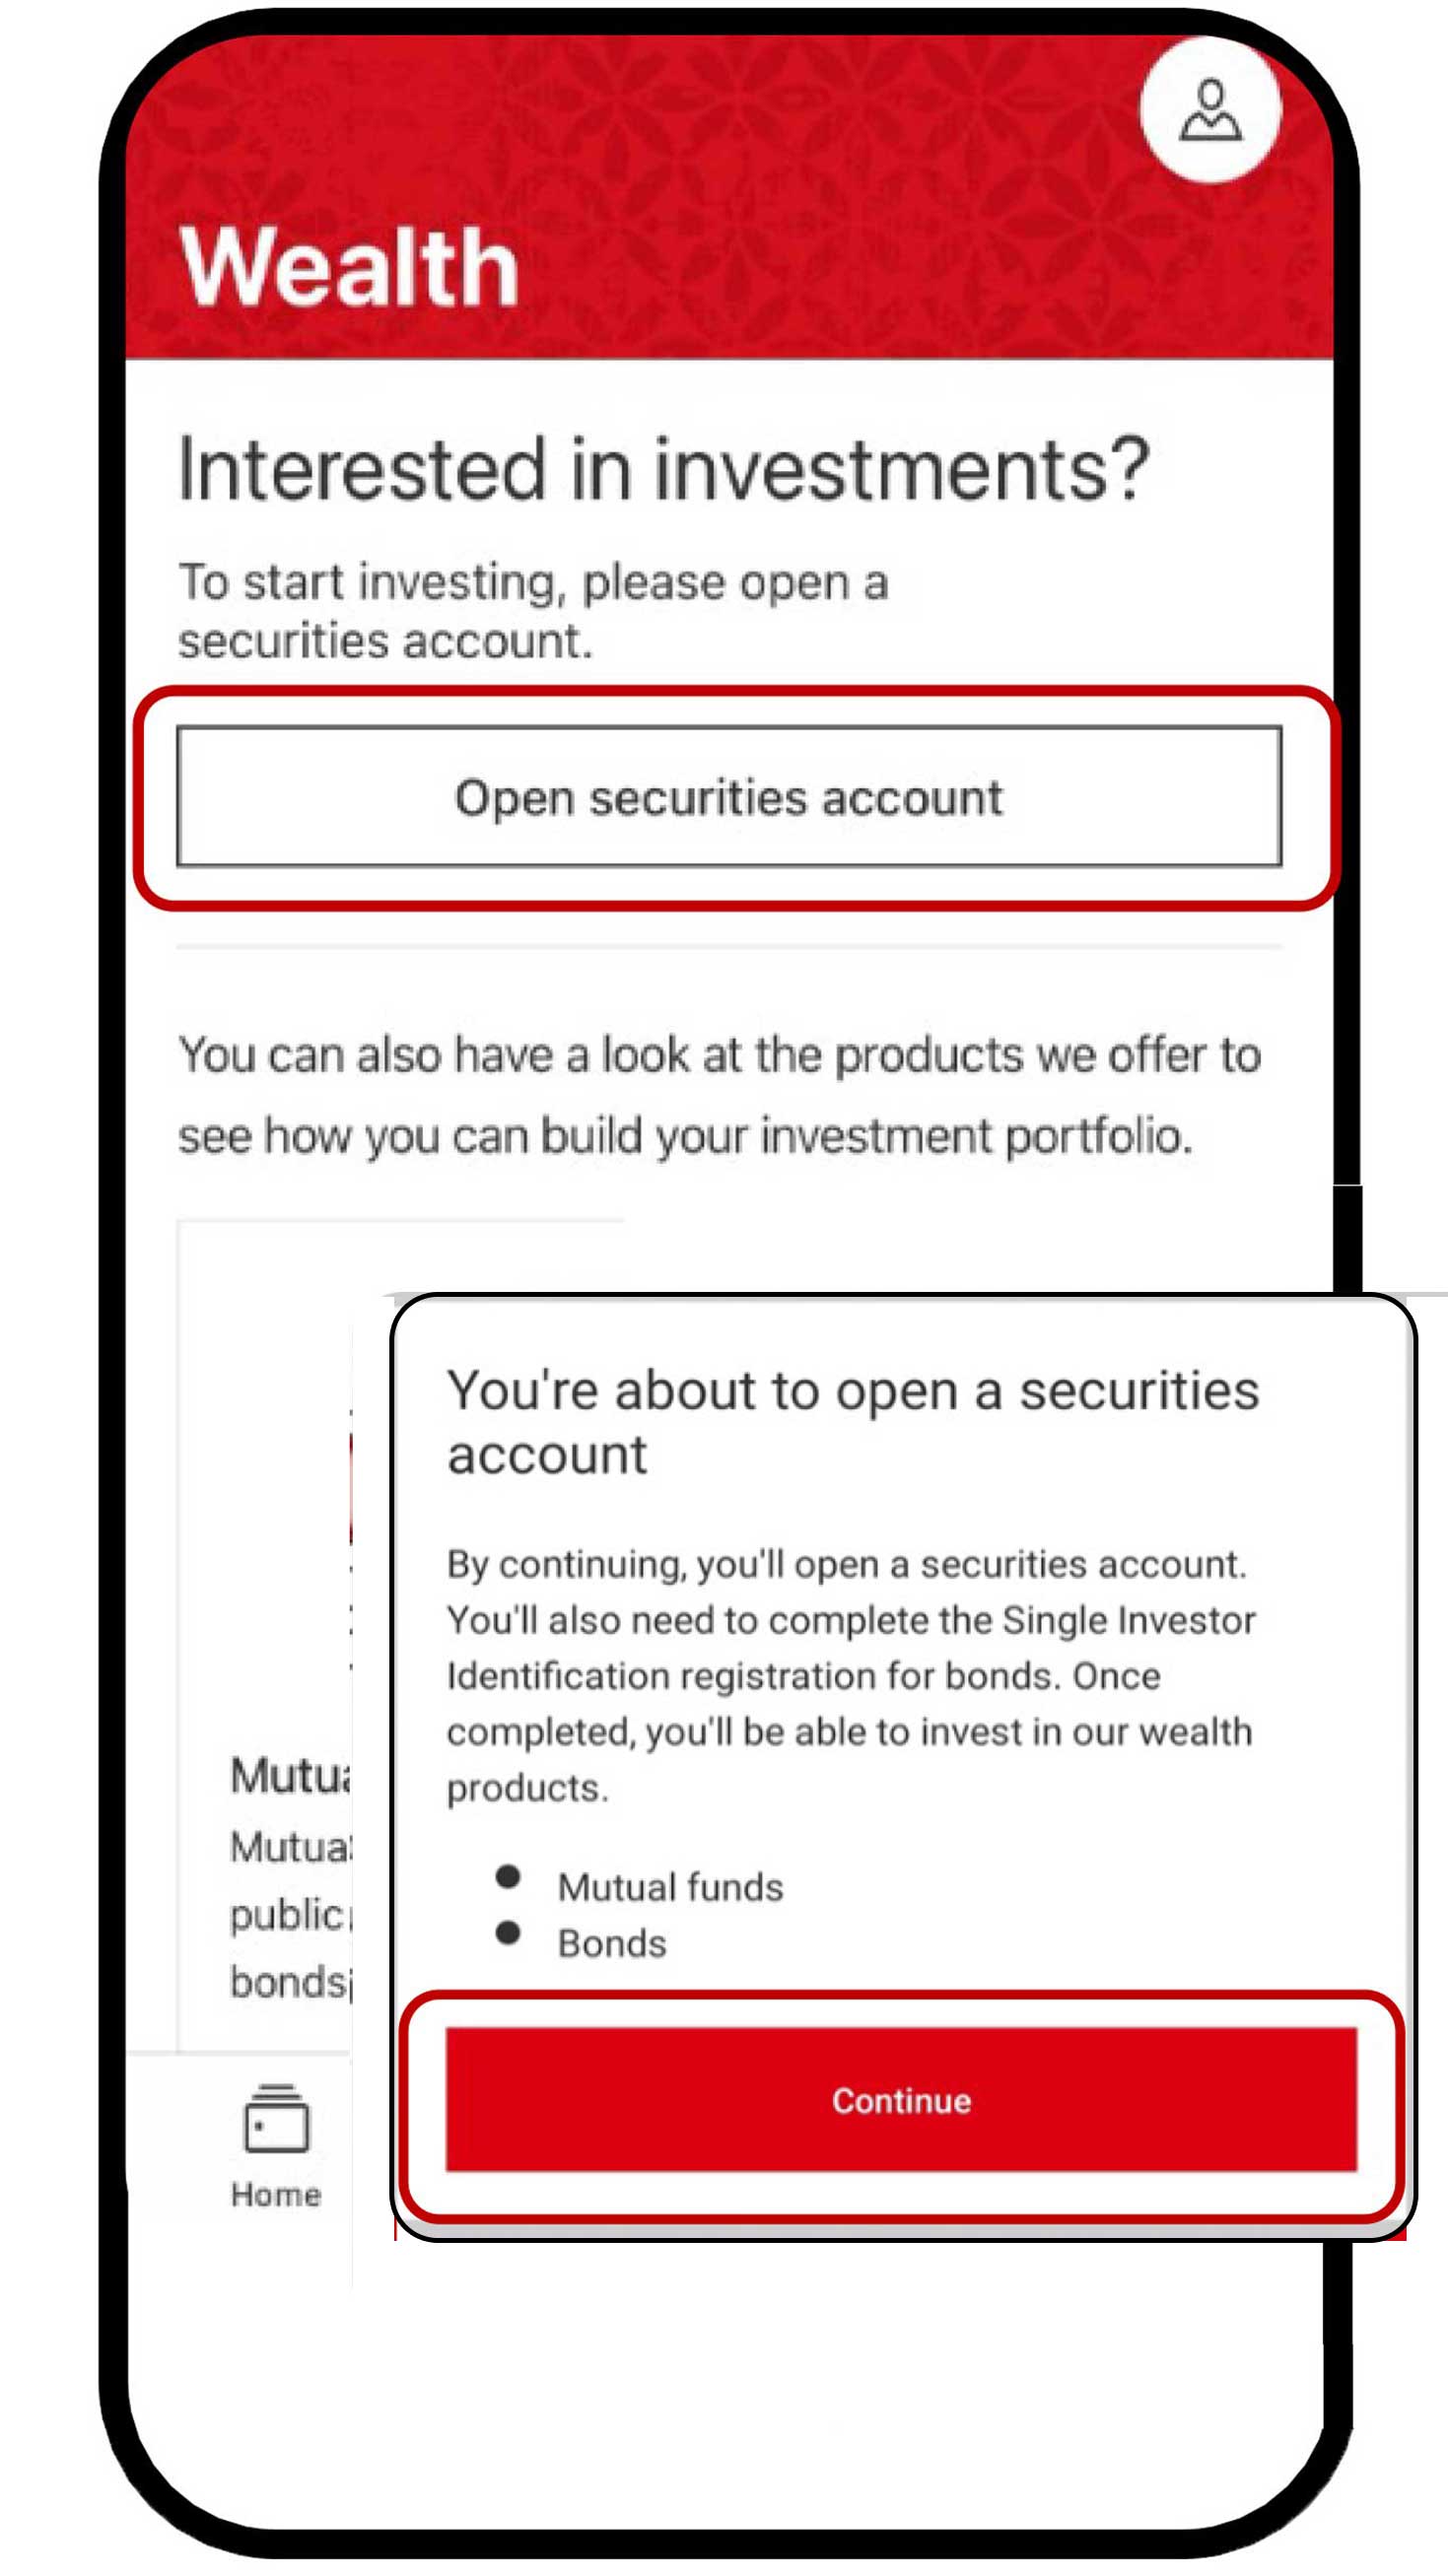
On the Wealth menu, select "Open securities account" dan click the "Continue" button.
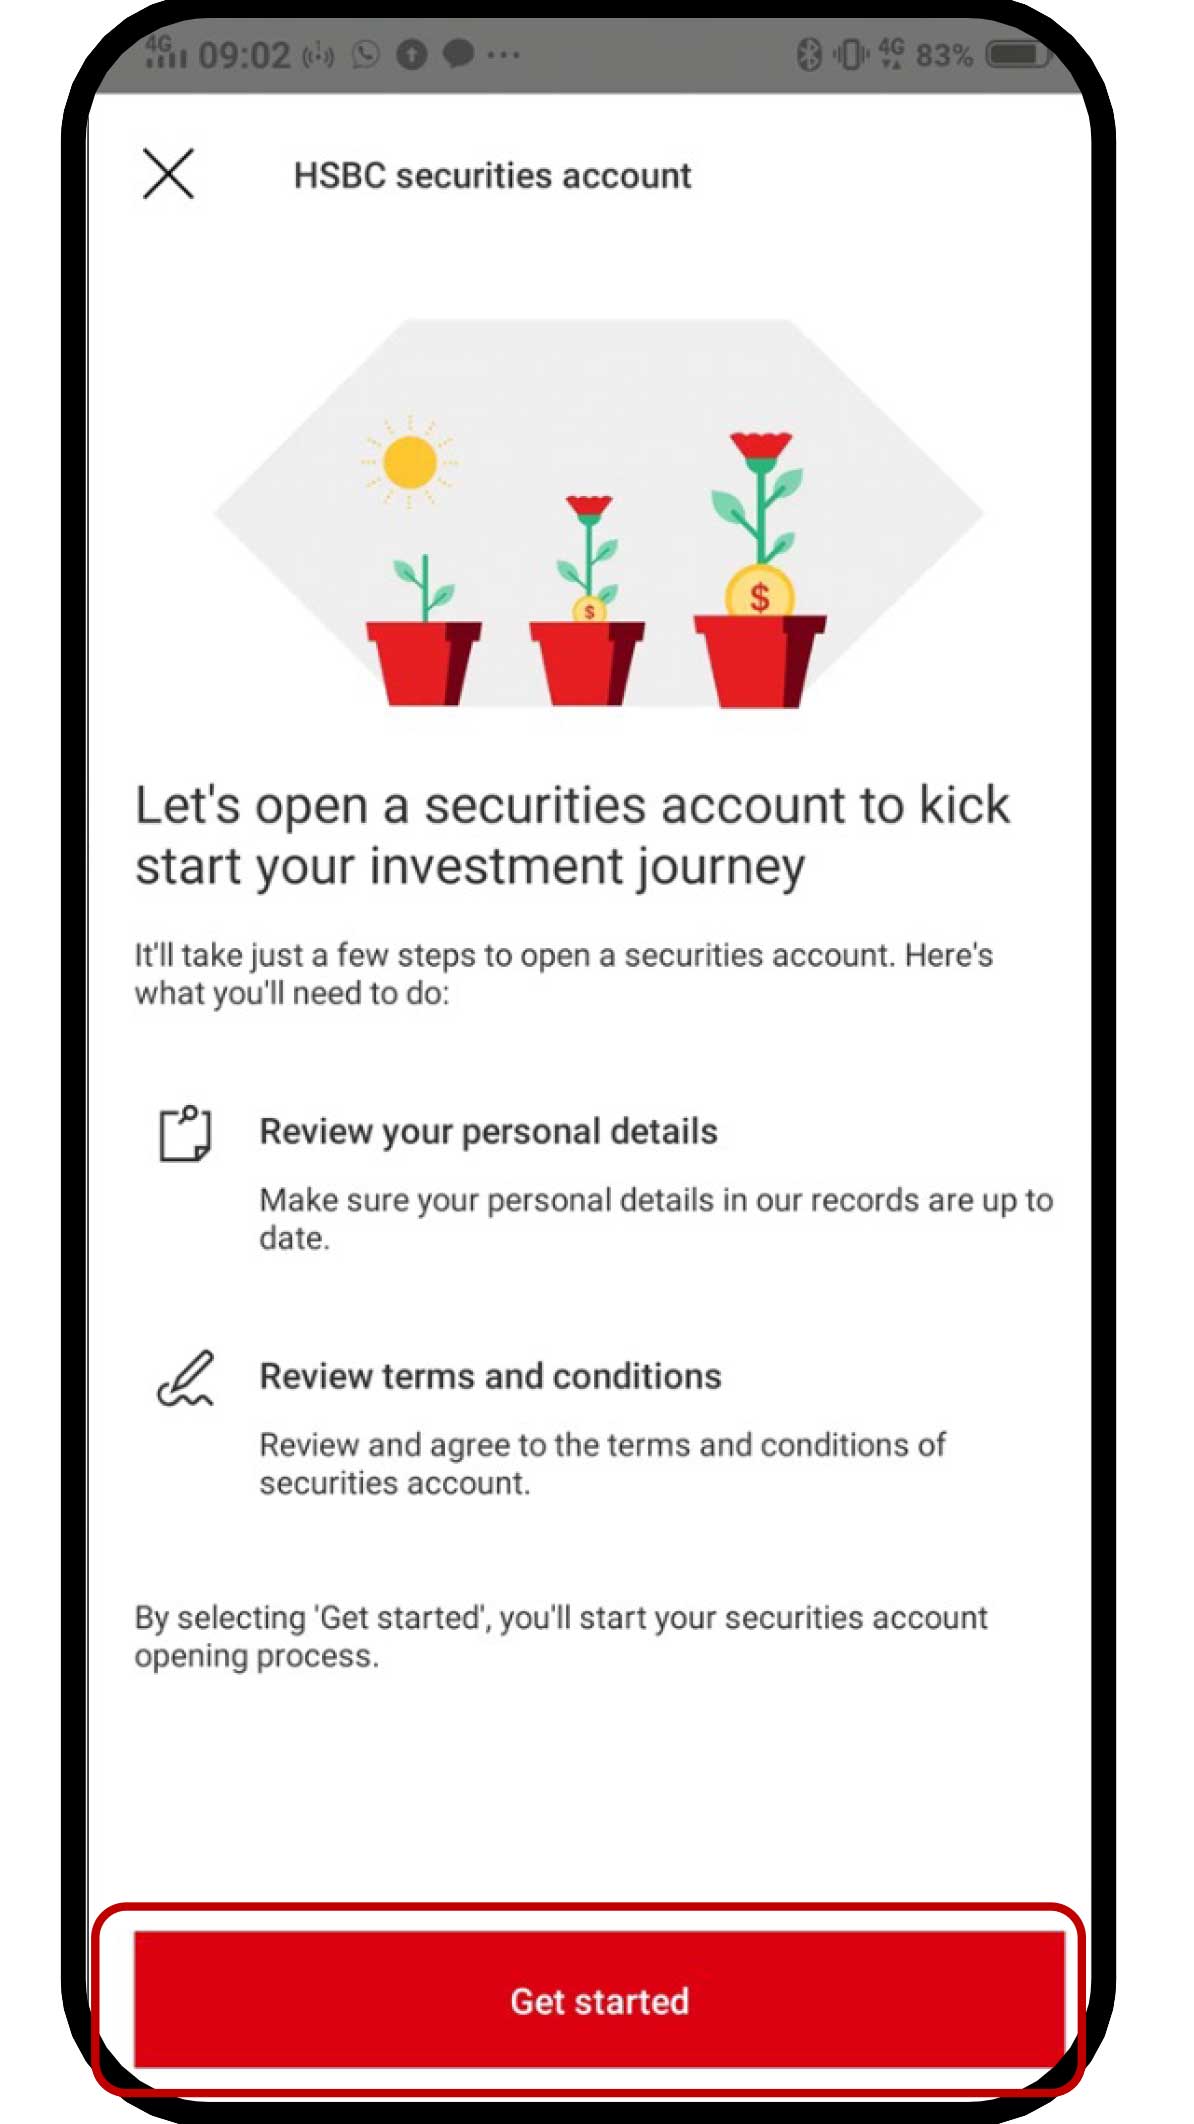
Click the "Get started" button to review your personal data.
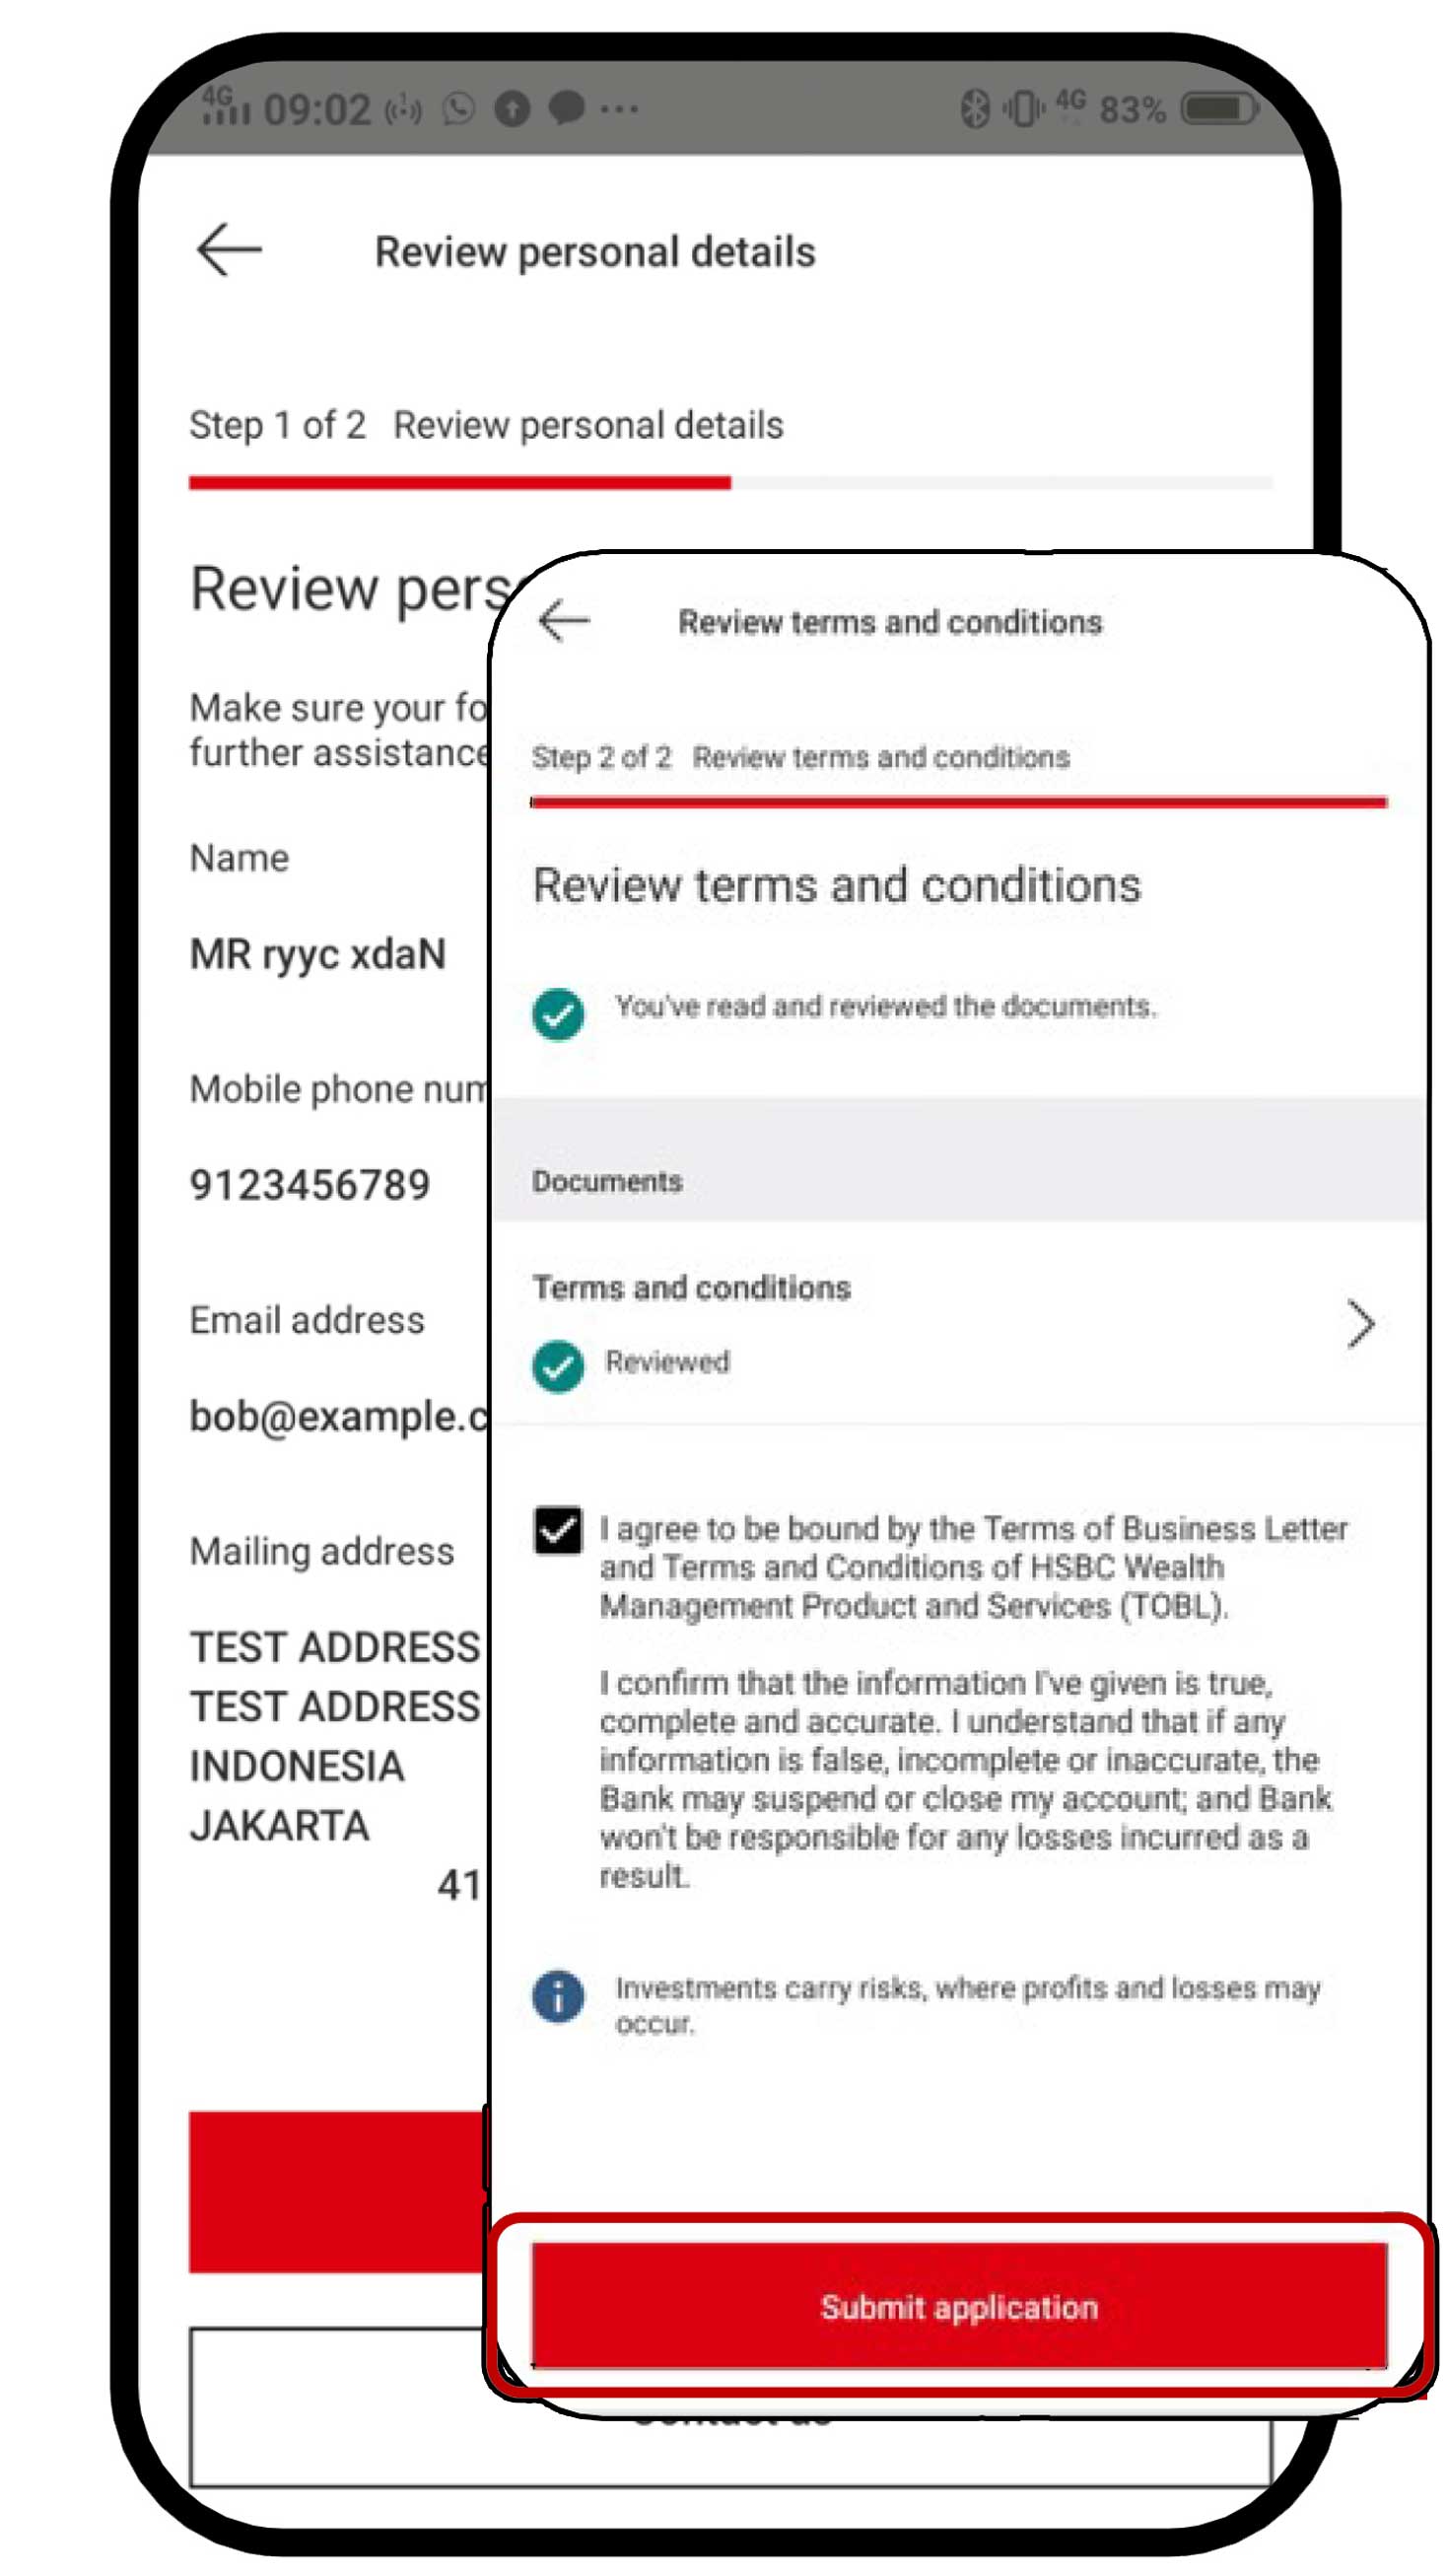
Upon confirming the information accuracy, click the "Continue" button. Review the terms and conditions that applies, then select "Submit application".
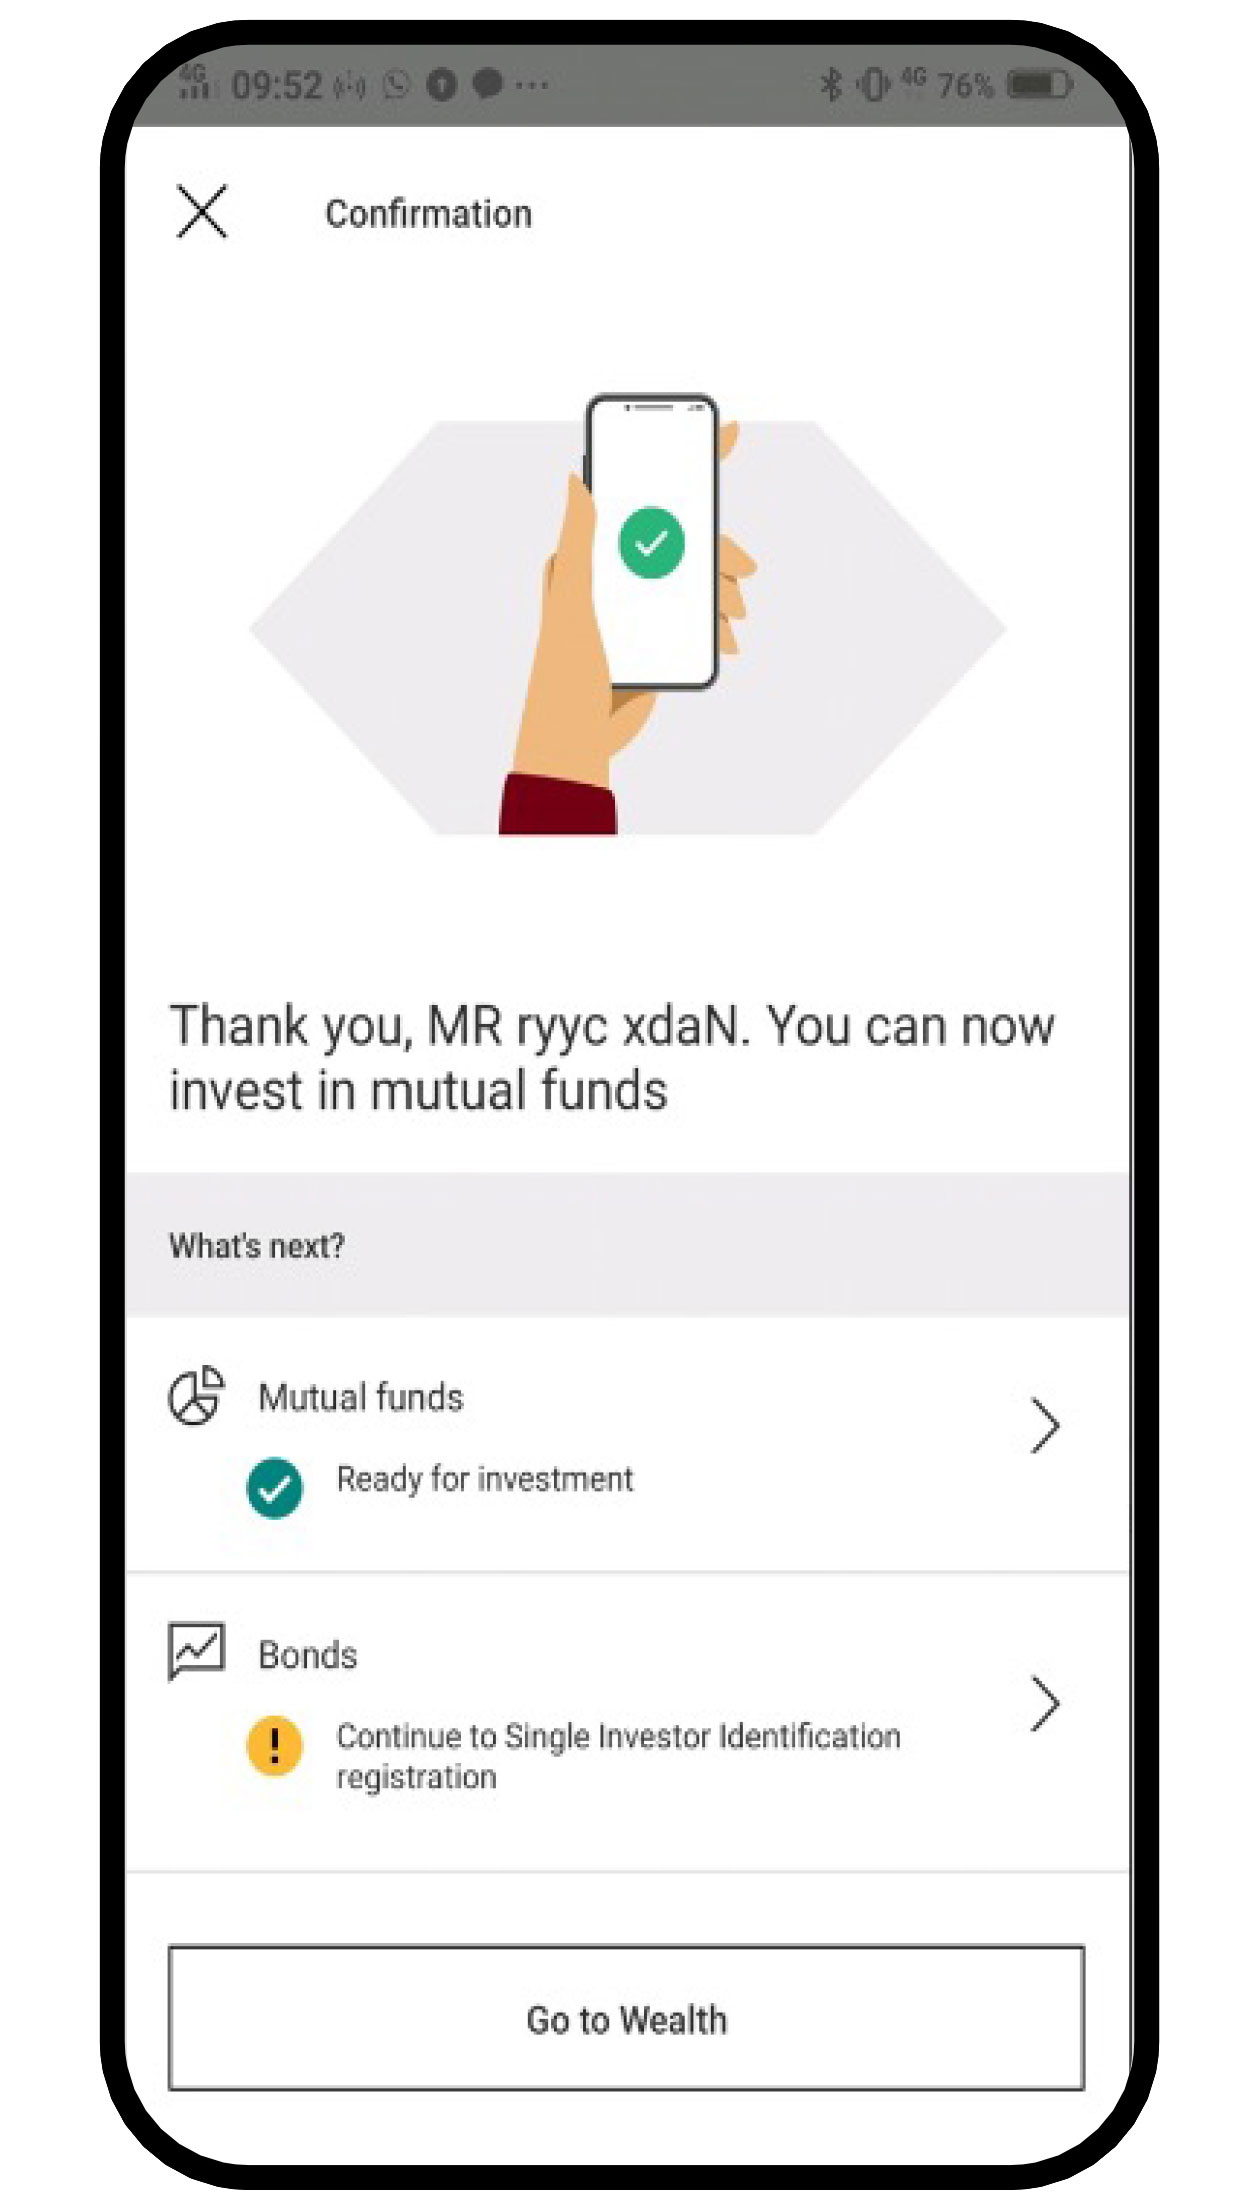
Your investment account has been successfully created. You can immediately make mutual fund transactions. For bond transactions, continue by creating a Single Investor Identification (SID).
You need a Single Investor Identification (SID) to do bonds transactions. Follow these steps:
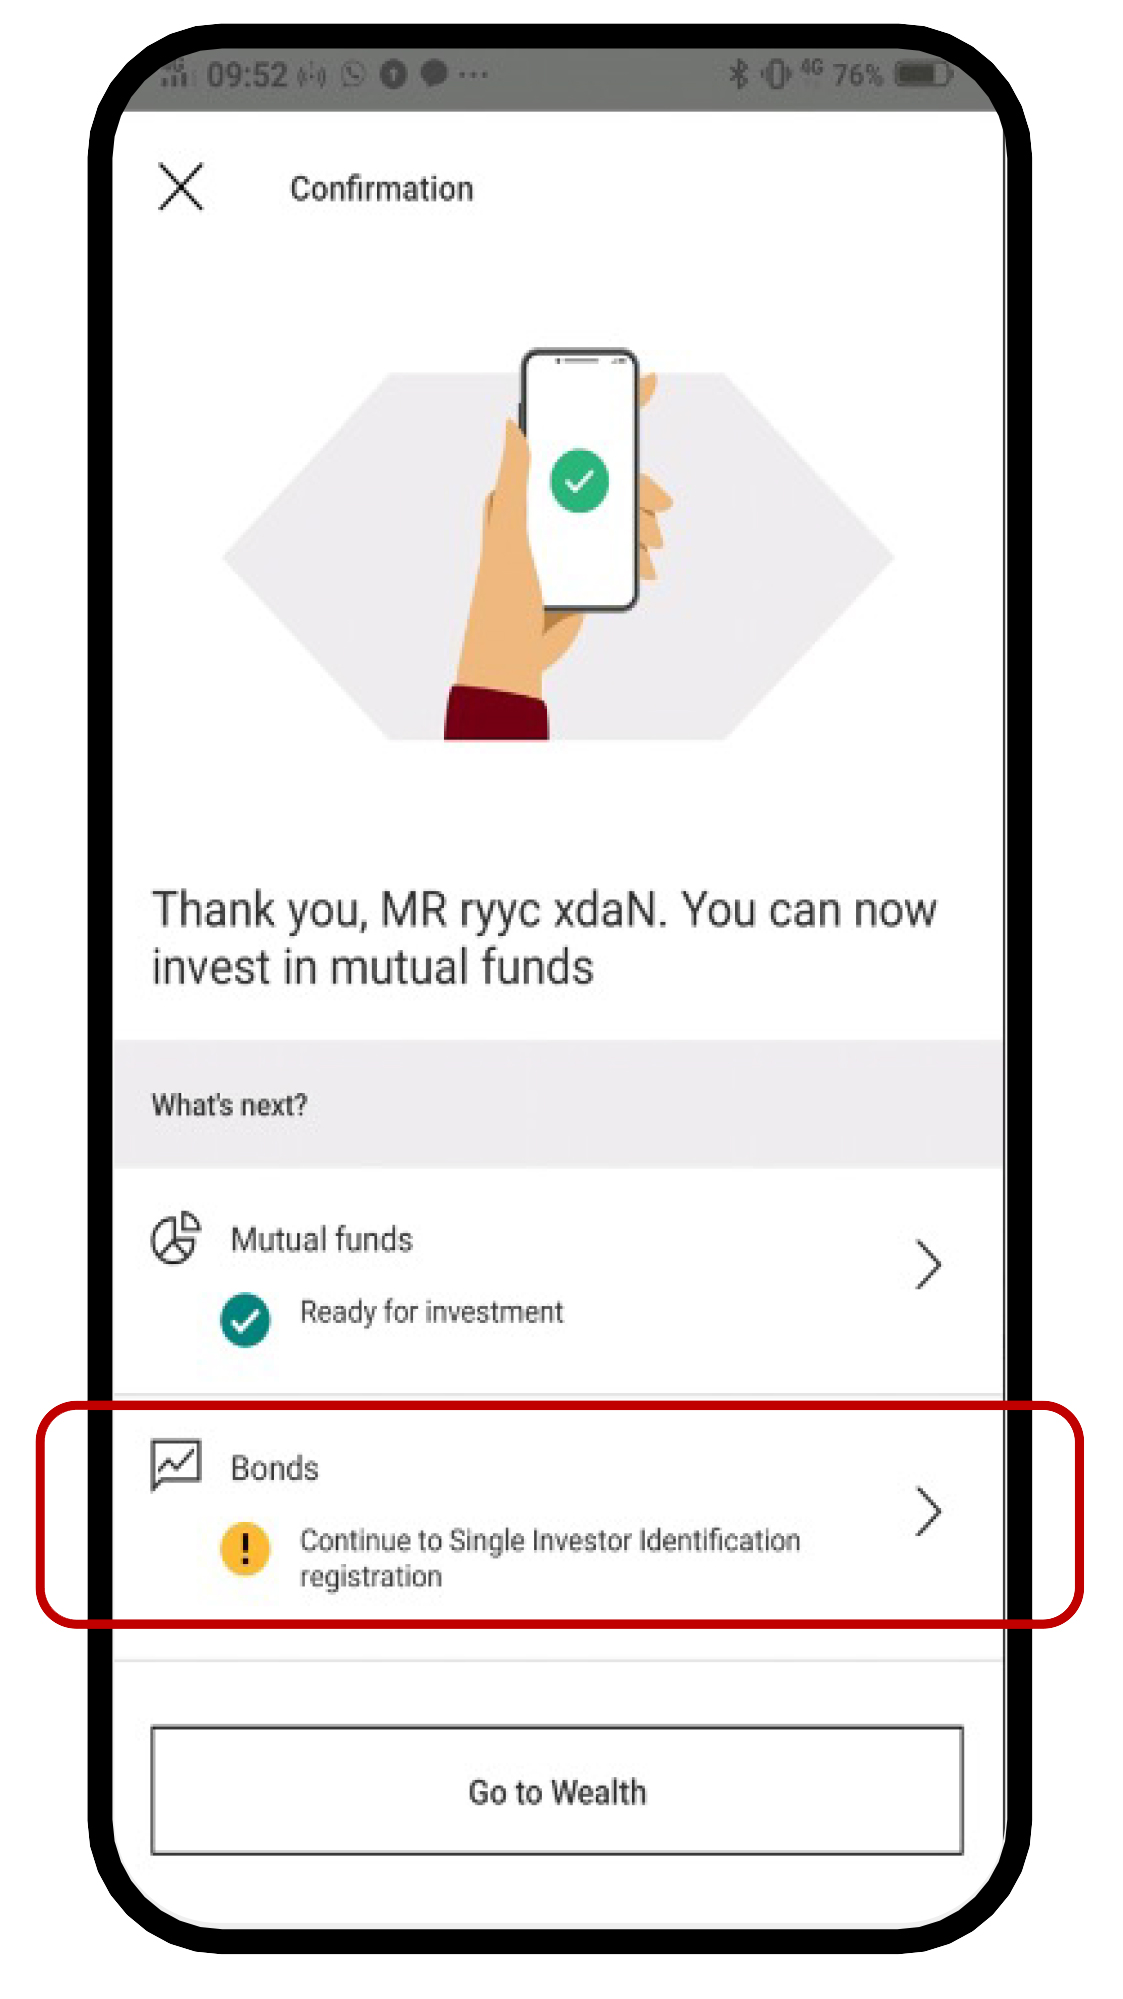
Continuing from the investment account opening process, select "Continue to Single Investor Identification registration".
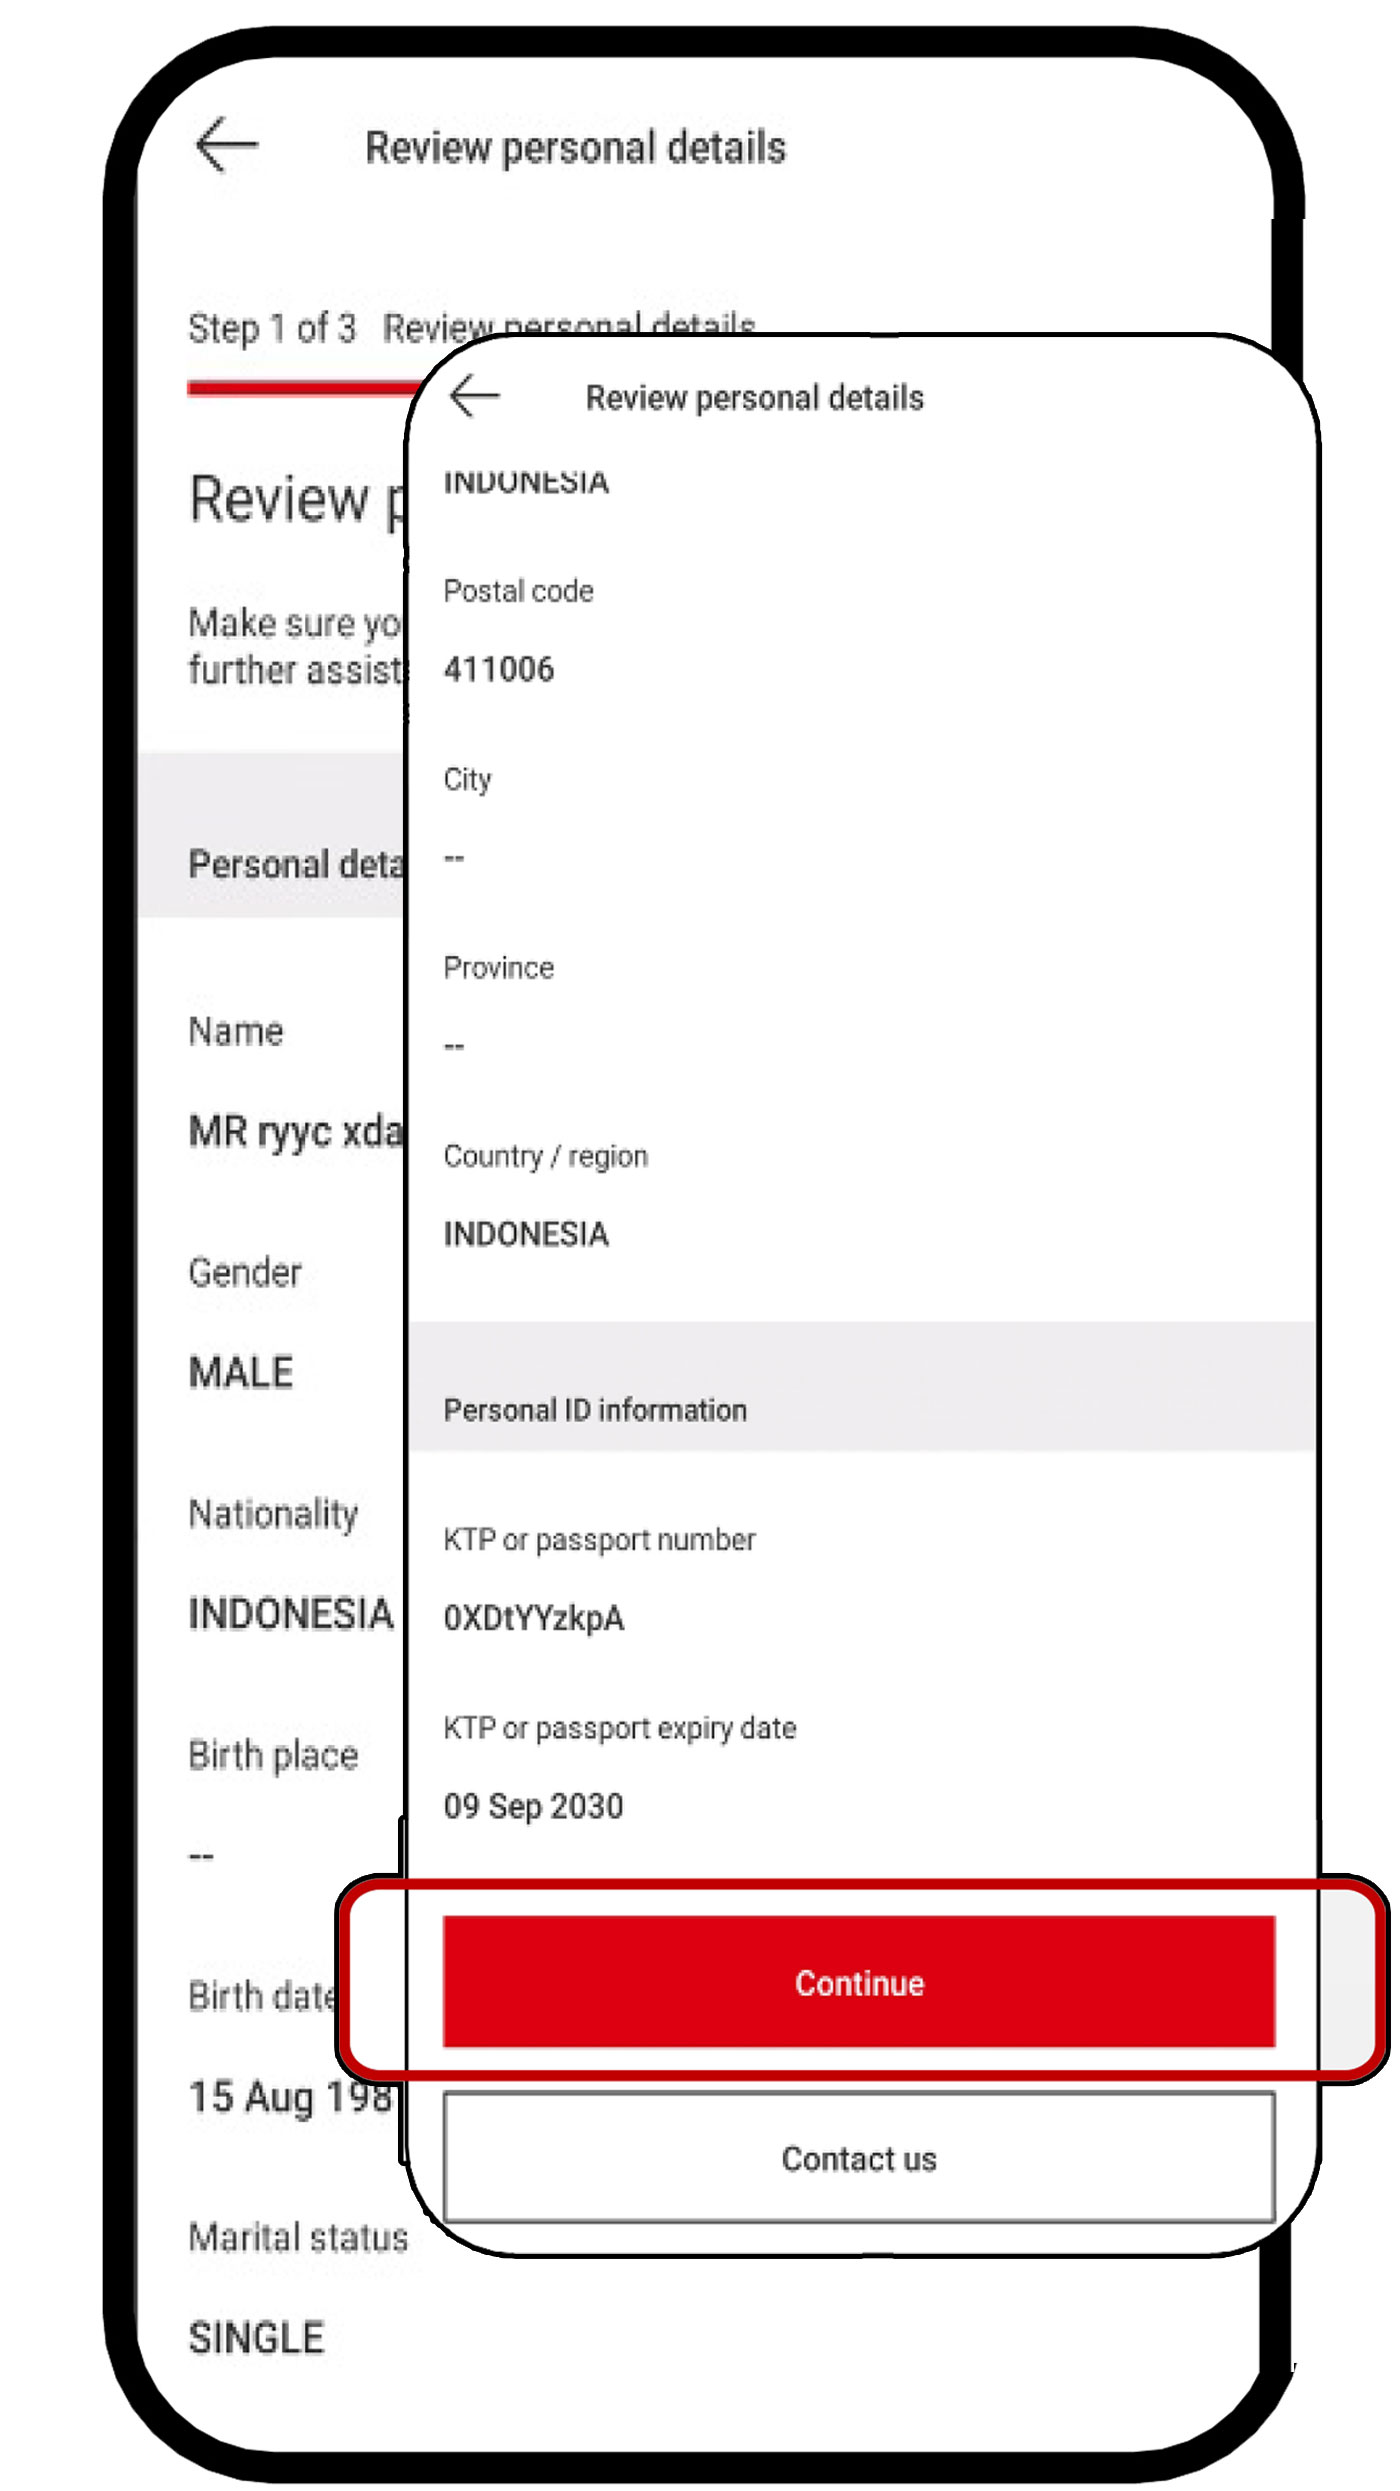
Review and check your personal information, then select the "Continue" button.
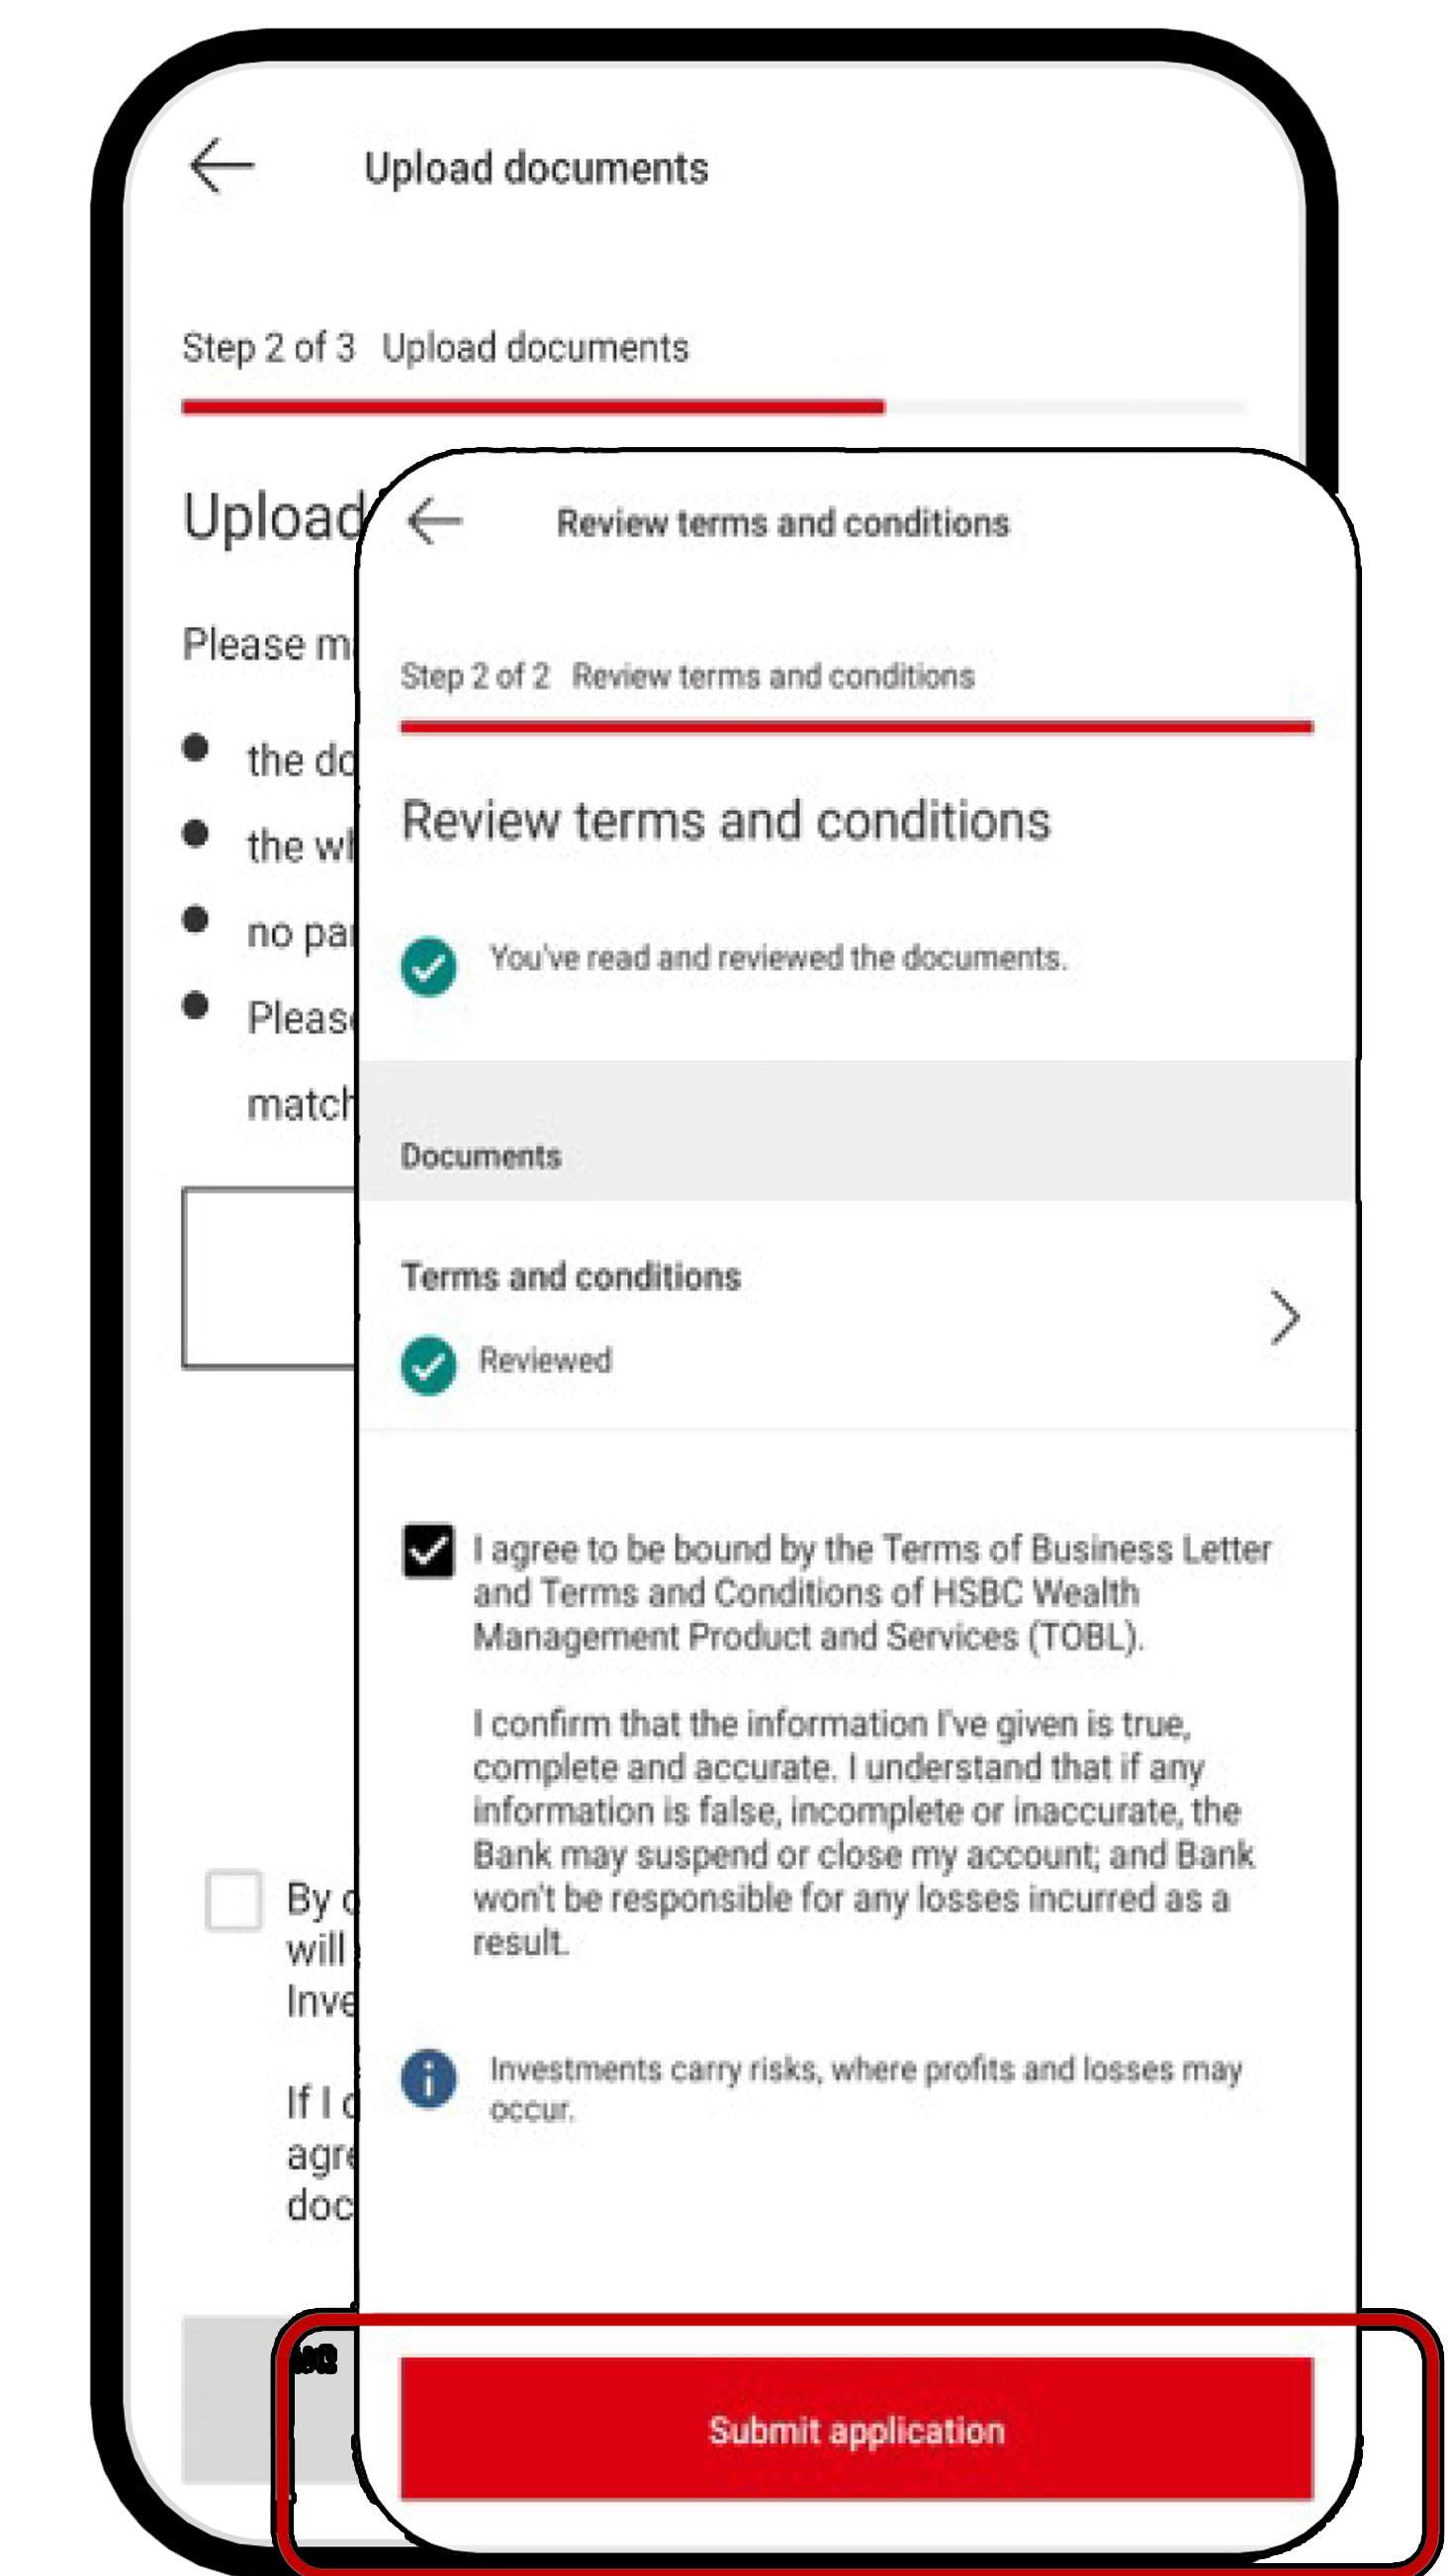
Upload a photo of your ID card, then select "Continue". Review the terms and conditions that applies and click the "Submit application" button.
Your SID application has been successfully submitted. You can
conduct bond transactions after receiving approval from KSEI
(Kustodian Sentral Efek Indonesia)*.
*Approval from KSEI takes up to 2 working days.
More about the steps for opening an investment account
Fill in risk questionnaire profile
Completing the risk questionnaire profile could help you discover your risk tolerance. You can use this information as a reference before before purchasing investment products such as mutual funds and bonds. Follow these steps:

On the Wealth menu, select "Risk profile questionnaire".
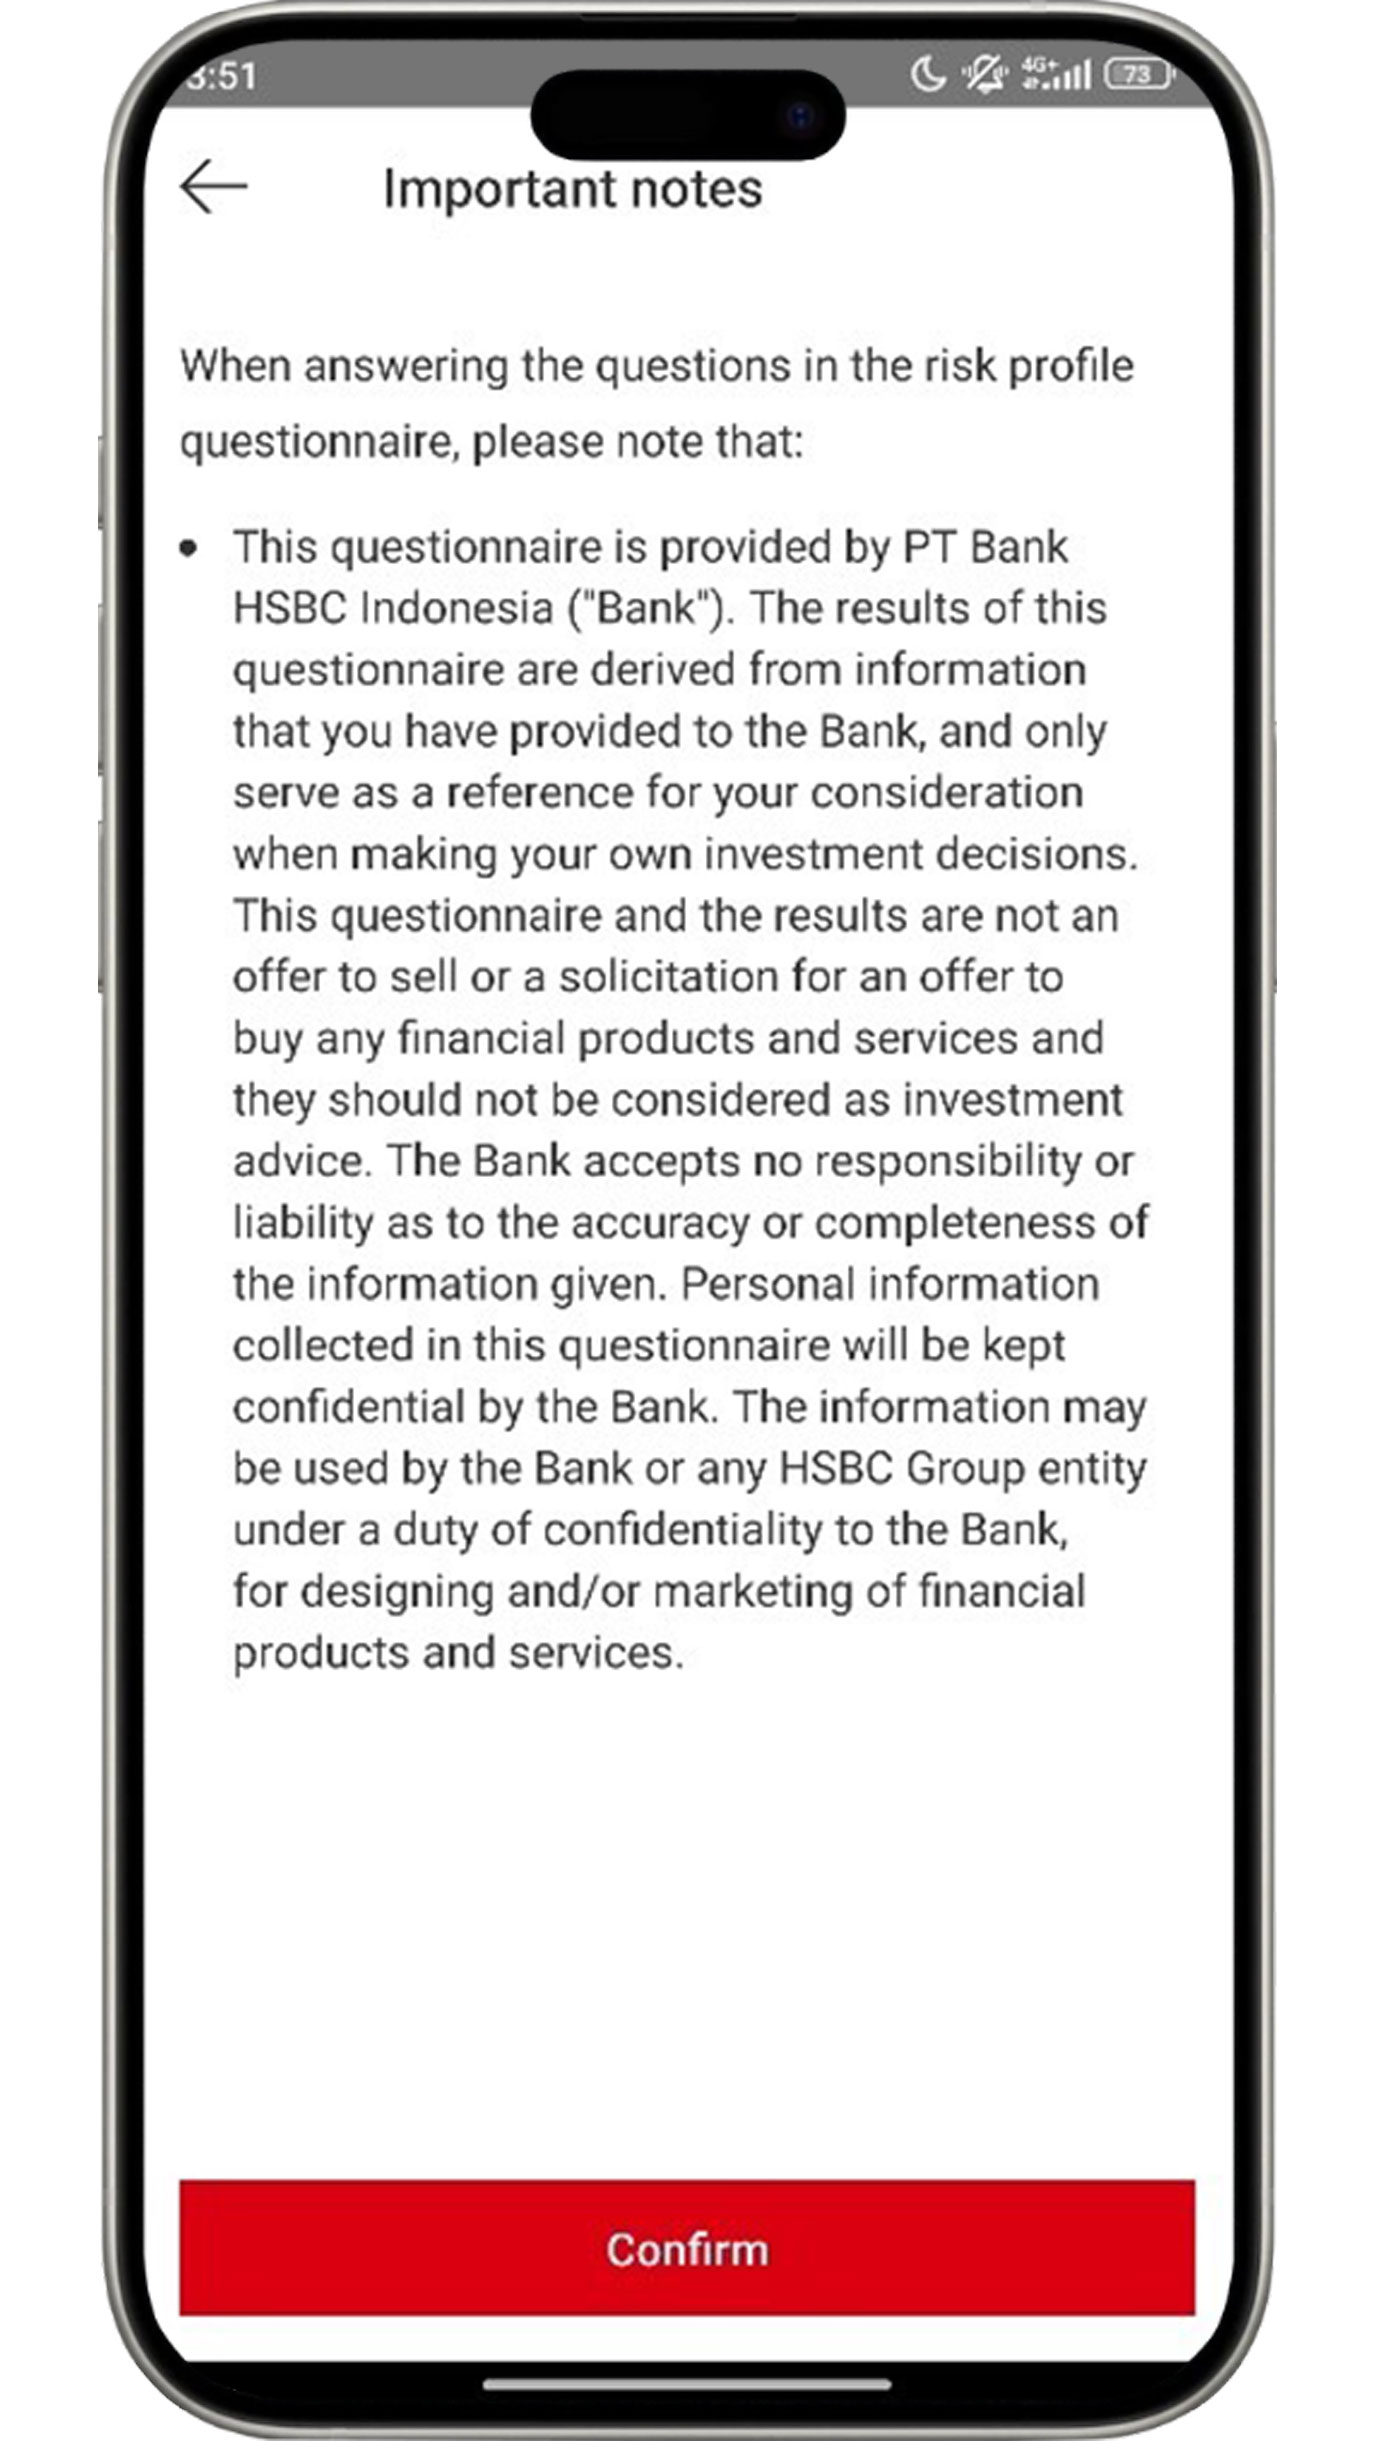
Before clicking the "Confirm" button, ensure you have read the information listed on the important notes page.
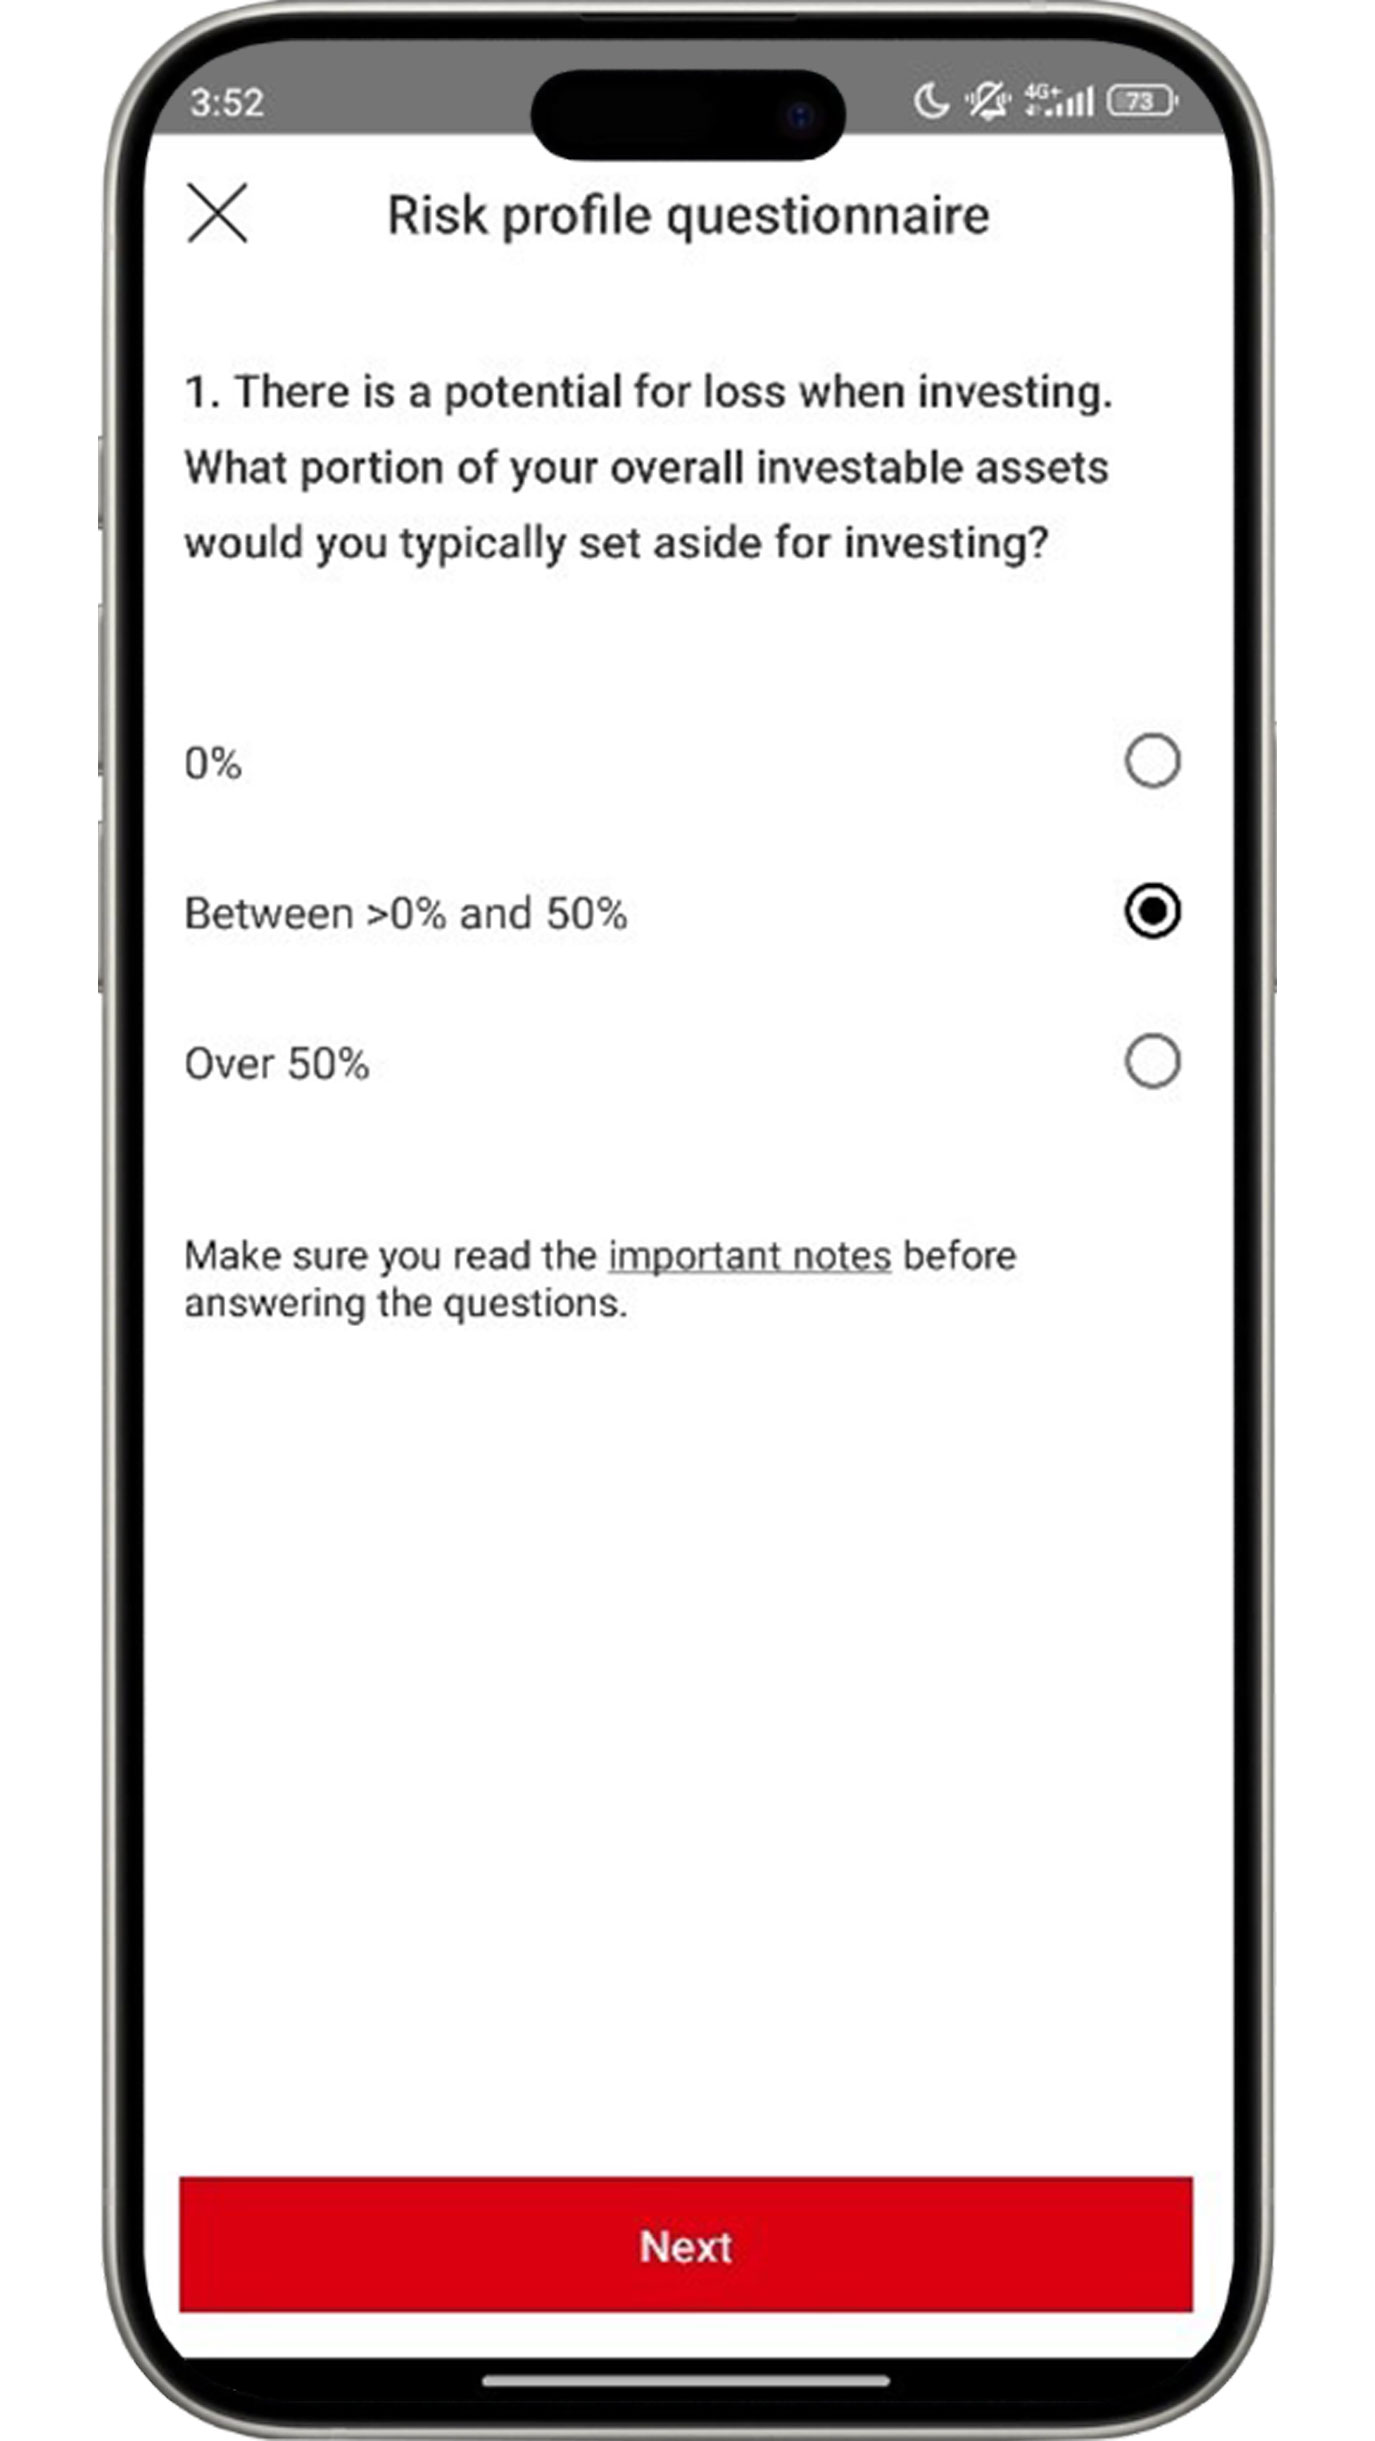
Fill in the questions based on your preferences. There are a total of six questions in the risk profile questionnaire.
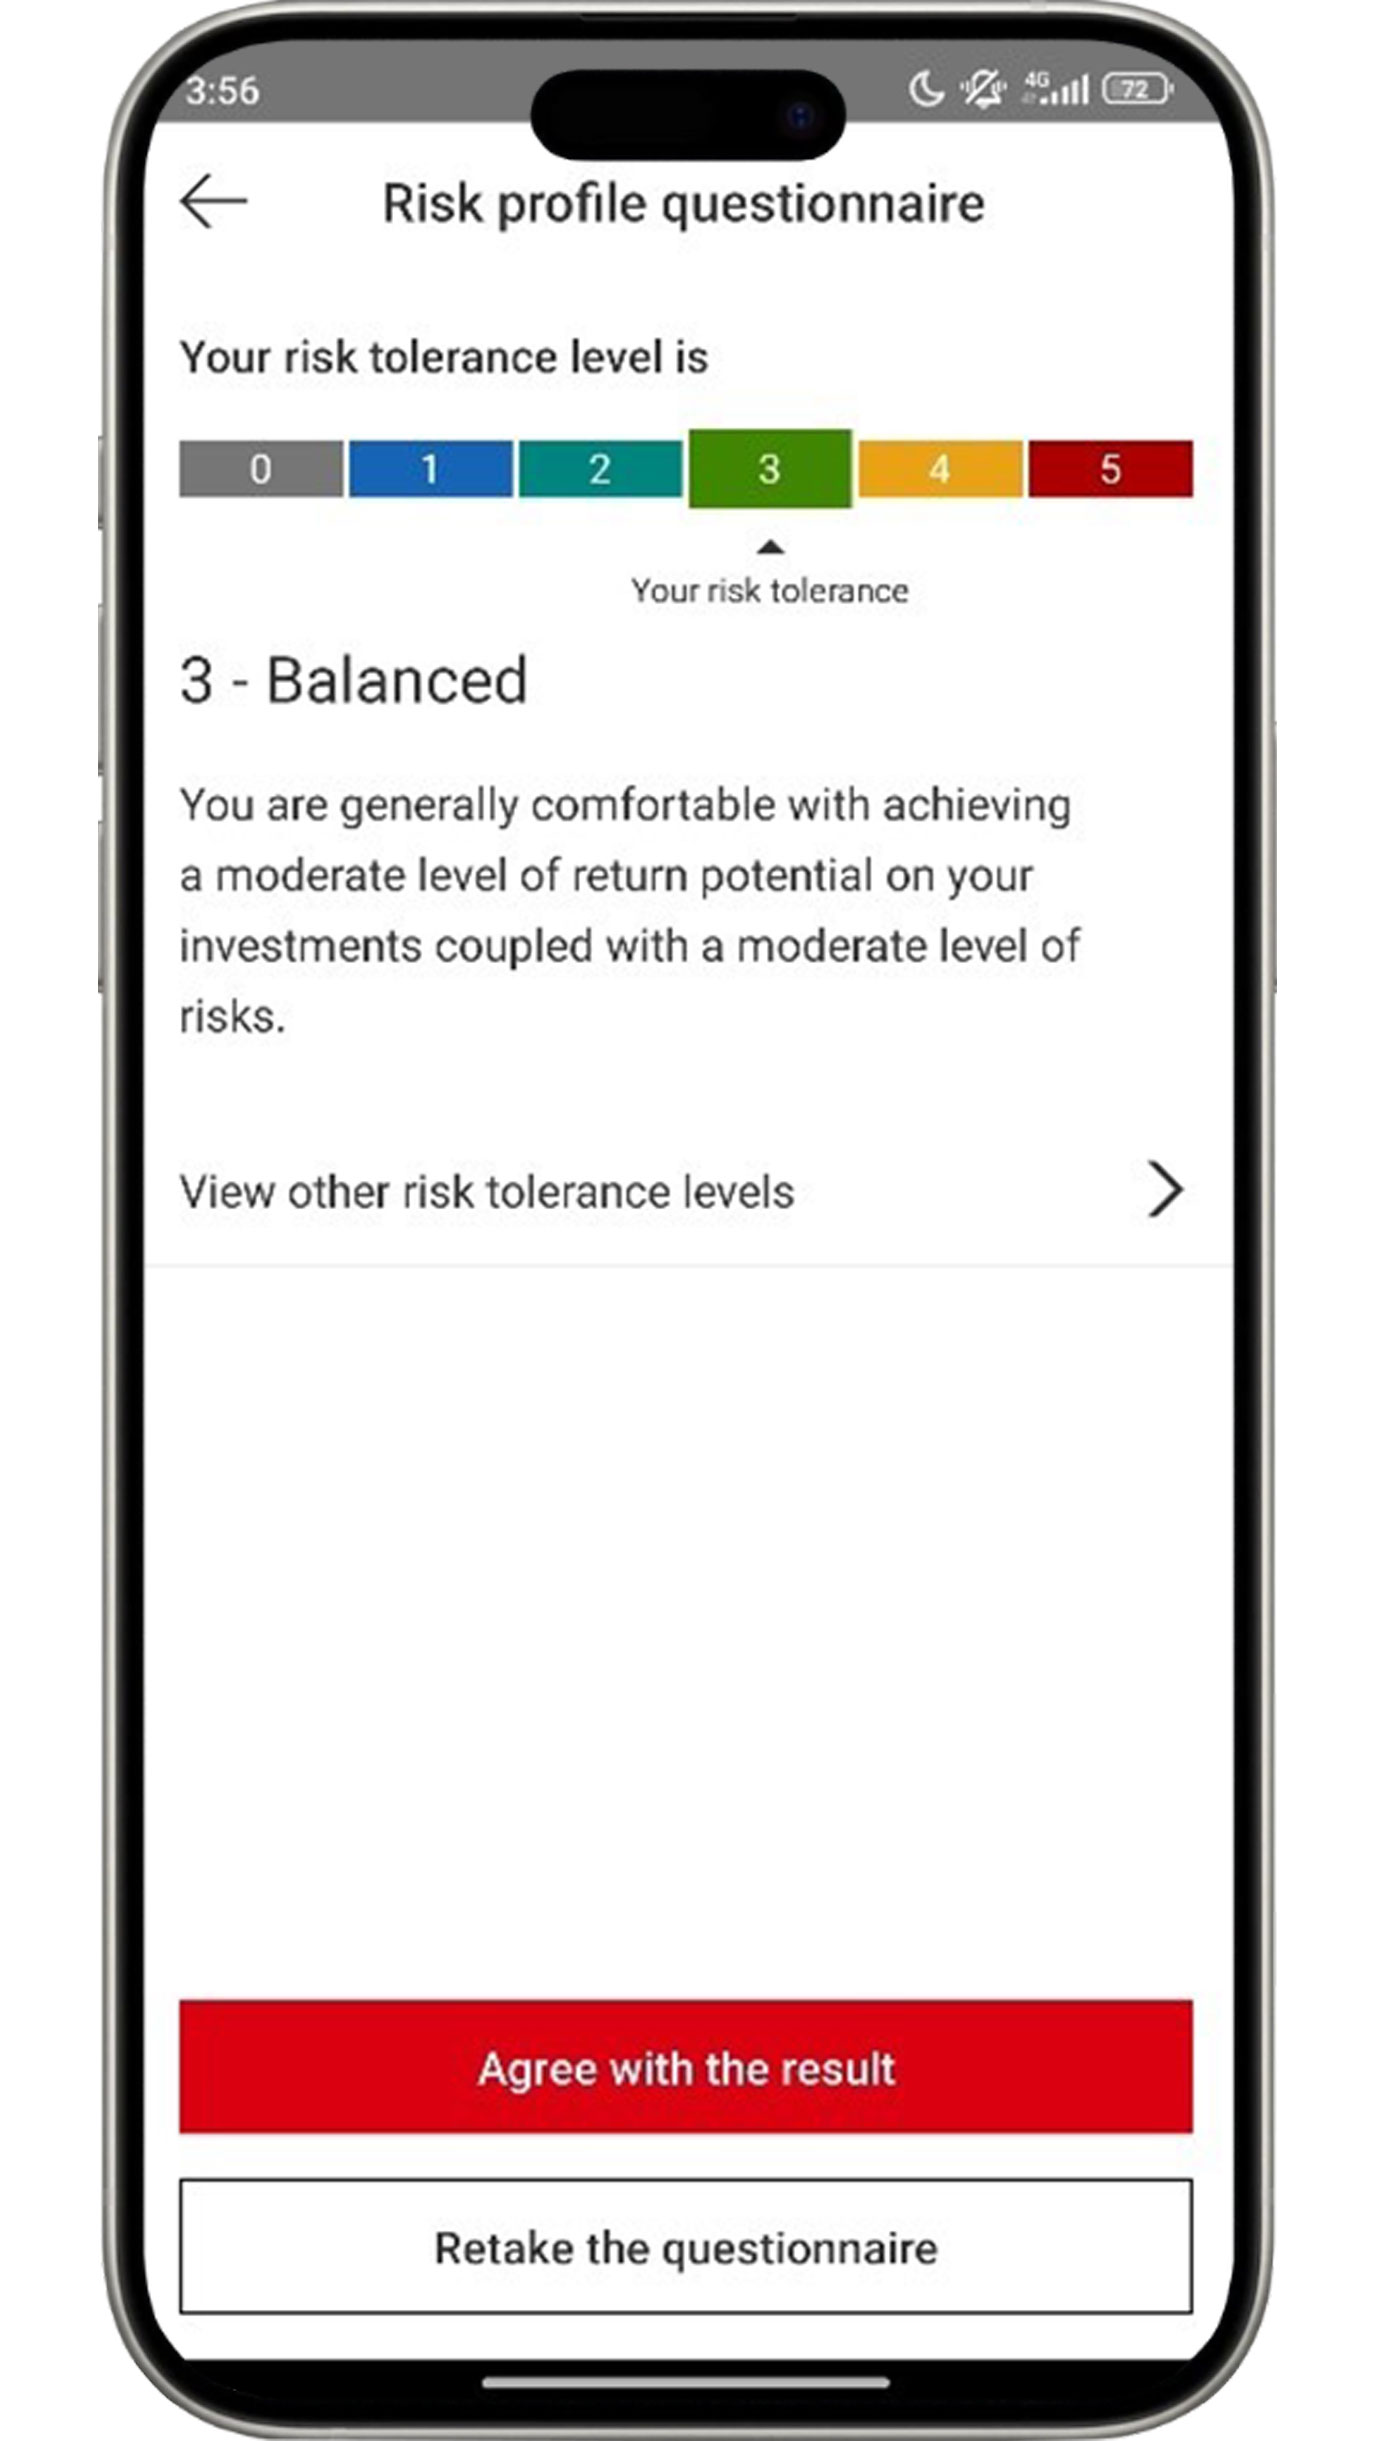
If you are satisfied with the results, click the "Agree with the result" button. If not, you may select "Retake the questionnaire" to retake the risk profile questionnaire.
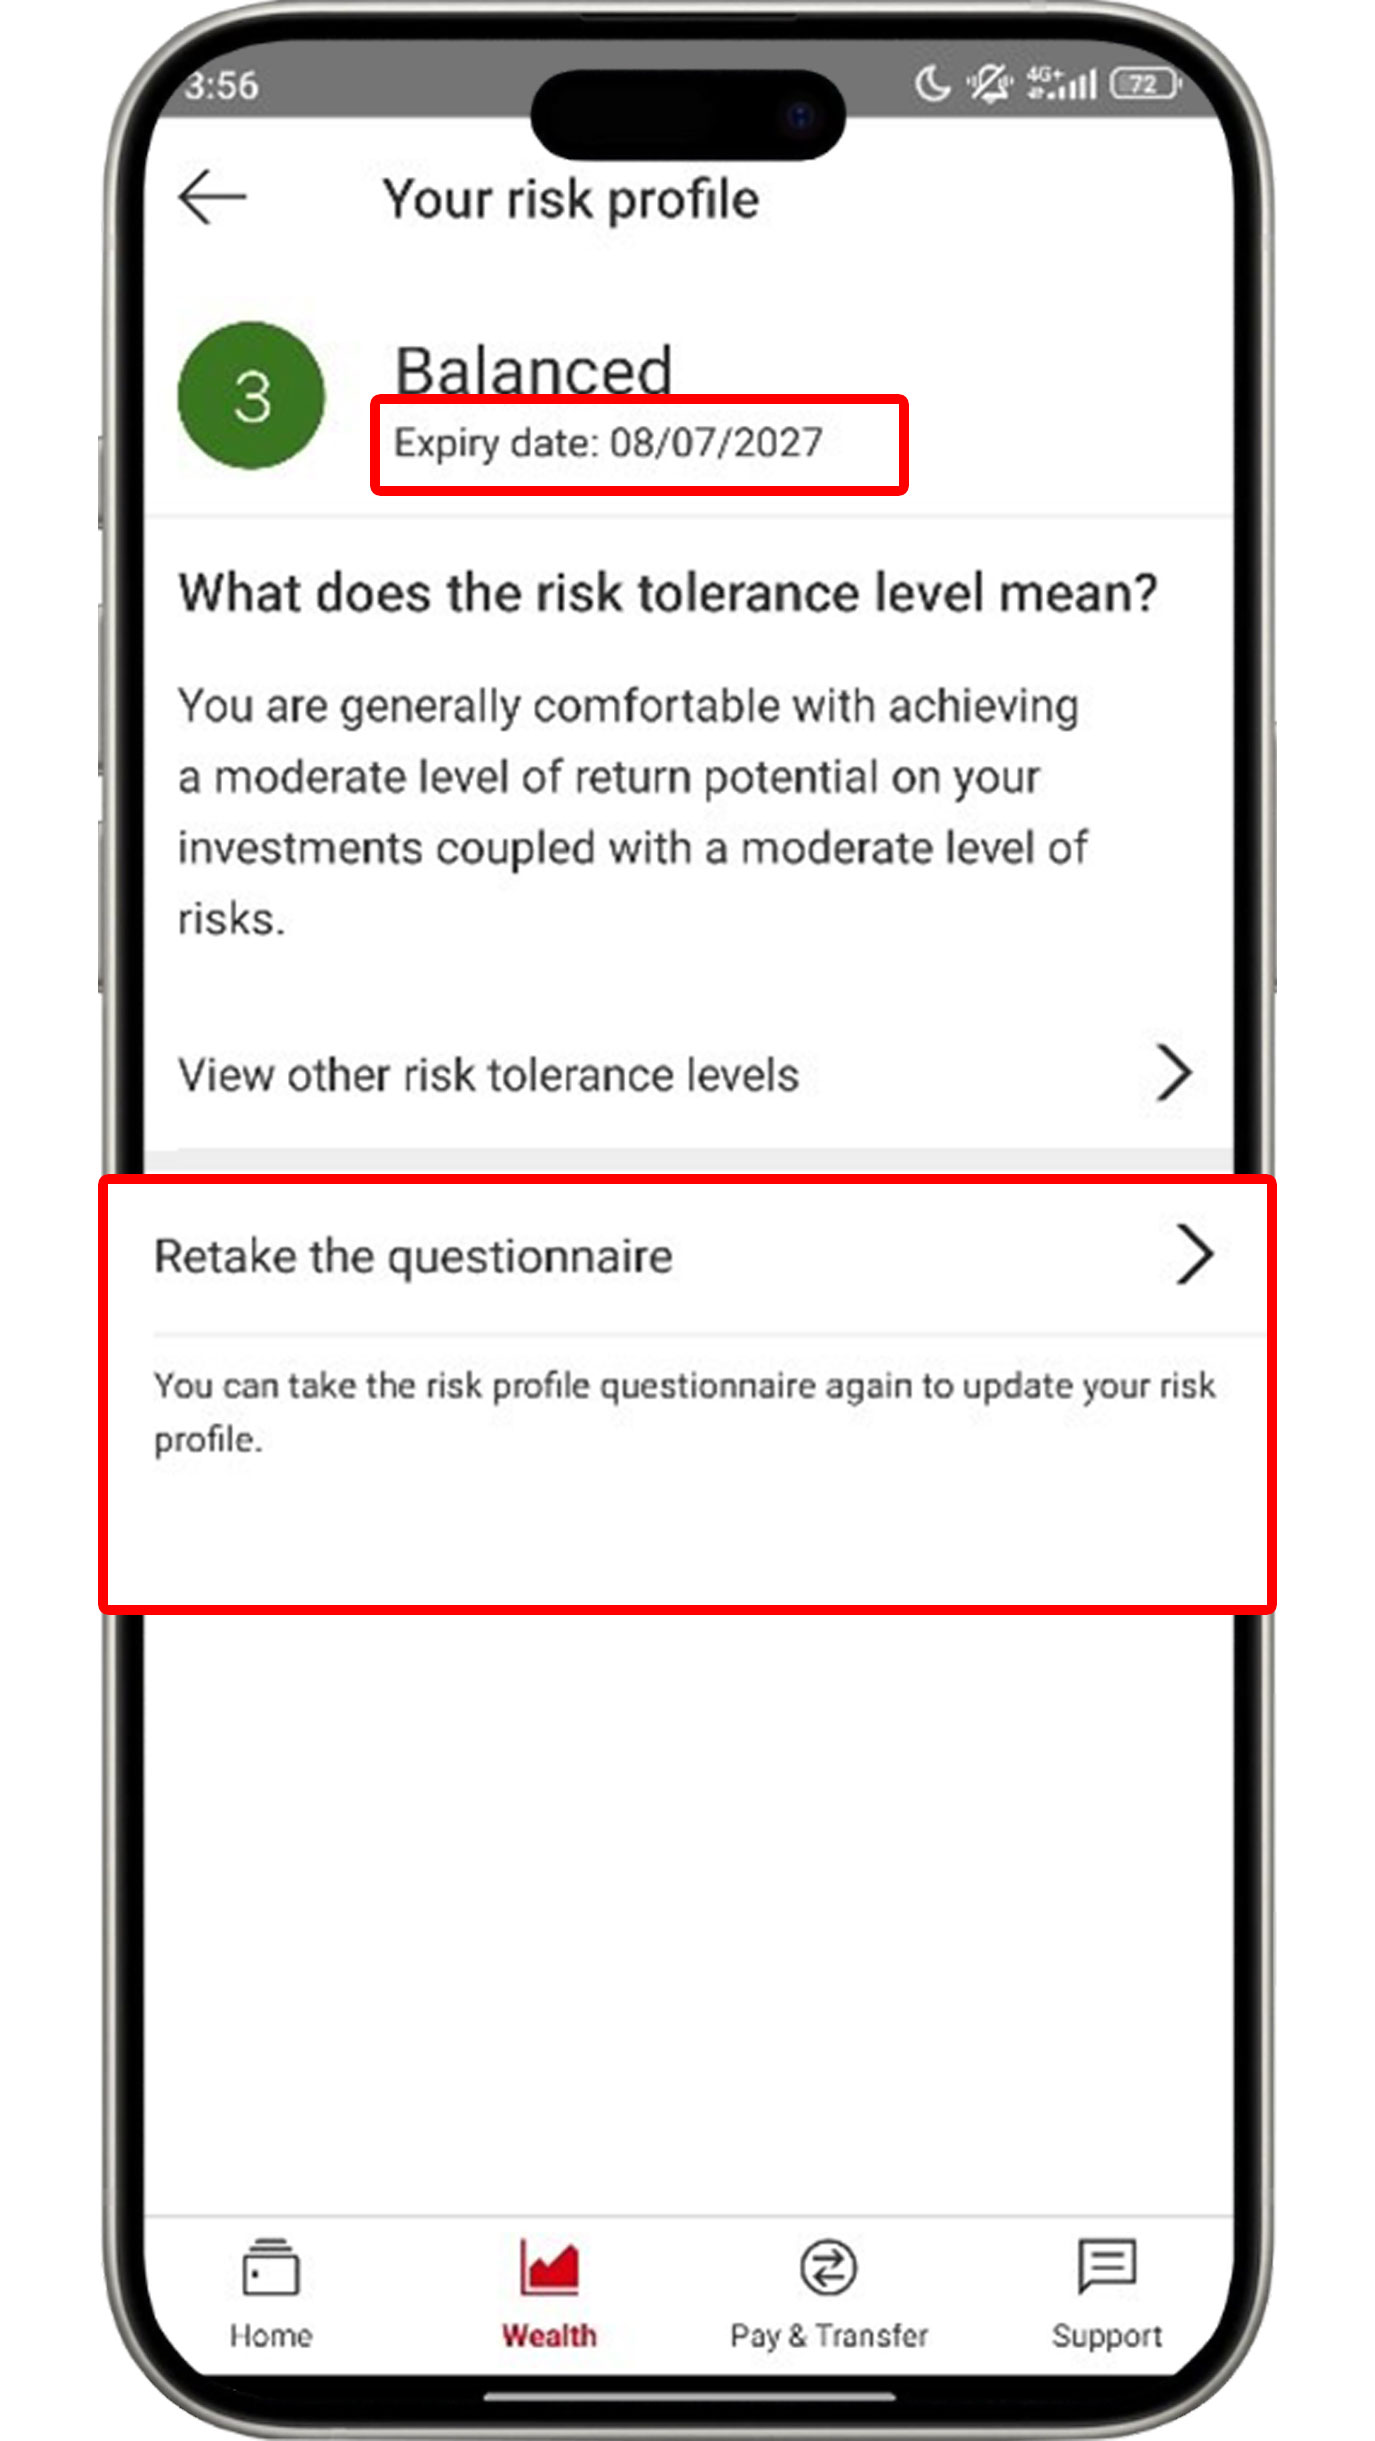
The results of your risk profile questionnaire will expire in 2
years.
If your risk profile questionnaire has expired, or is about to
expire, you can renew it by clicking "Retake the
questionnaire" to
be able to purchase investment products easily.
Purchase primary bonds (e-IPO)
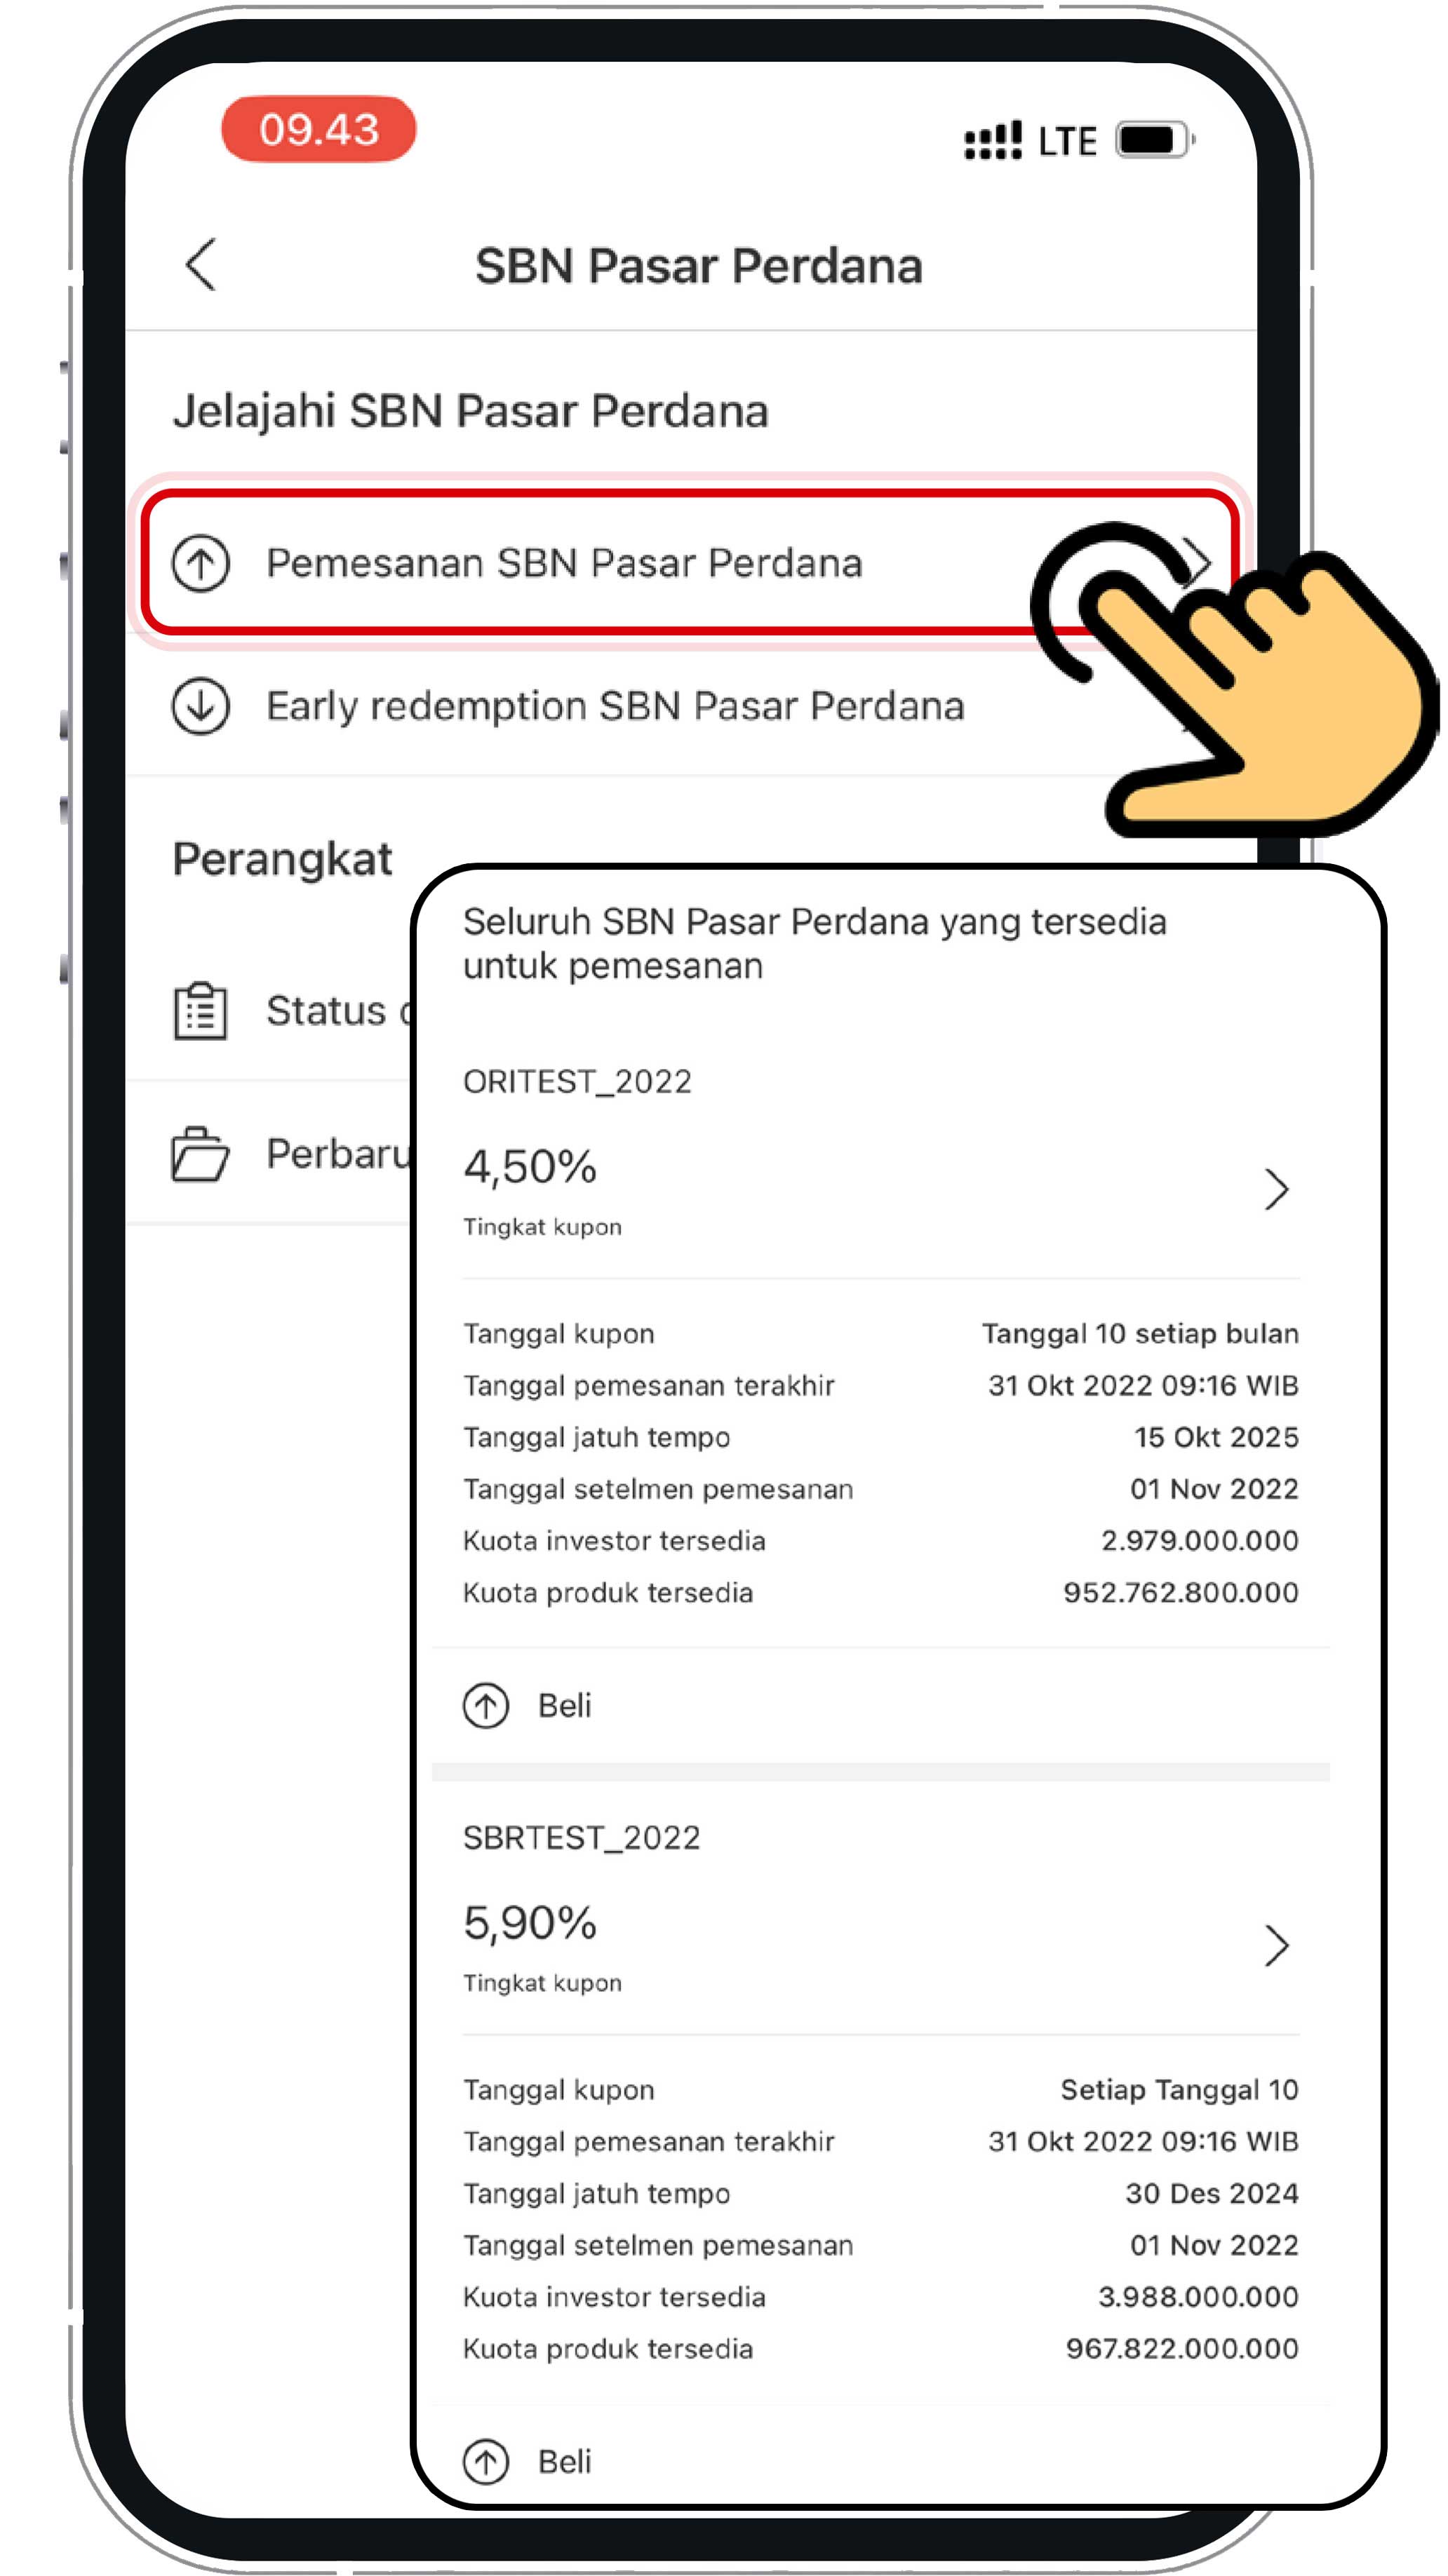
On the Wealth menu, select "IPO bonds" and click "Order IPO bonds".
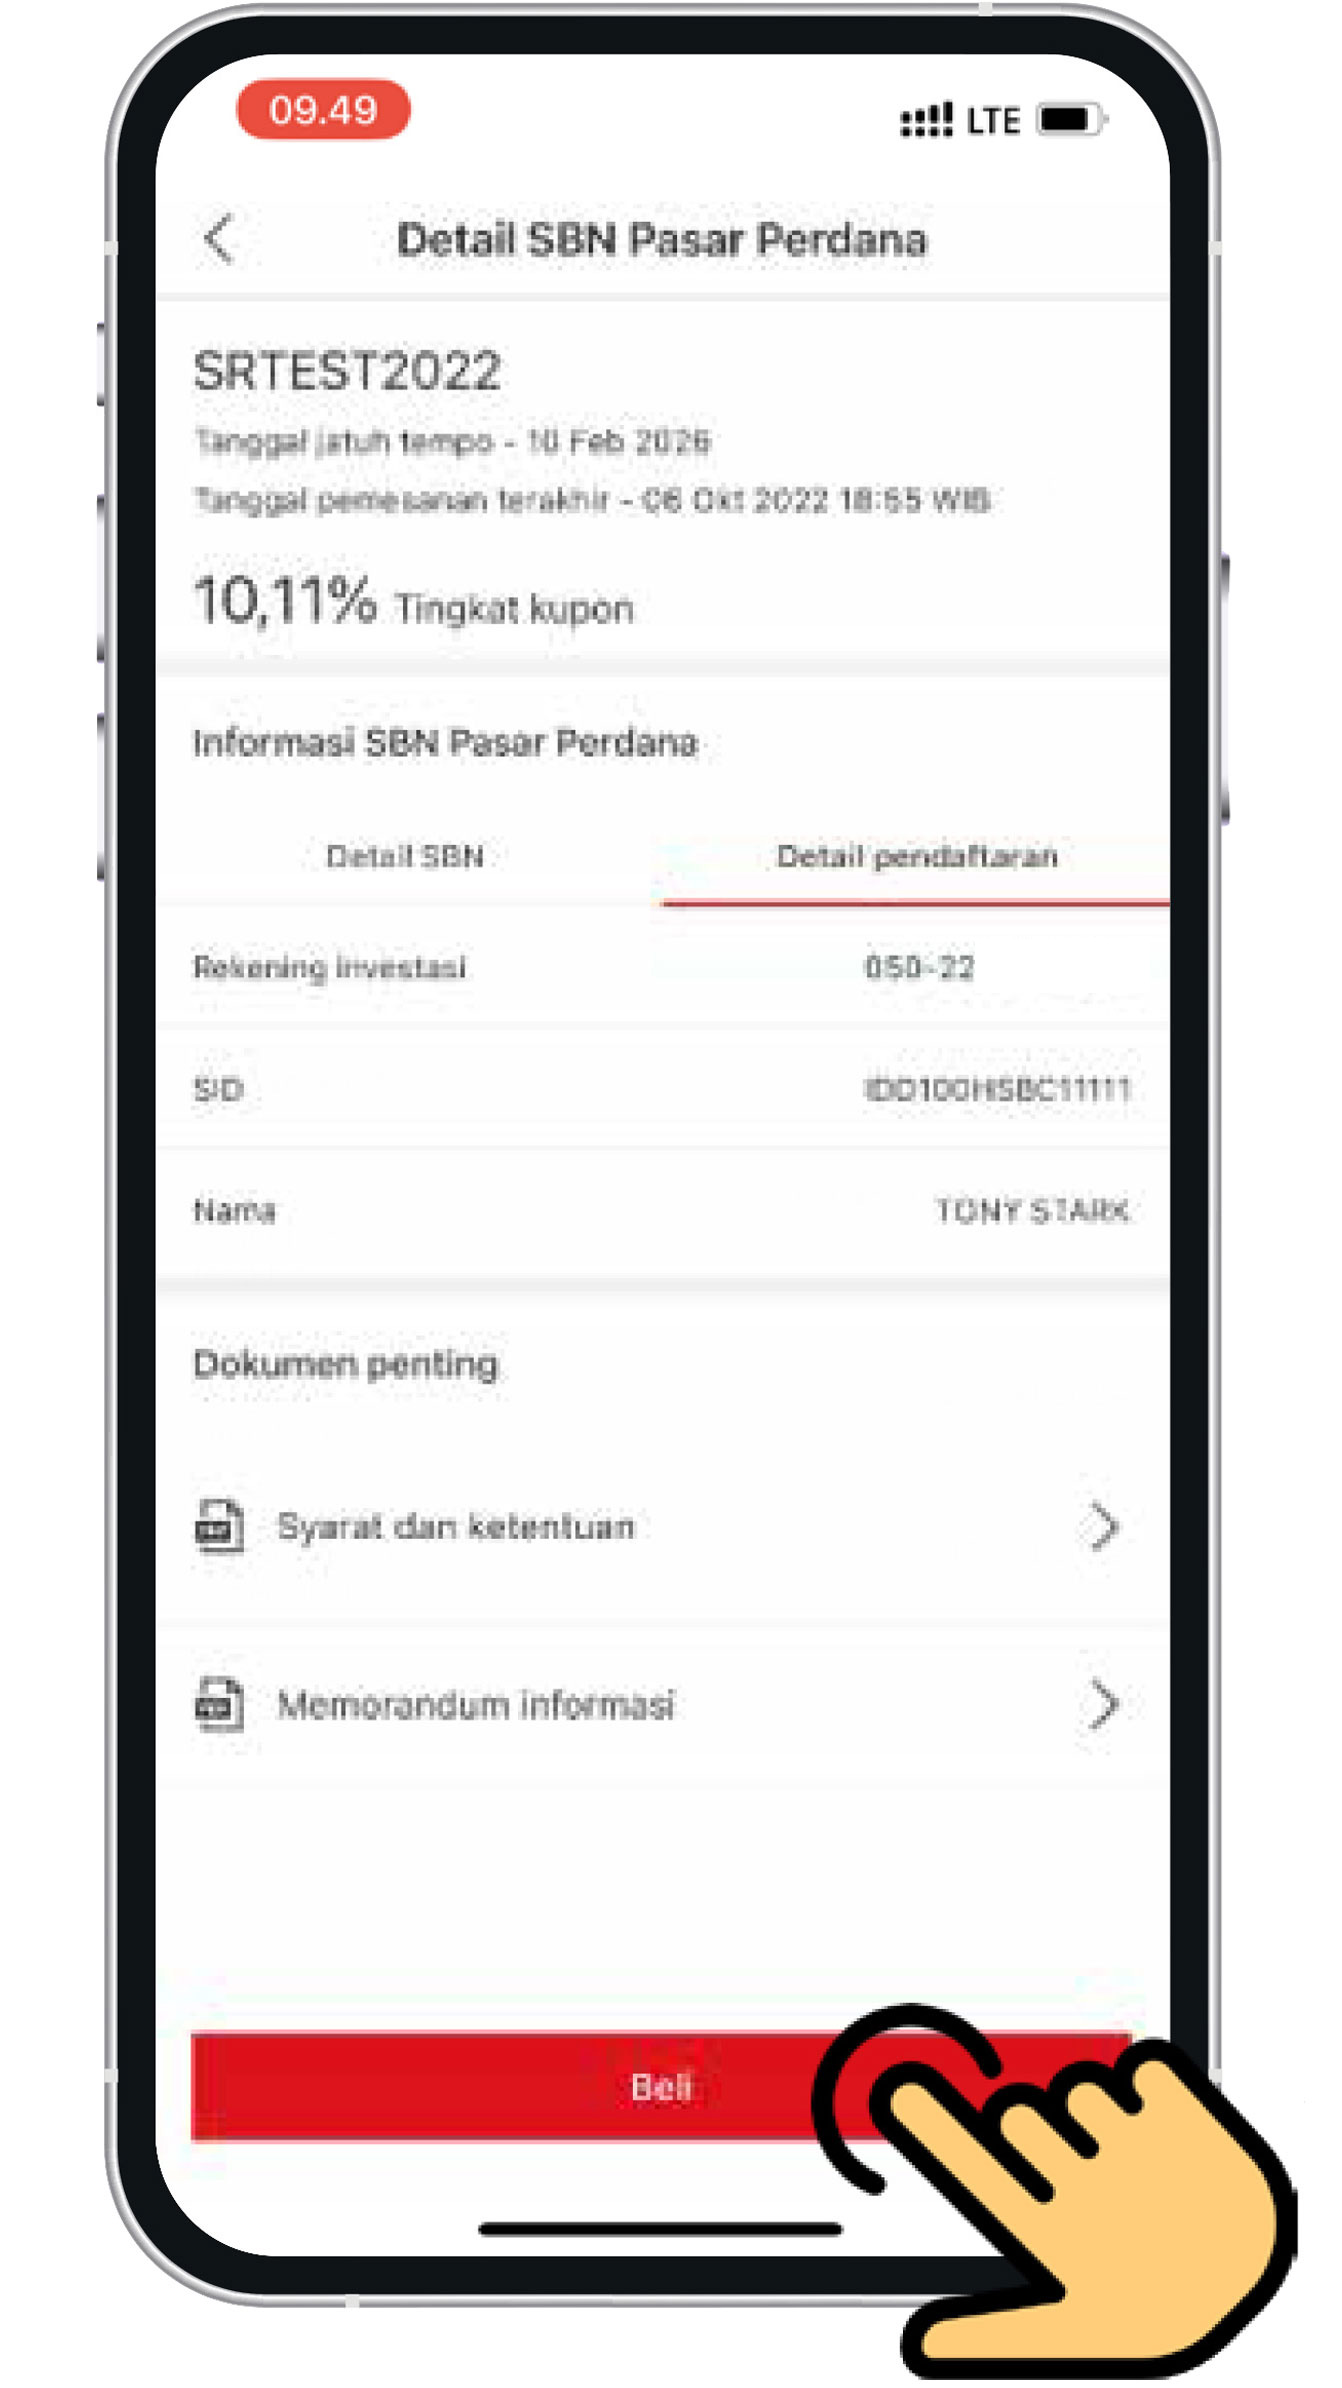
Click the IPO product that you would like to buy, then click the "Buy" button.
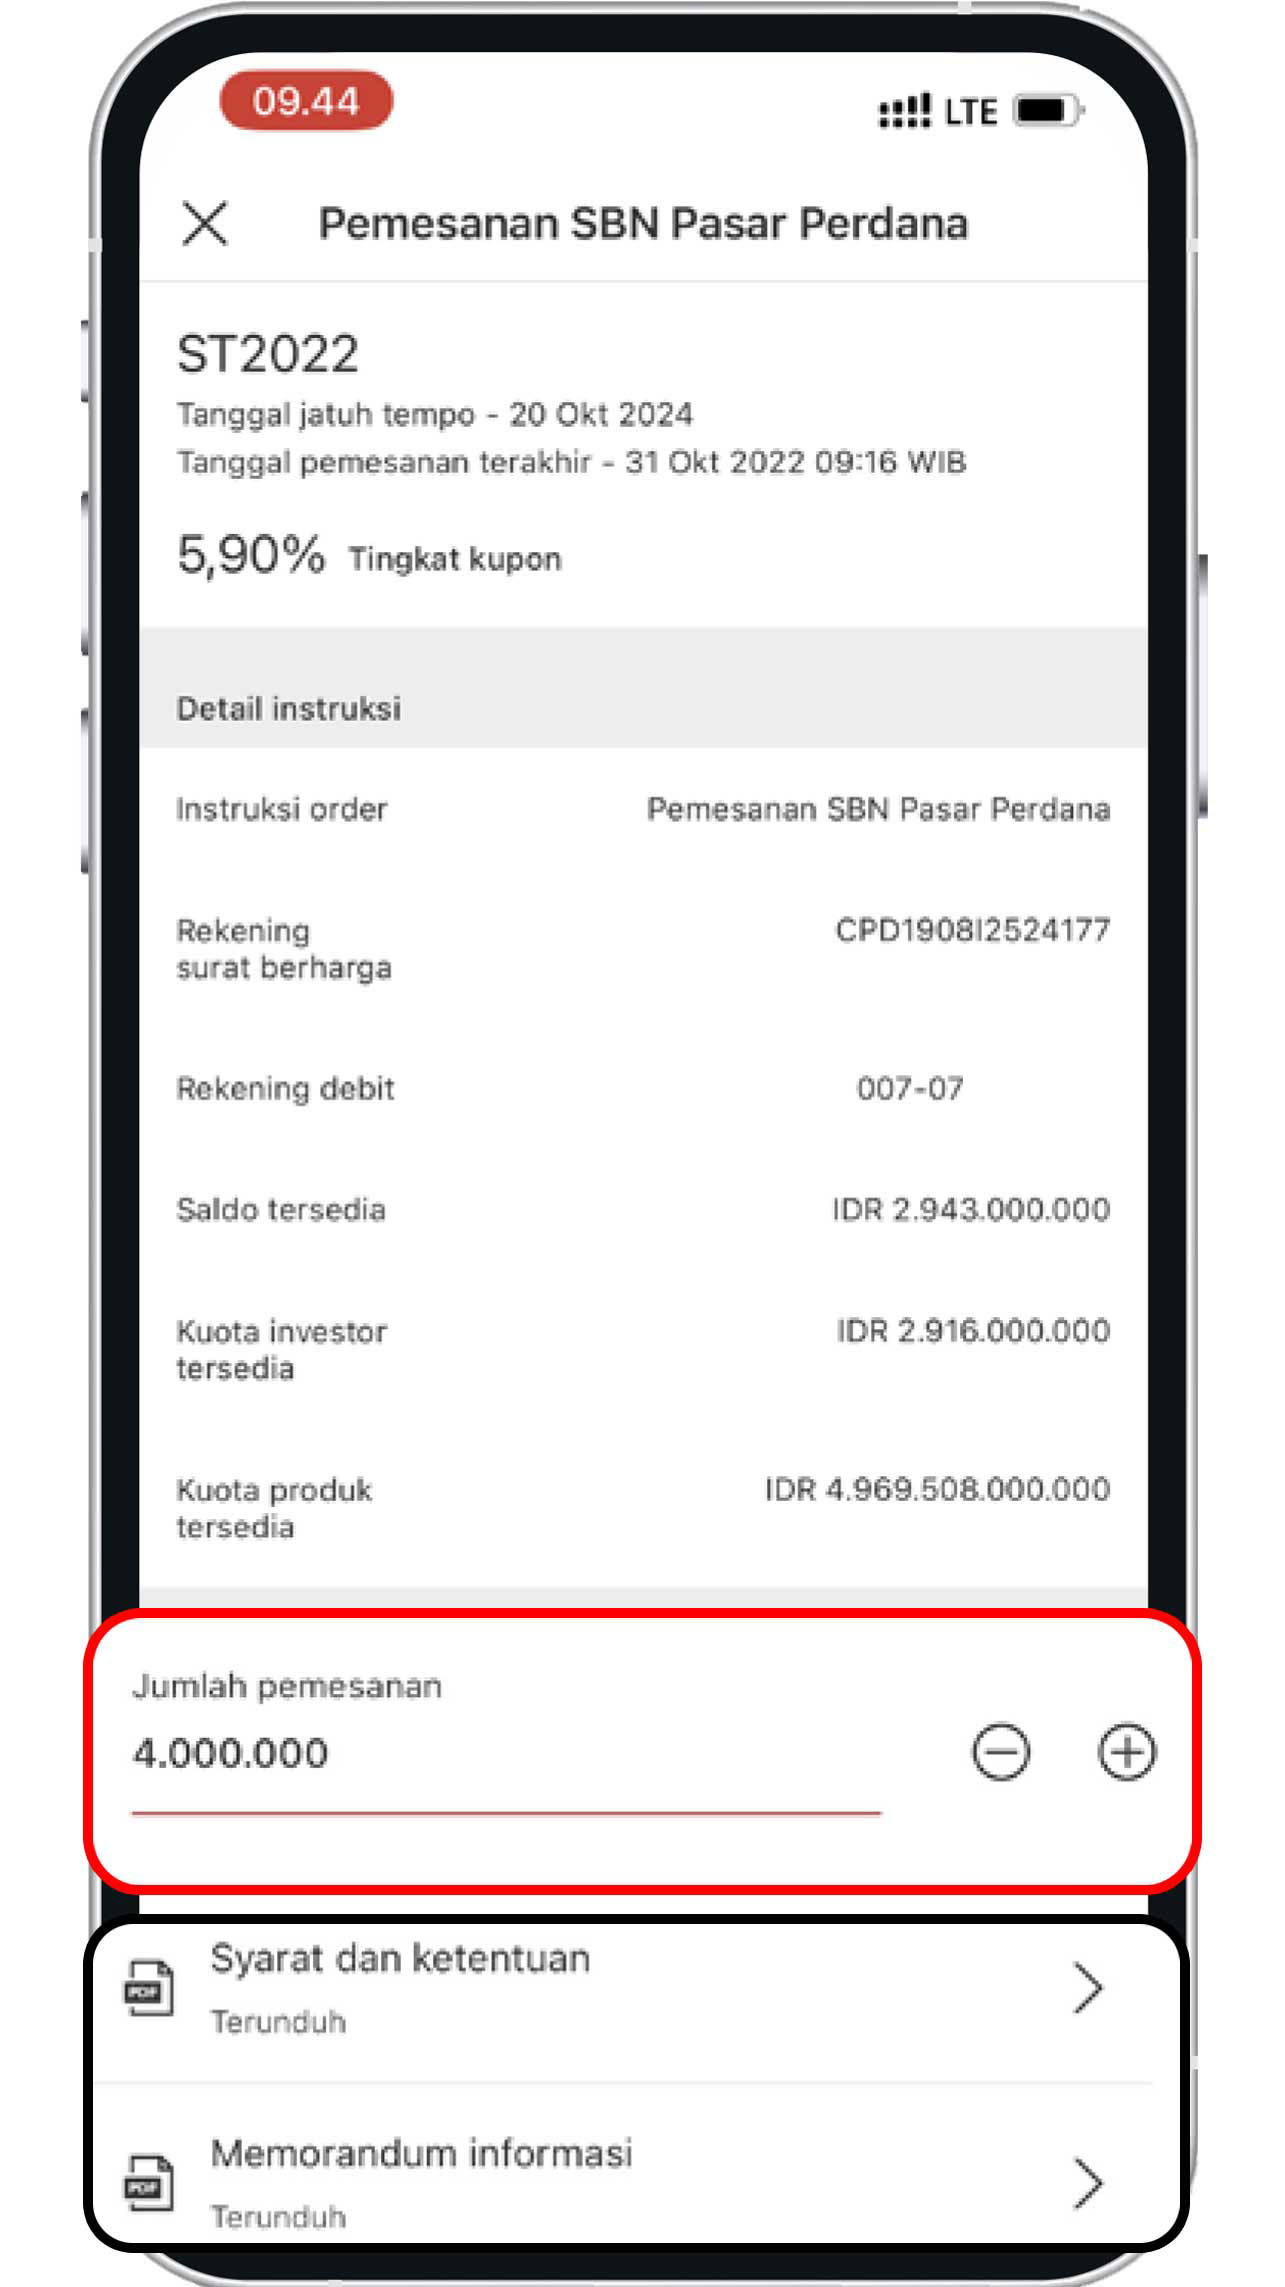
Enter the order amount based on your requirements. Download the terms and conditions as well as the information memorandum, then click the "Continue" button.
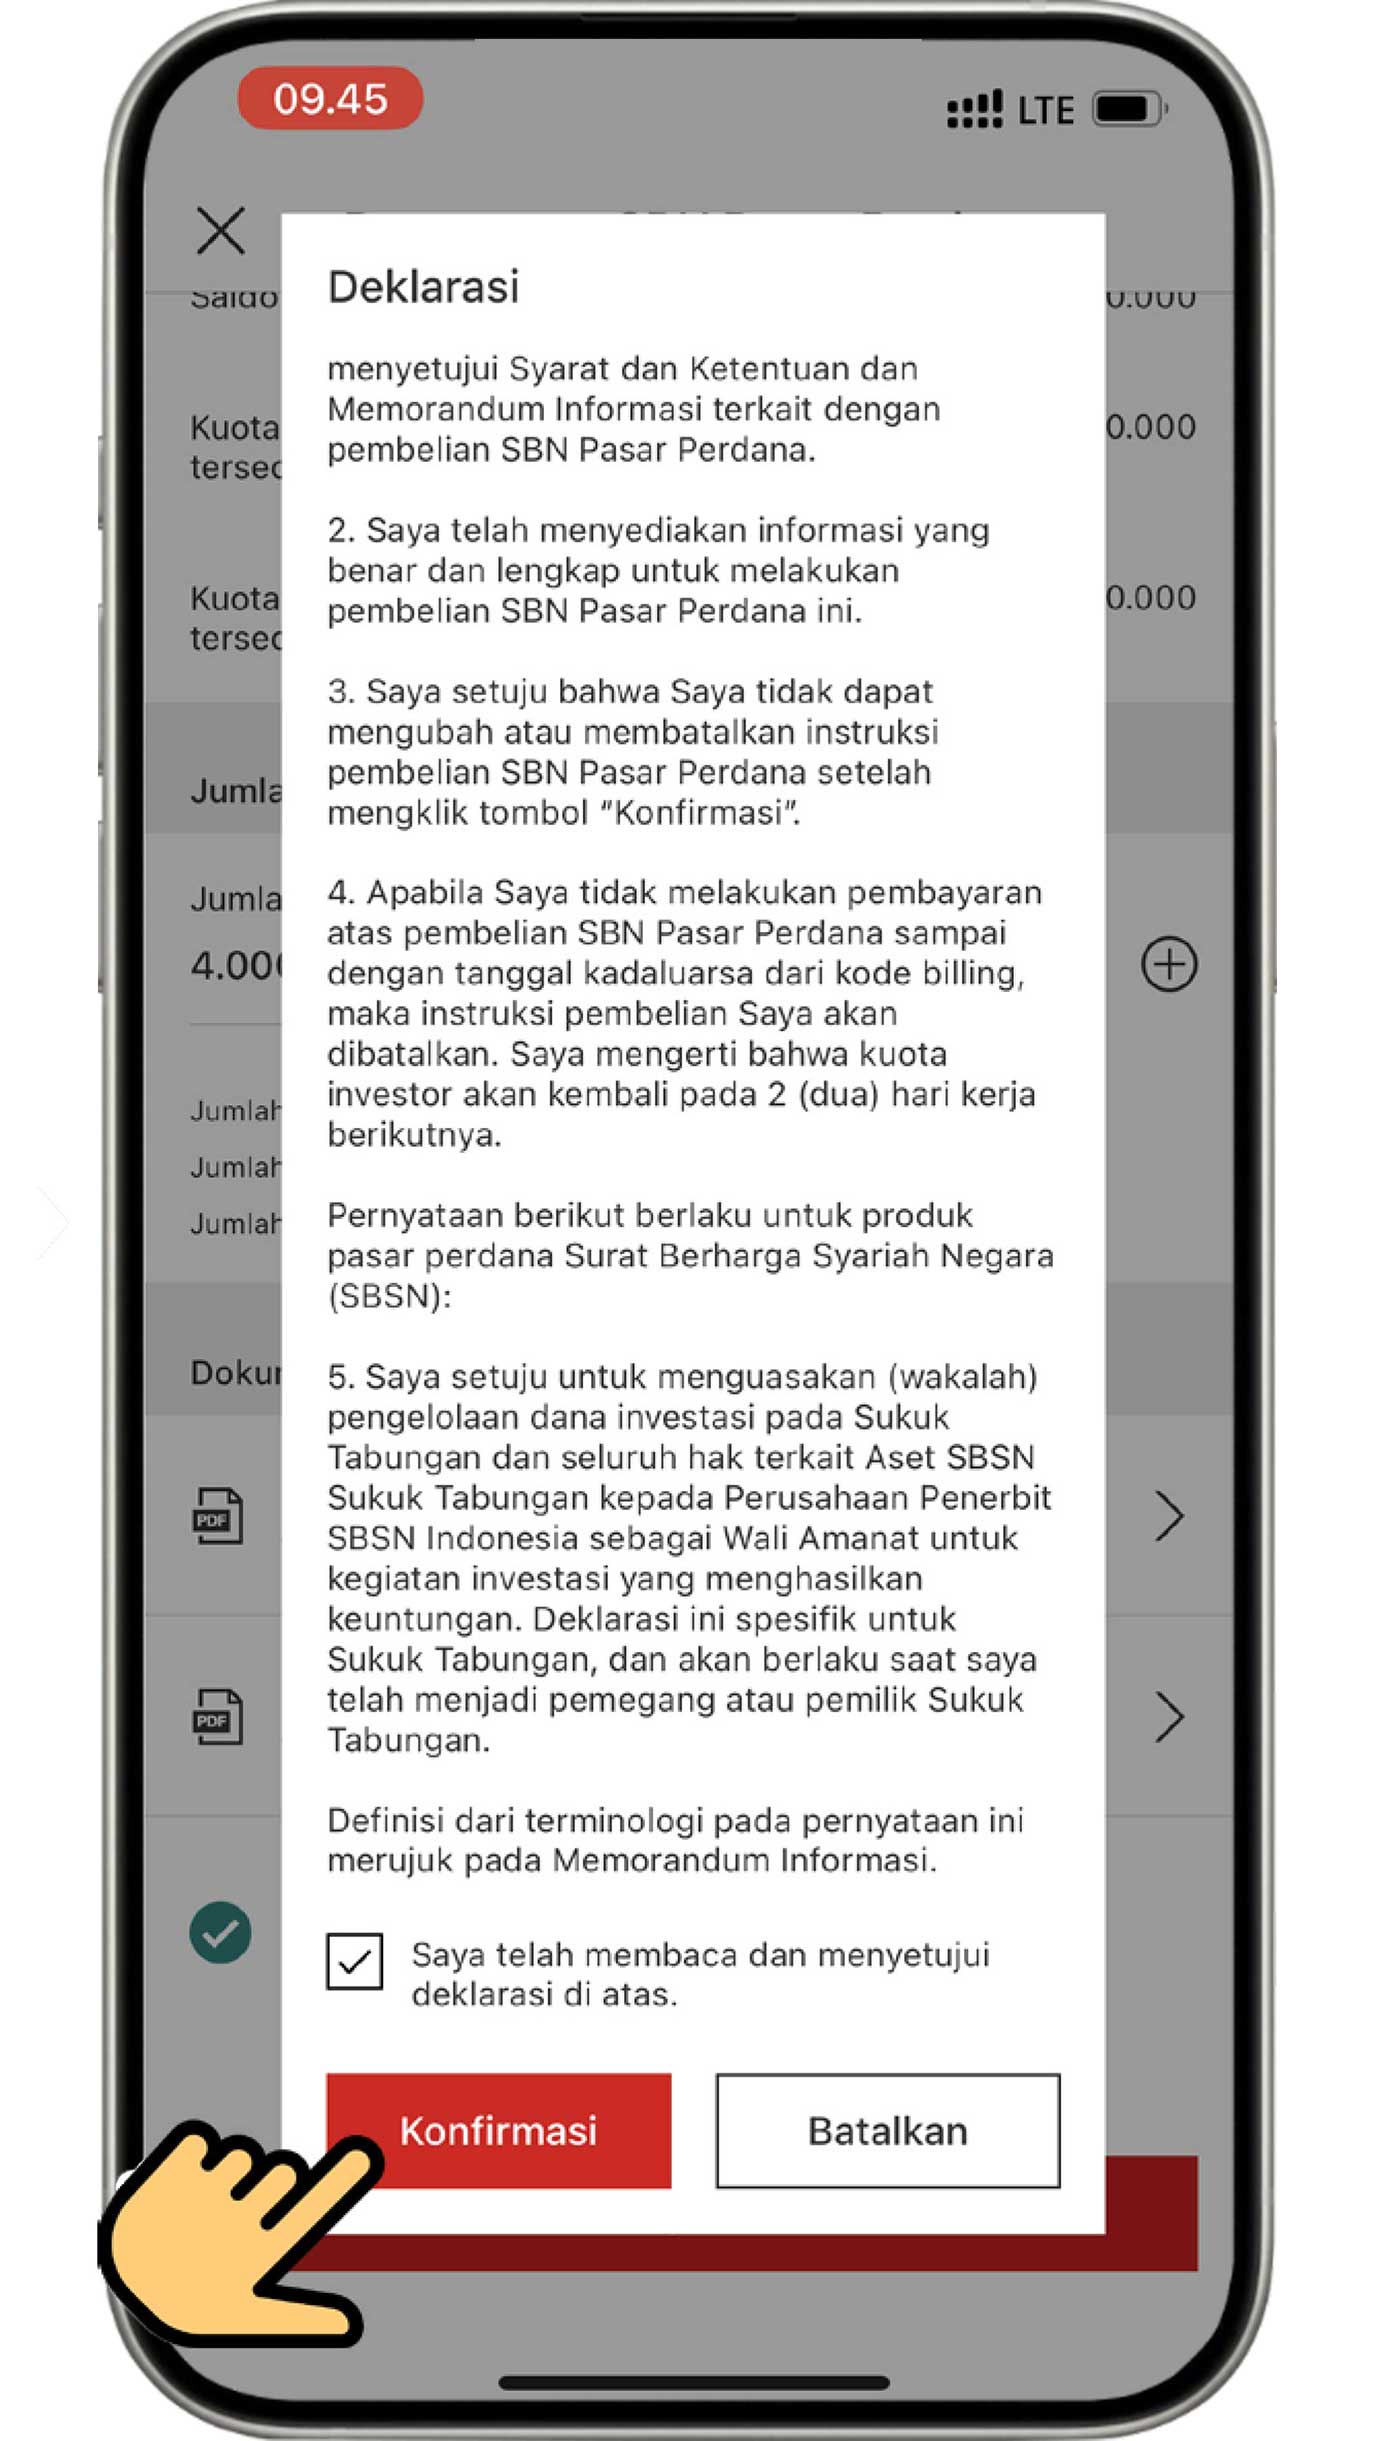
Before pressing the "Confirm" button, ensure that you have read the terms and conditions that apply on the declaration page.
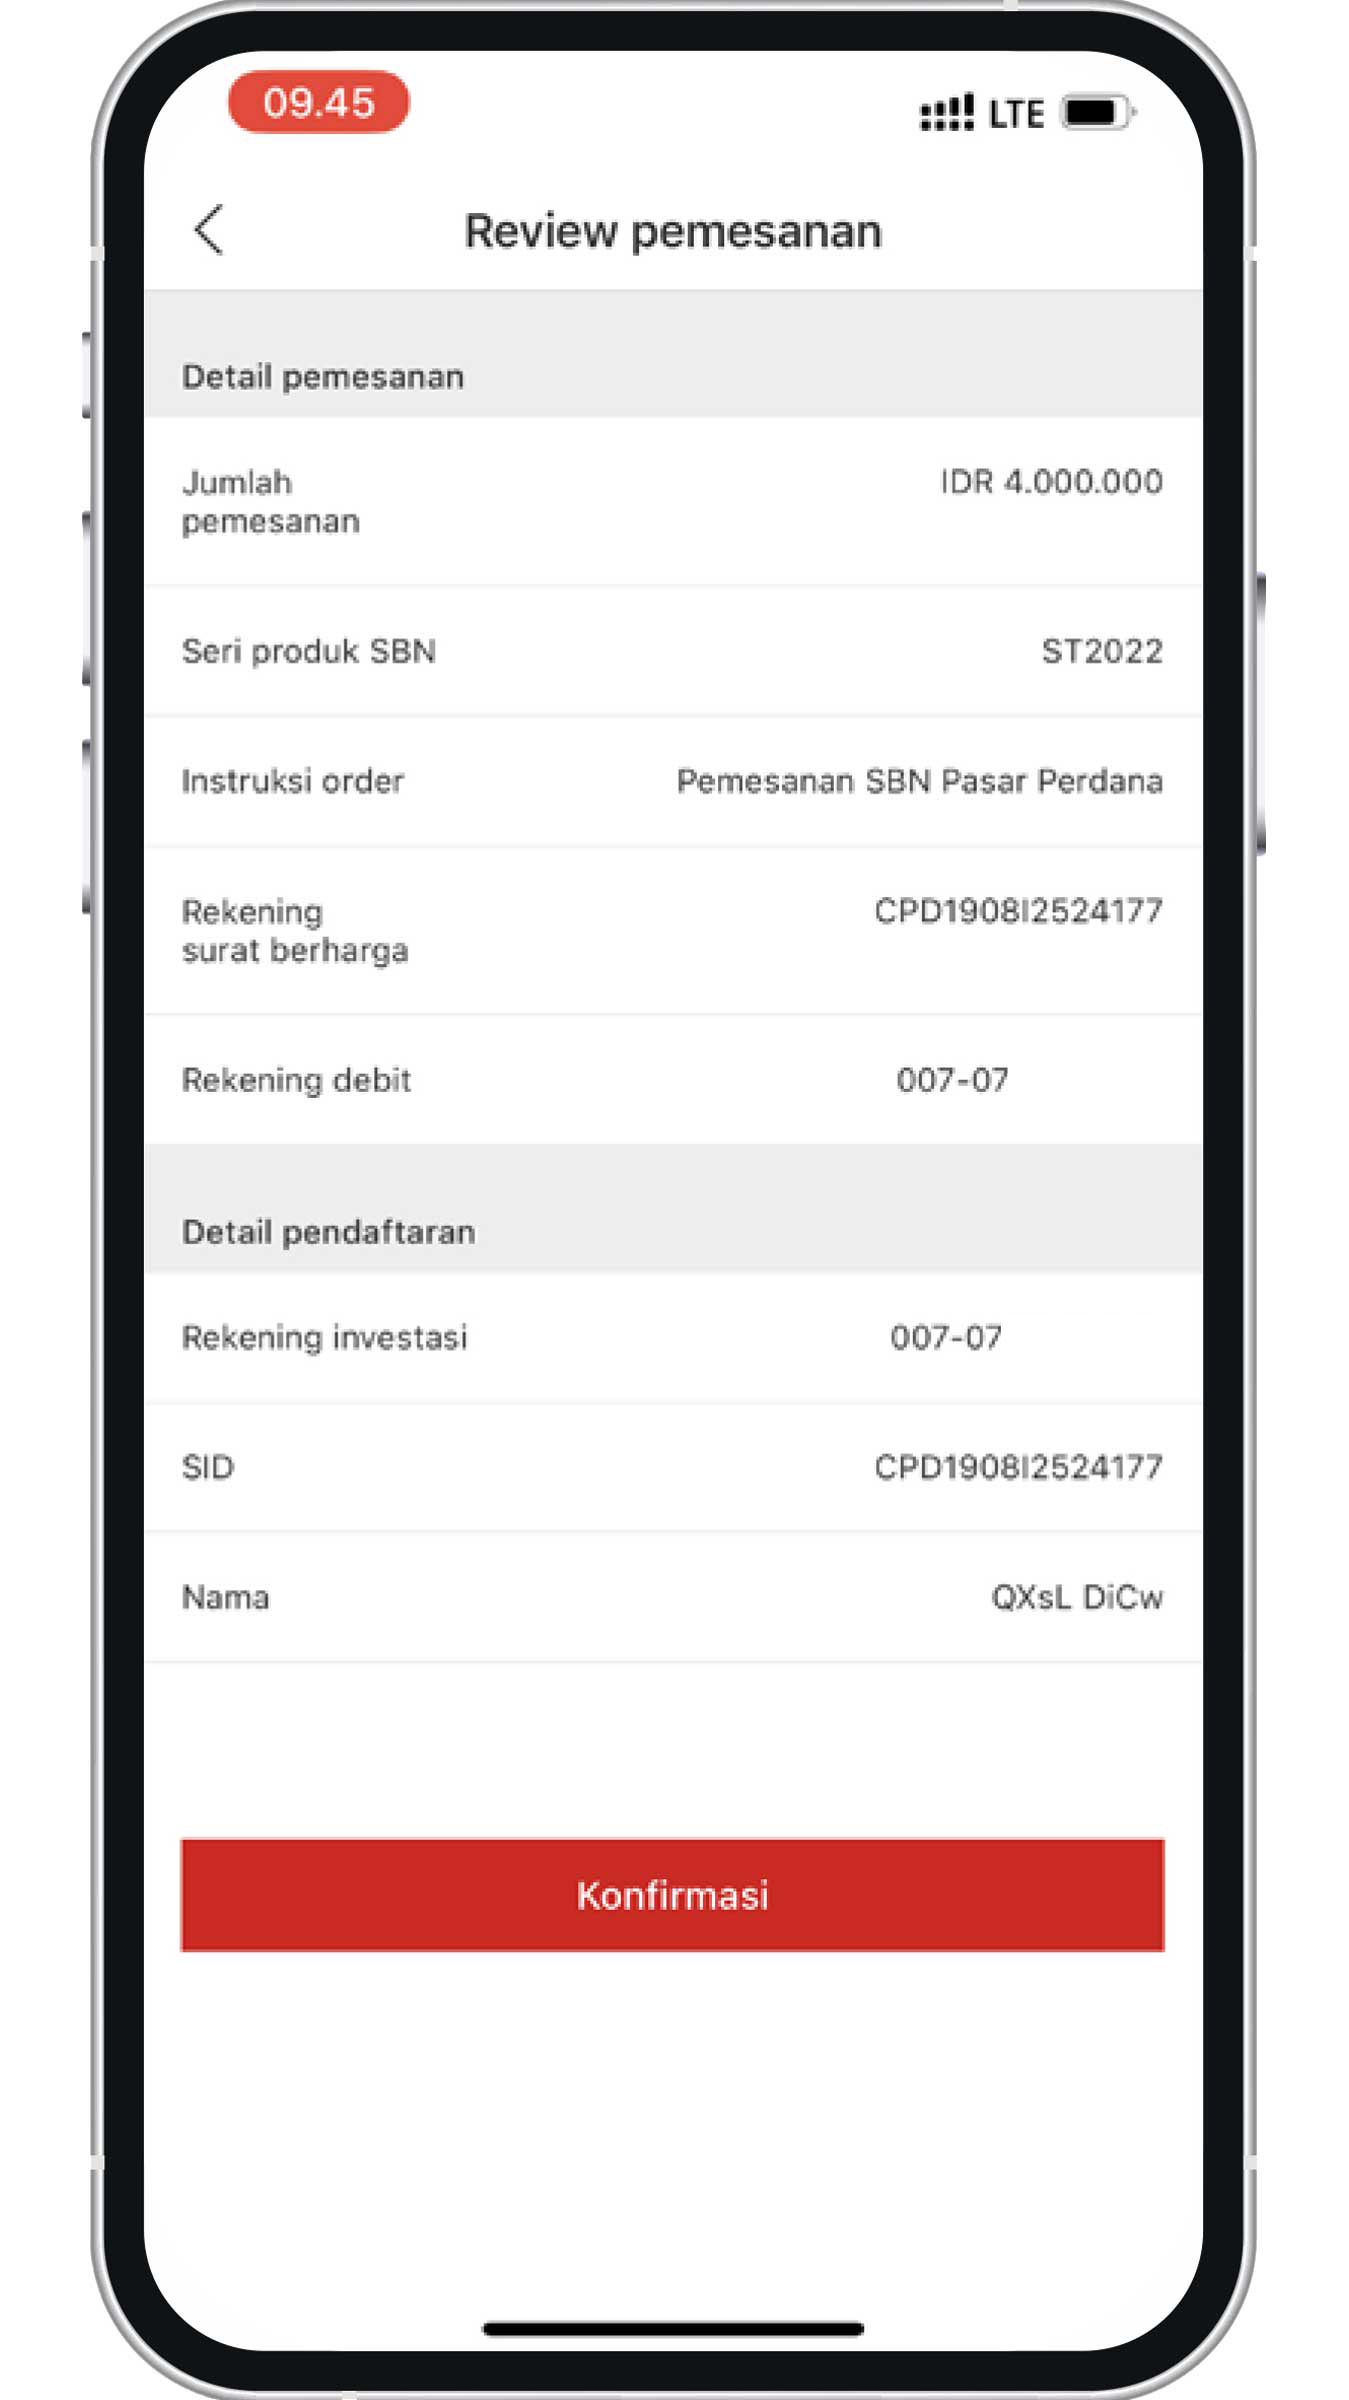
Review the information that you have input for your purchase. If all the information is accurate, click the "Confirm" and "Continue to payment" button.

Review your payment information. If all the information is accurate, click the "Confirm" button to complete the IPO bonds purchase process.
More about primary market bonds (e-IPO)
Purchase secondary bonds
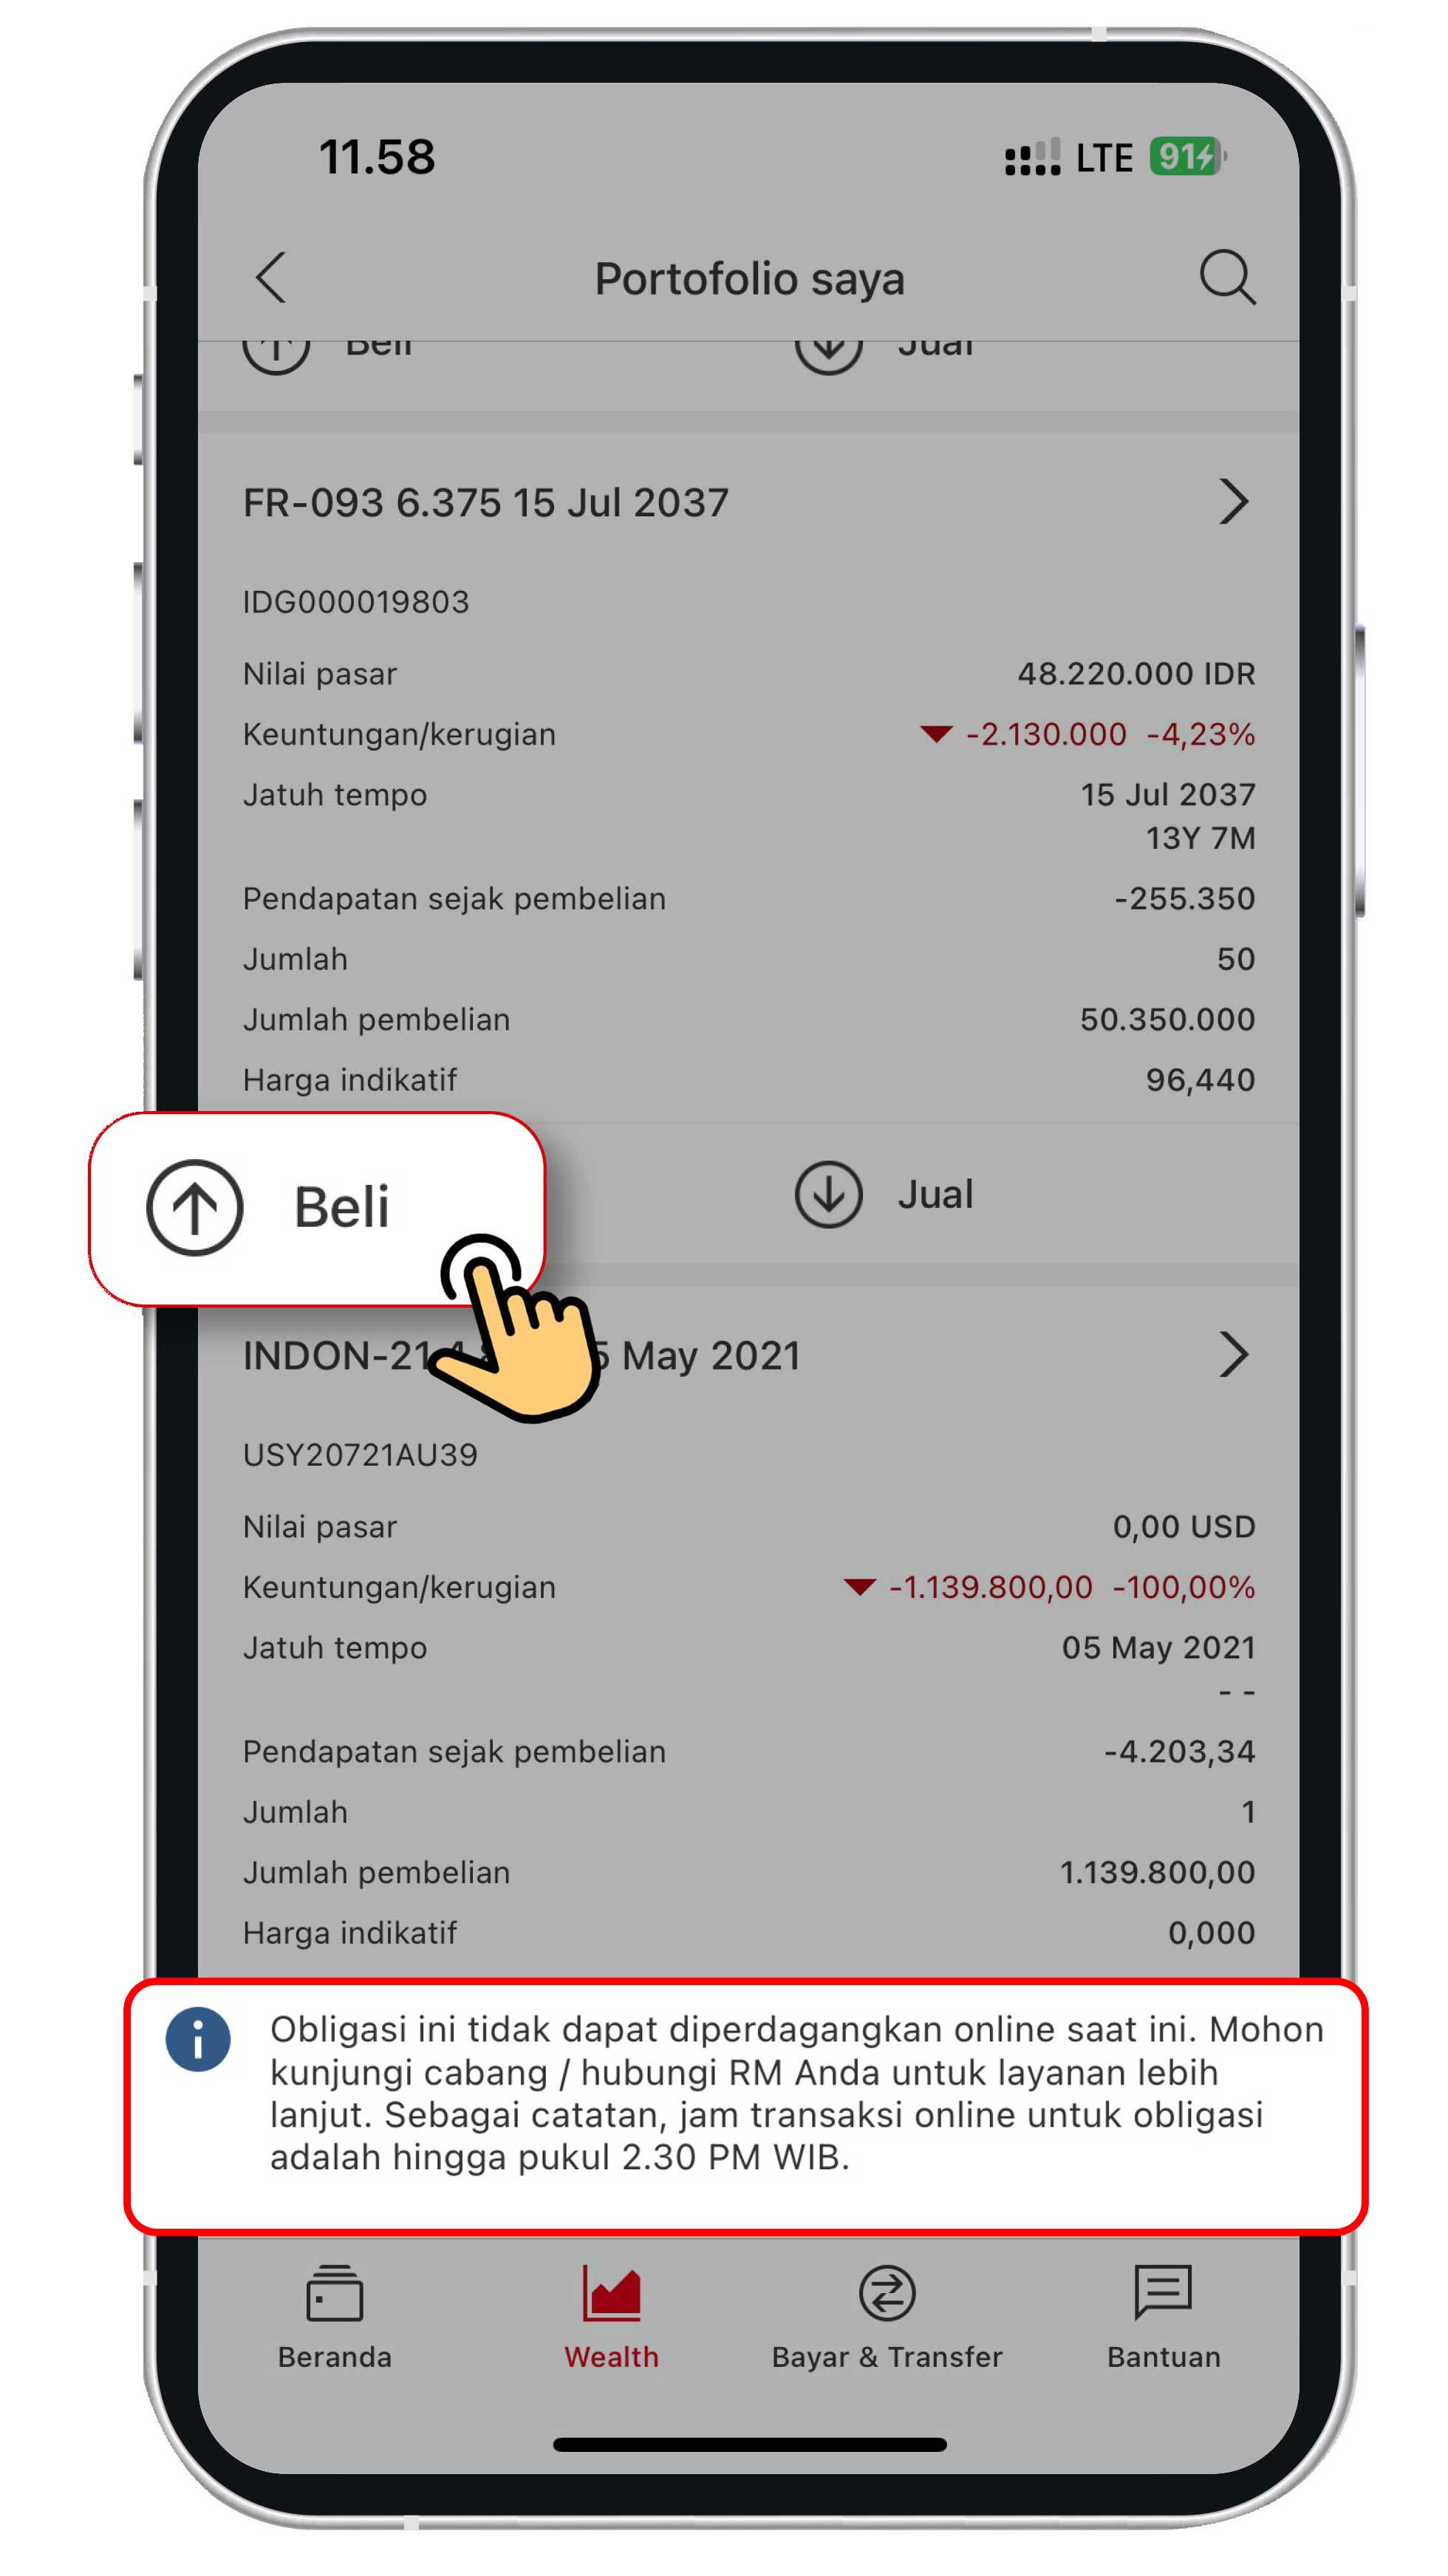
On the Wealth menu, select "Secondary bonds" and click "View all bonds" to see the available products.

Select the product that you would like to purchase. Please note that secondary market bonds can only be traded during investment market hours.
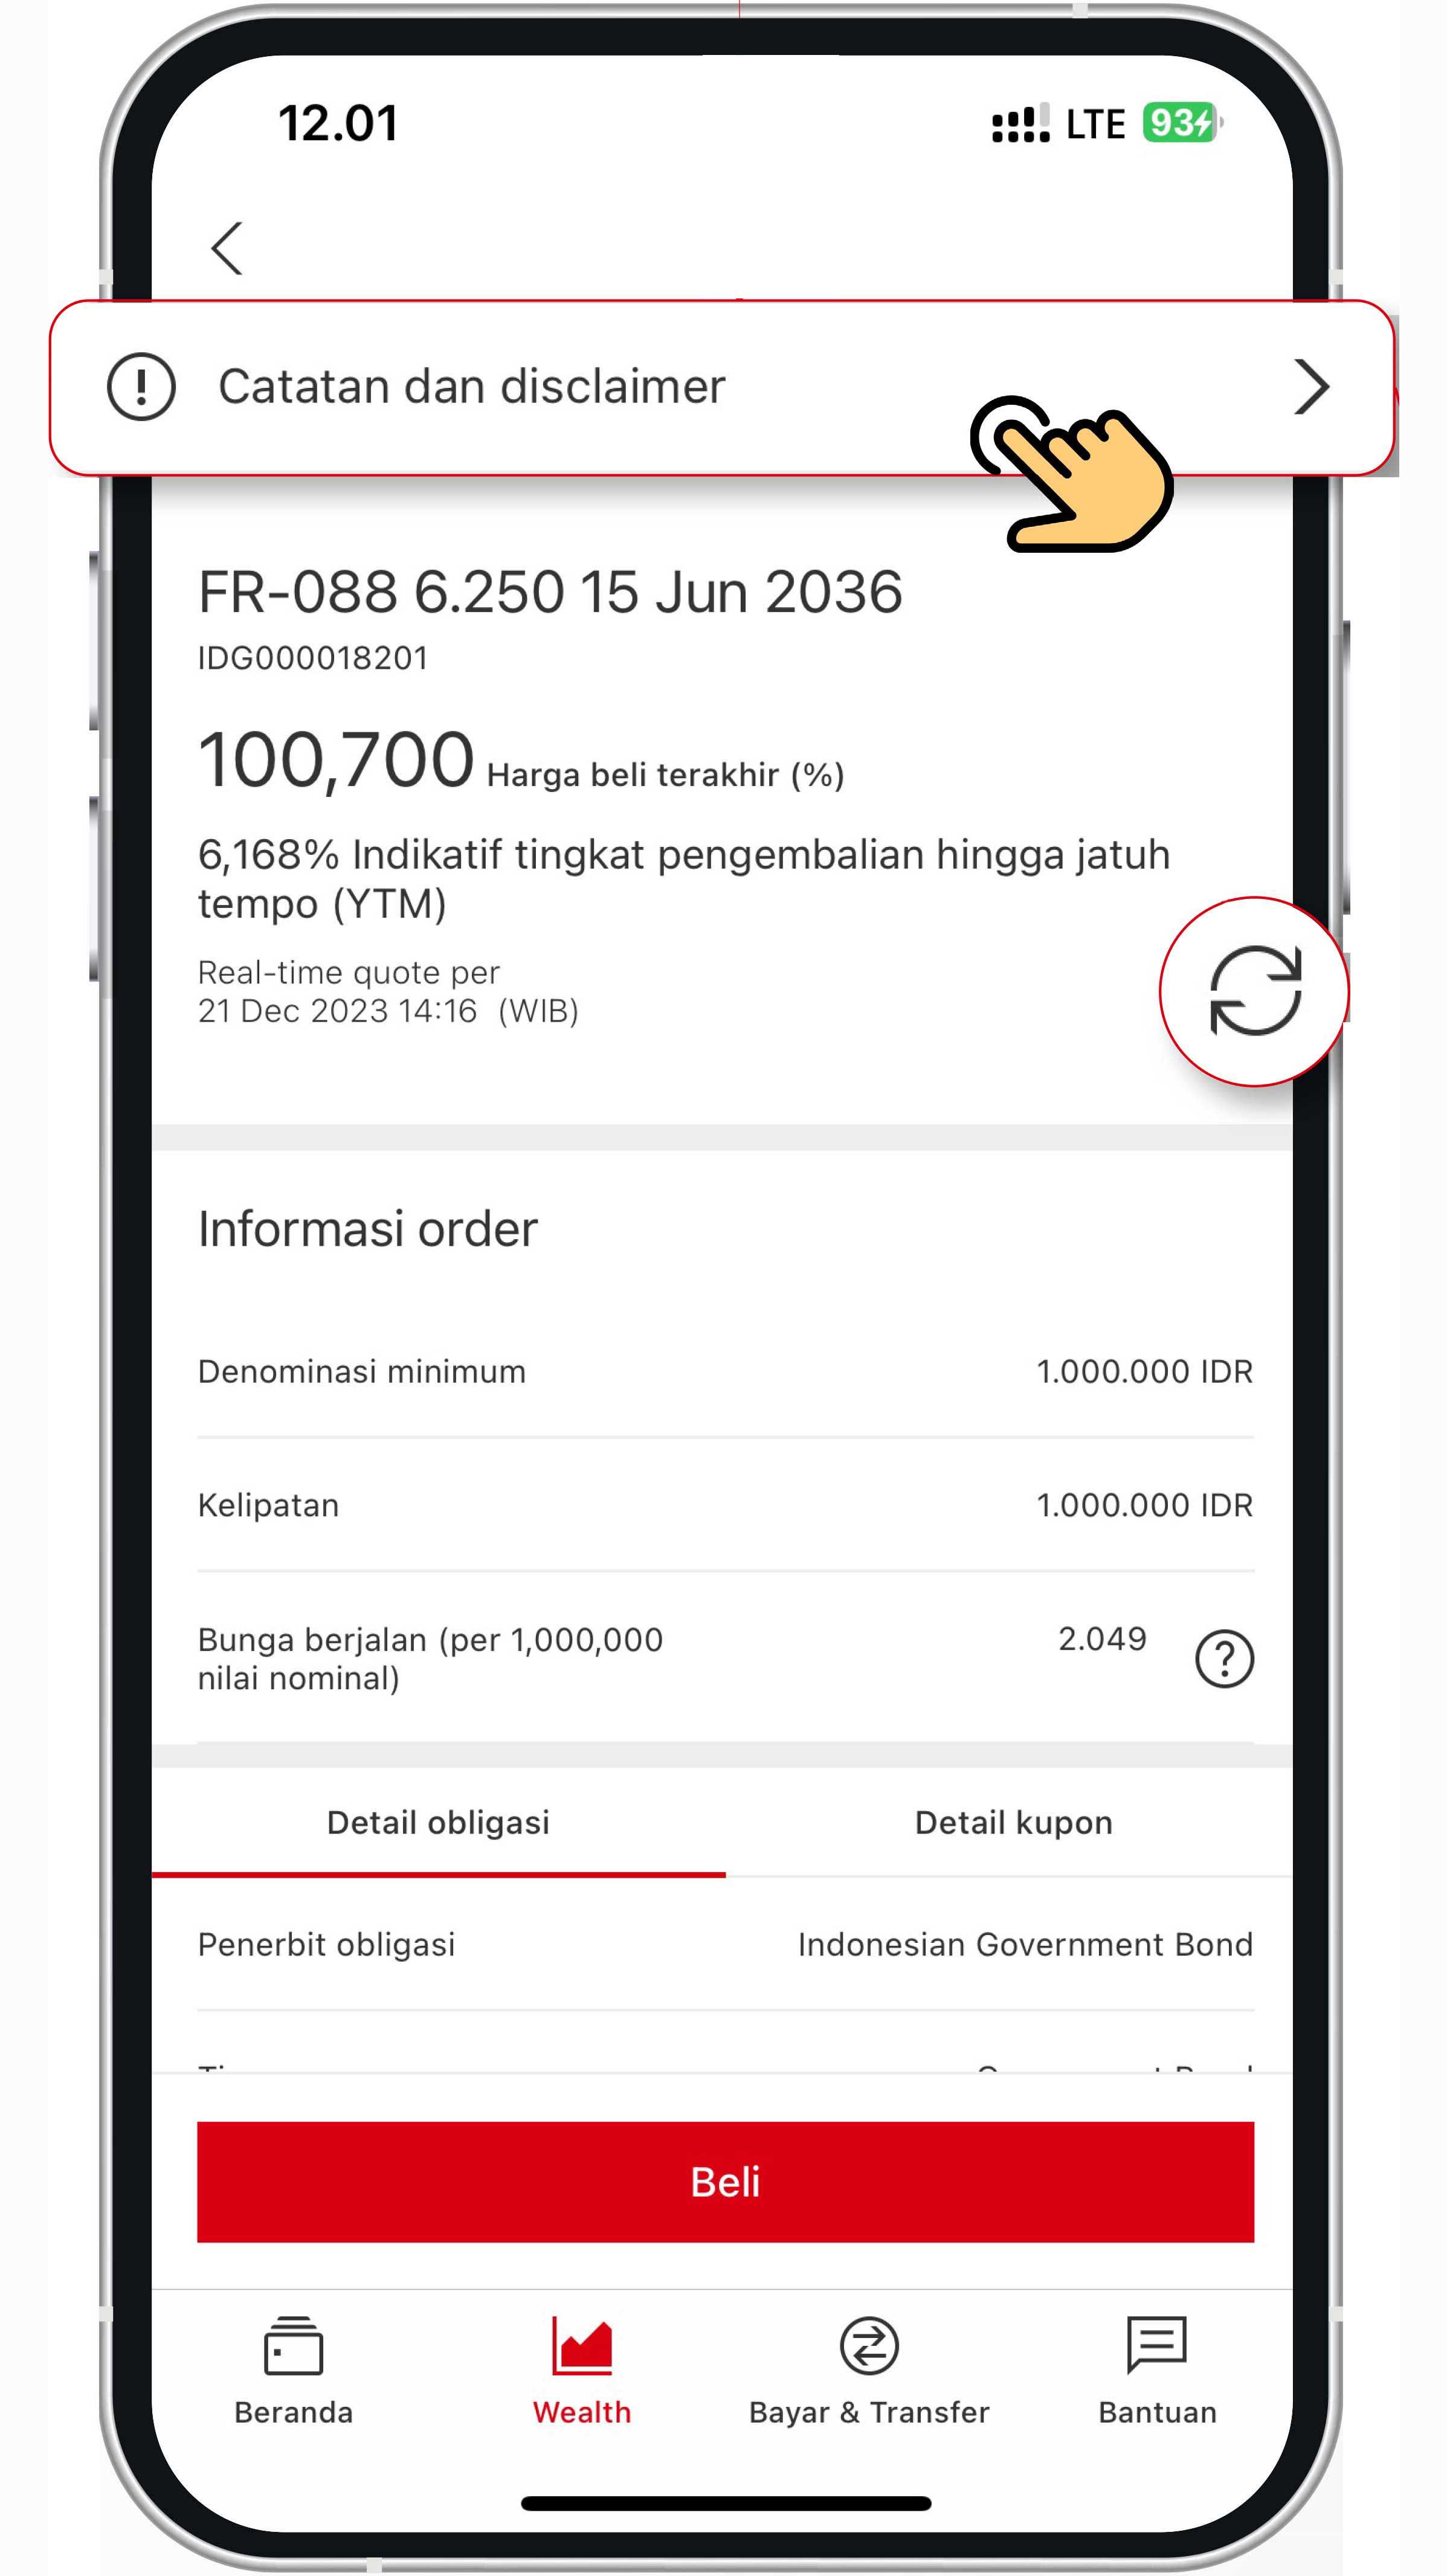
Information on purchase price, indicated yield, and information on the minimum nominal order will appear on your screen.
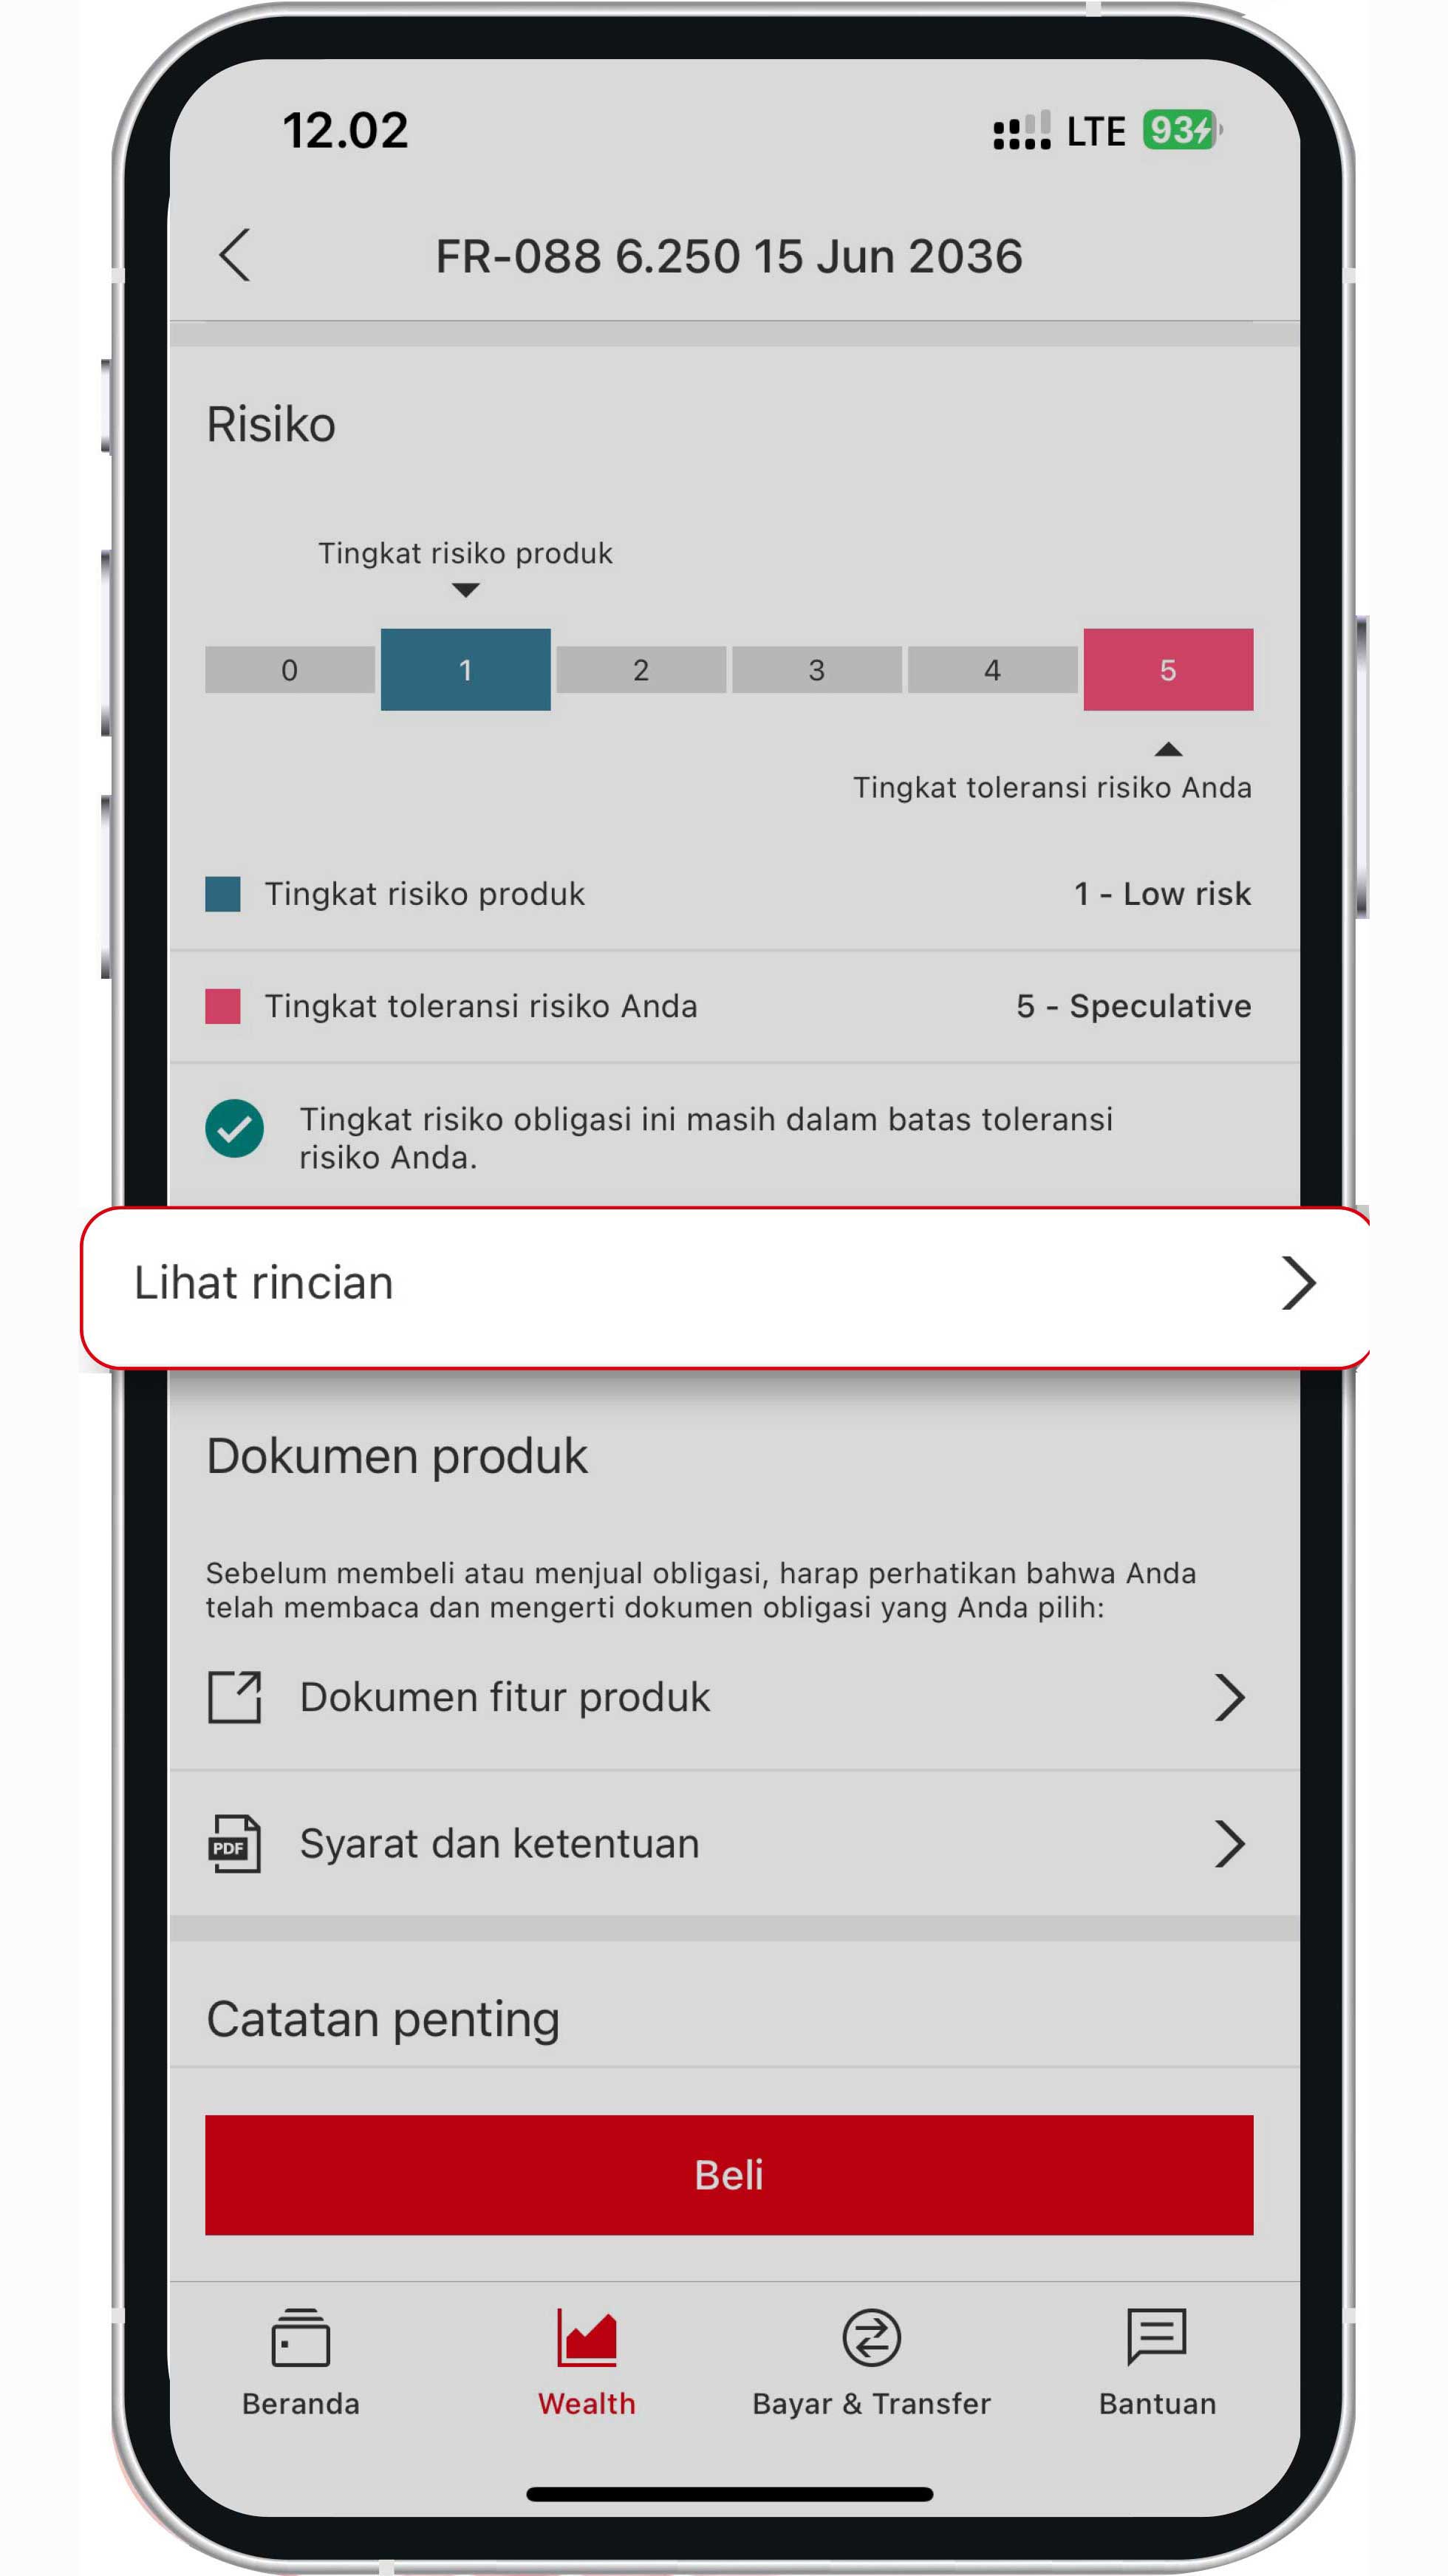
As you continue scrolling, bonds details and coupon details will appear on your screen. The product risk level and your risk tolerance level, based on the risk profile questionnaire results, will also be displayed on the screen for your further review.
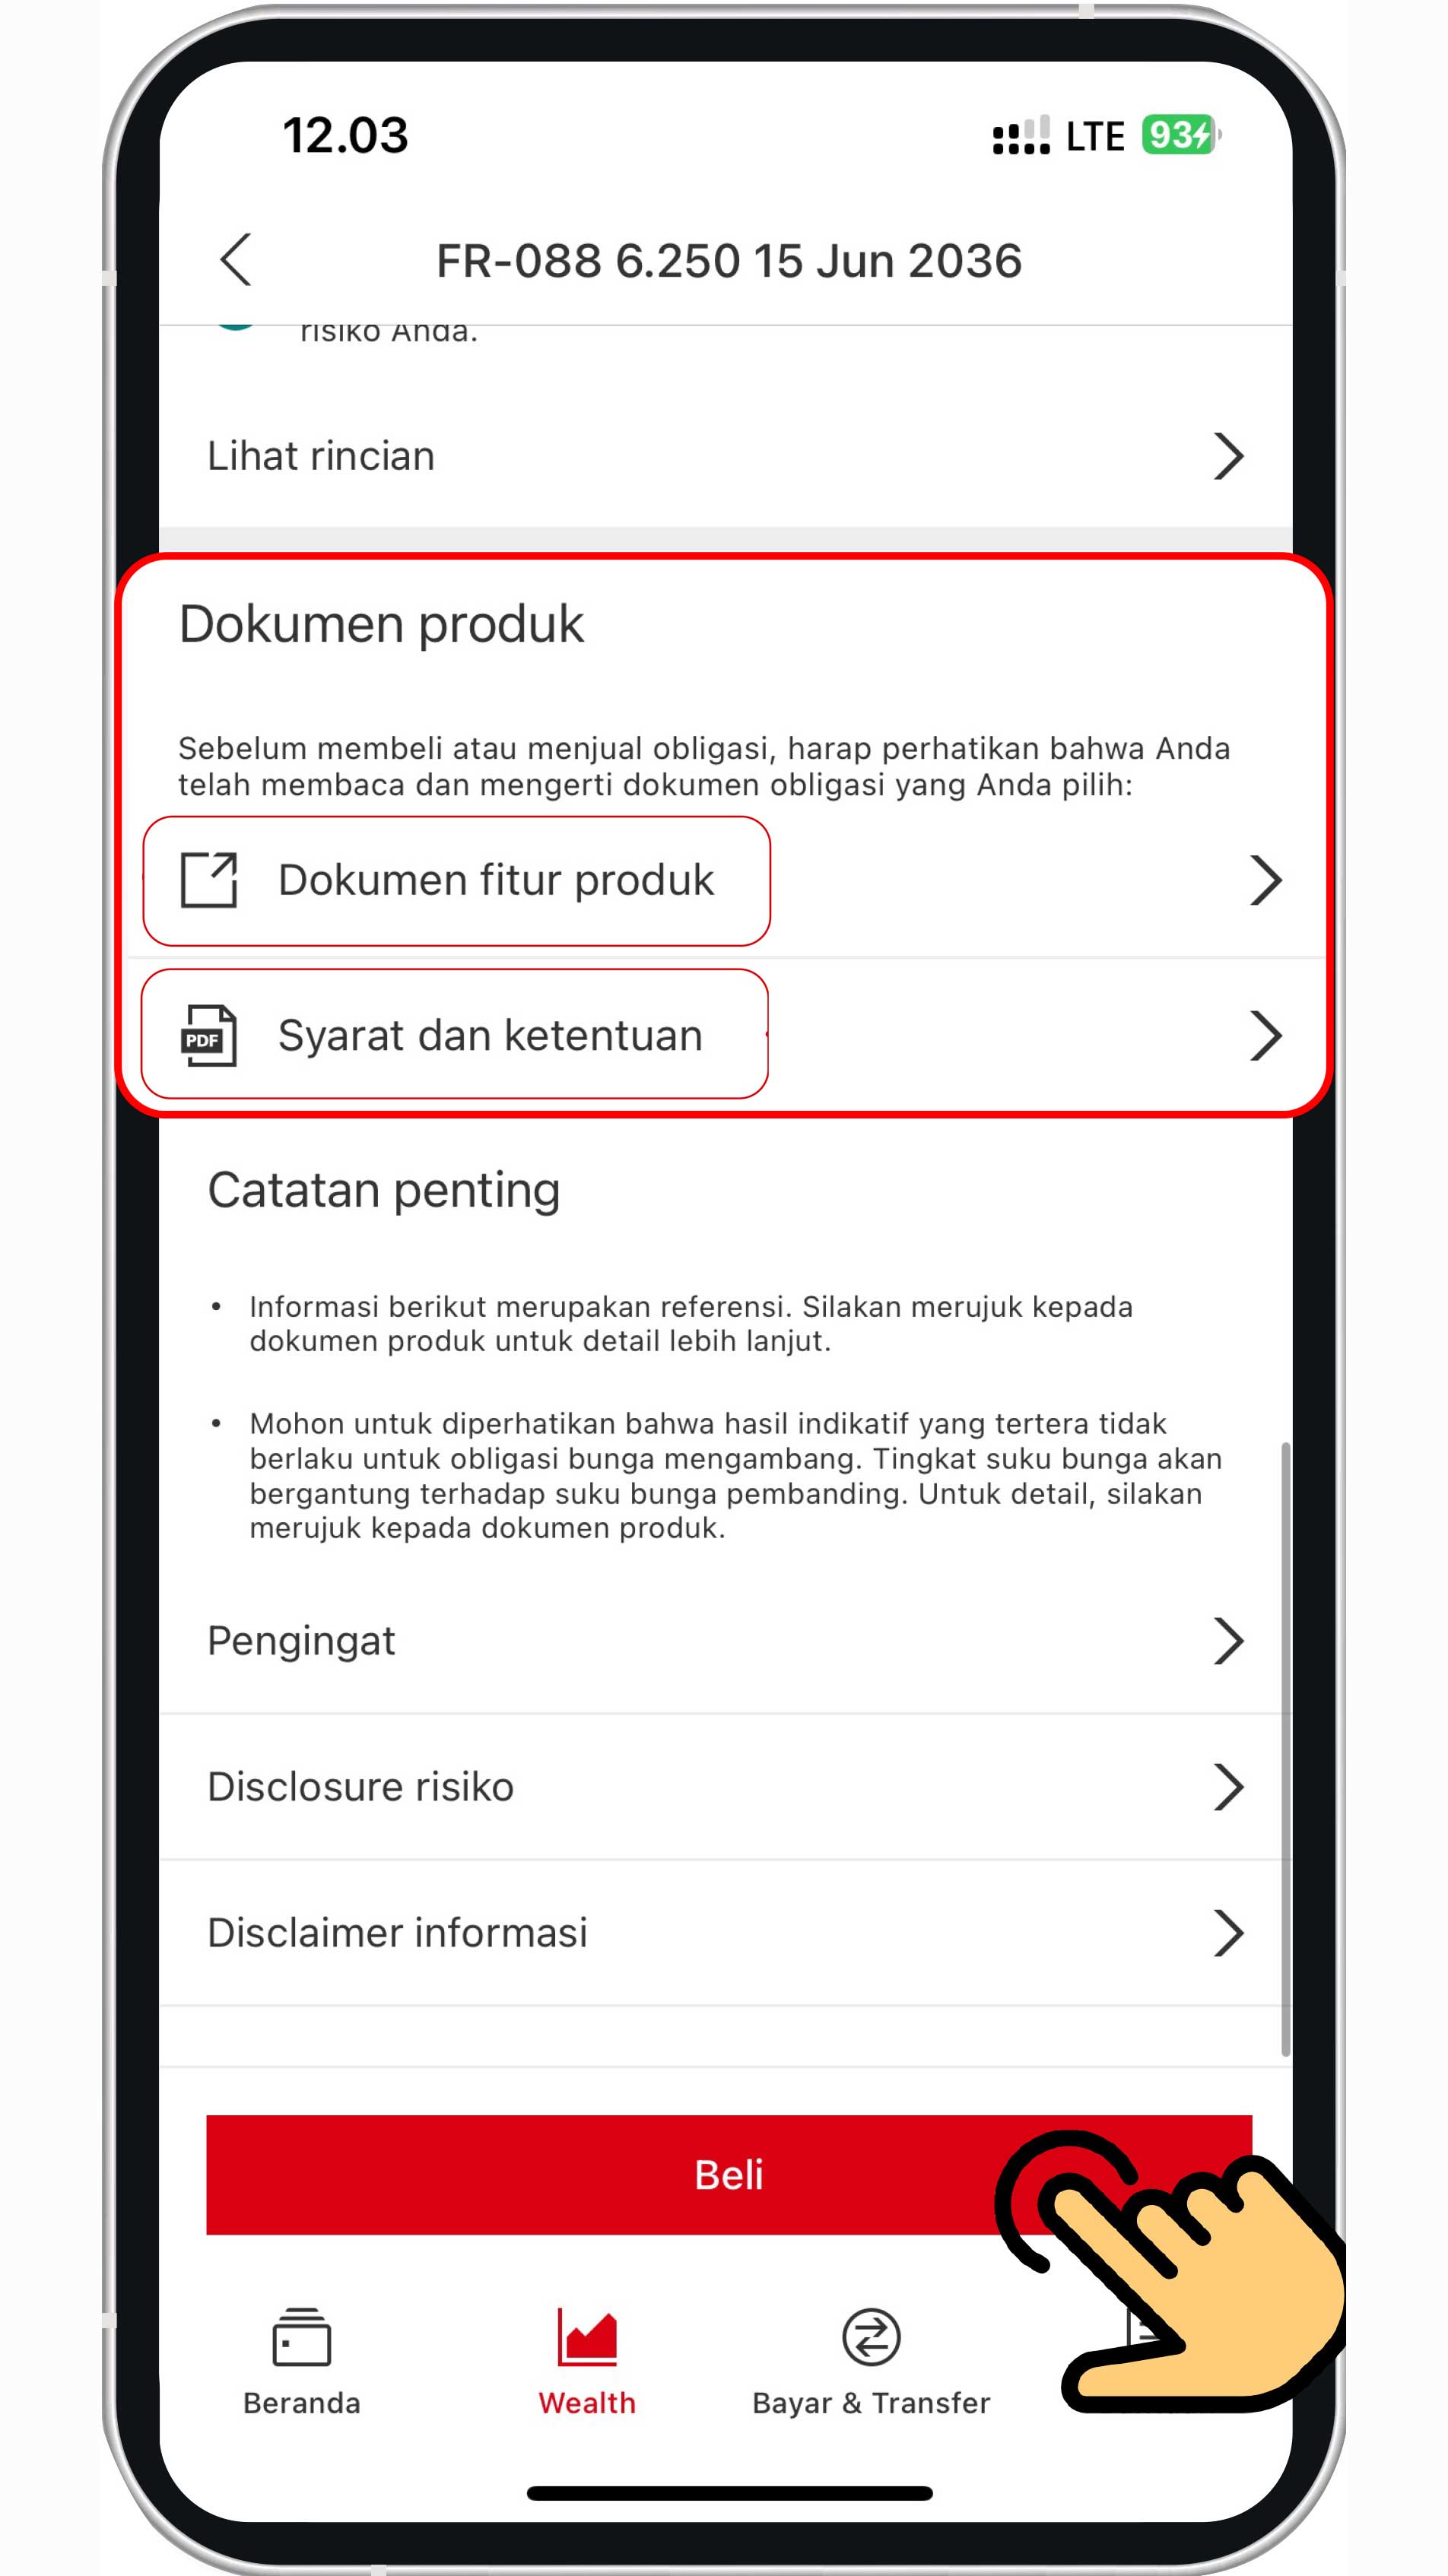
Before clicking the "Buy" button, ensure that you have read the product feature document and understand the applicable terms and conditions.
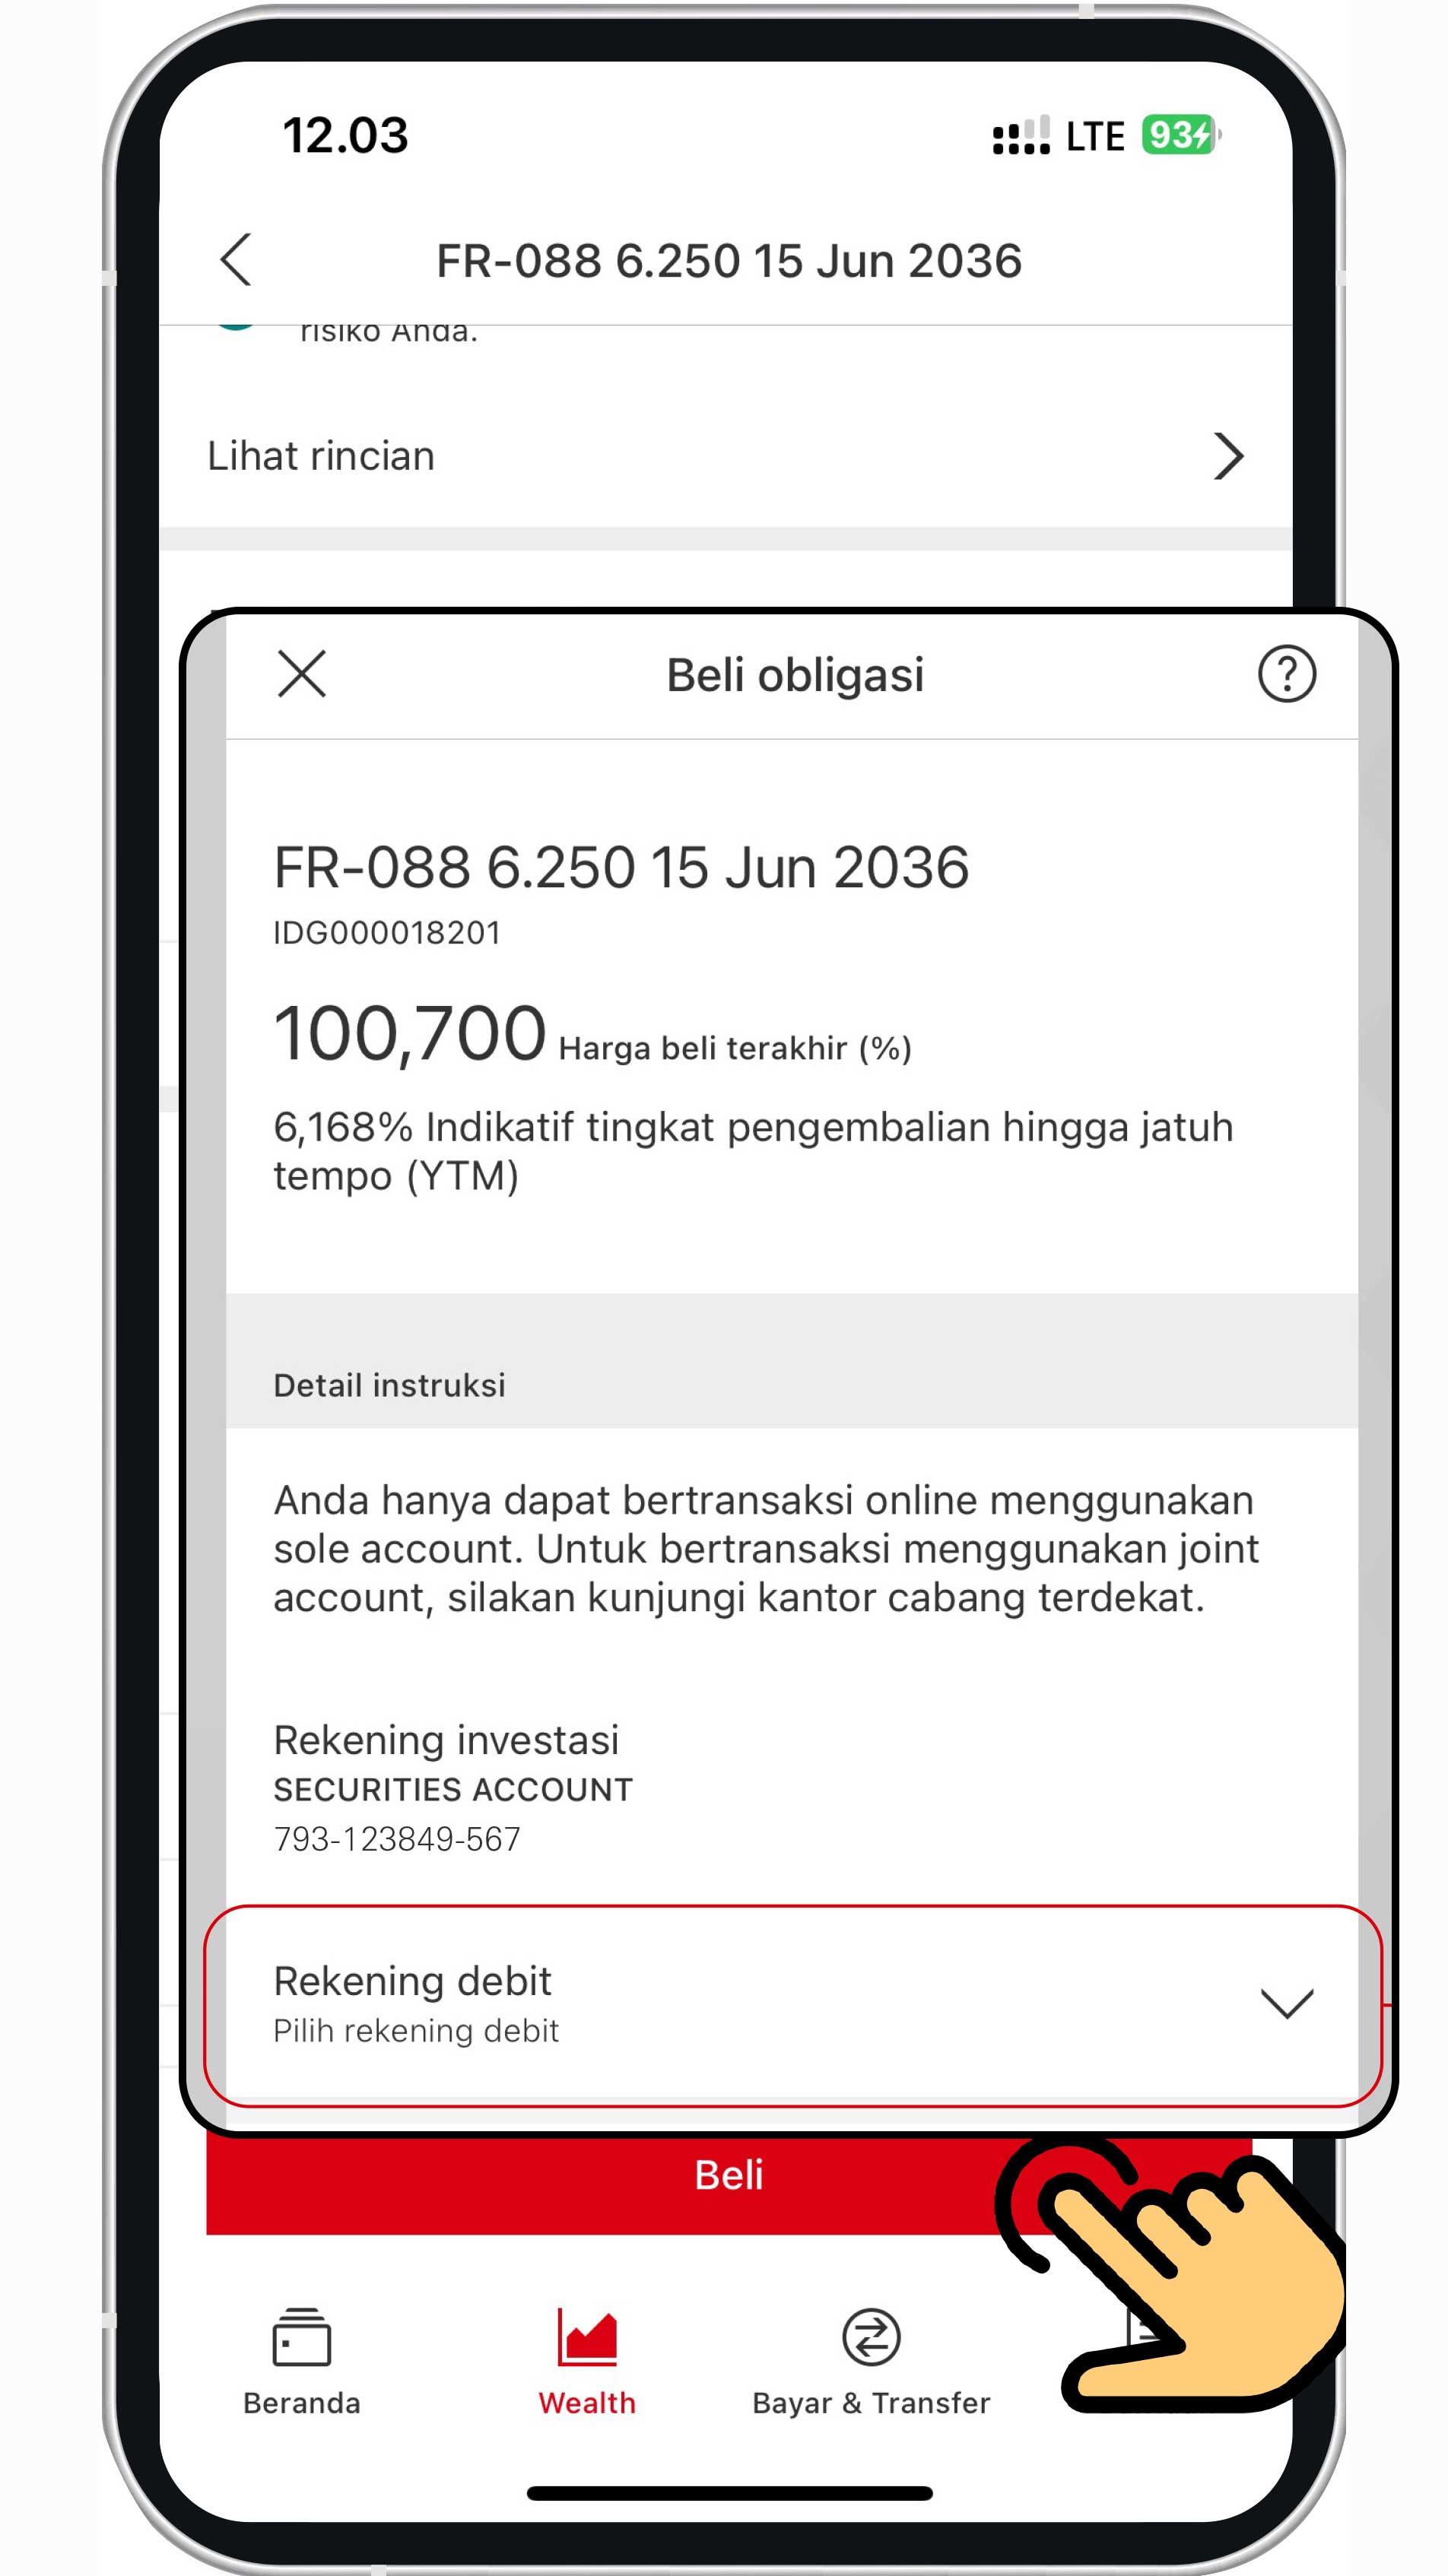
After clicking the "Buy" button, you will be directed to select the debit account used to accommodate the yield paid and enter the nominal amount that you would like to invest.
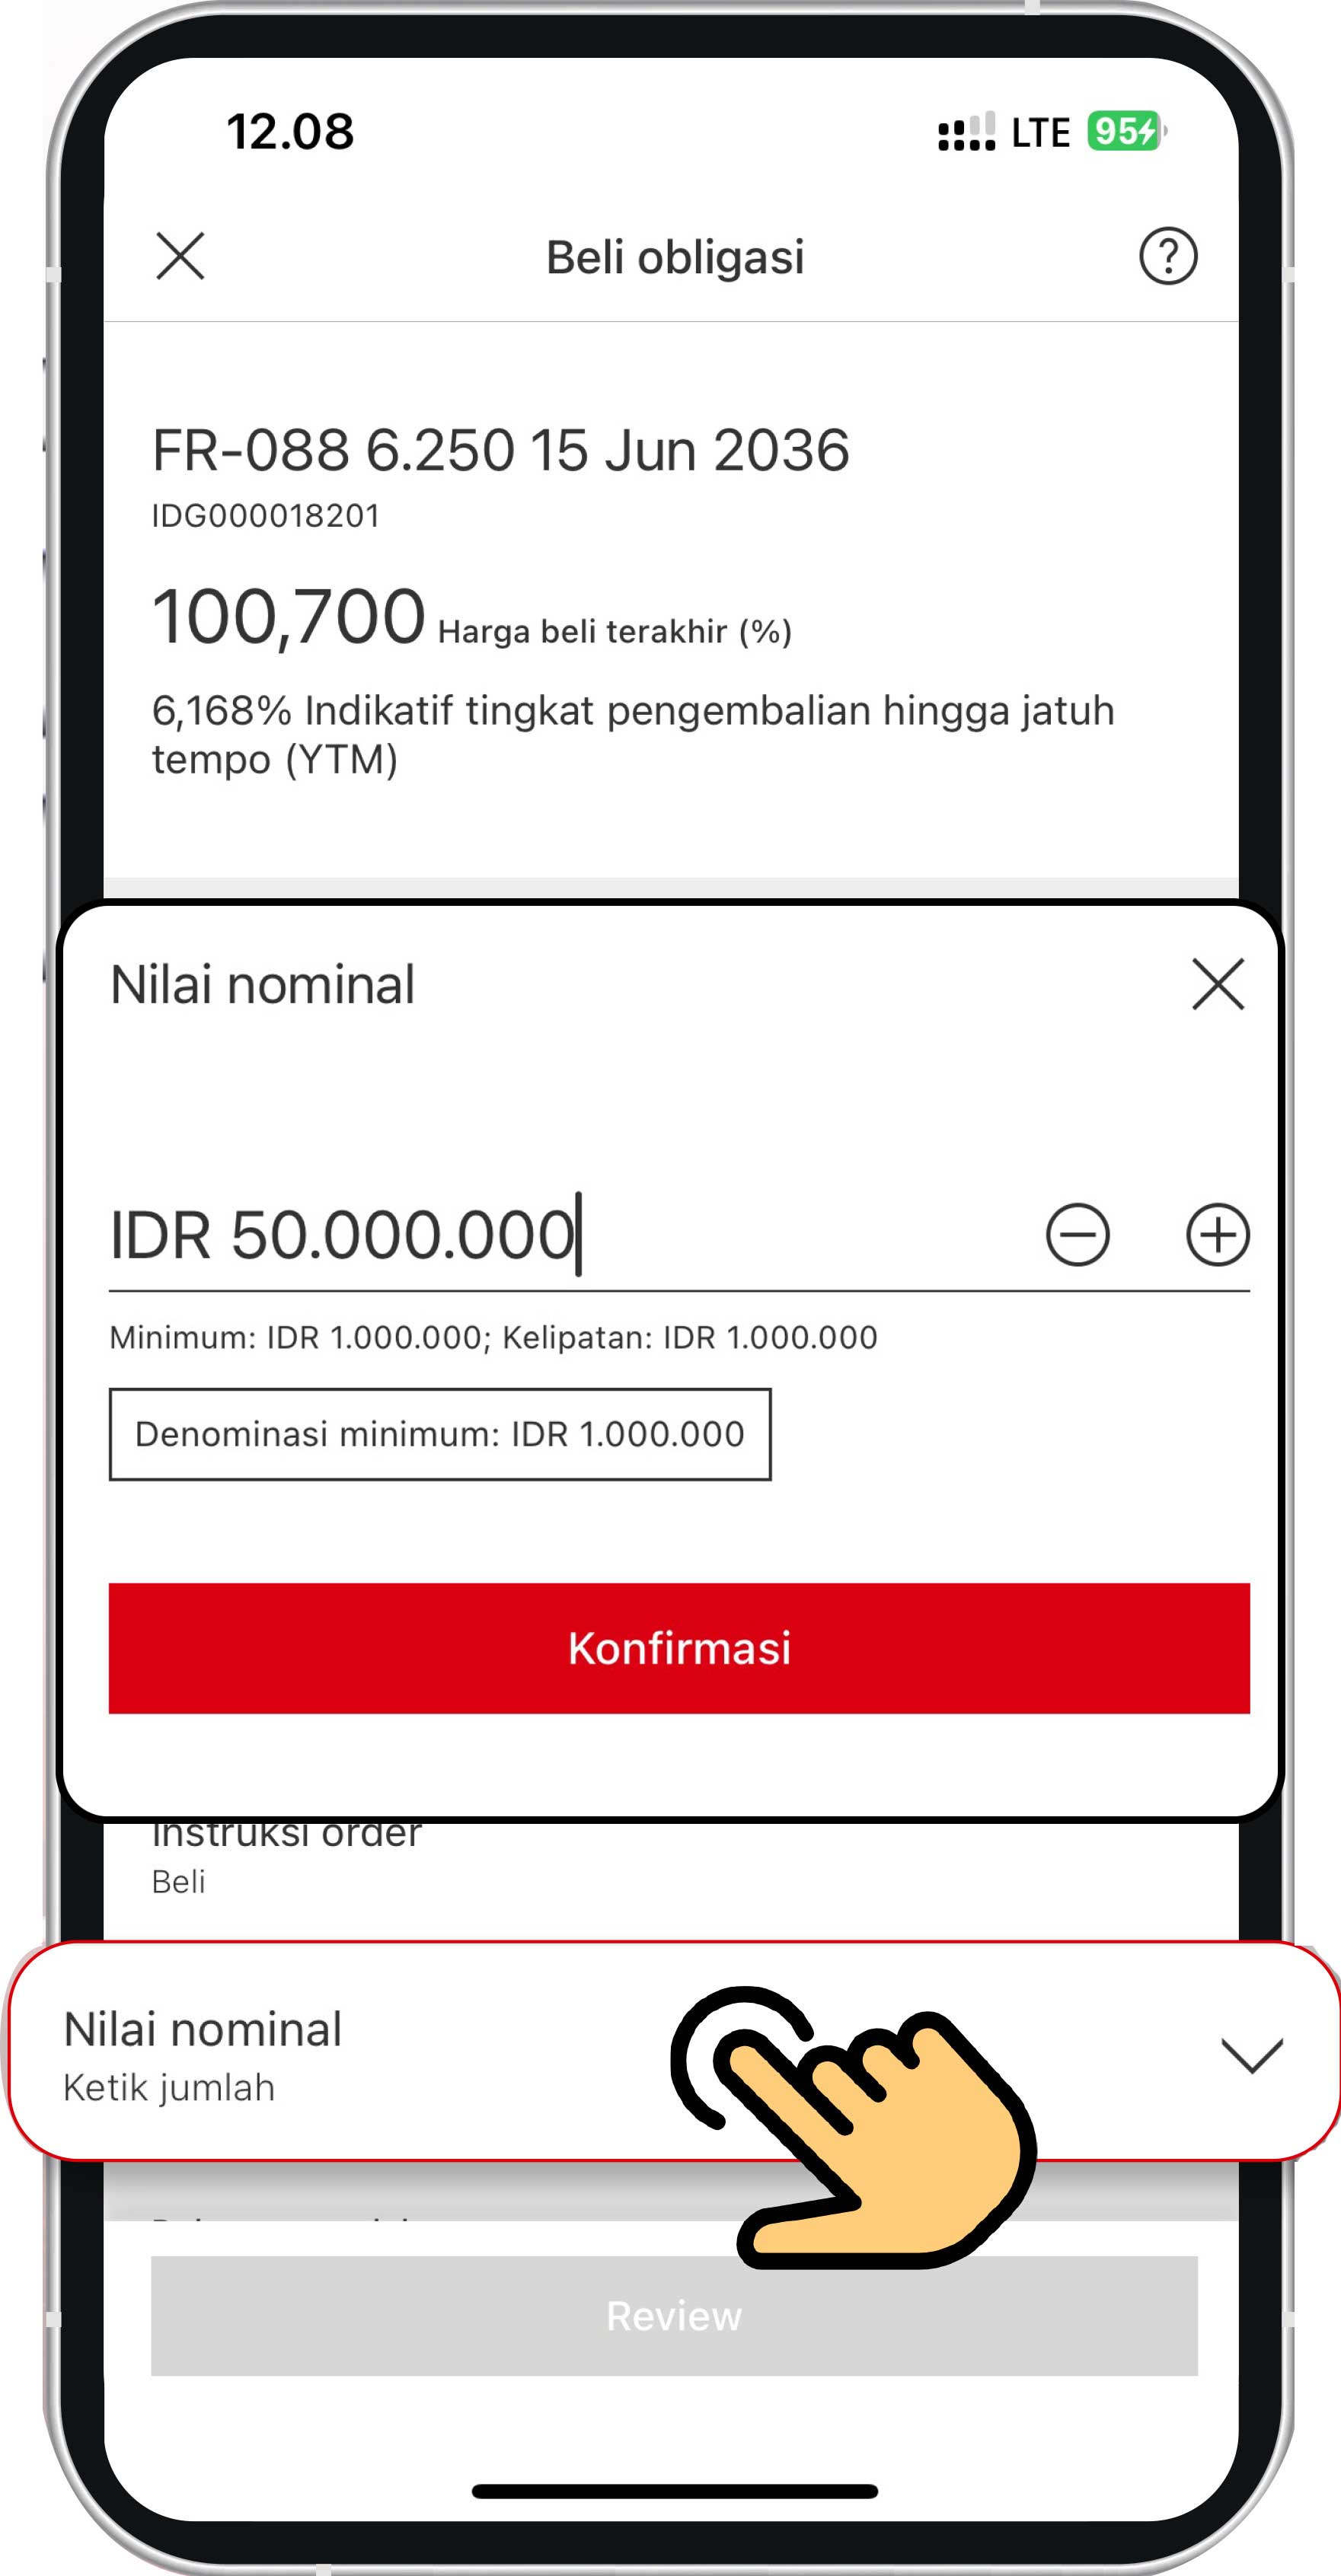
Review the information that you have input. Please ensure that you have read the product feature document and understand the applicable terms and conditions before clicking the "Confirm" button to complete the secondary bonds purchase process.
More about Secondary Bonds
Purchase mutual funds
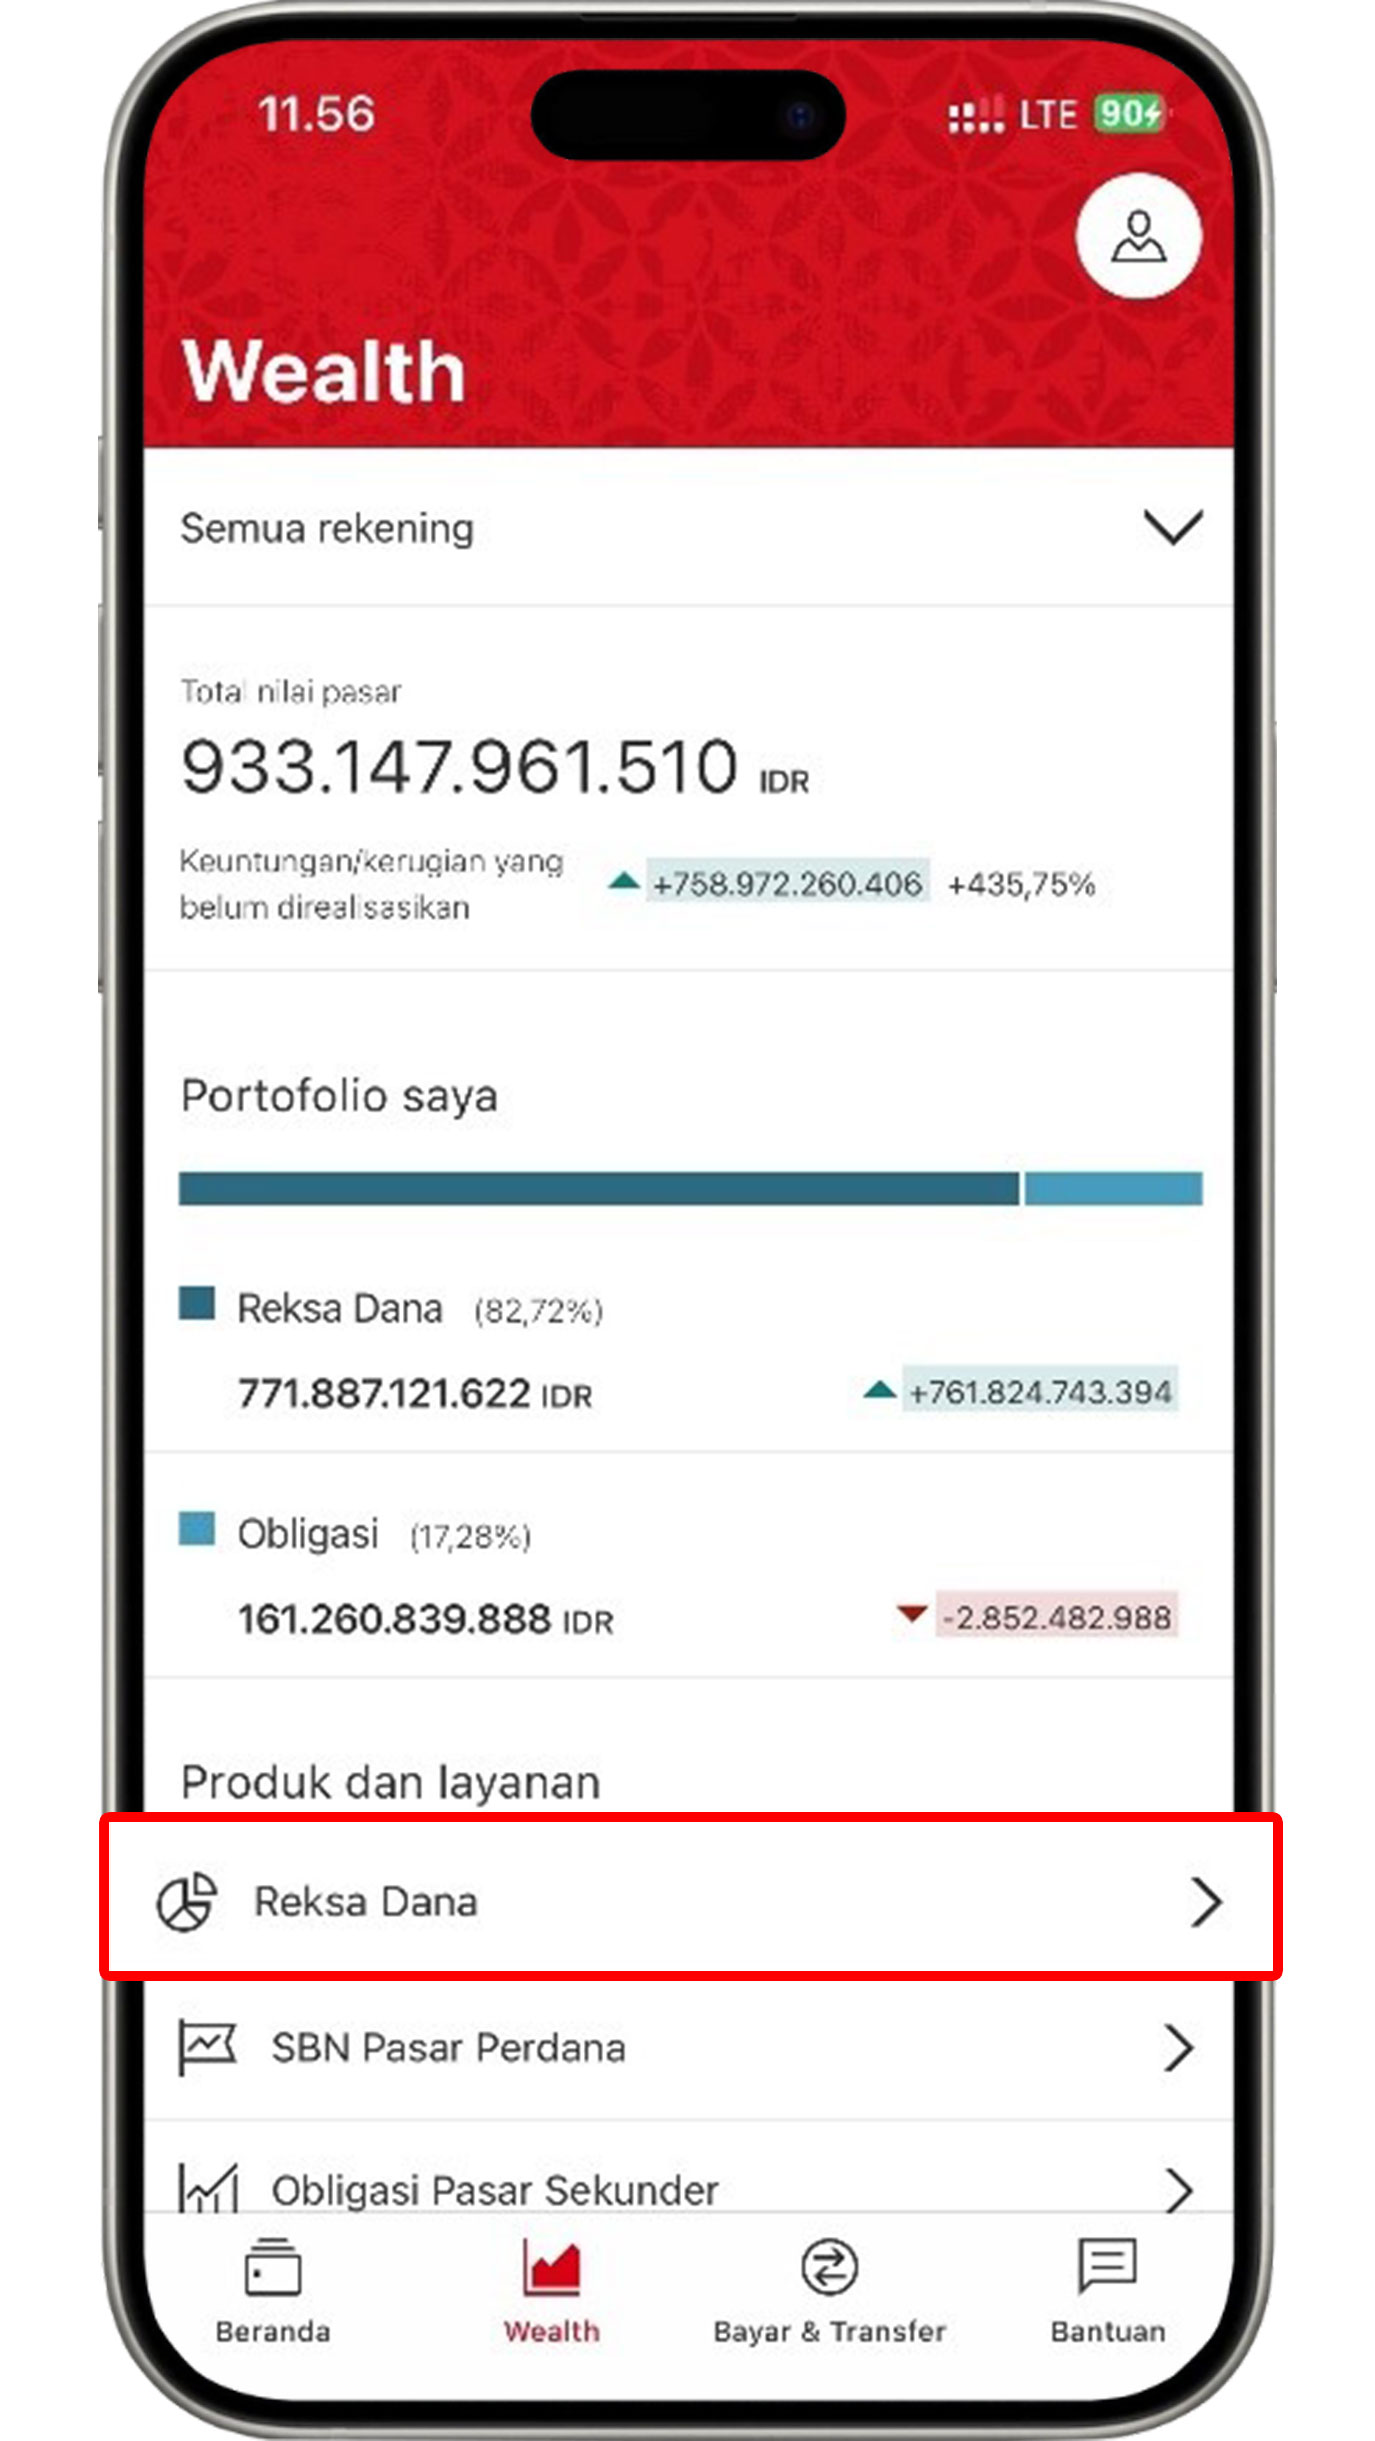
On the Wealth menu, select "Mutual Fund".
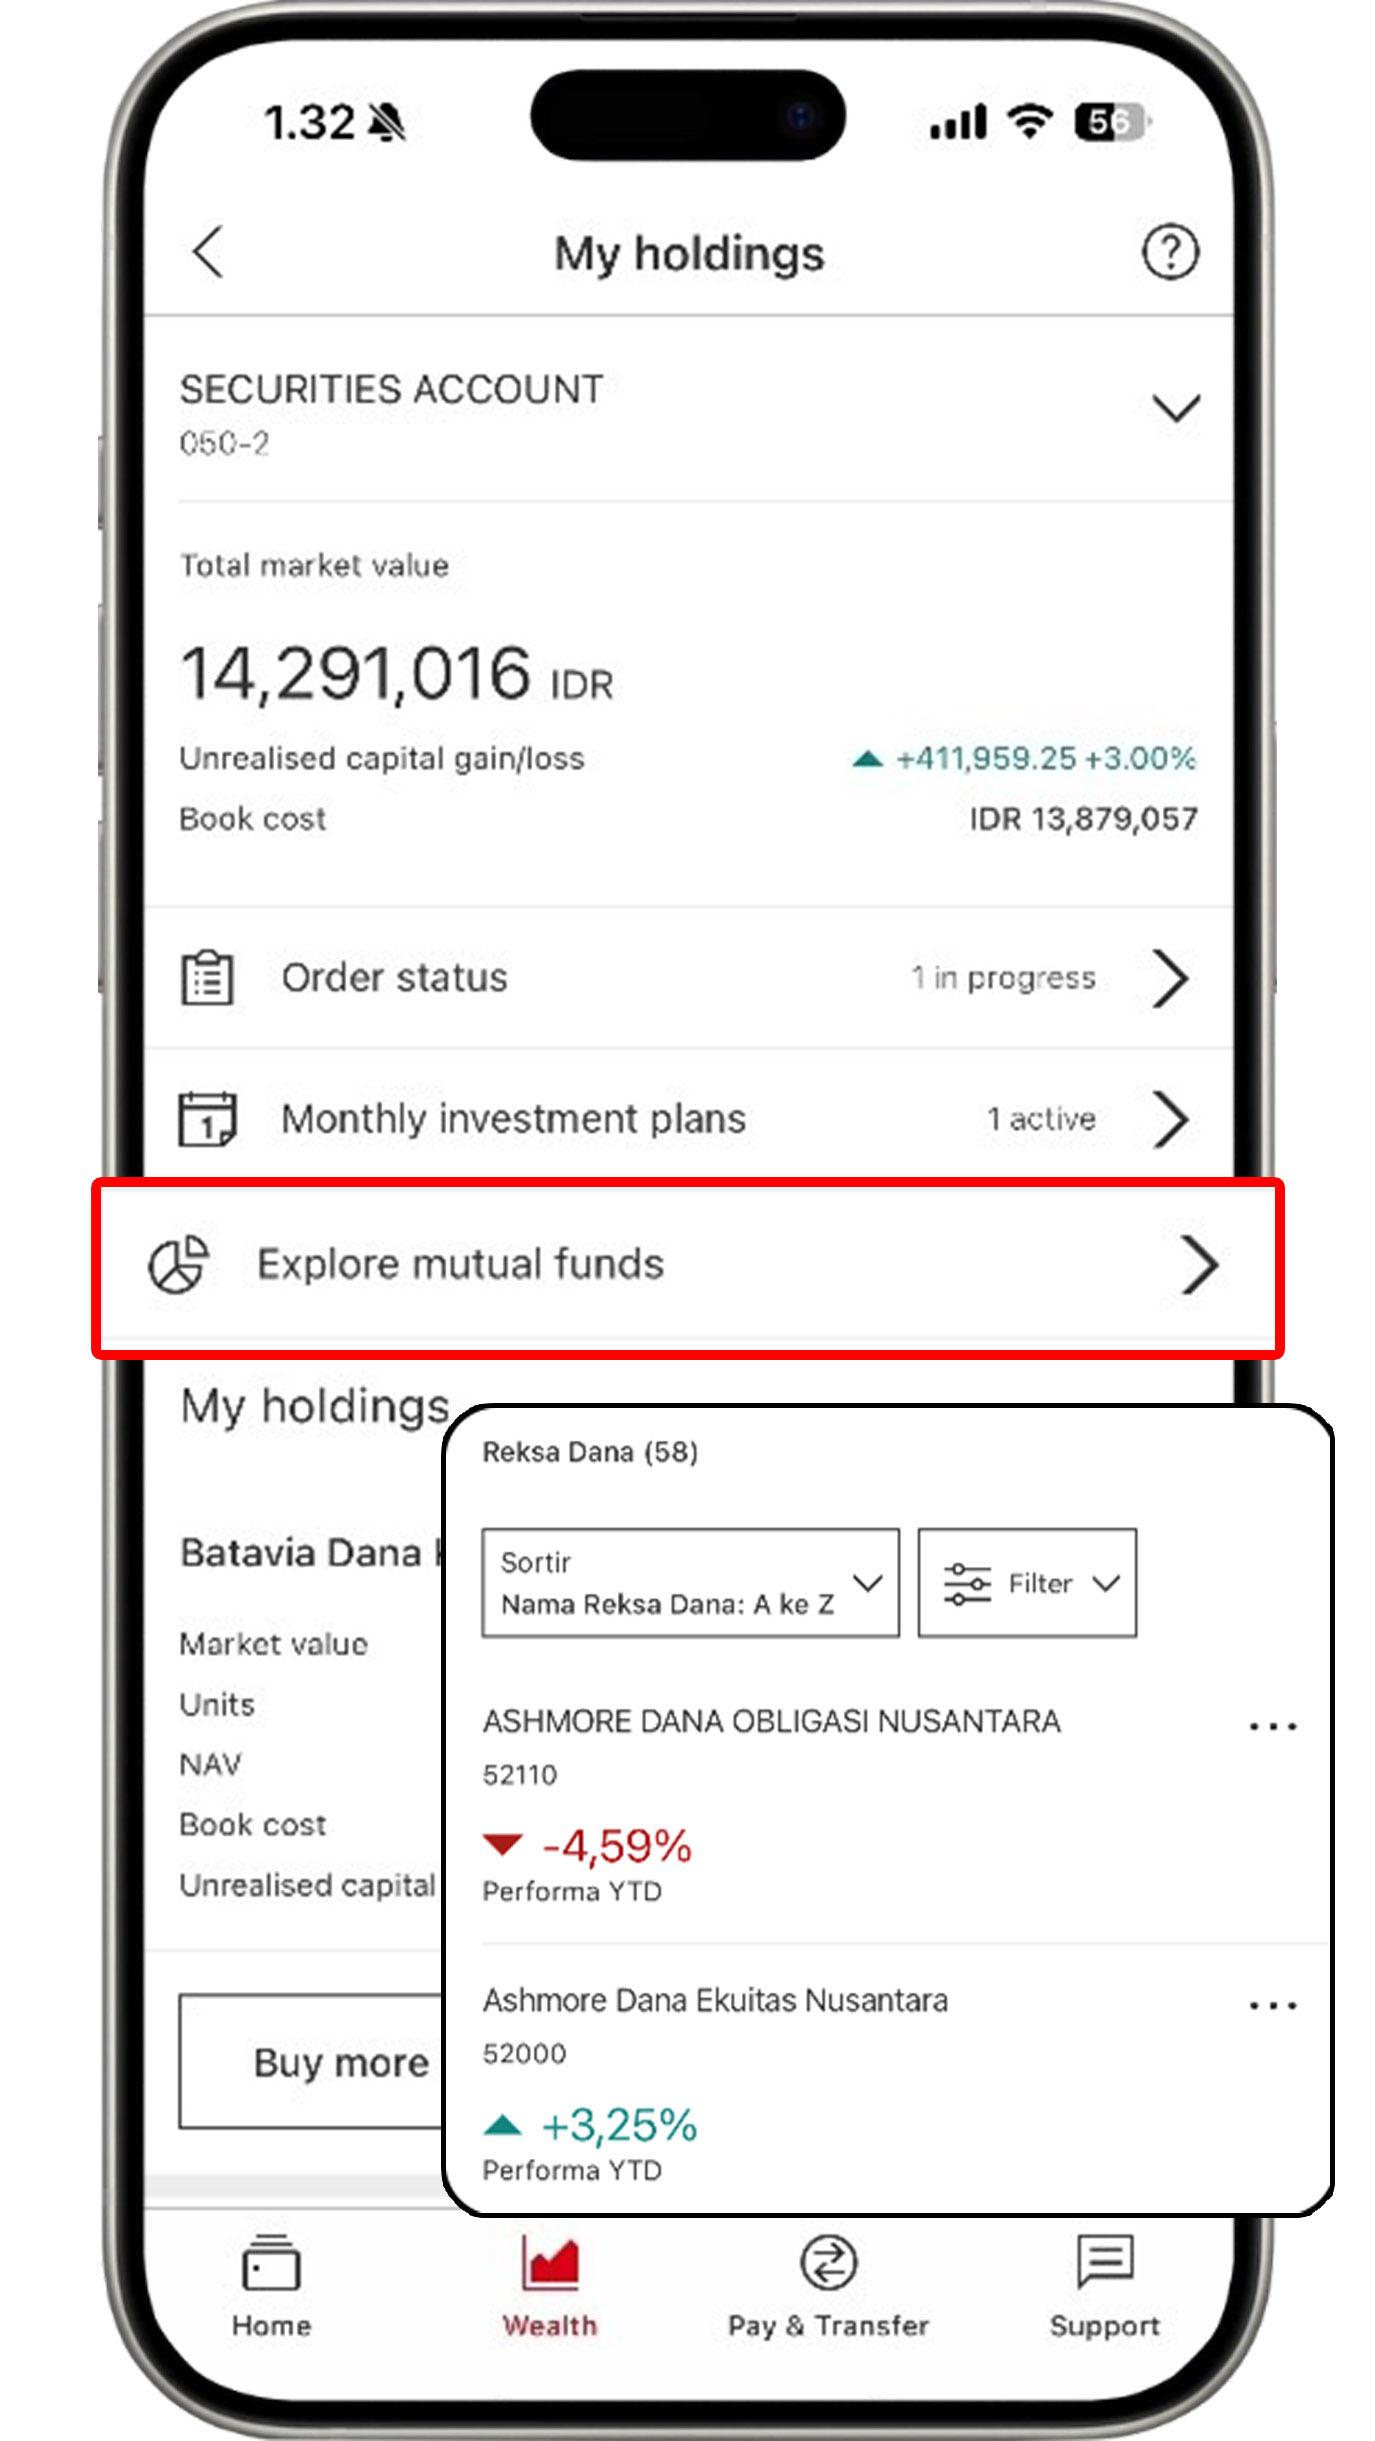
Click "Explore mutual funds" and select the product you would like to view.
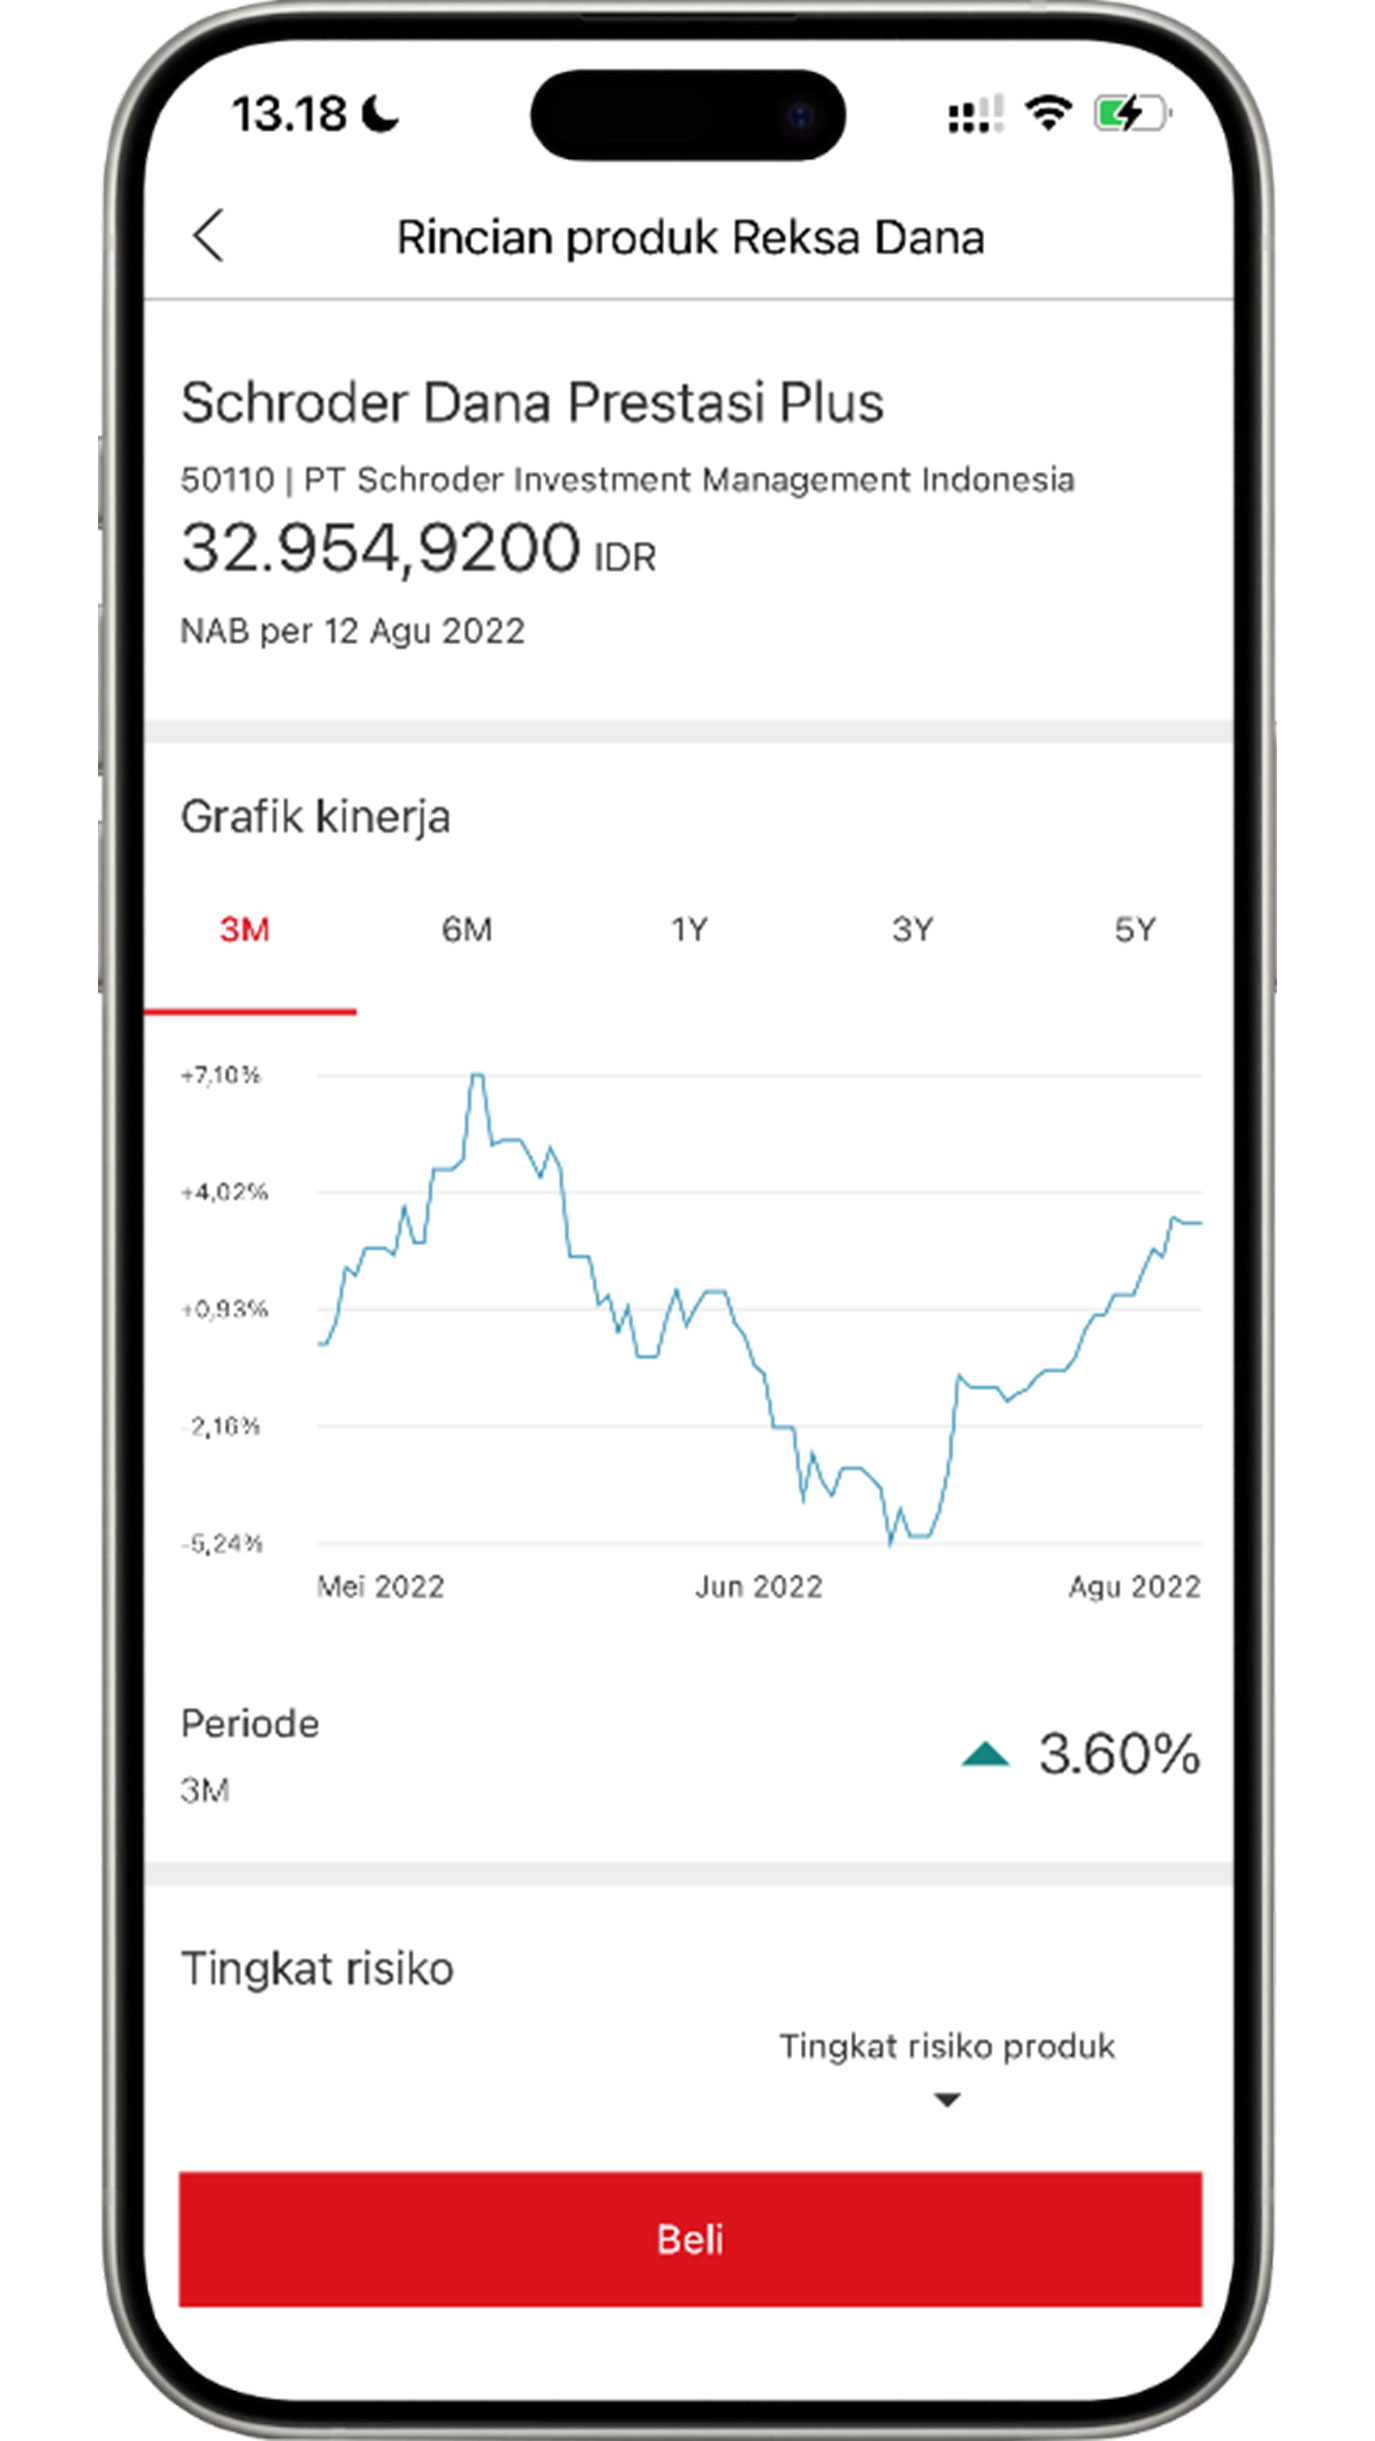
After selecting the mutual fund product that you would like to proceed with, click "Buy".
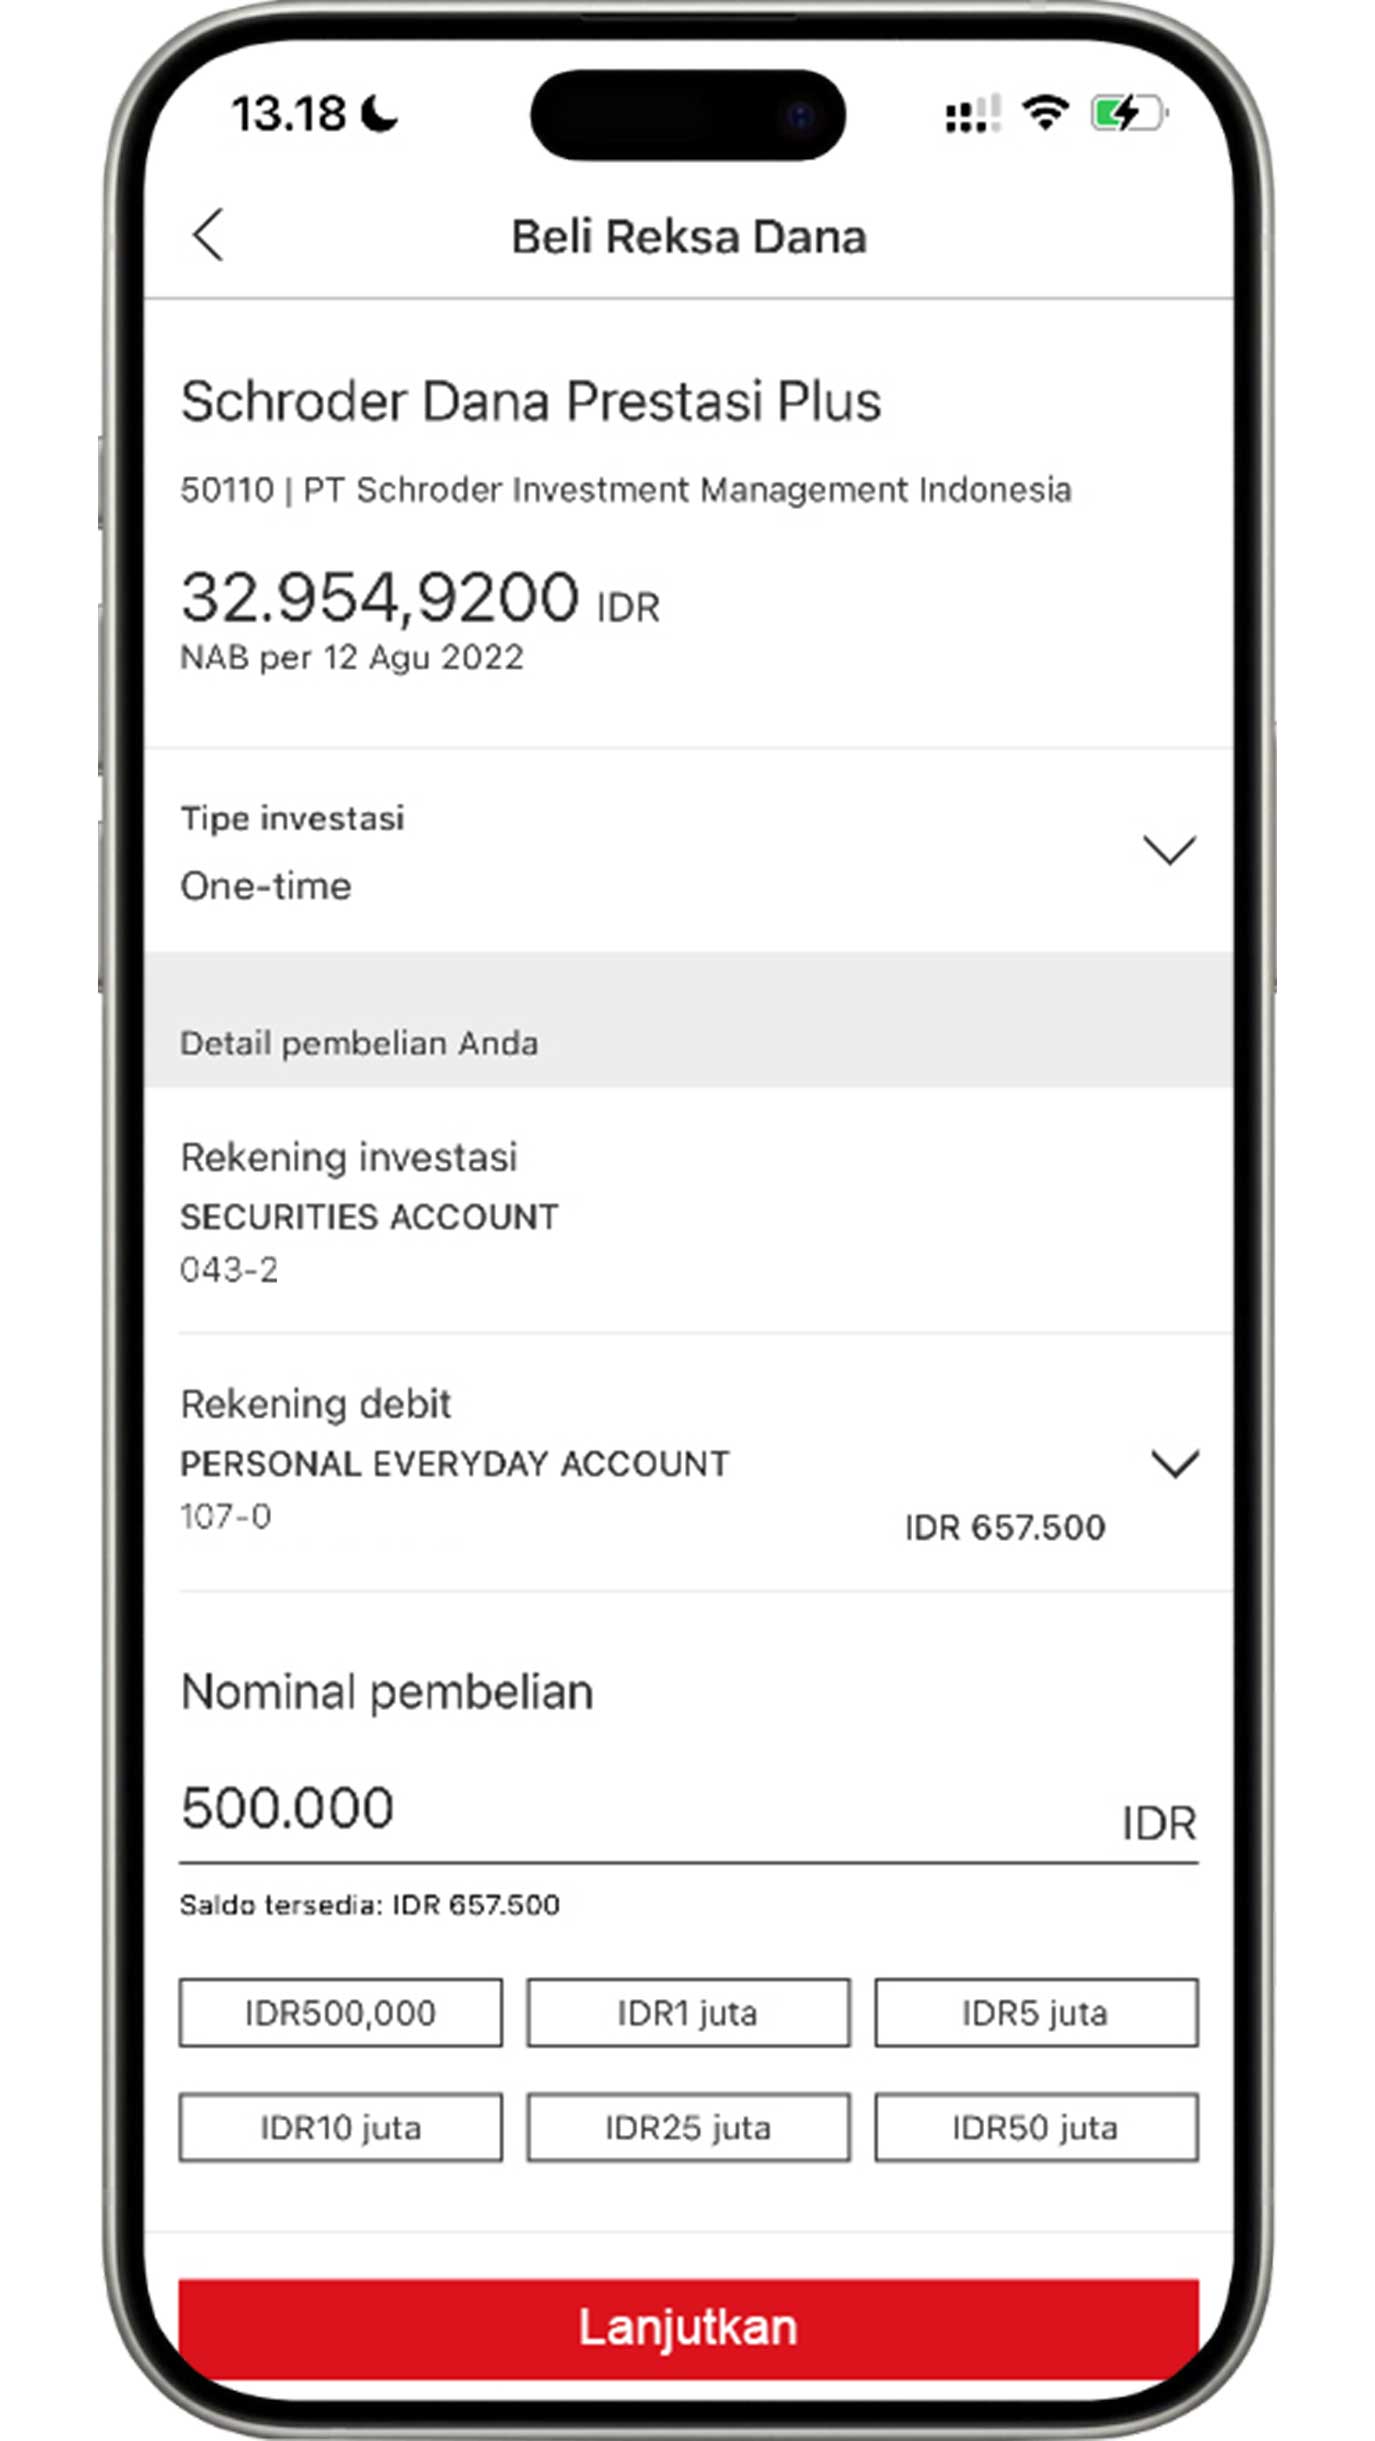
Enter the purchase amount based on your requirements, then click the "Continue" button.
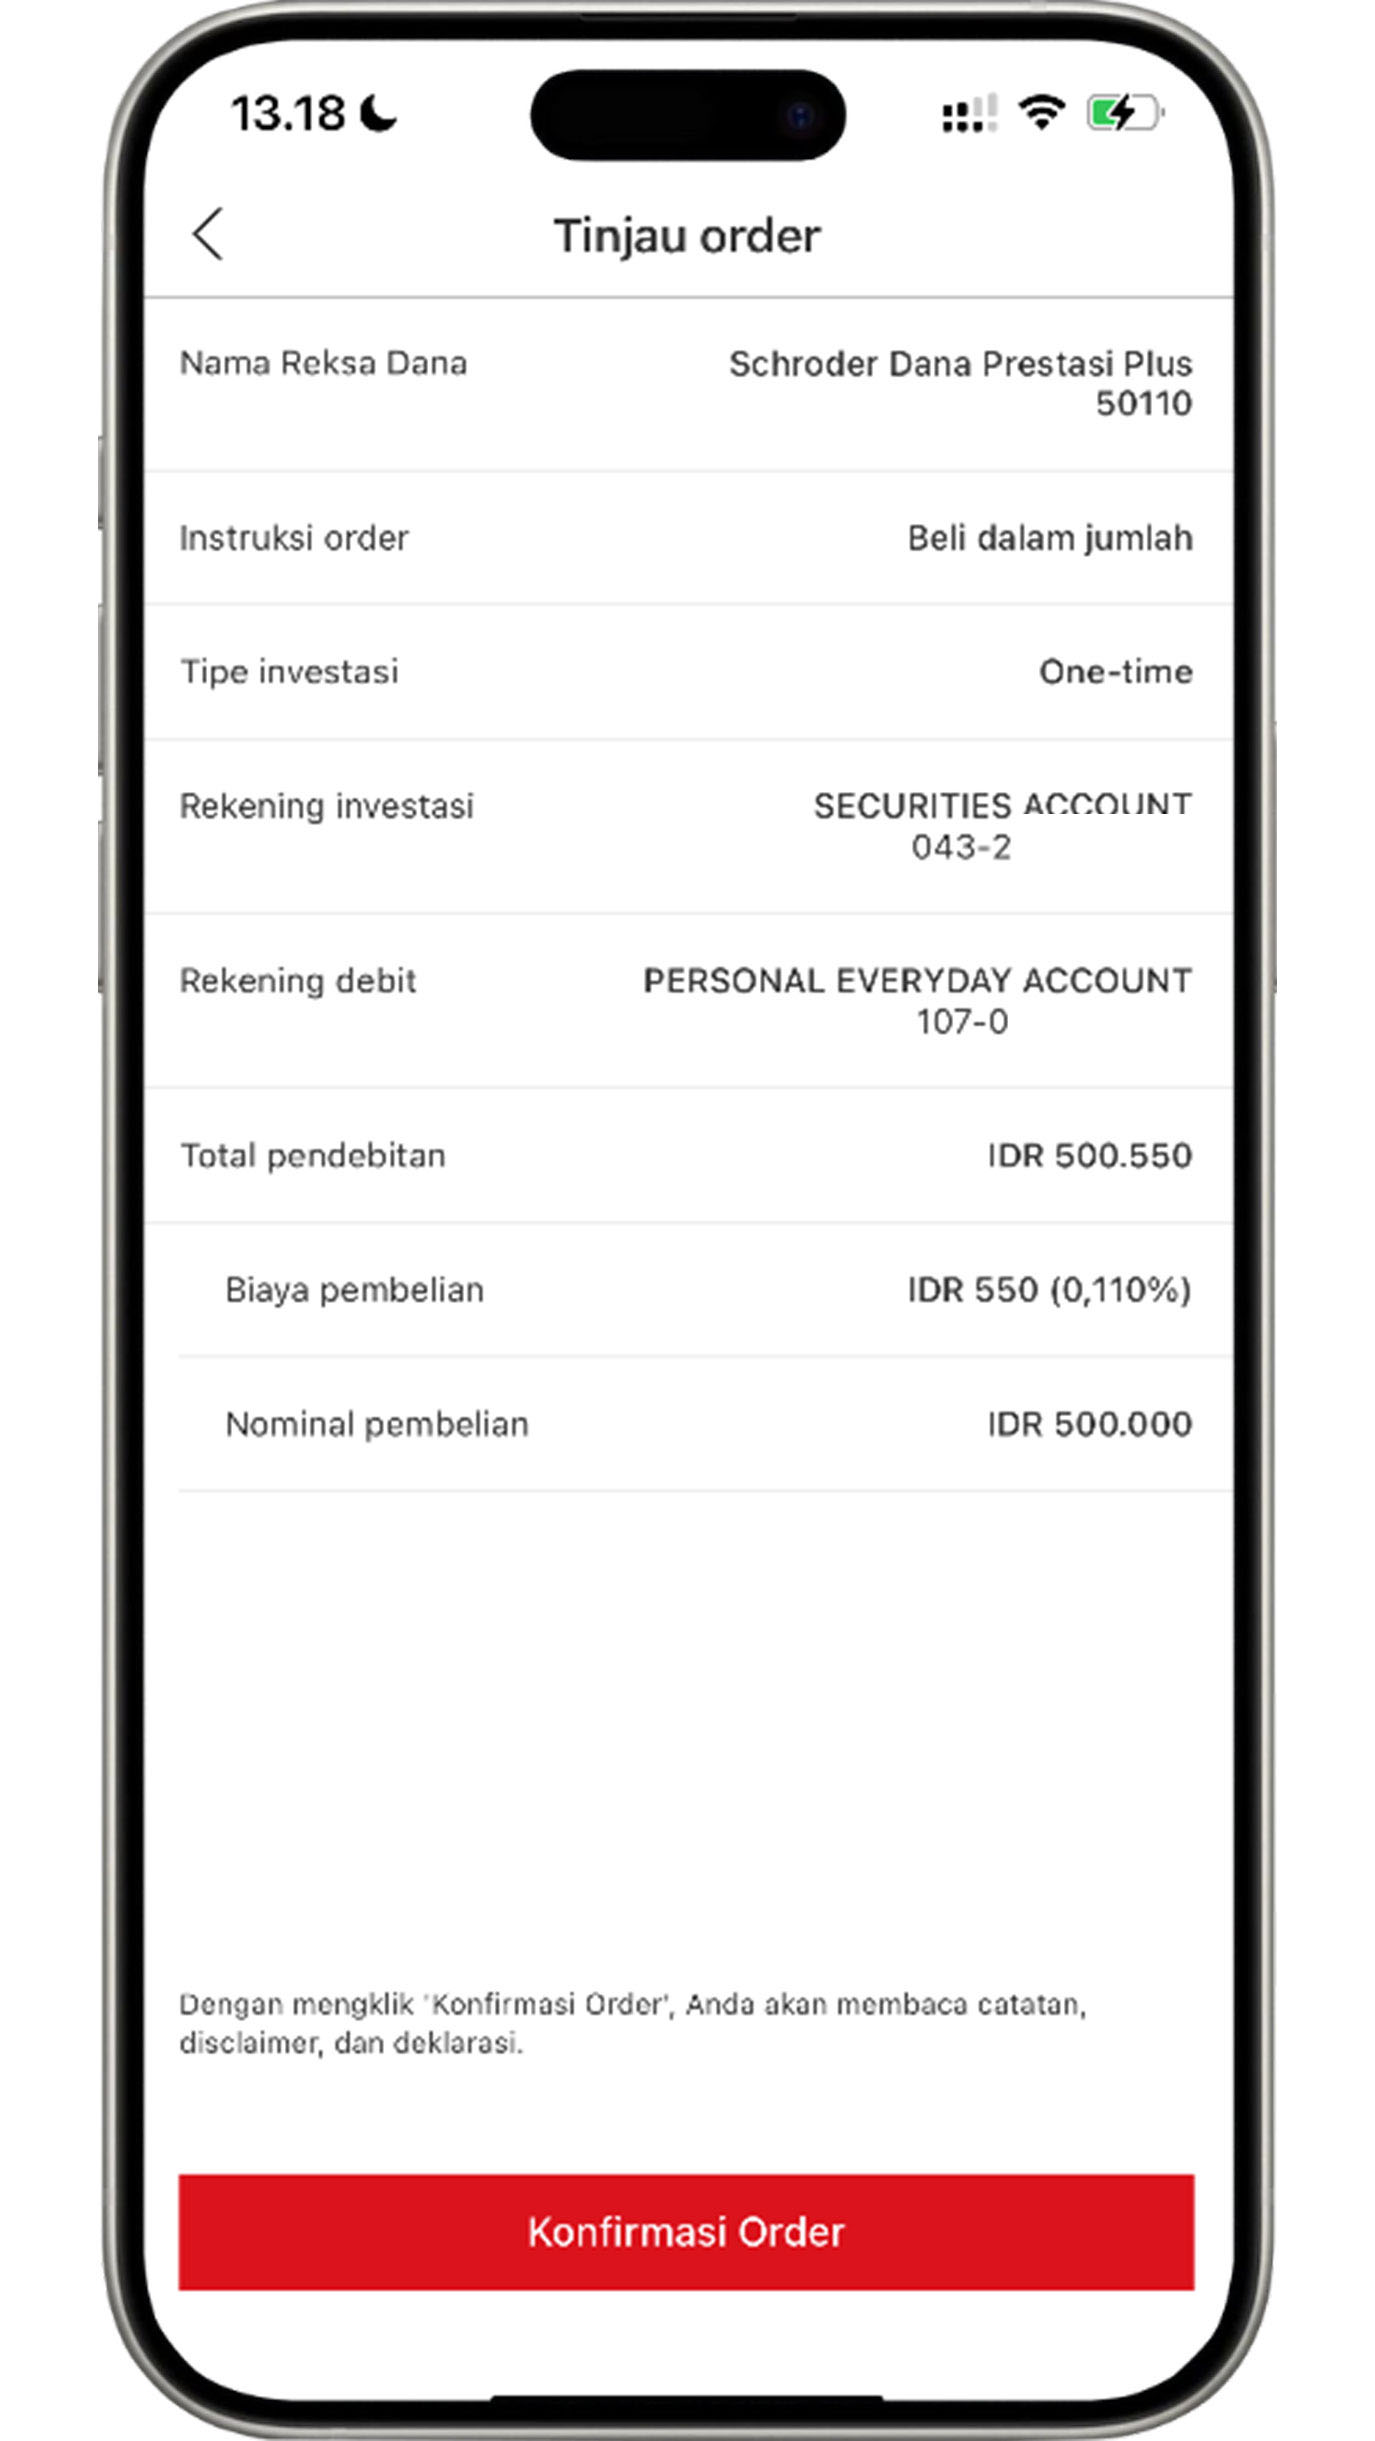
Review the information that you have input. If all the information is accurate, click the "Confirm" button to complete the mutual fund purchase process.
View Wealth Dashboard
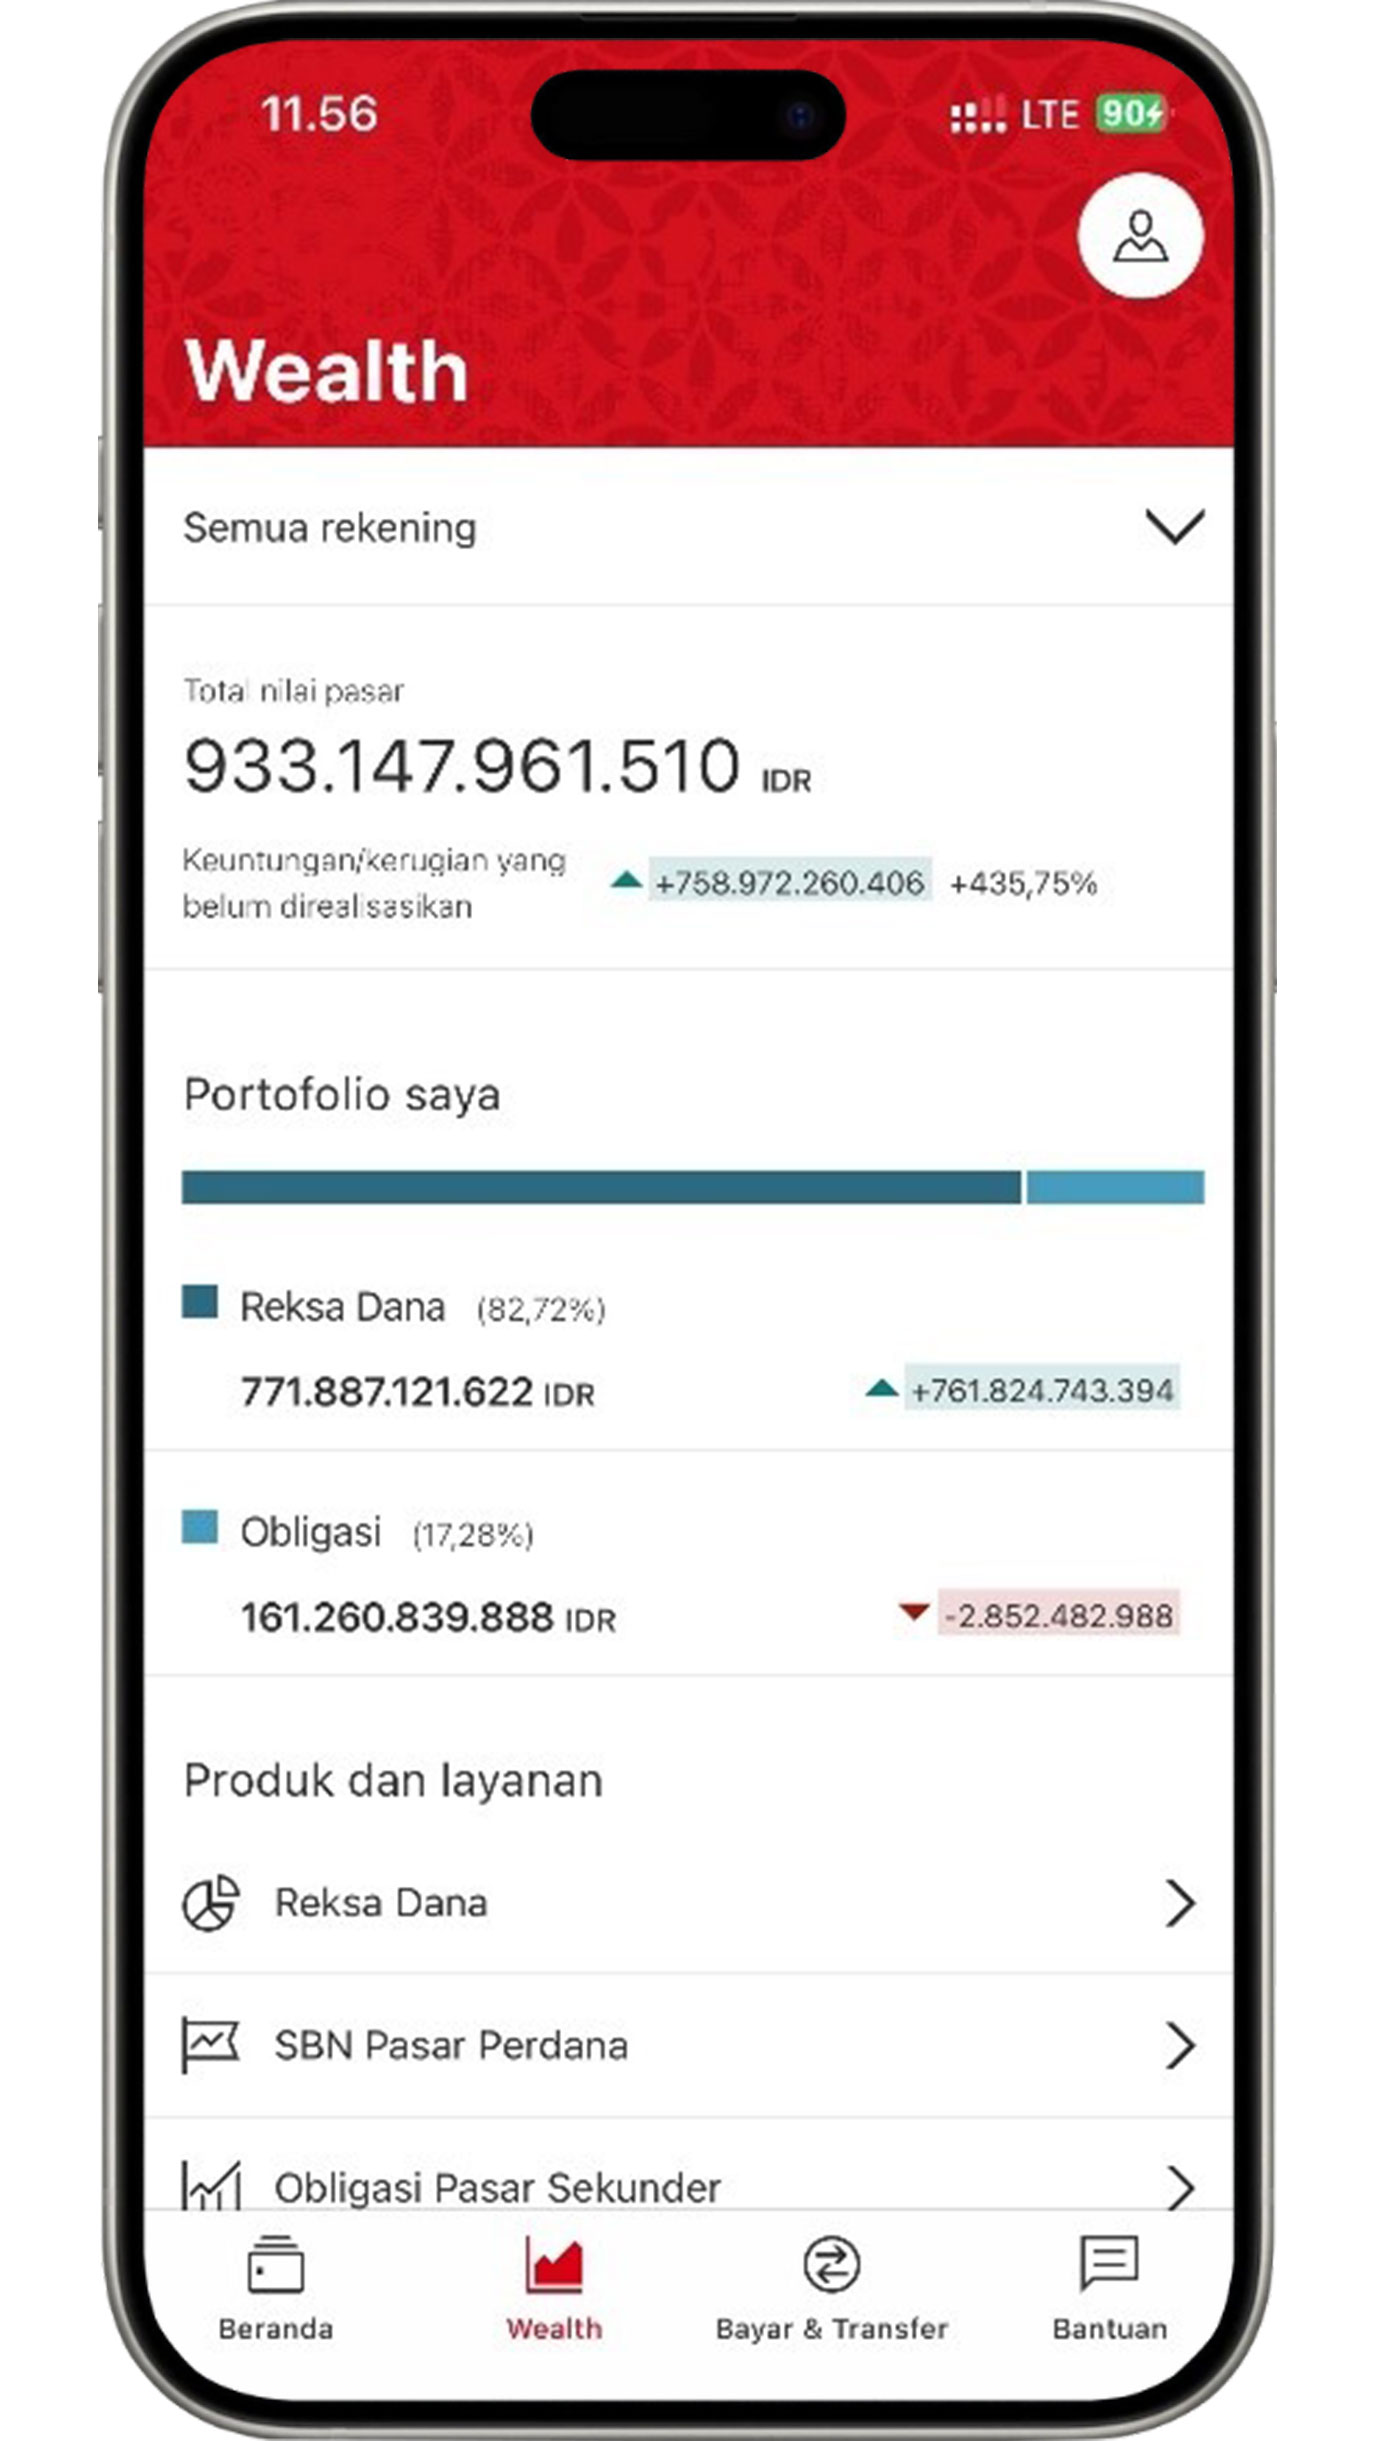
The Wealth Dashboard will appear on your screen in the Wealth menu with information on total portfolio from the products you have invested in.
More about Wealth Dashboard
View Insurance Dashboard
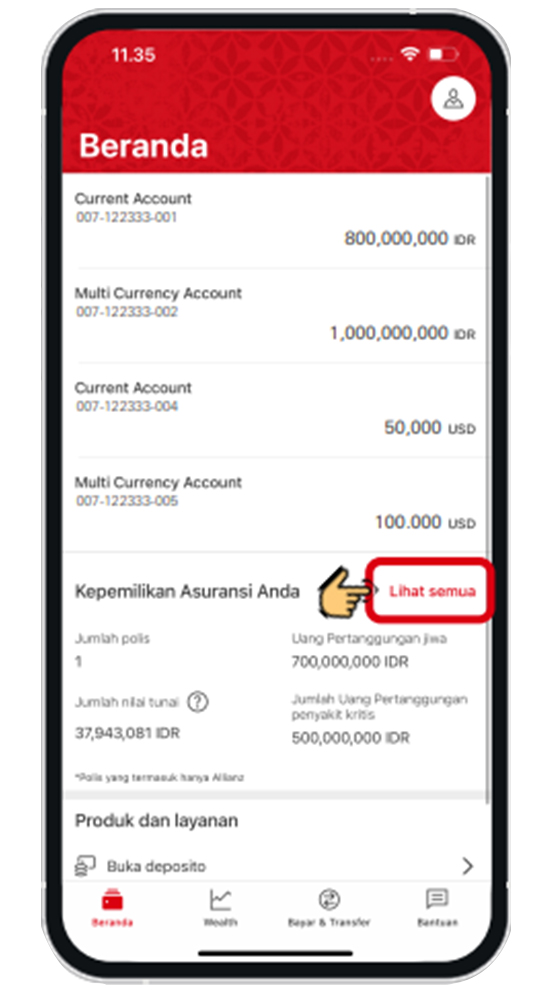
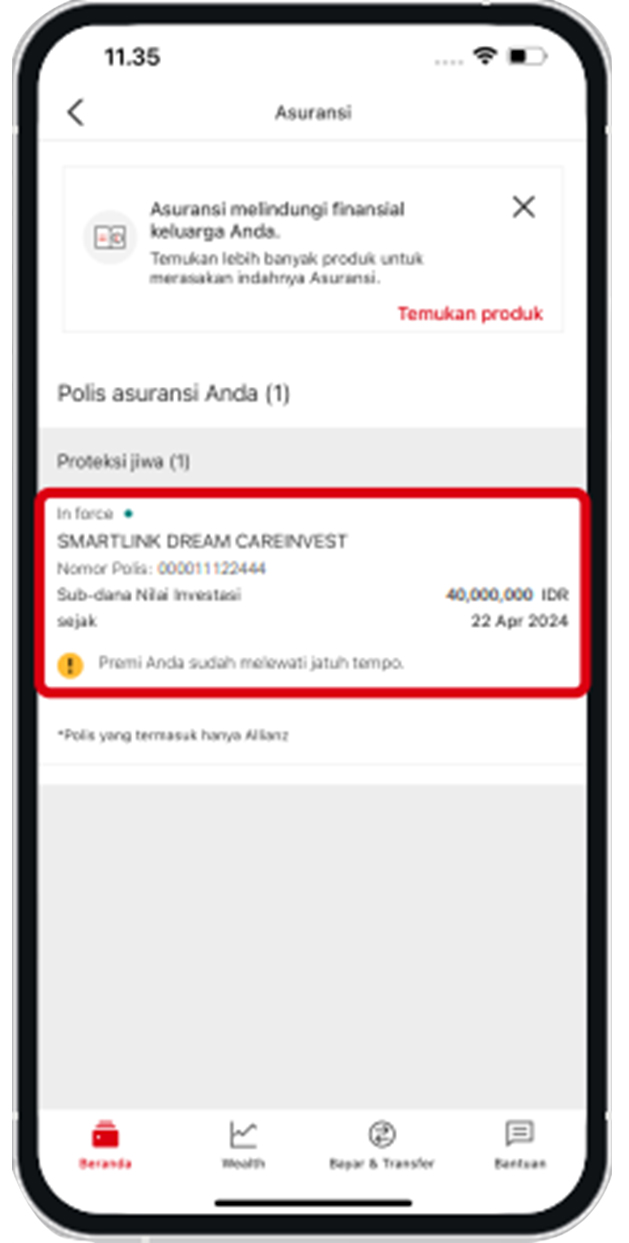
On the Home menu, click the "View all" button to view the Insurance Dashboard from the insurance that you would like to review.
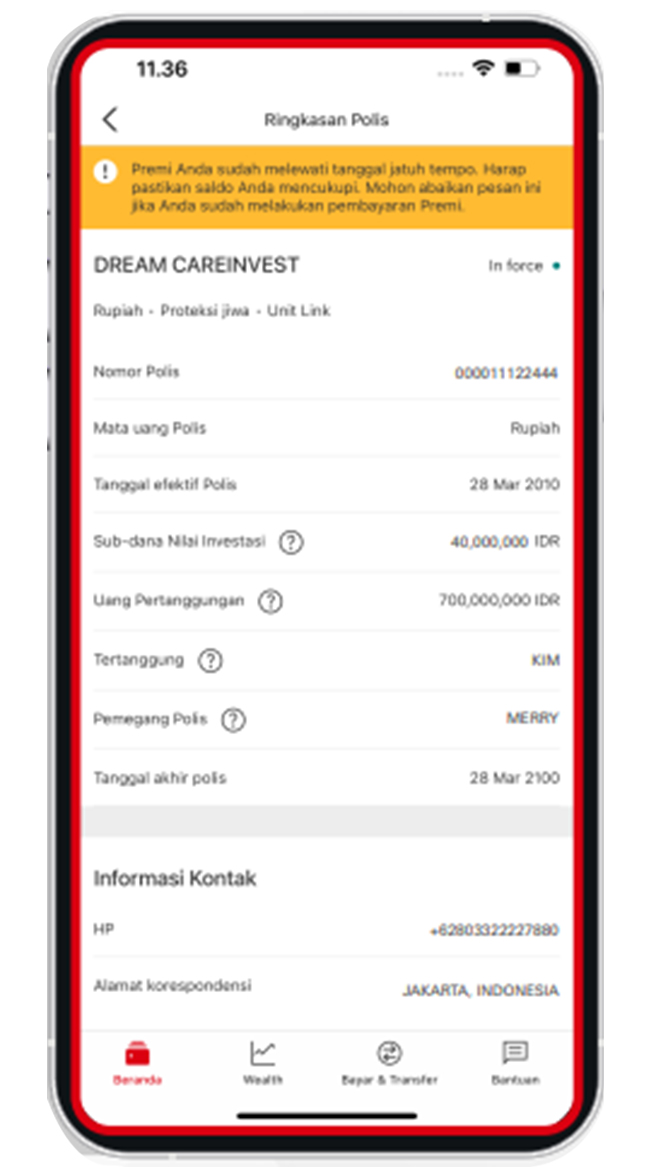
Select the insurance that you would like to view.
The Insurance Dashboard will display information such as policy number, policyholder name, premium amount, up to insurance benefits.
More about Insurance Dashboard
Steps on Security Features
Forget PIN HSBC Mobile Banking
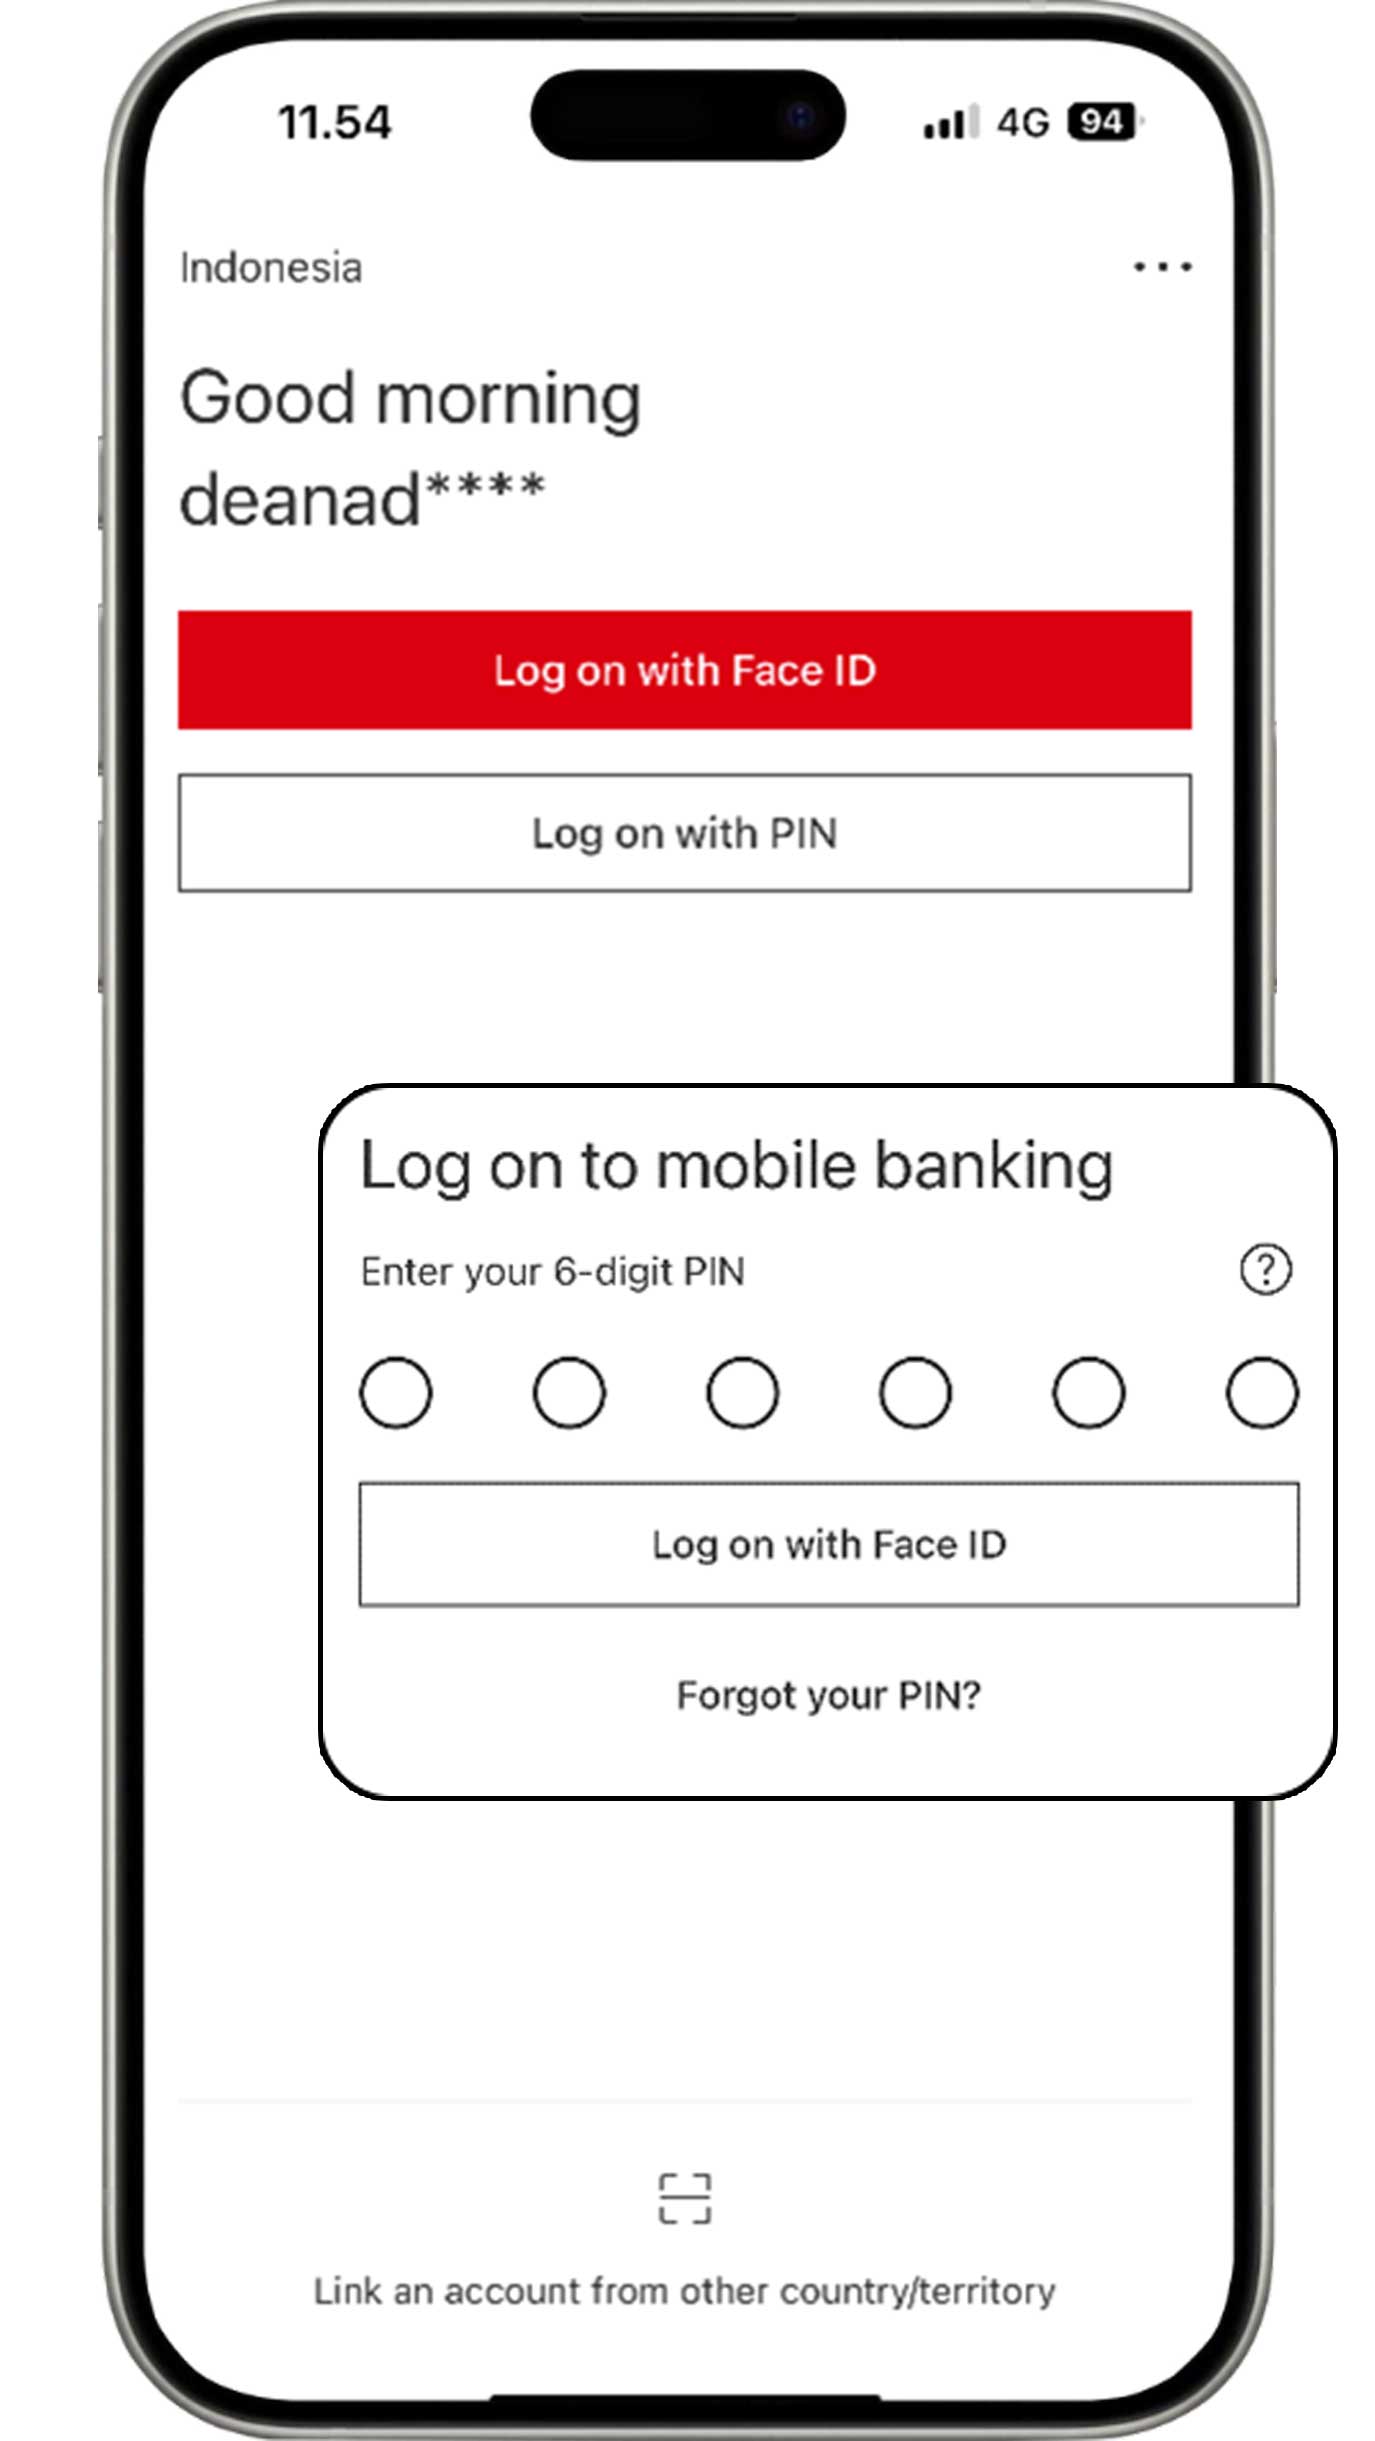
Before logging in to HSBC Mobile, select the "Log on with PIN" button and click "Forgot your PIN?".
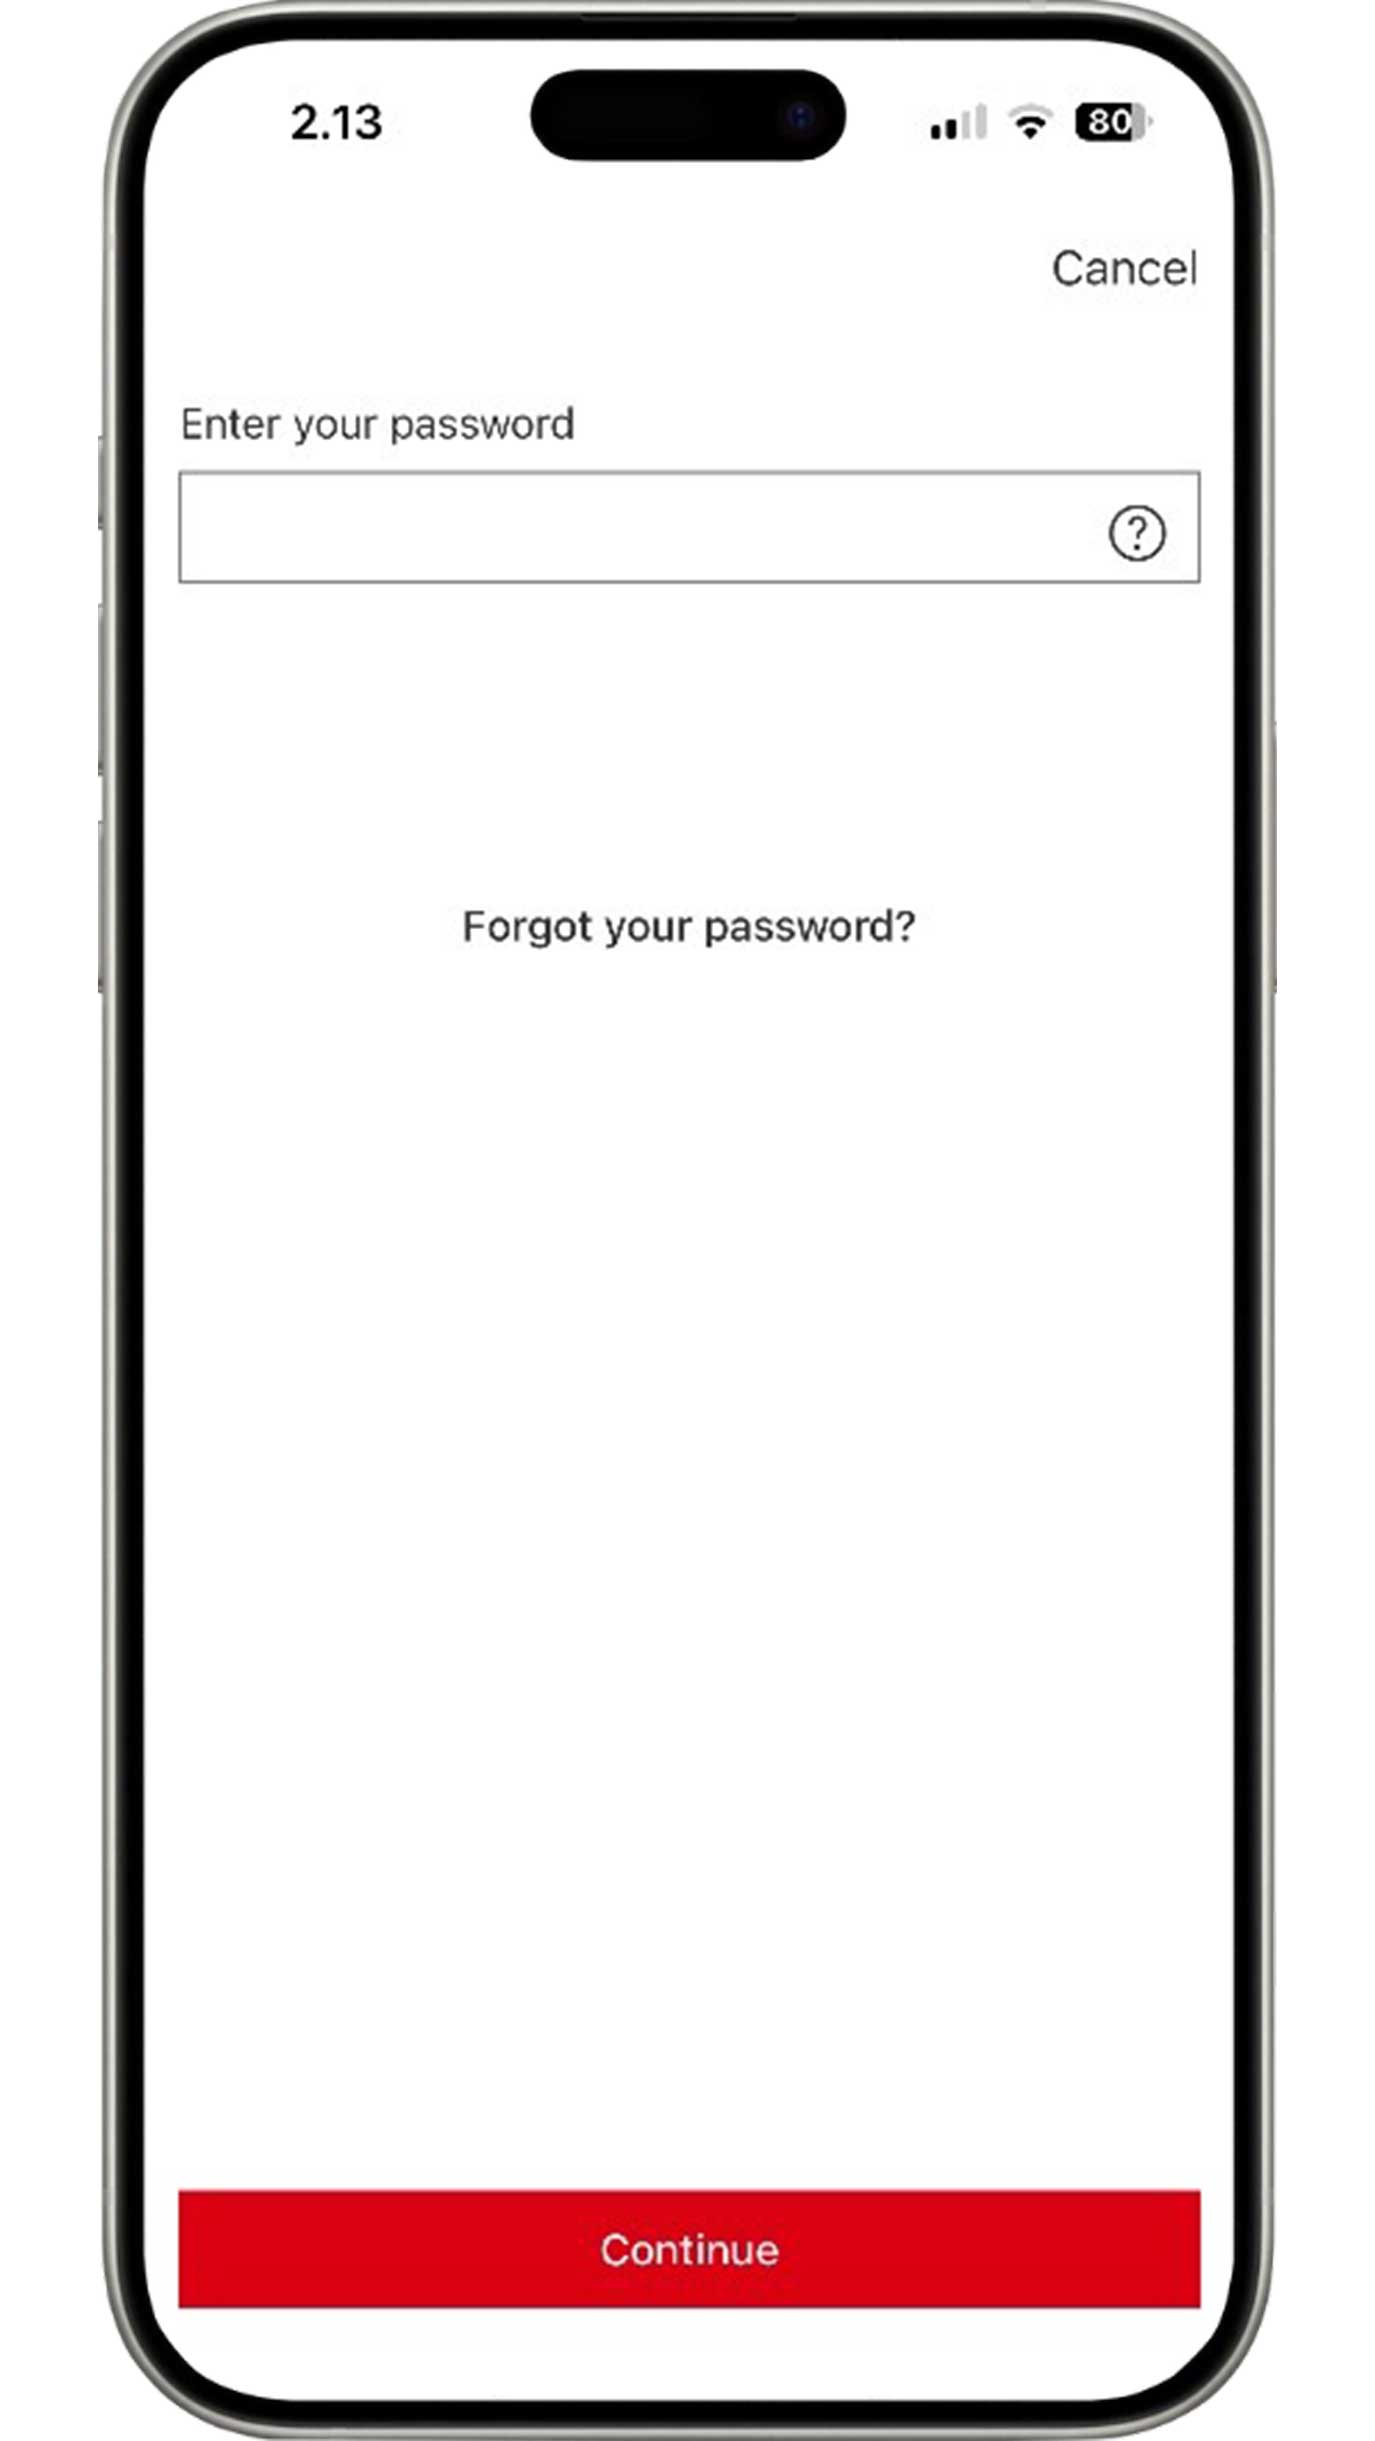
Enter your HSBC Mobile password. If you do not remember your password, please select "Forgot your password" to create a new HSBC Mobile password.
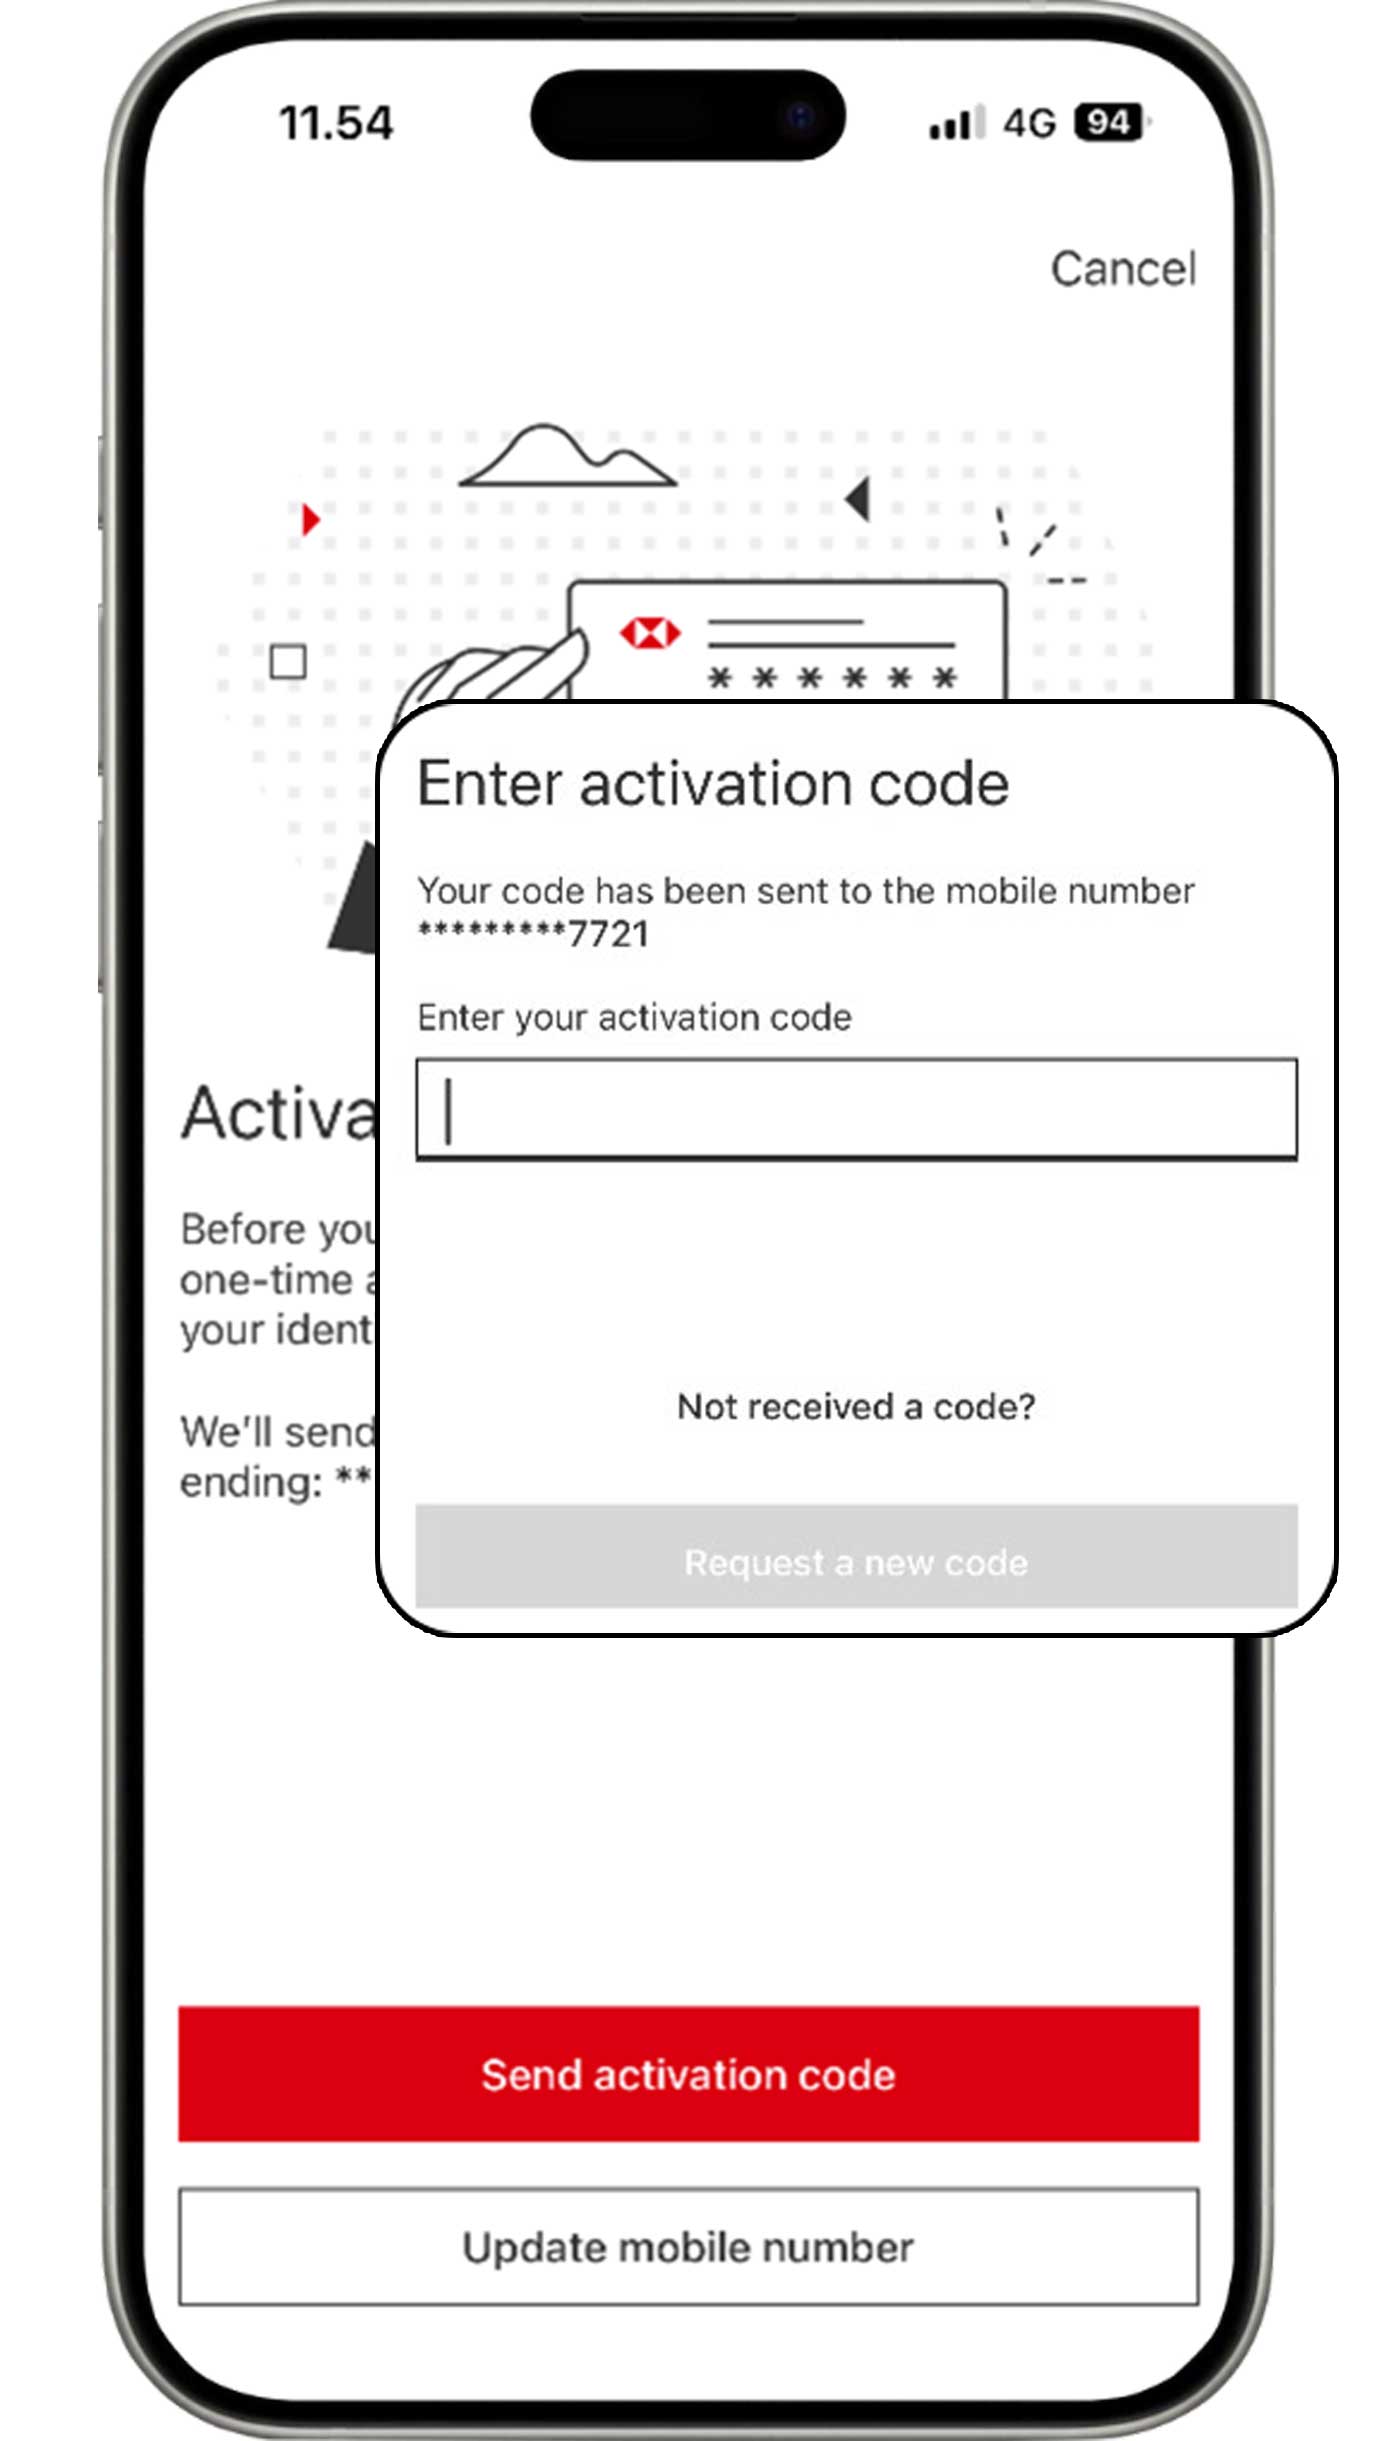
For verification, select the "Send activation code" button and enter the activation code sent to your mobile number that is registered with the bank.
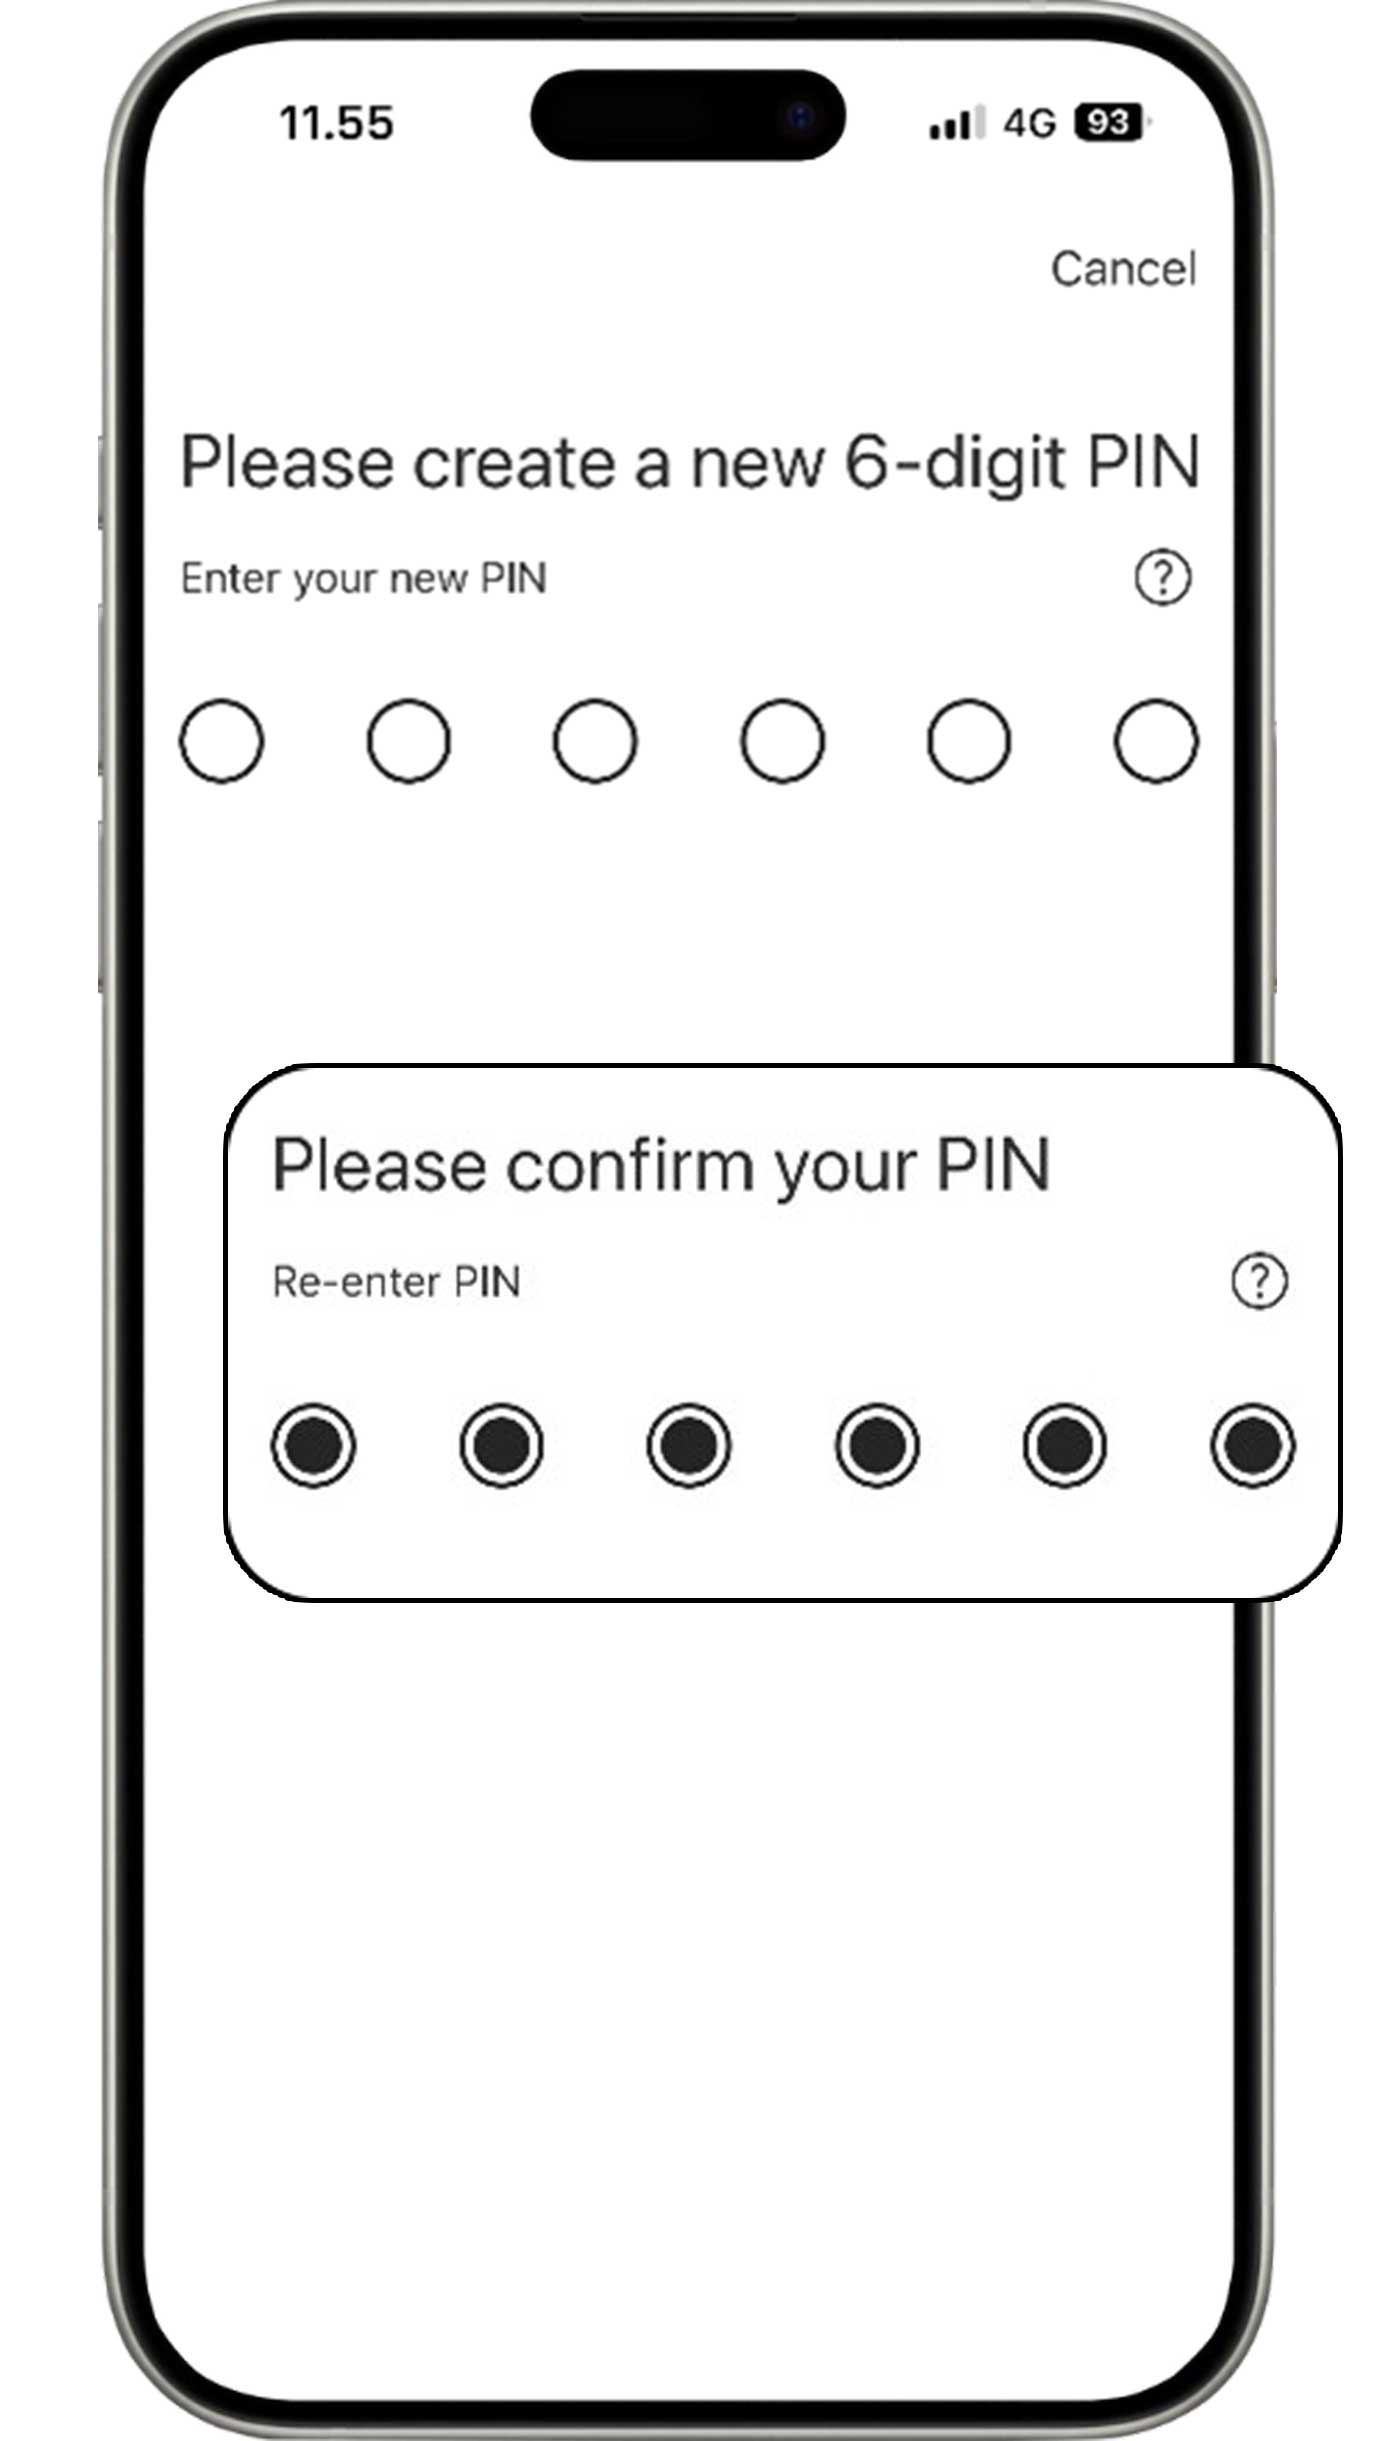
Create your new 6-digit HSBC Mobile PIN and re-enter your new PIN for confirmation.
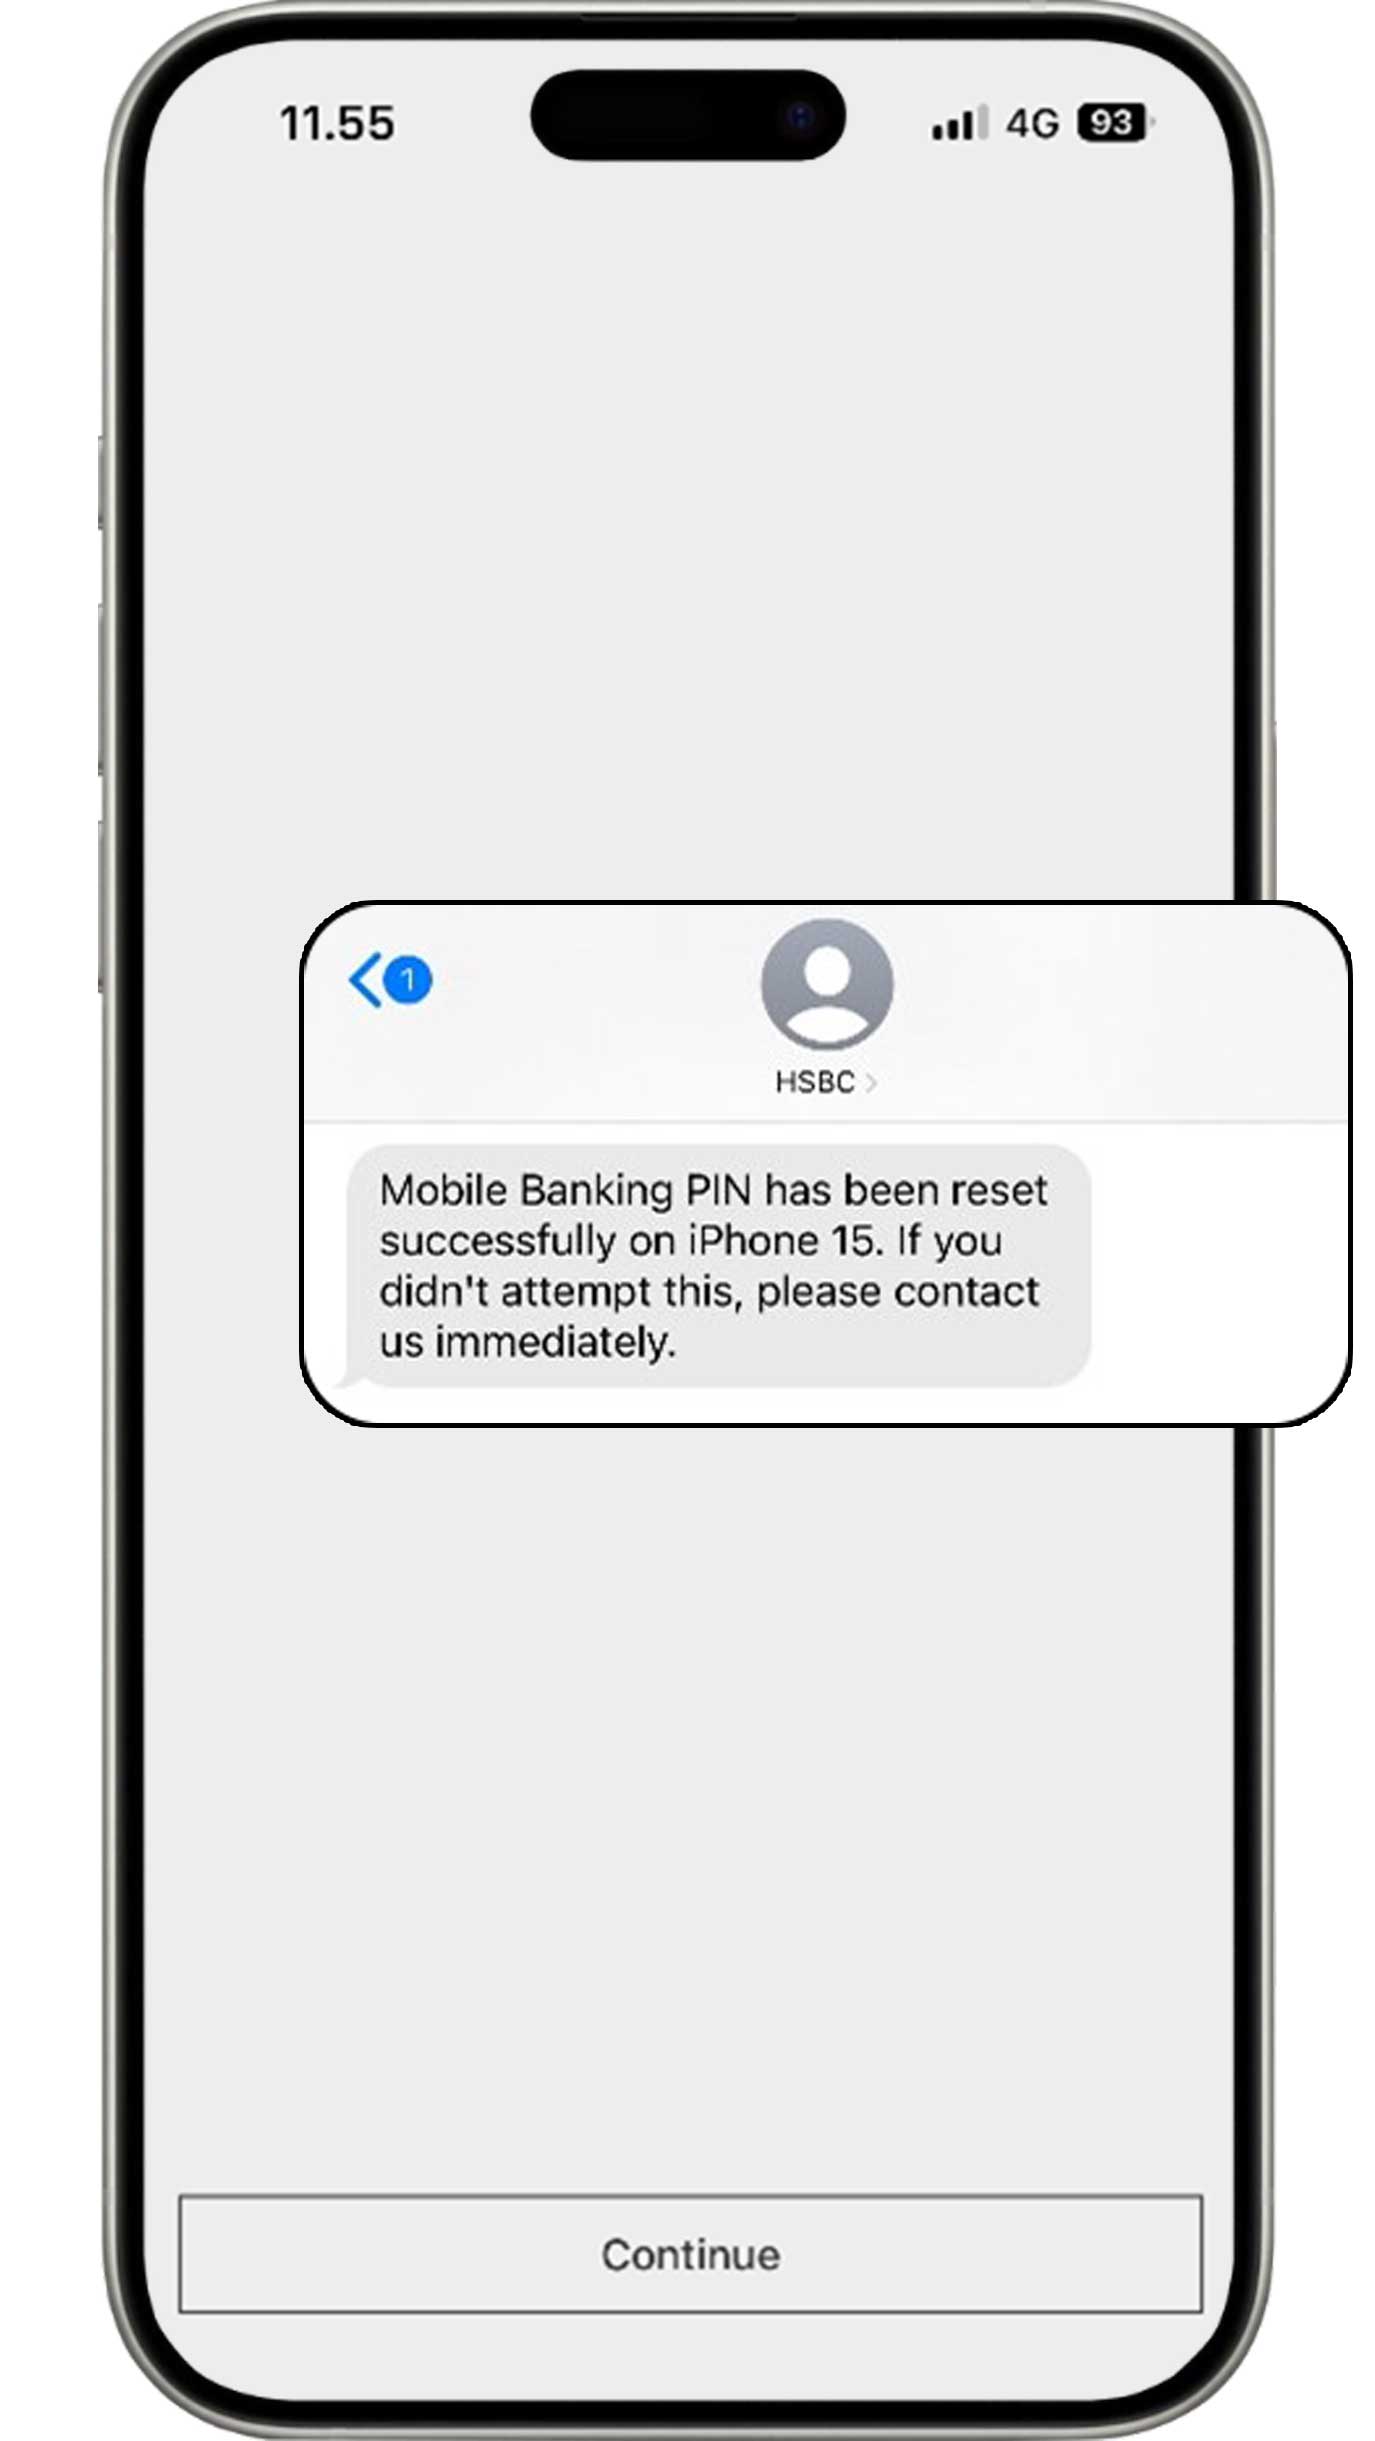
Your HSBC Mobile PIN has been created successfully. You will receive an SMS notification for creation of a new PIN.
Foget password HSBC Mobile Banking
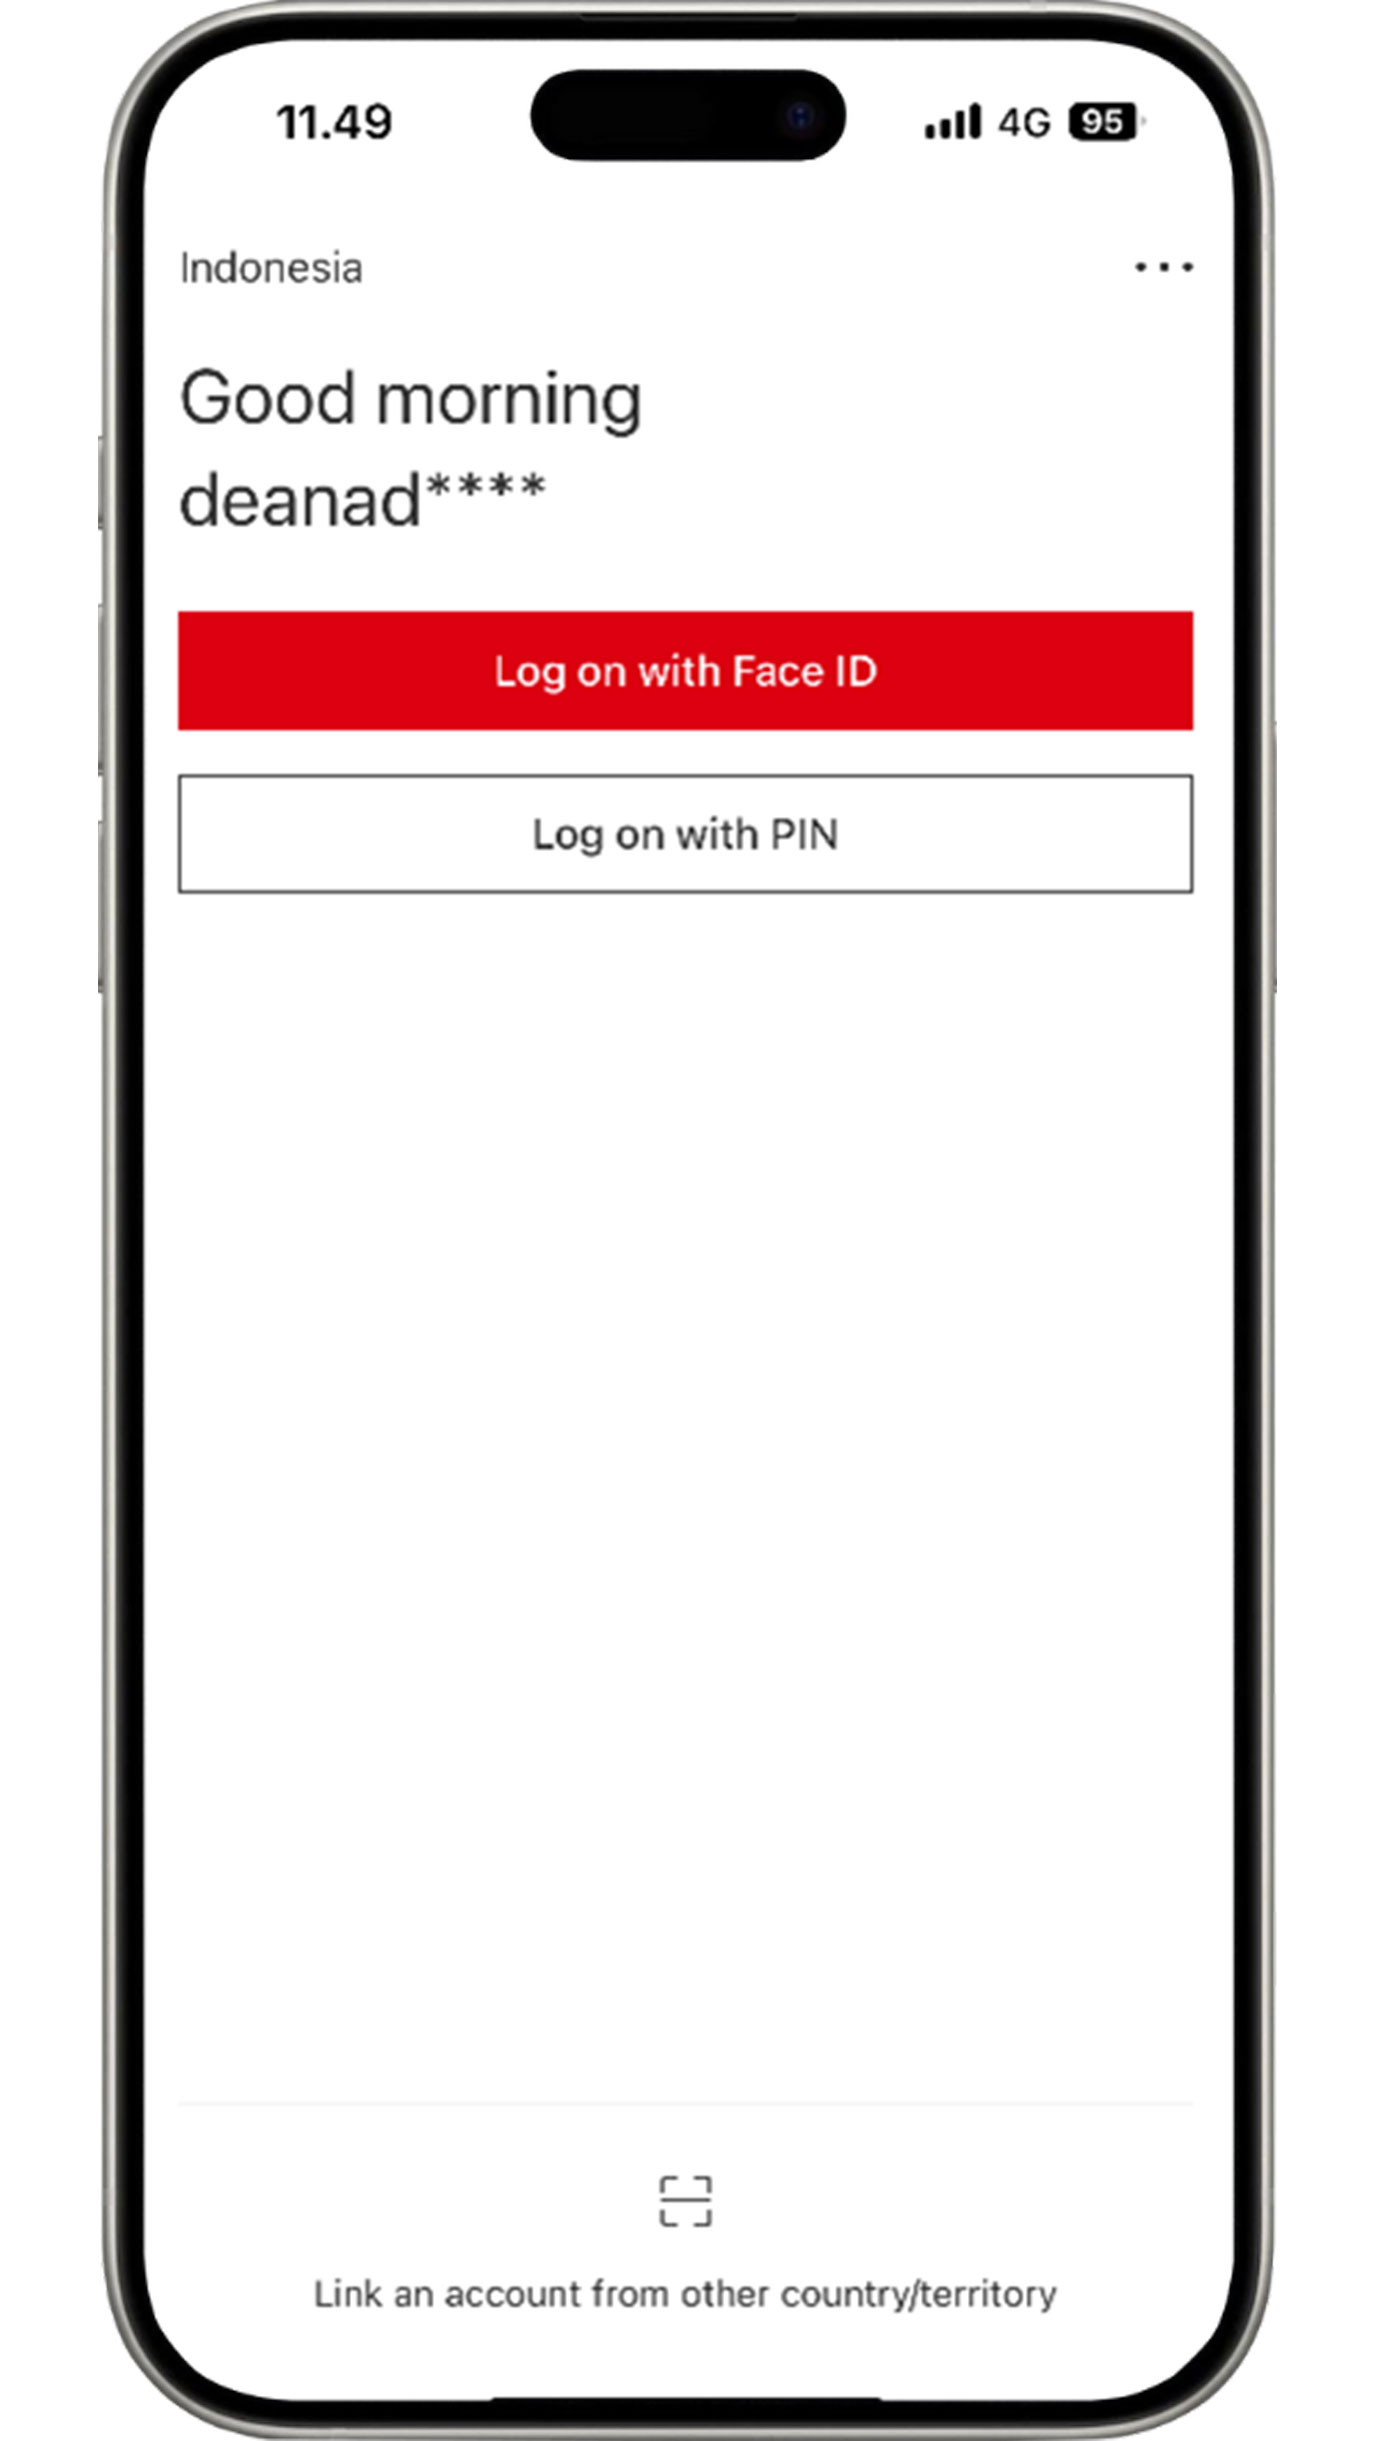
Before logging in to HSBC Mobile Banking, select the "Log on with PIN" button.
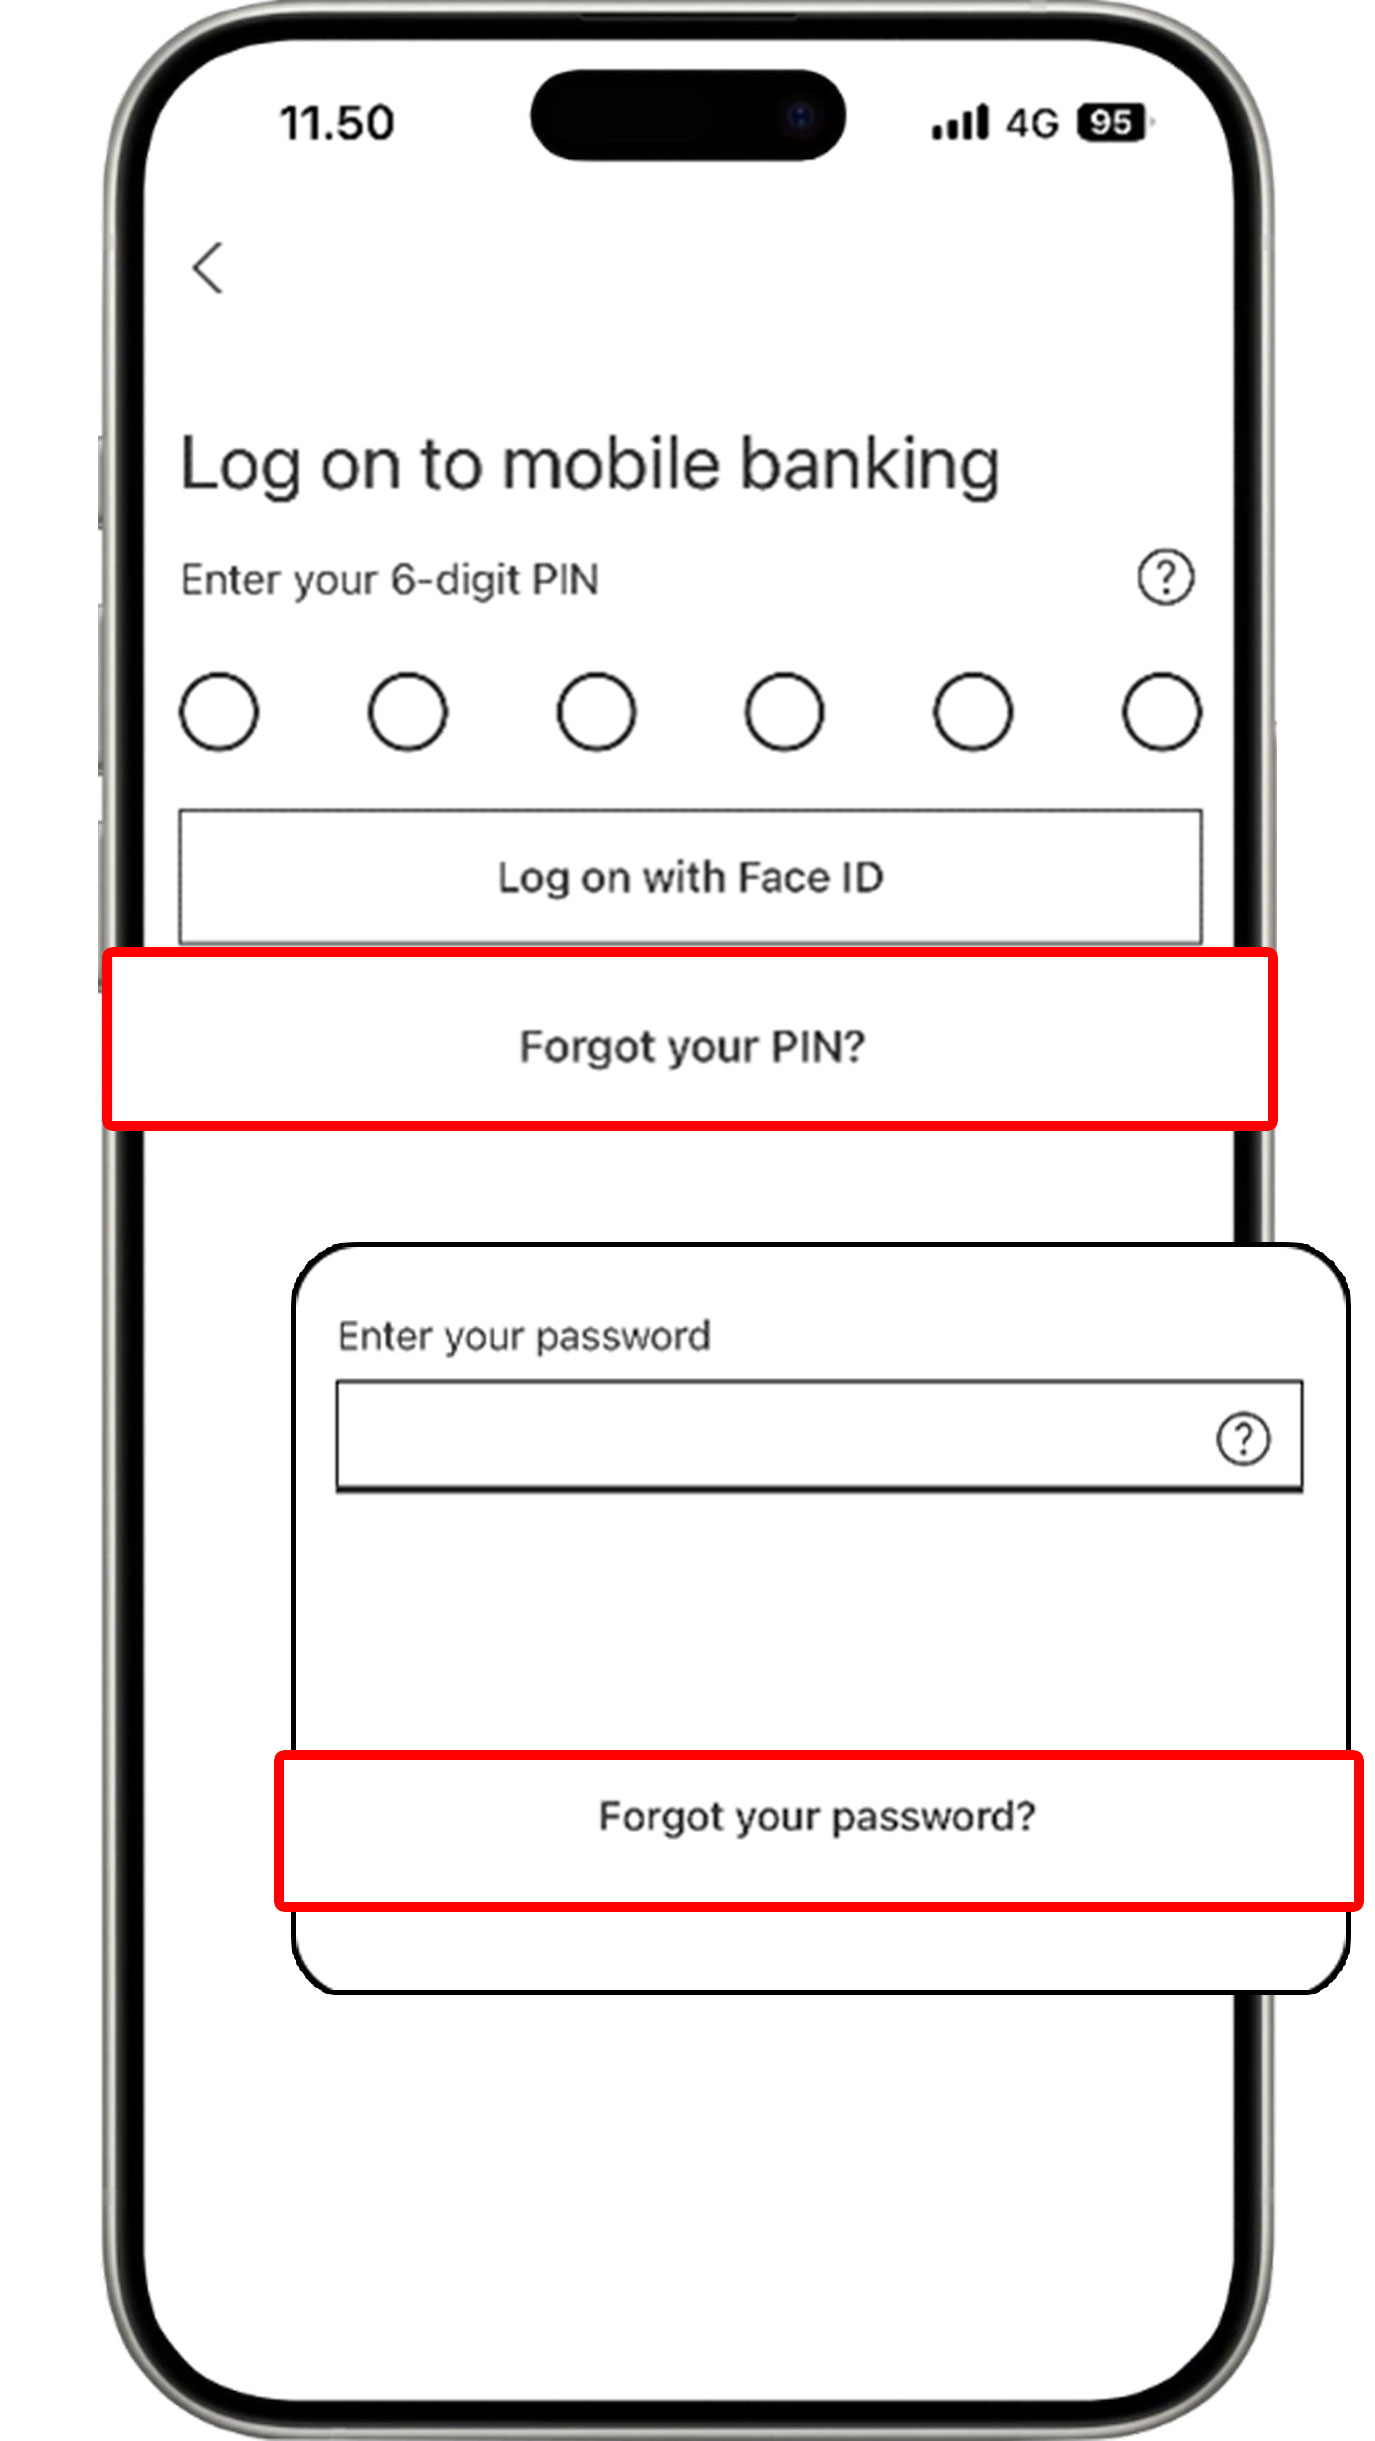
Select “Forgot your PIN?” and click "Forgot your password?".
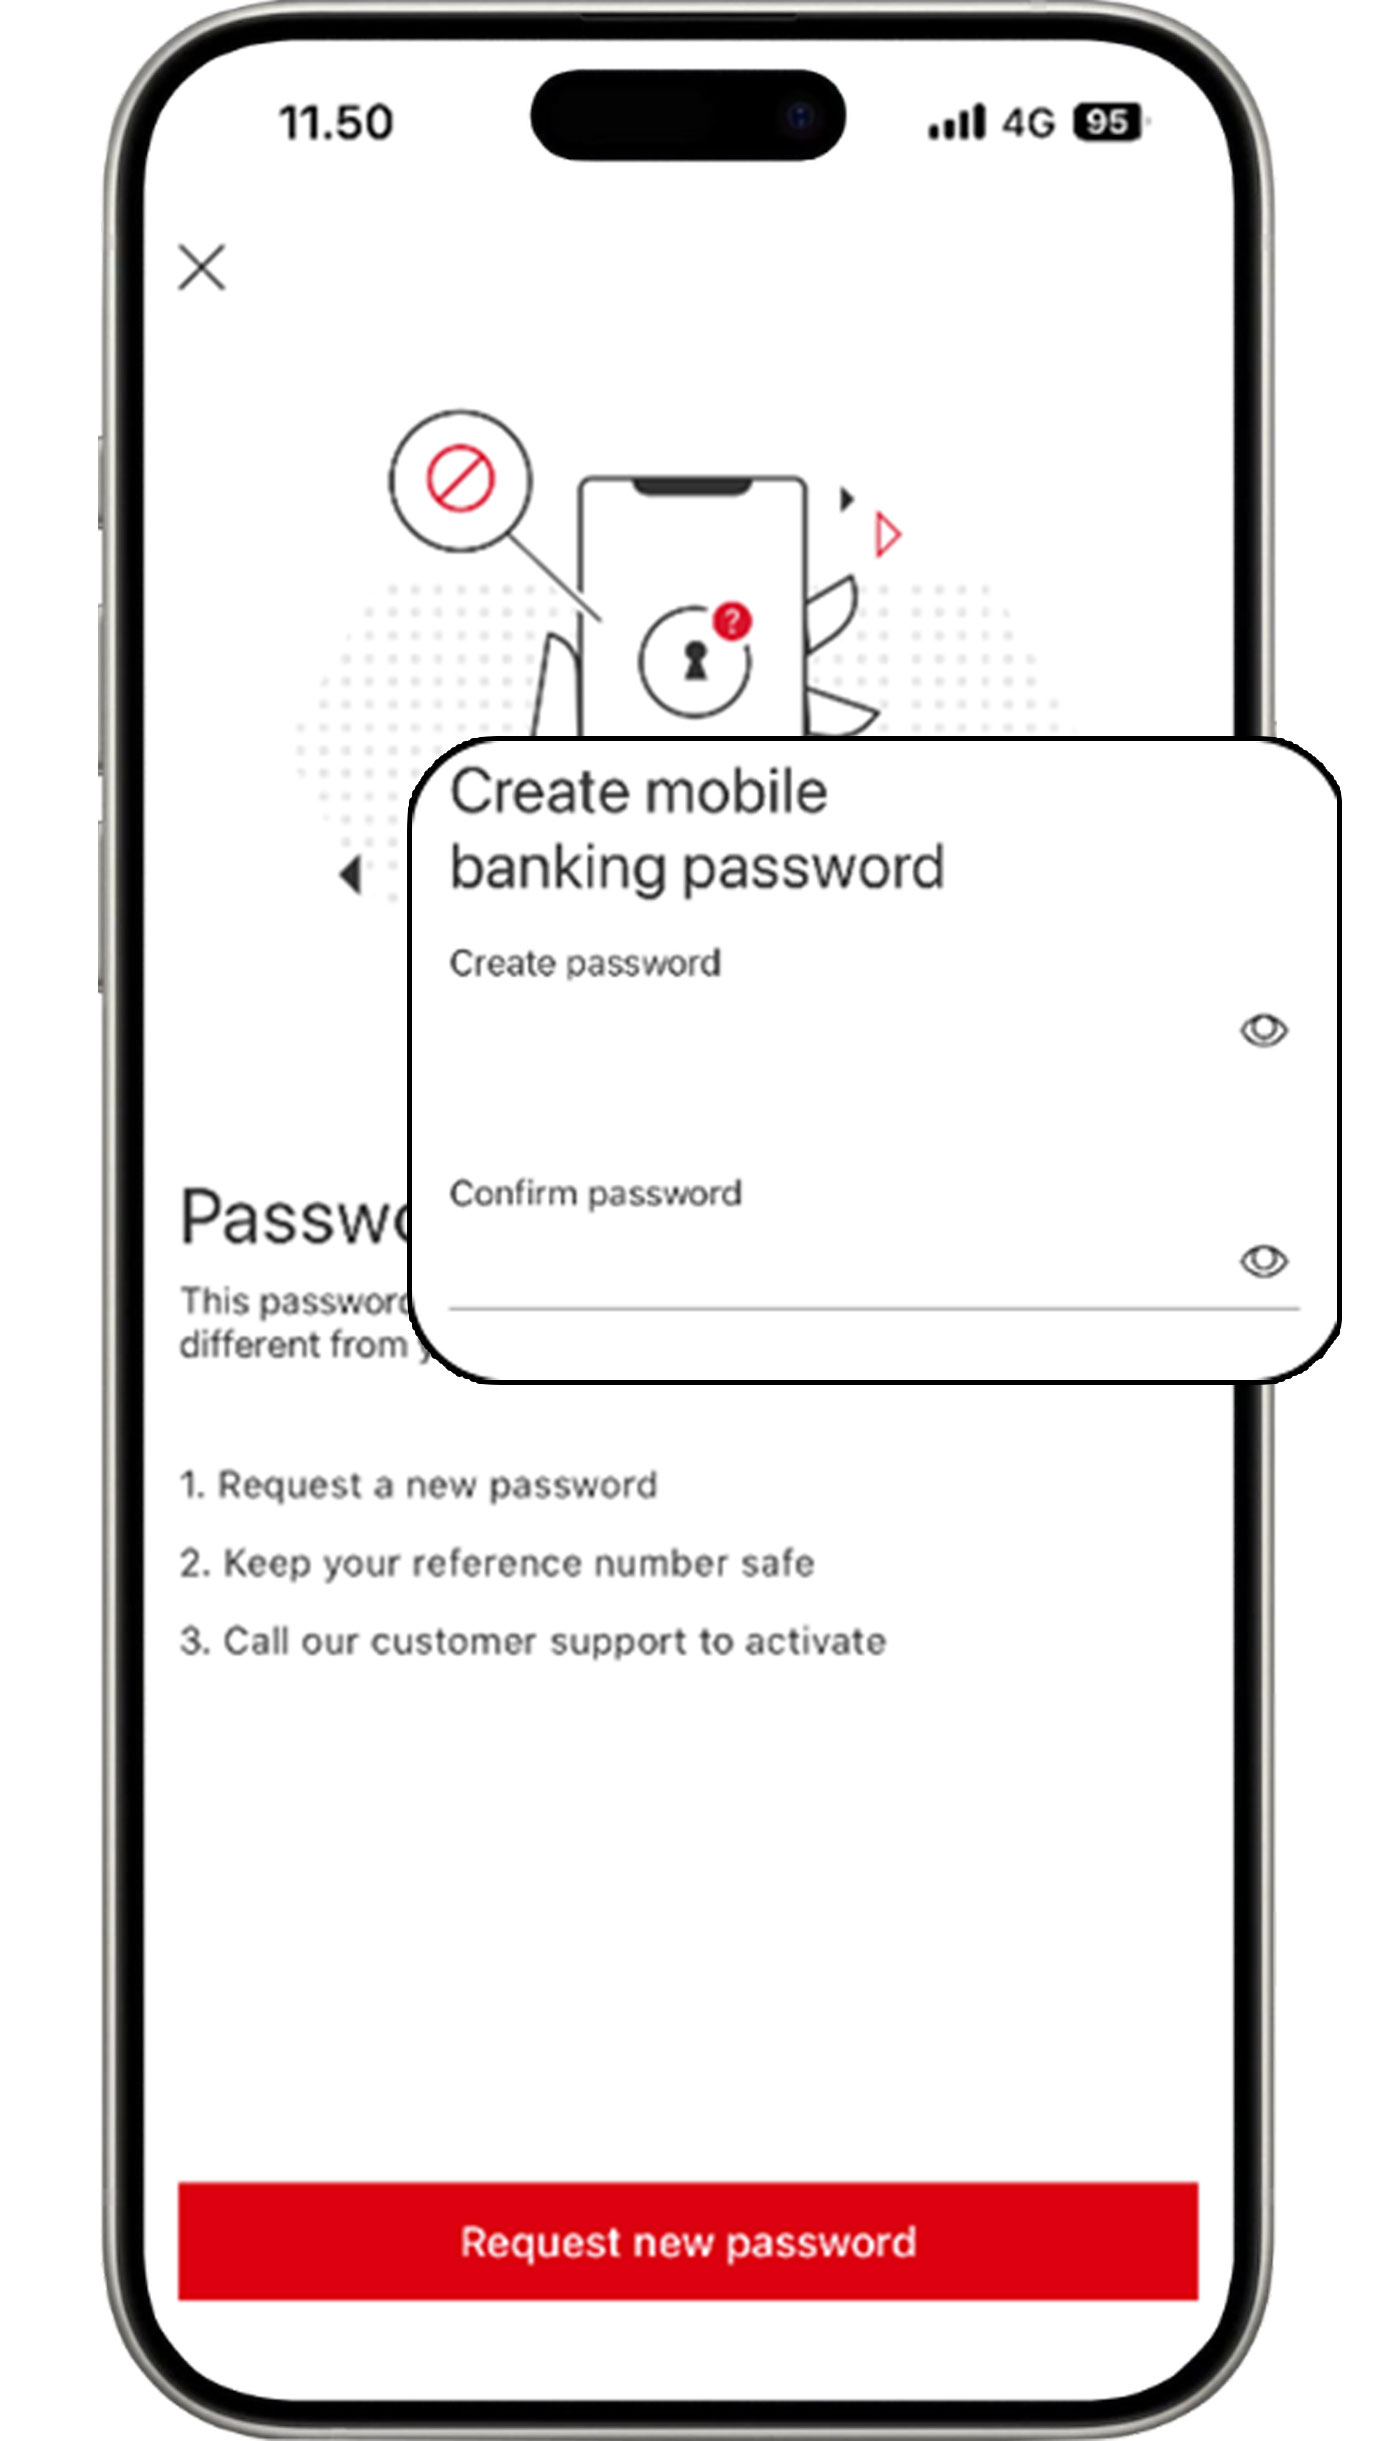
Click the "Request new password" button, then create your new password.
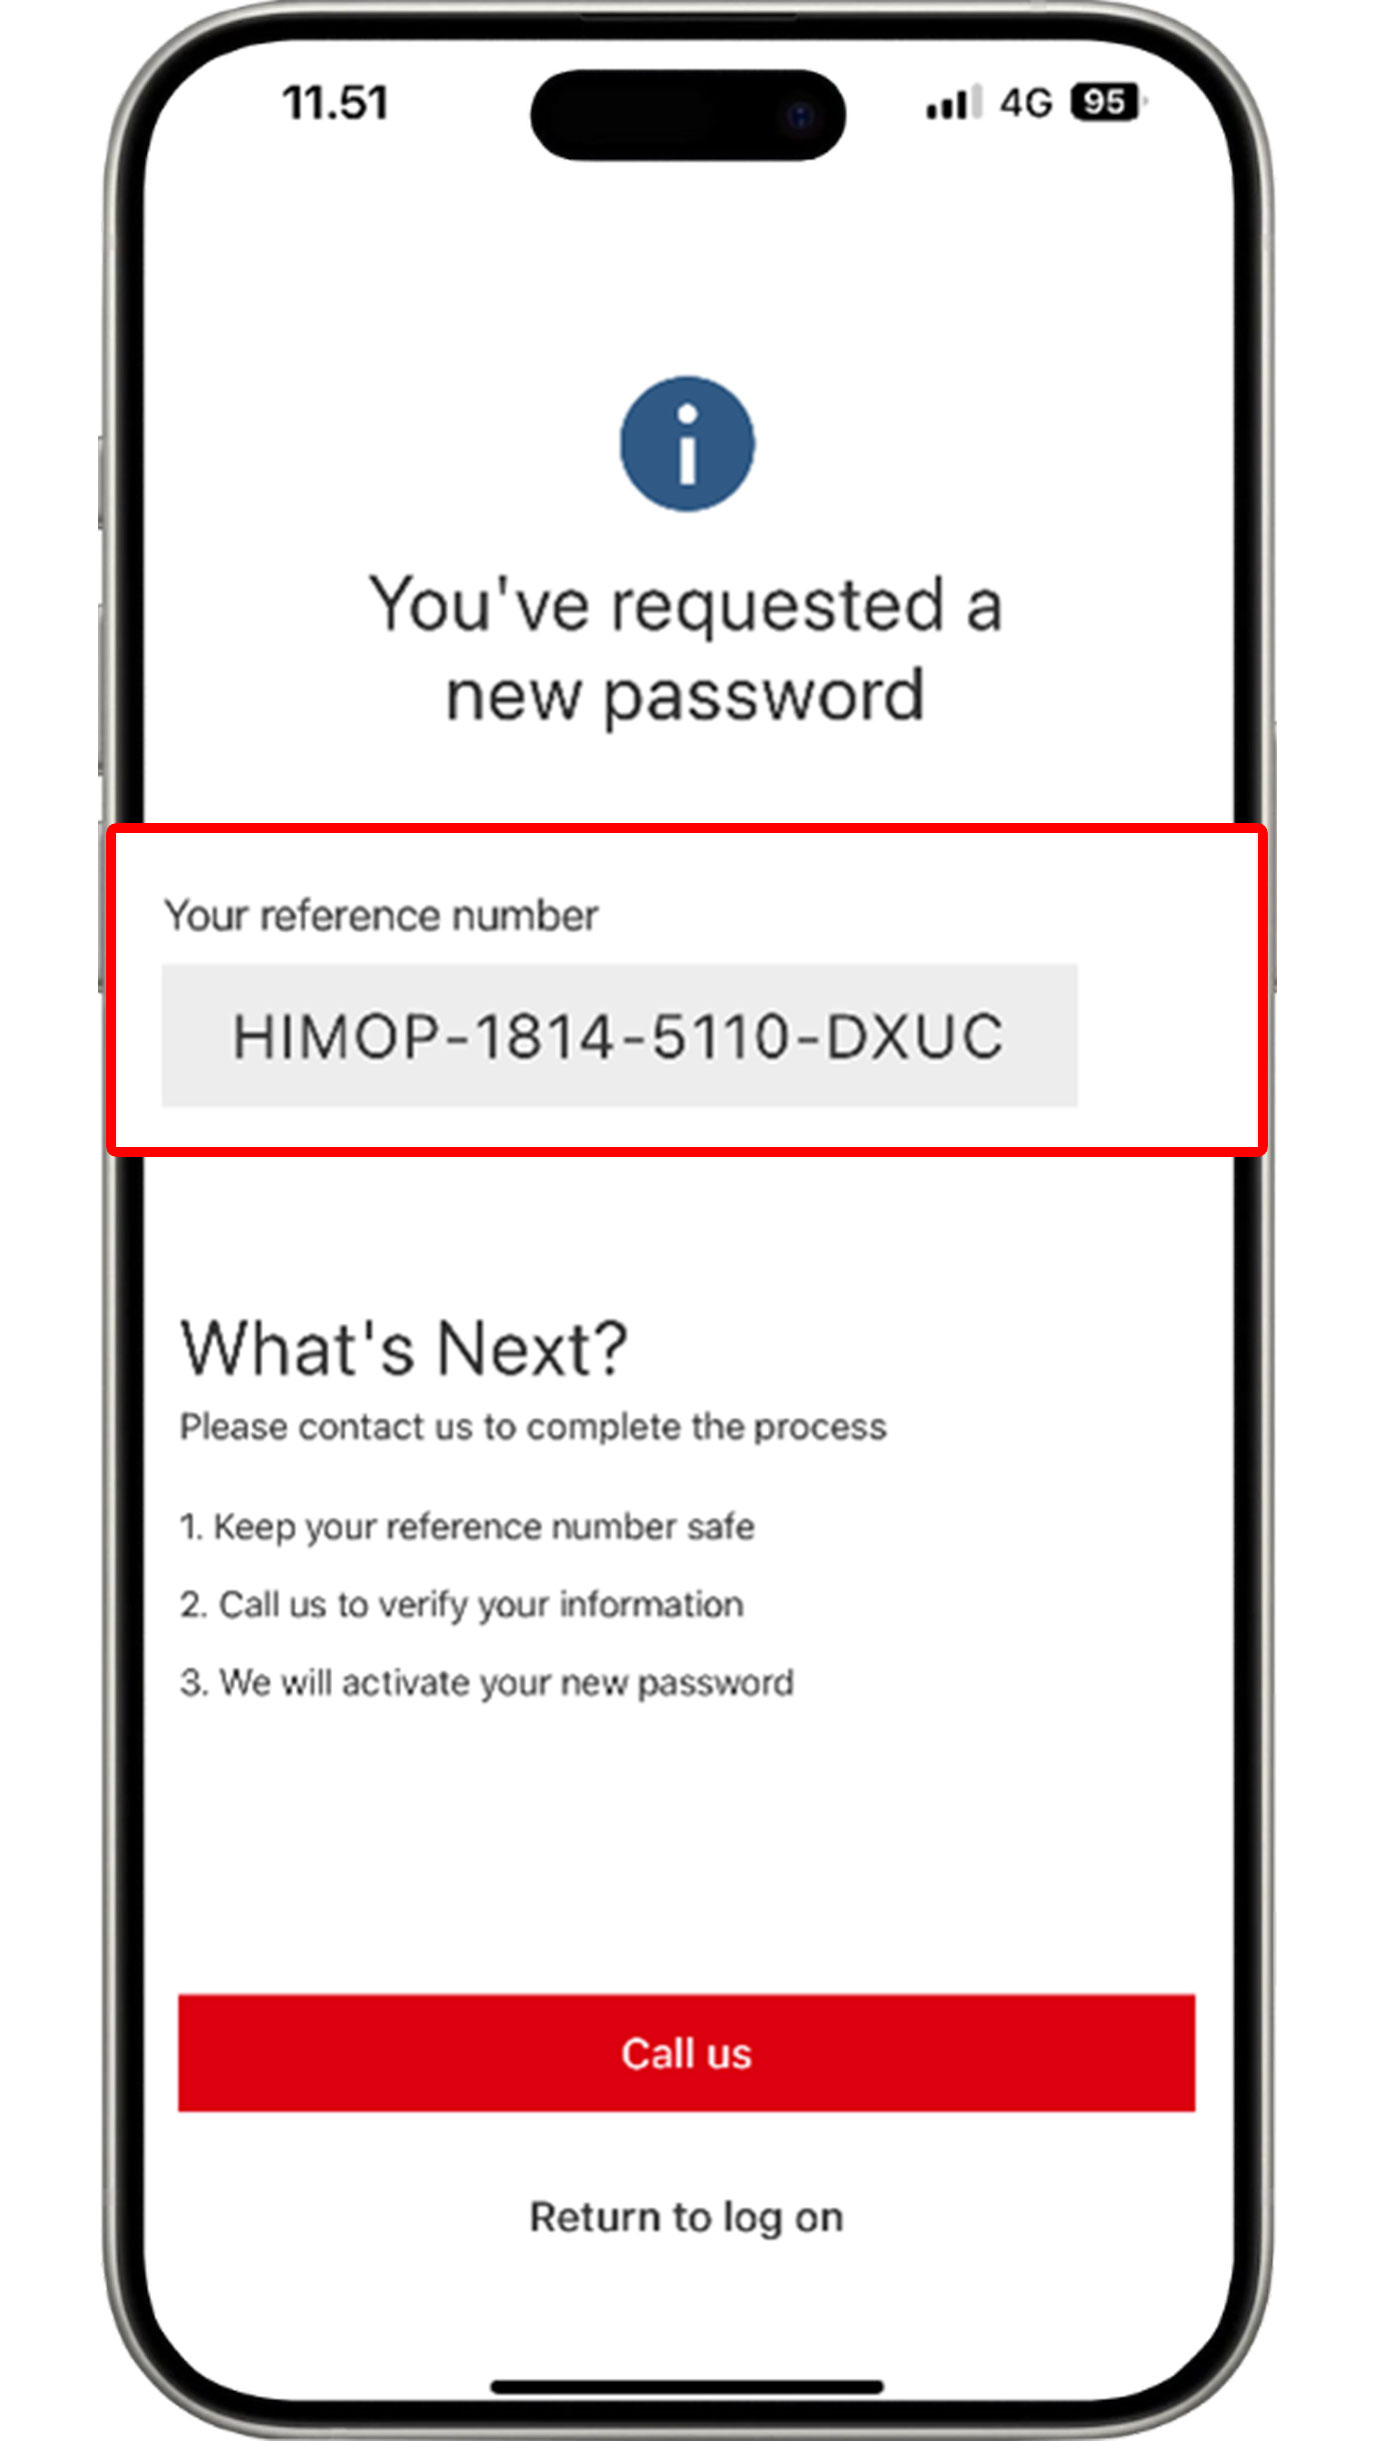
After getting the reference code, please call HSBC Contact Center by pressing the "Call us" button for verification.
Change PIN HSBC Mobile Banking

Access your Profile at the top right corner of the HSBC Mobile Banking homepage and select "Security".
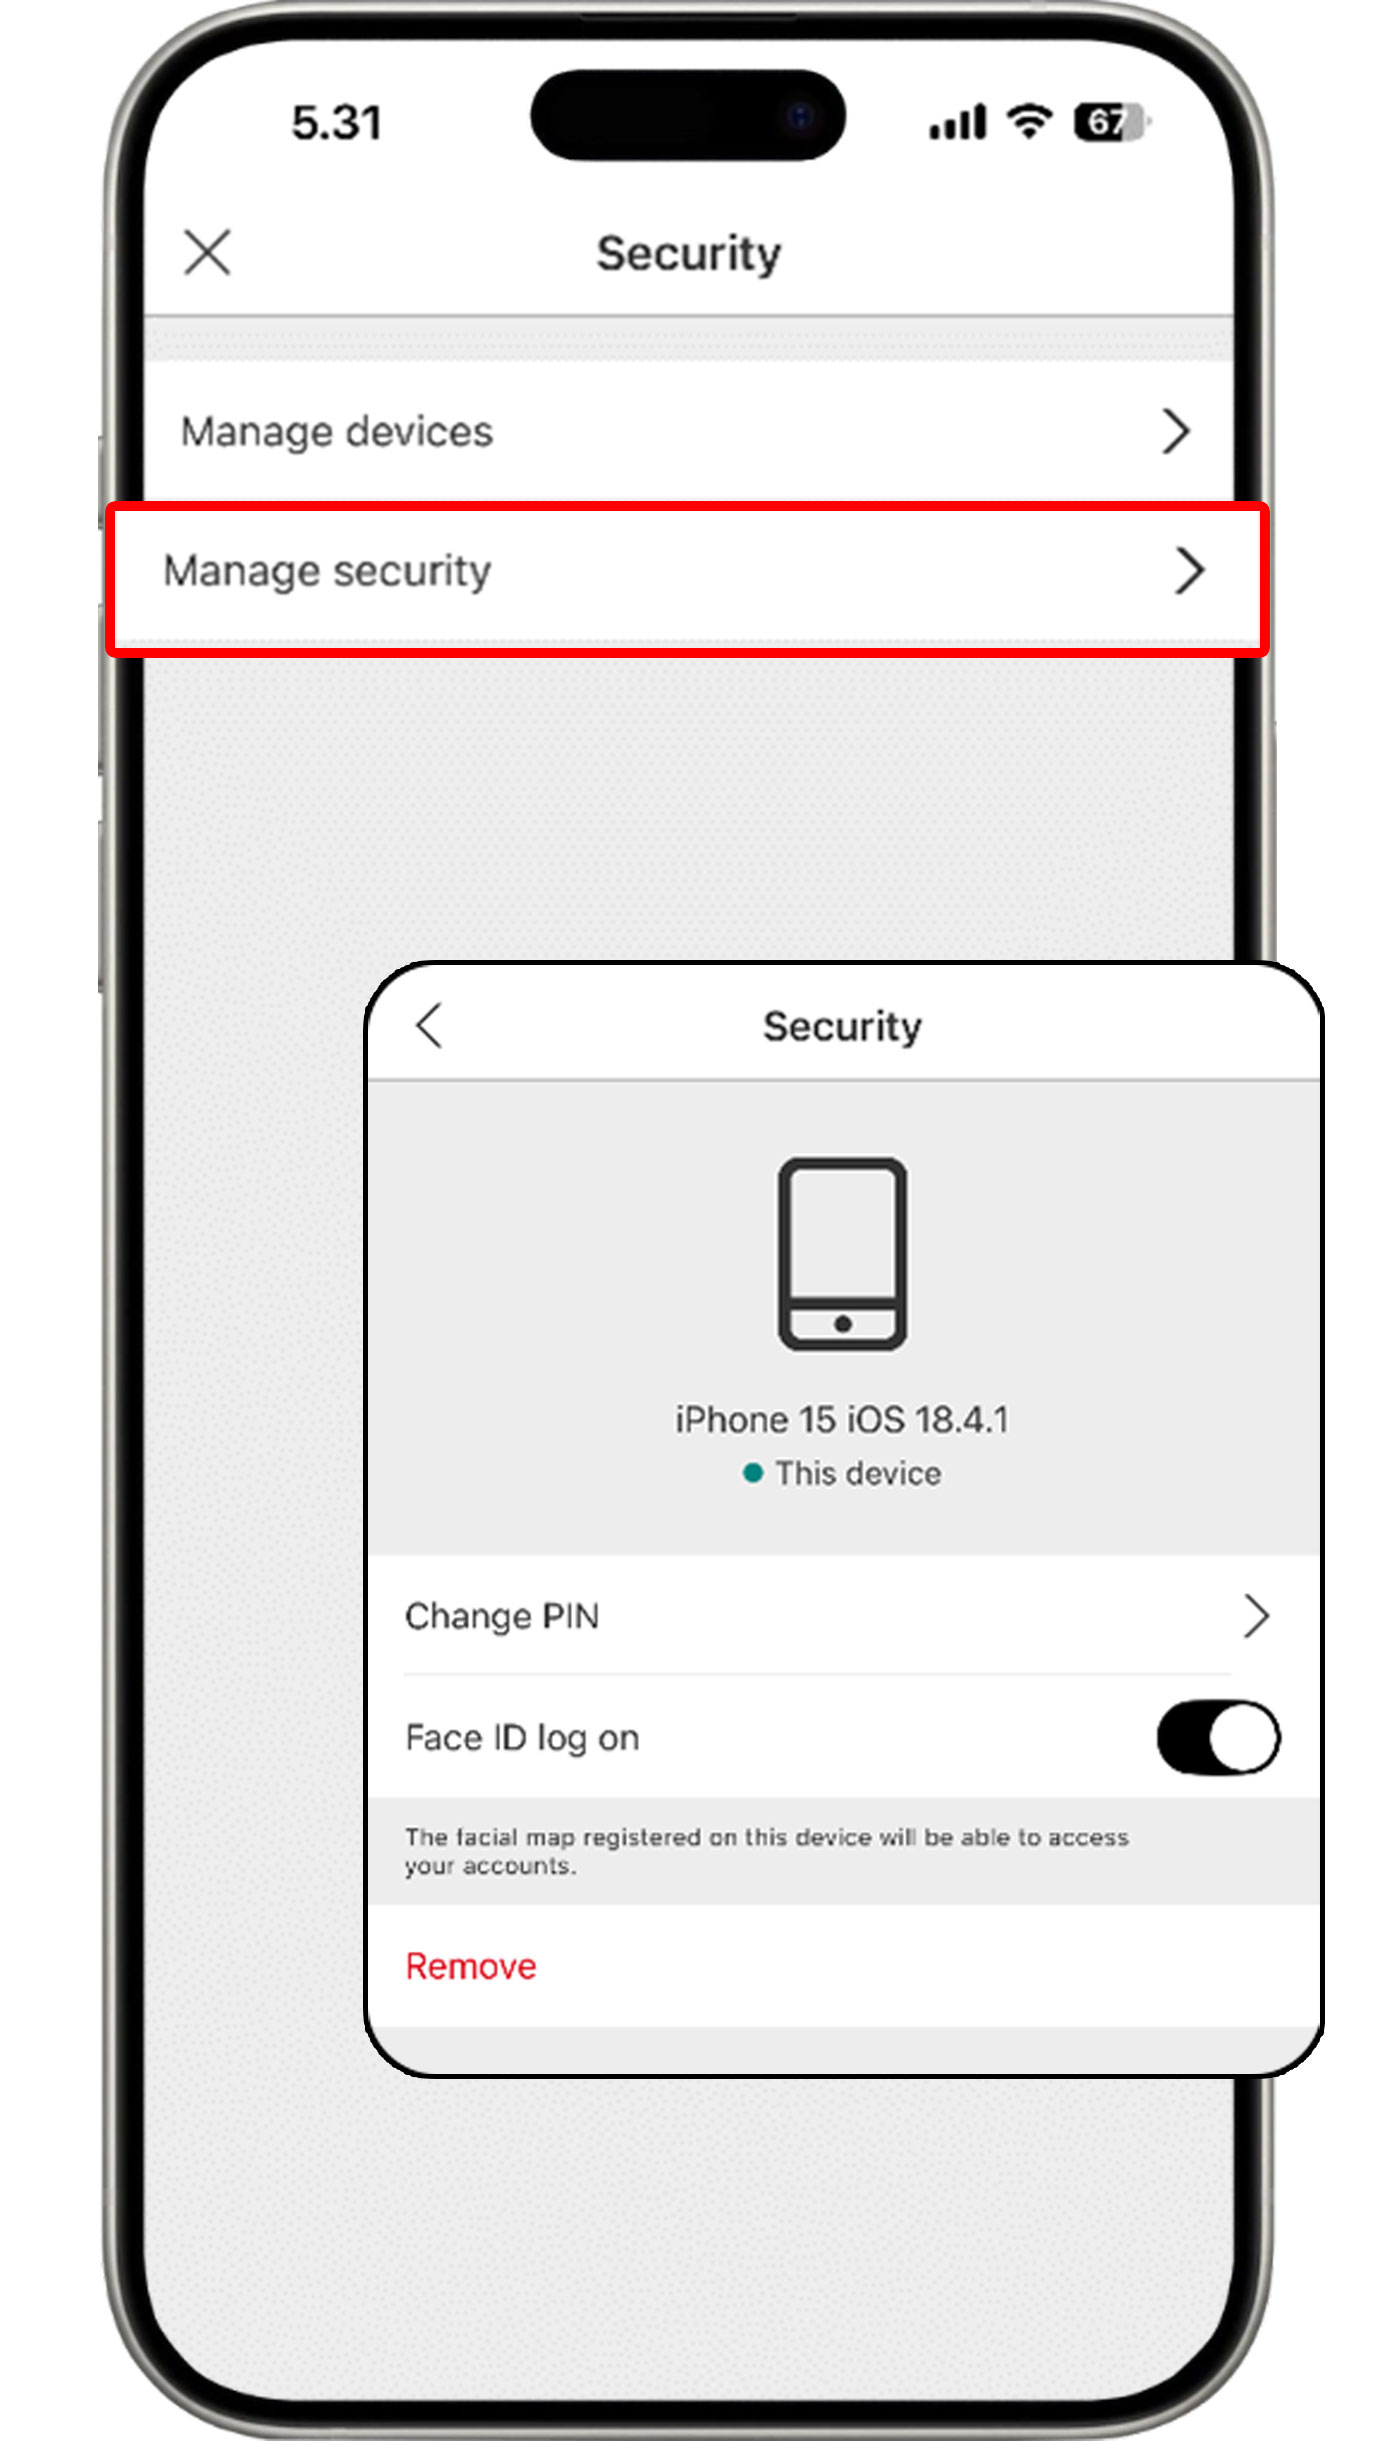
Select "Manage security" and click "Change PIN".

Enter your current 6-digit HSBC Mobile PIN.
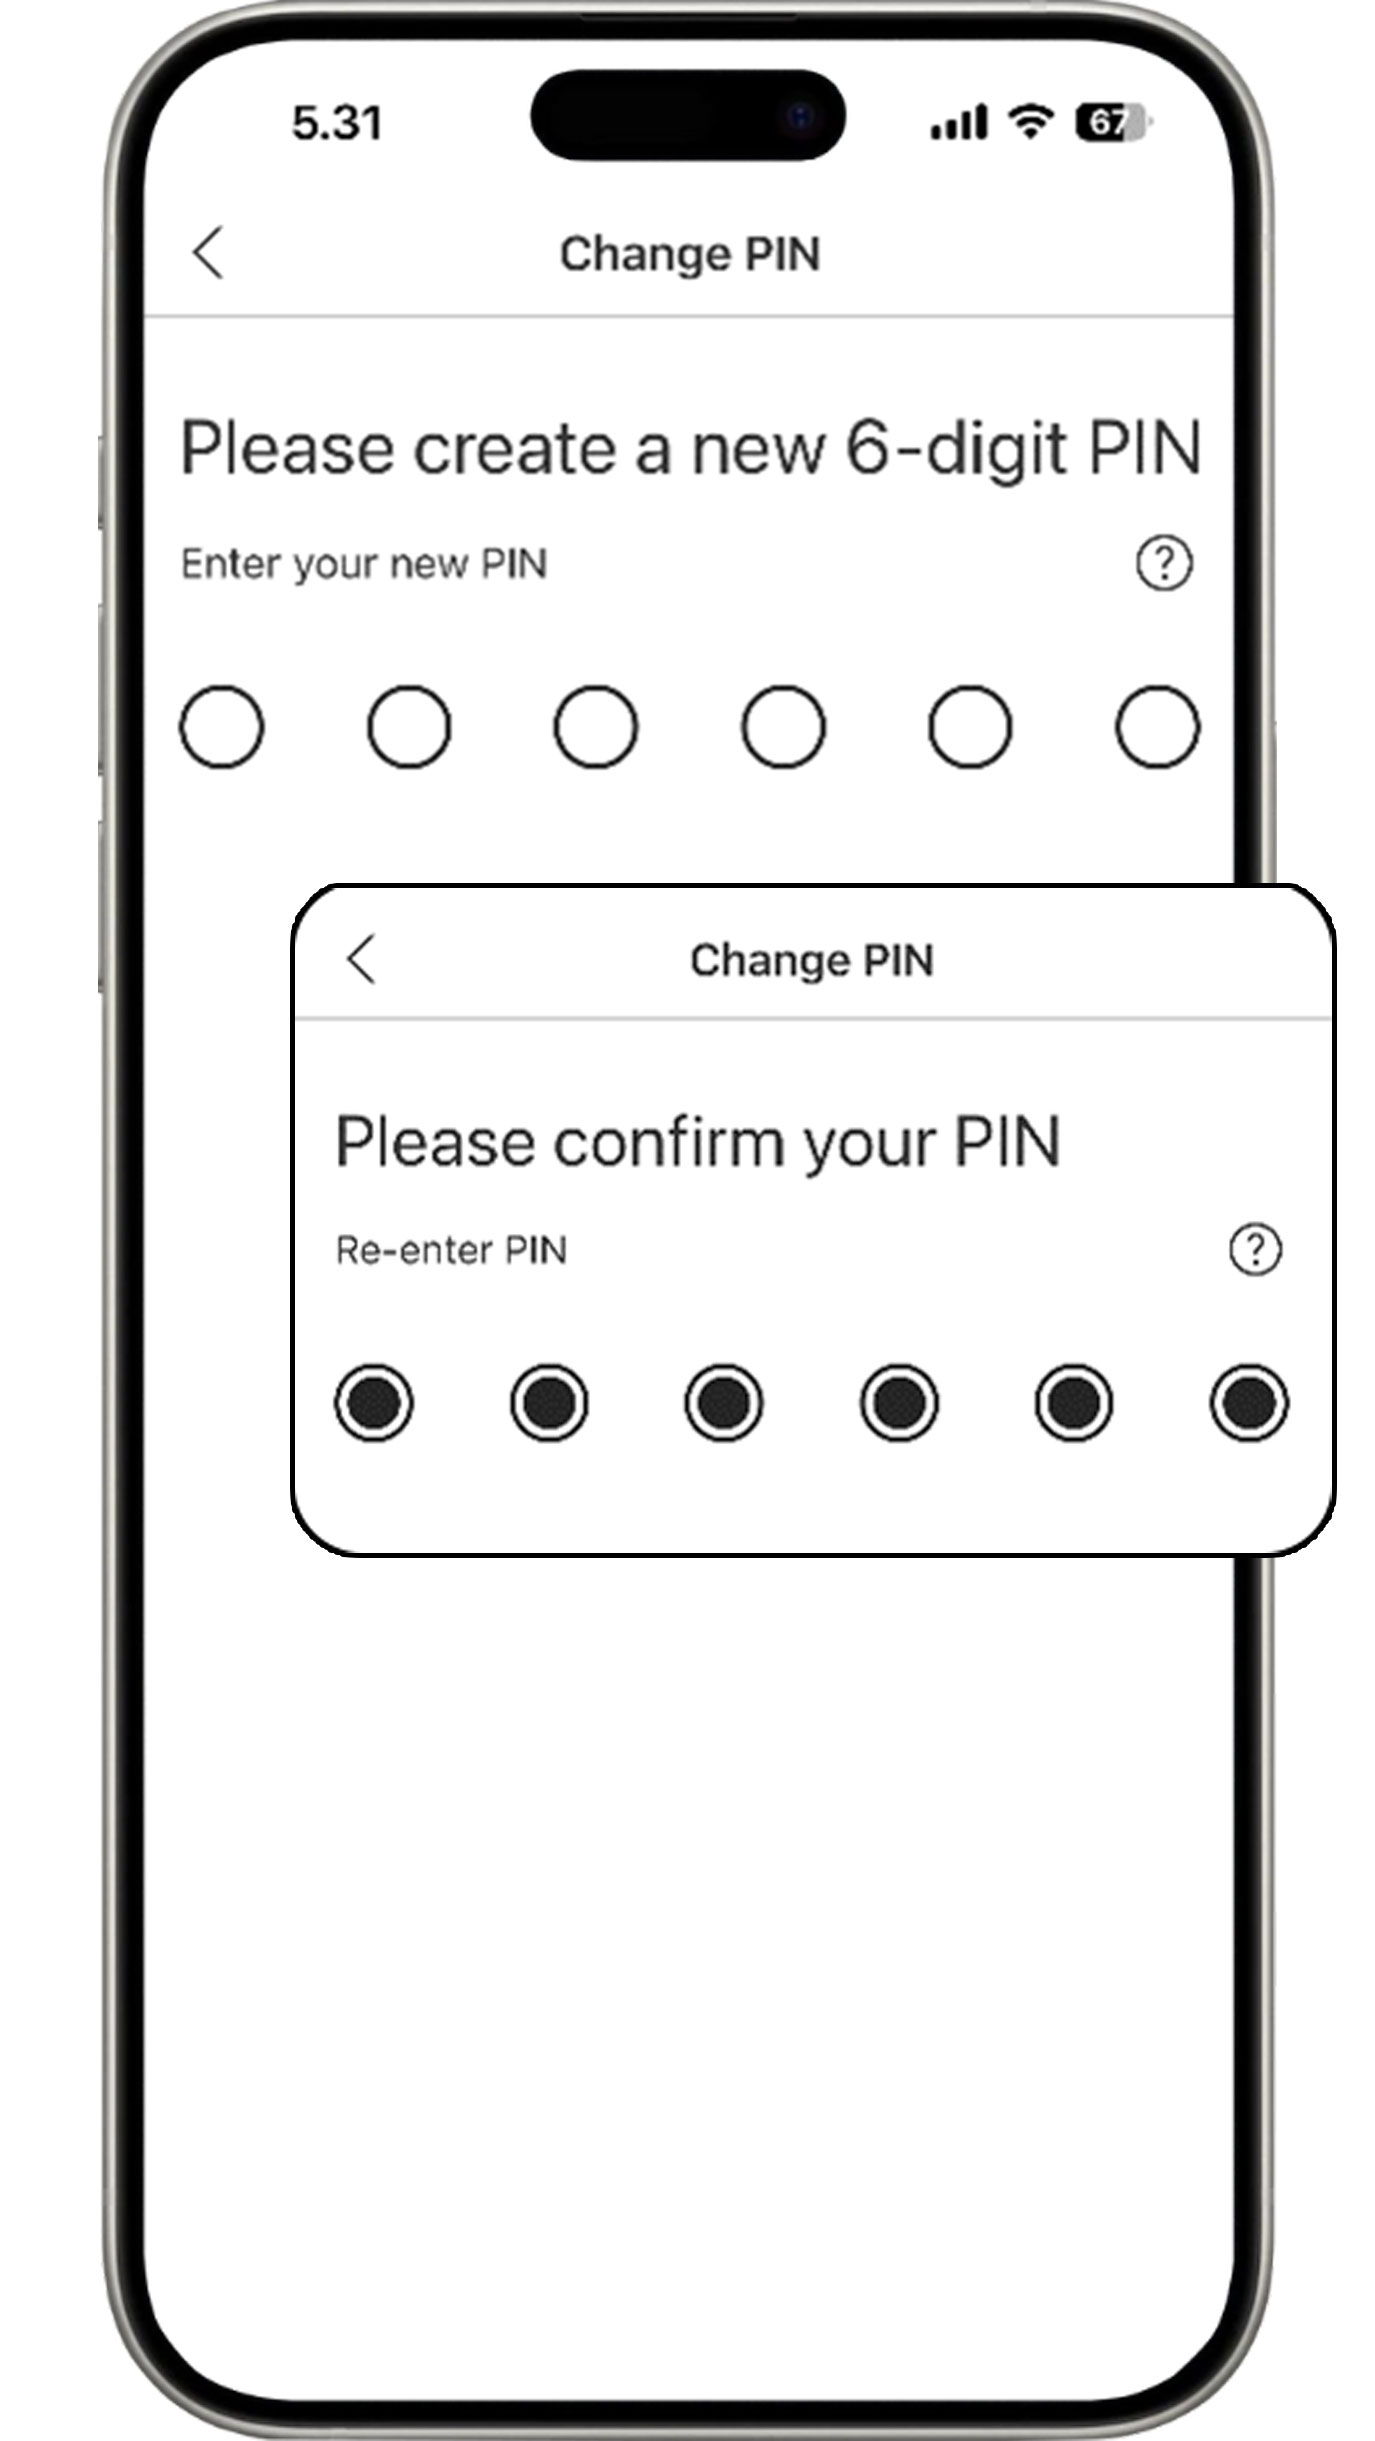
Create your new 6-digit HSBC Mobile PIN and re-enter your new PIN for confirmation.
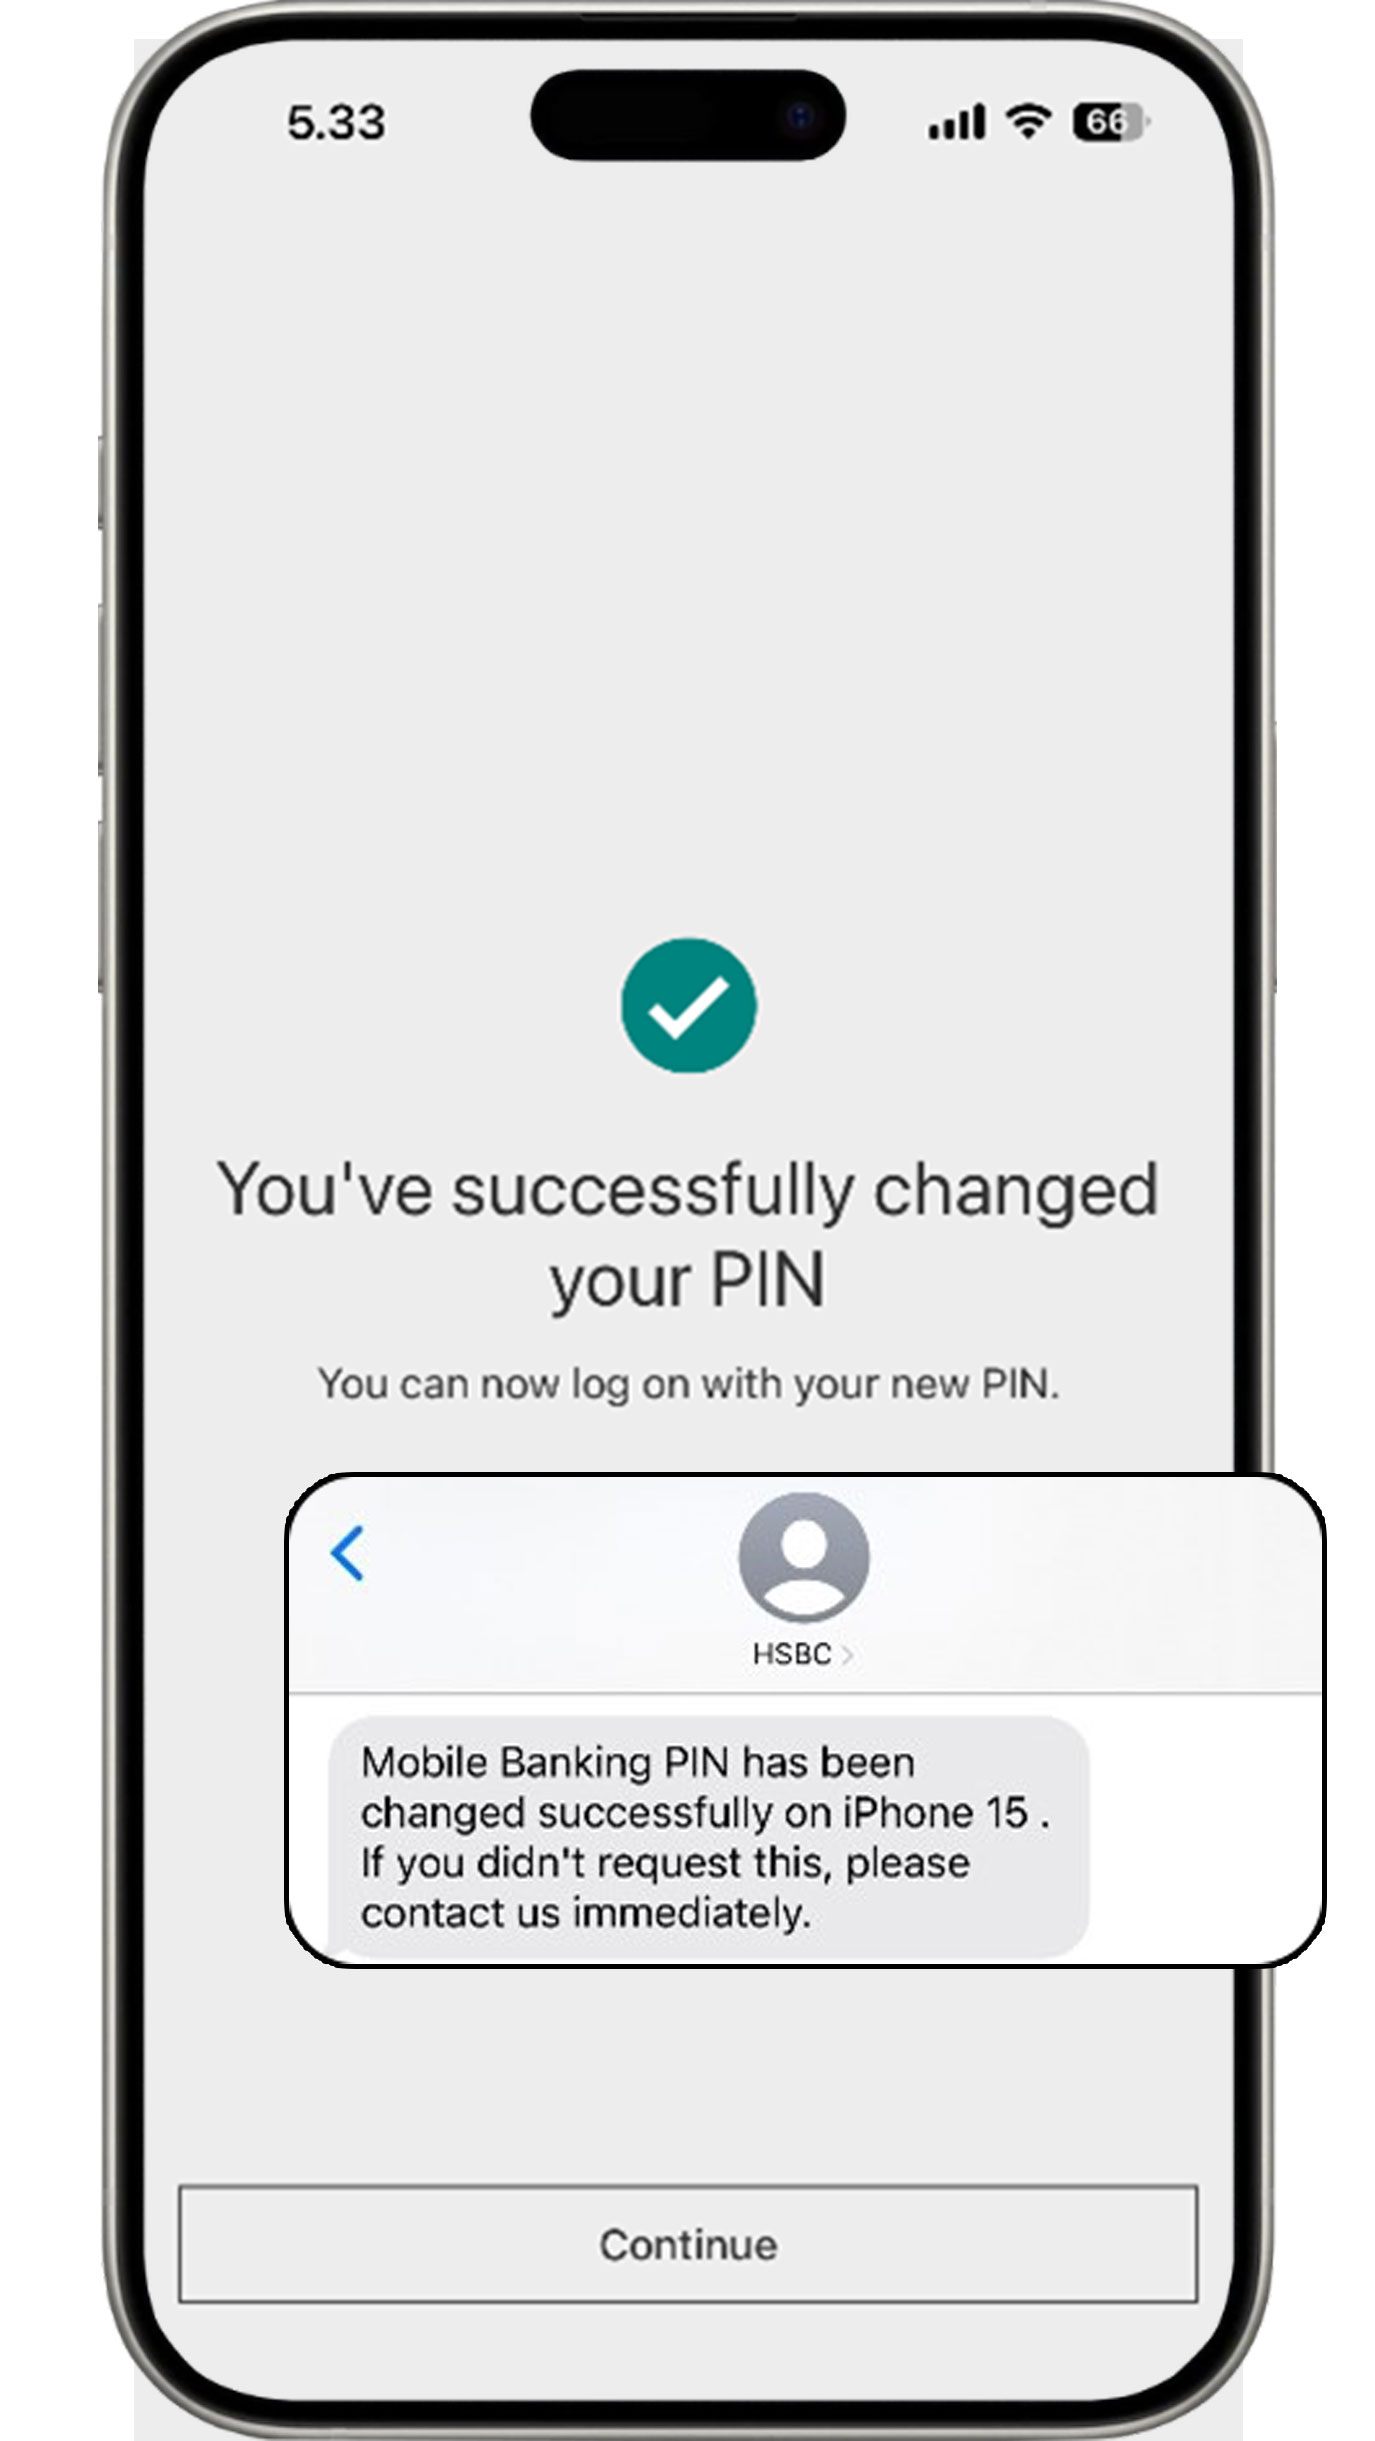
Your new HSBC Mobile PIN has been created successfully. You will receive an SMS notification for creation of a new PIN.
Remove device from HSBC Mobile Banking
The HSBC Mobile Banking app can only be accessed from one registered device to protect your data. If you would like to to switch devices or transfer the app access to another device, follow these steps:
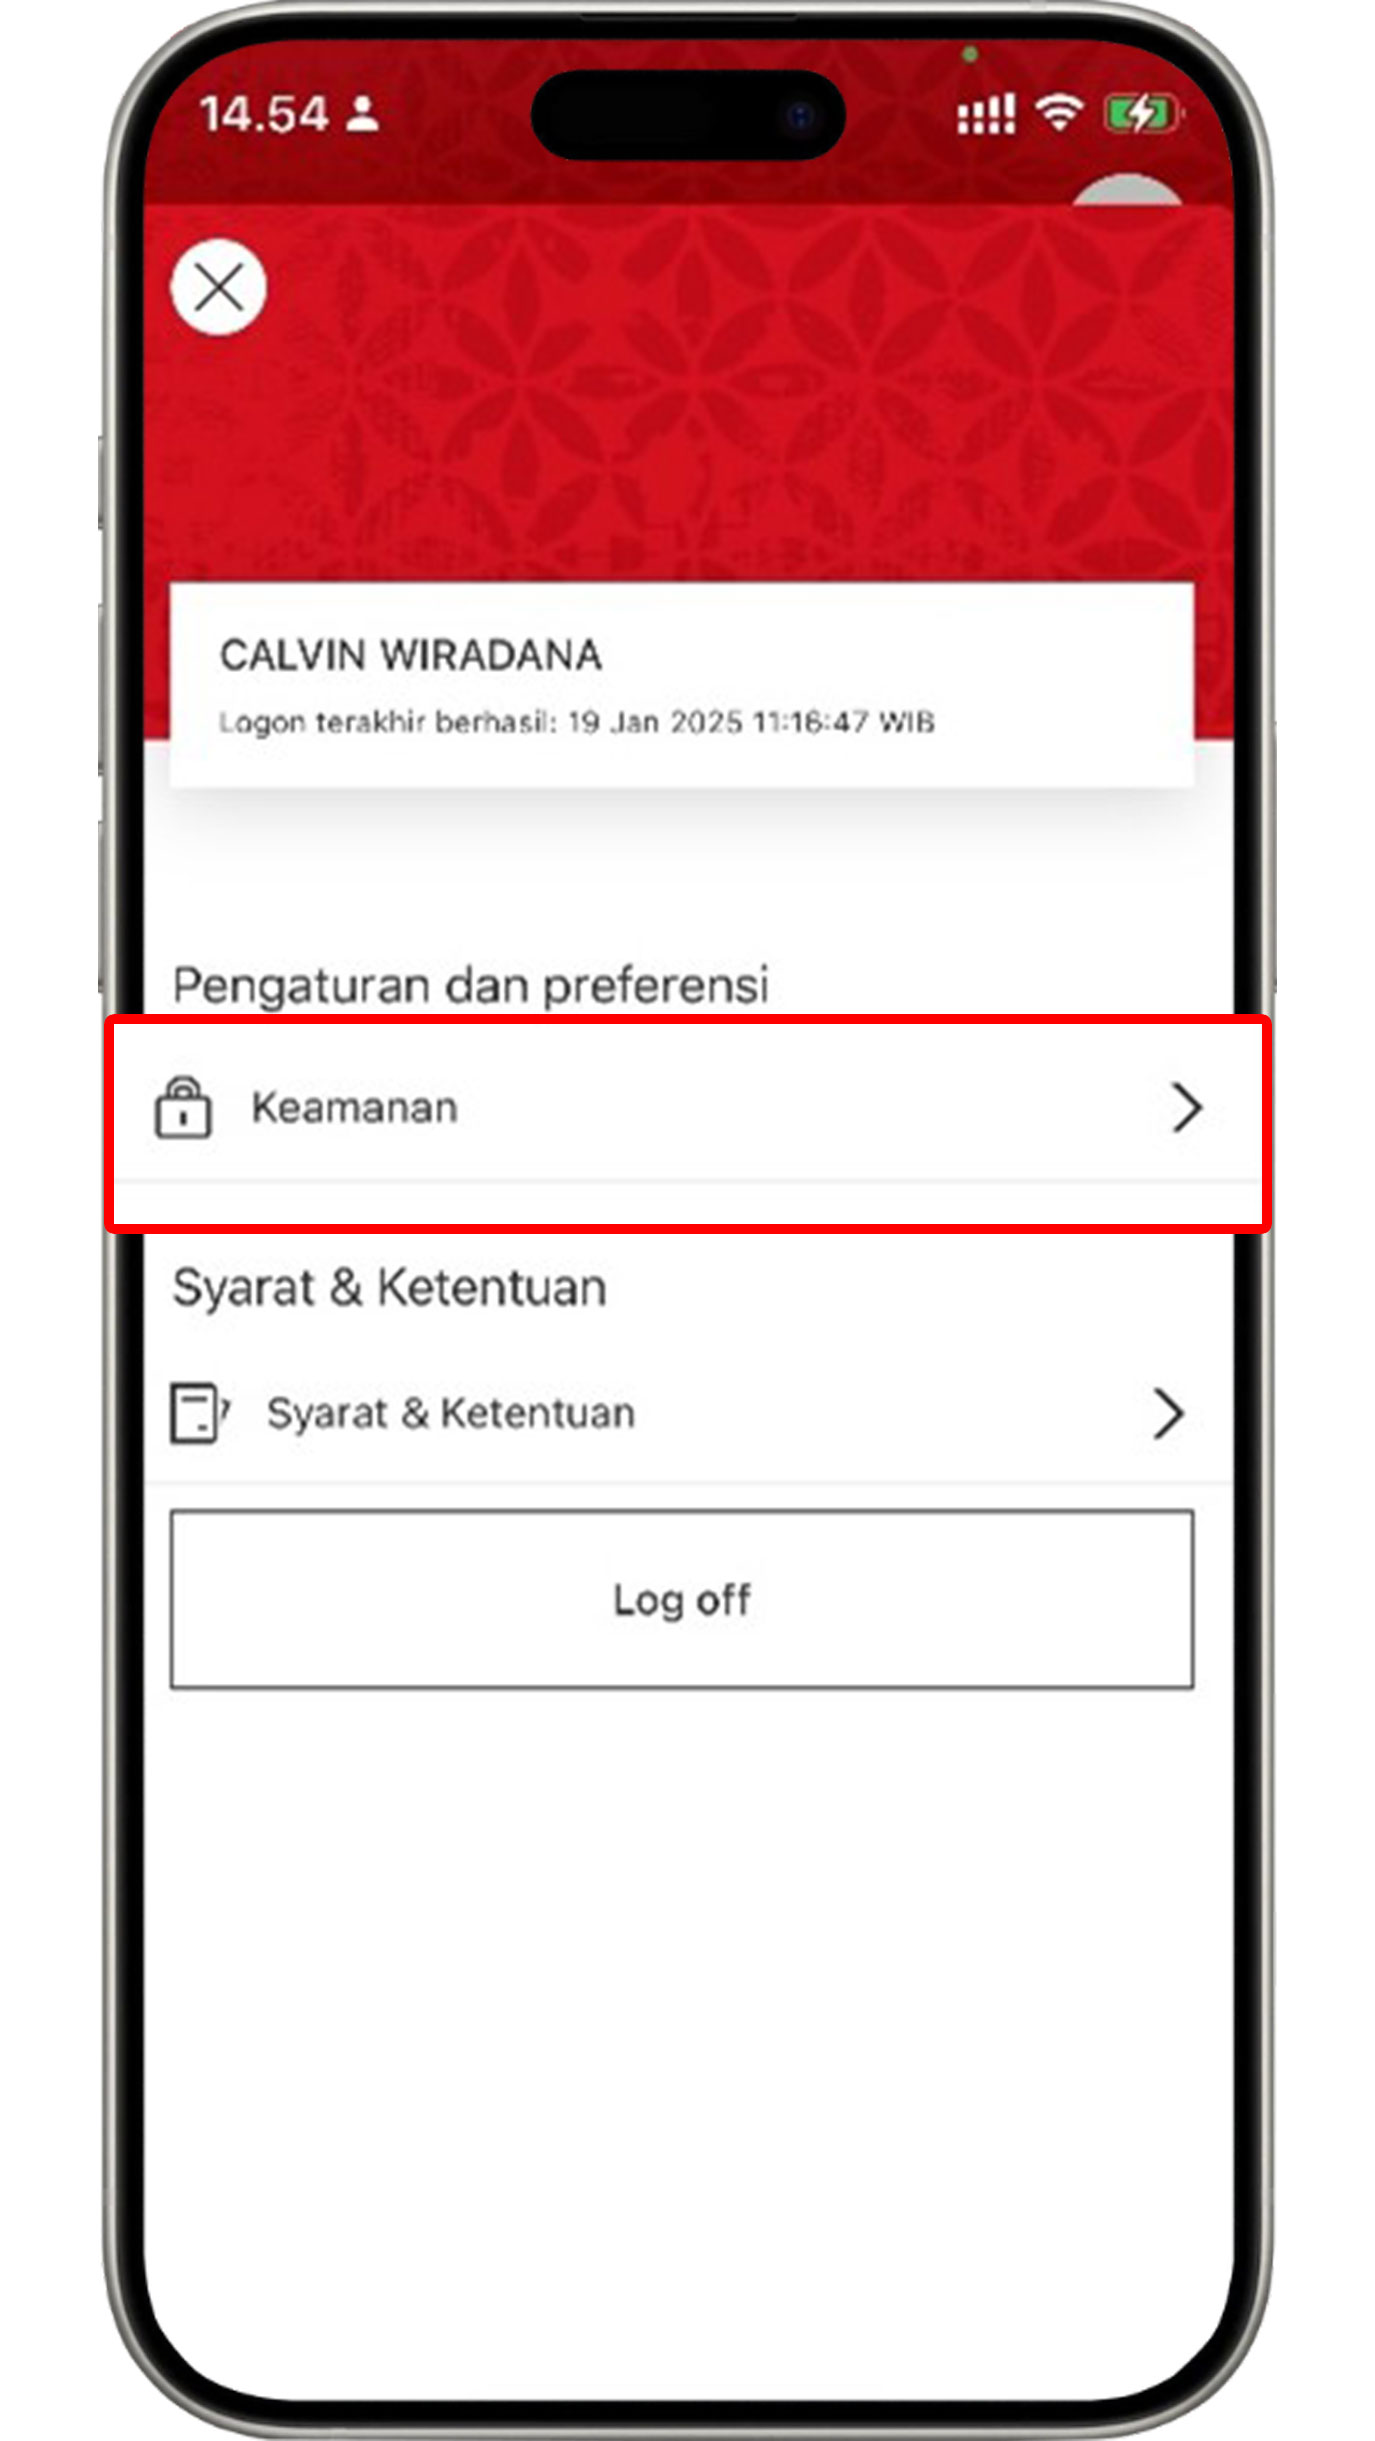
Access your Profile at the top right corner of the HSBC Mobile Banking homepage and select "Security".
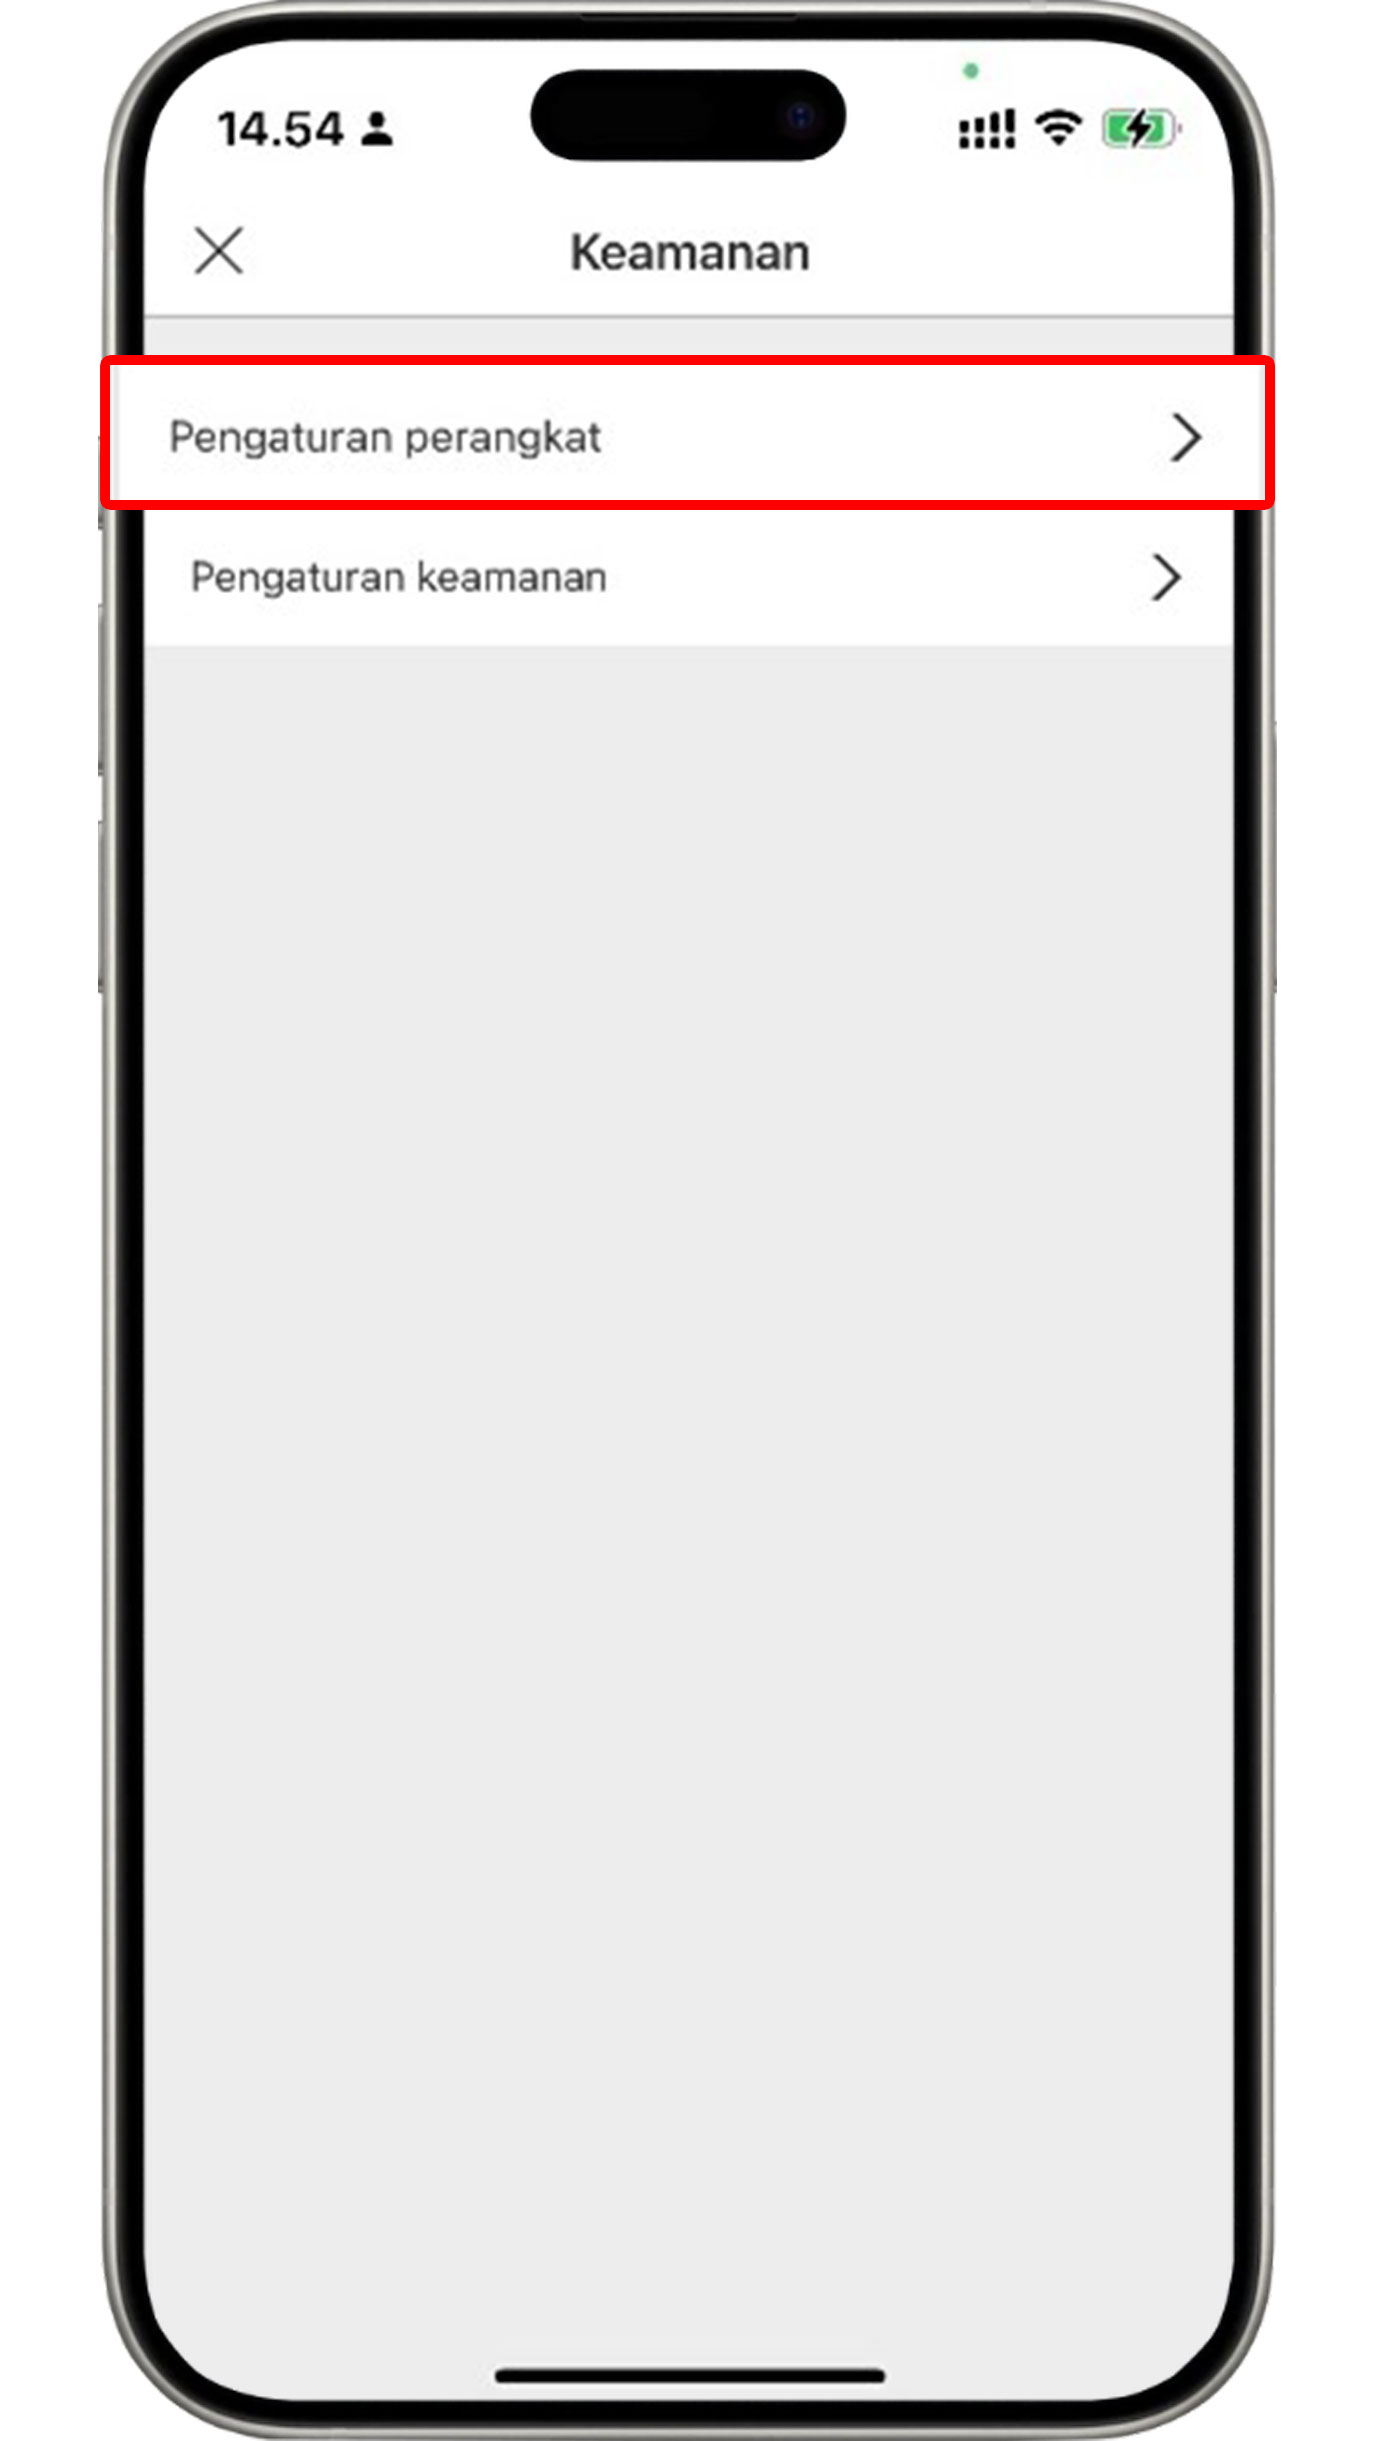
Select "Manage devices".
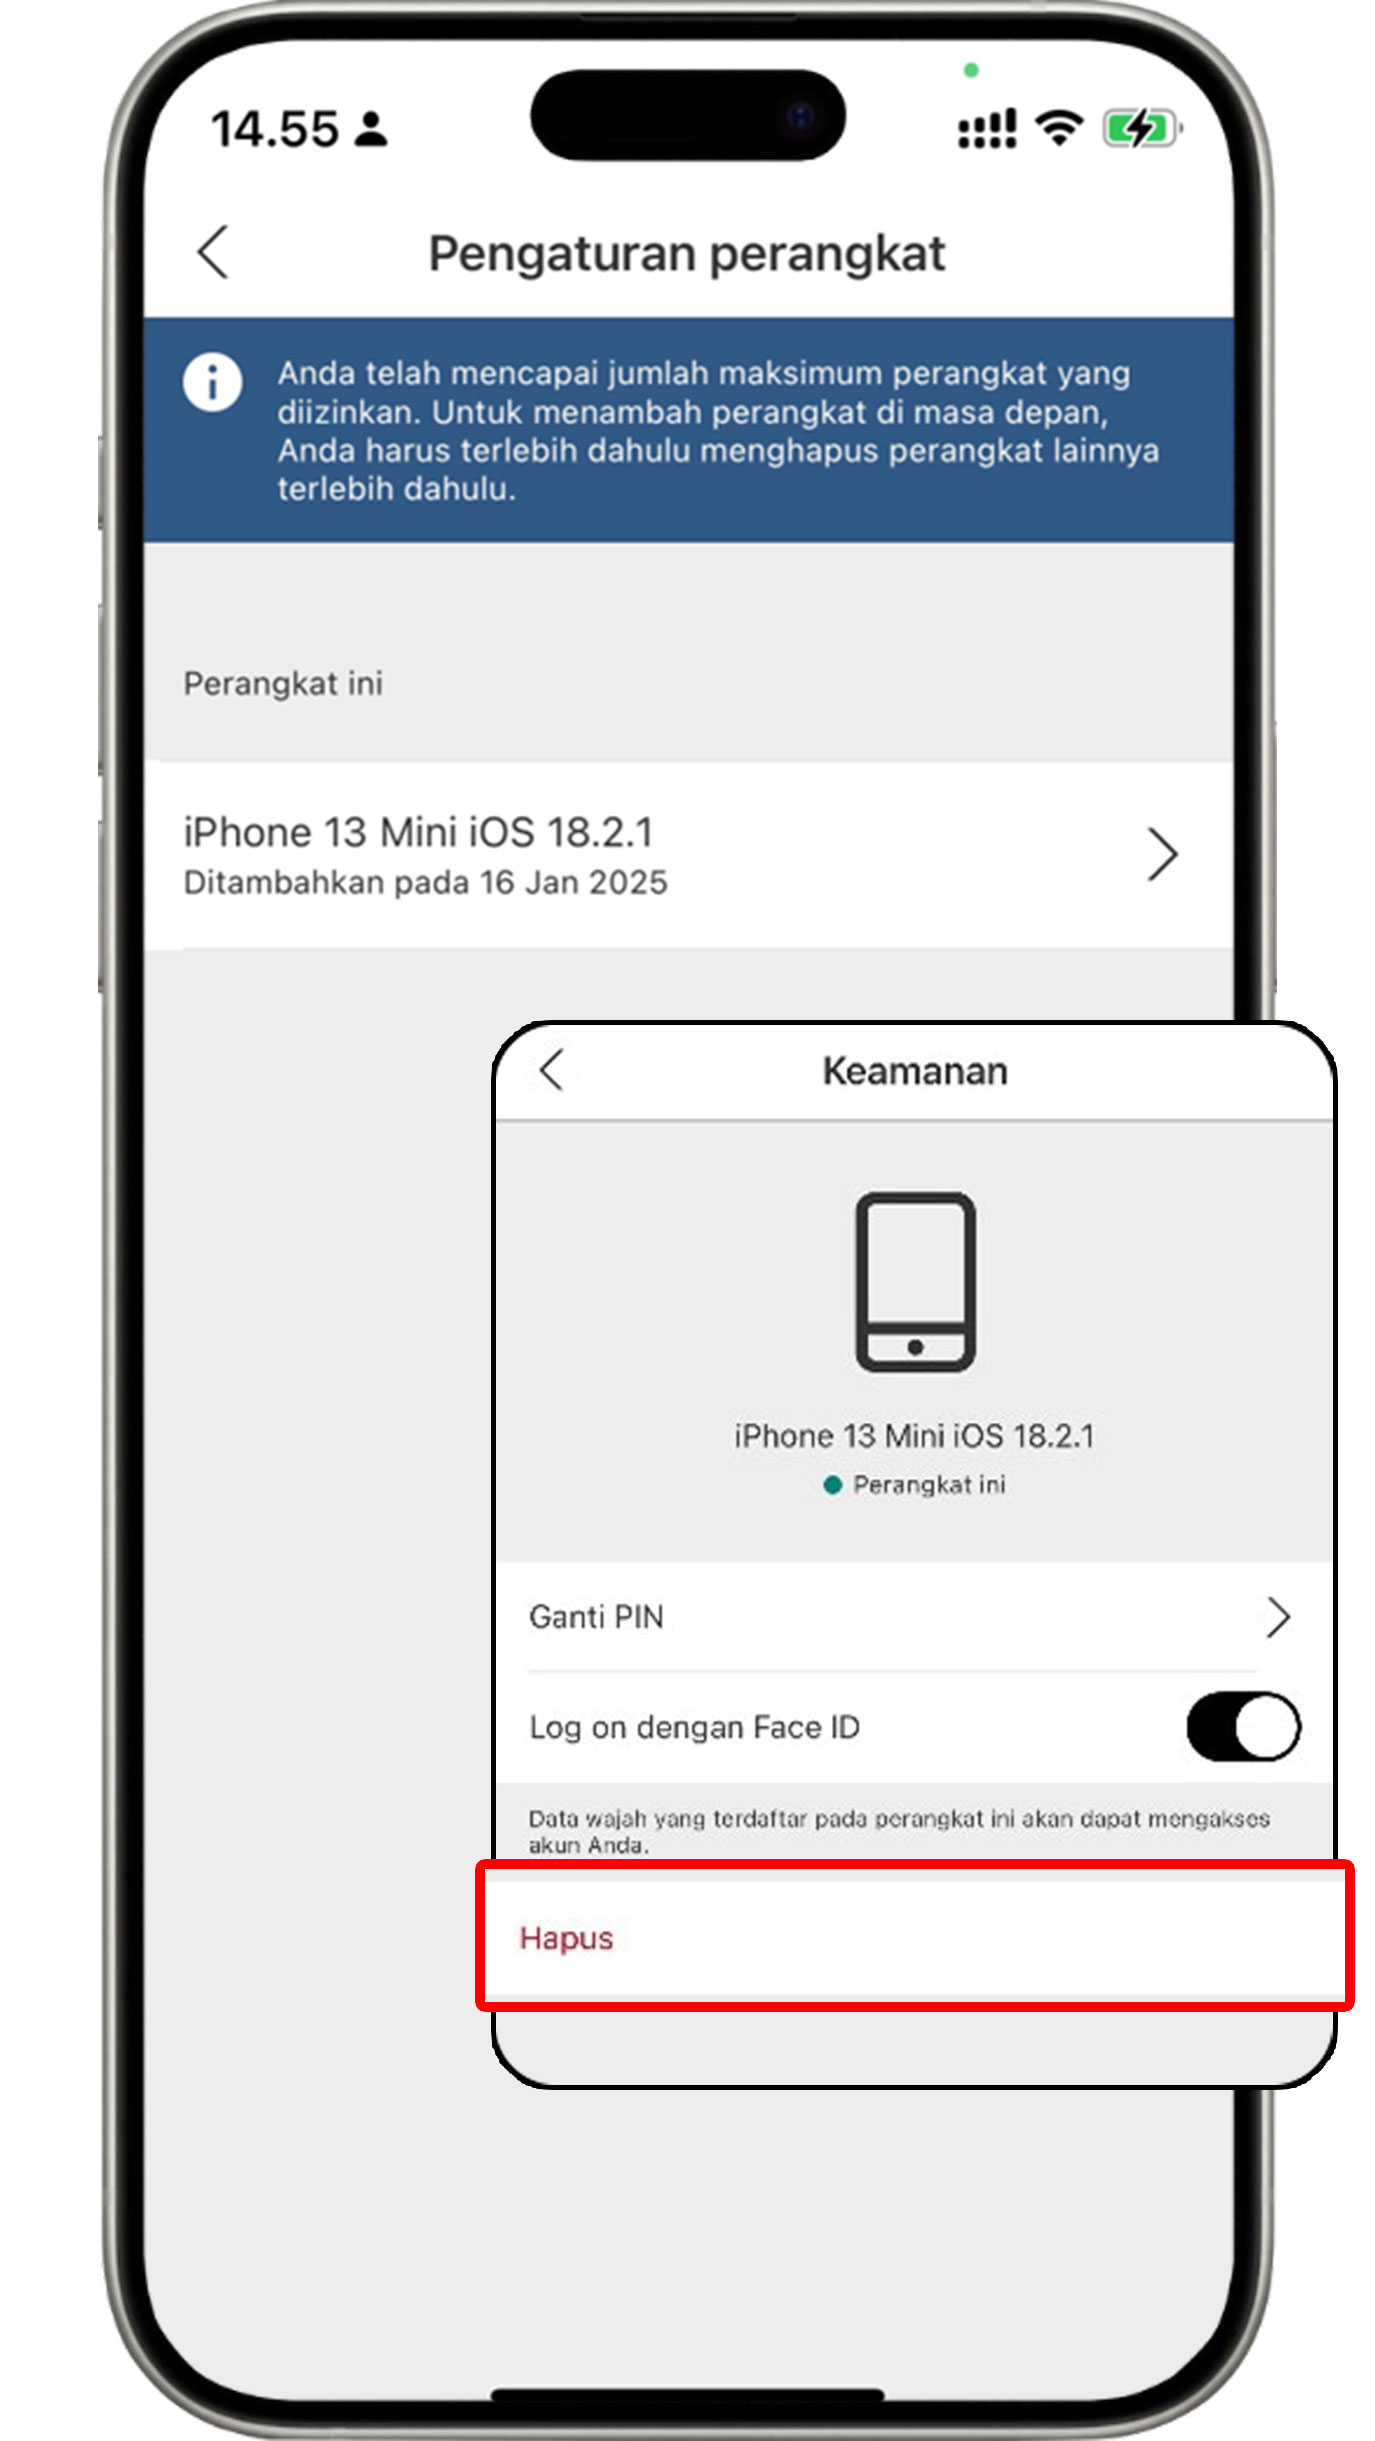
Select your device and click the "Remove" button.
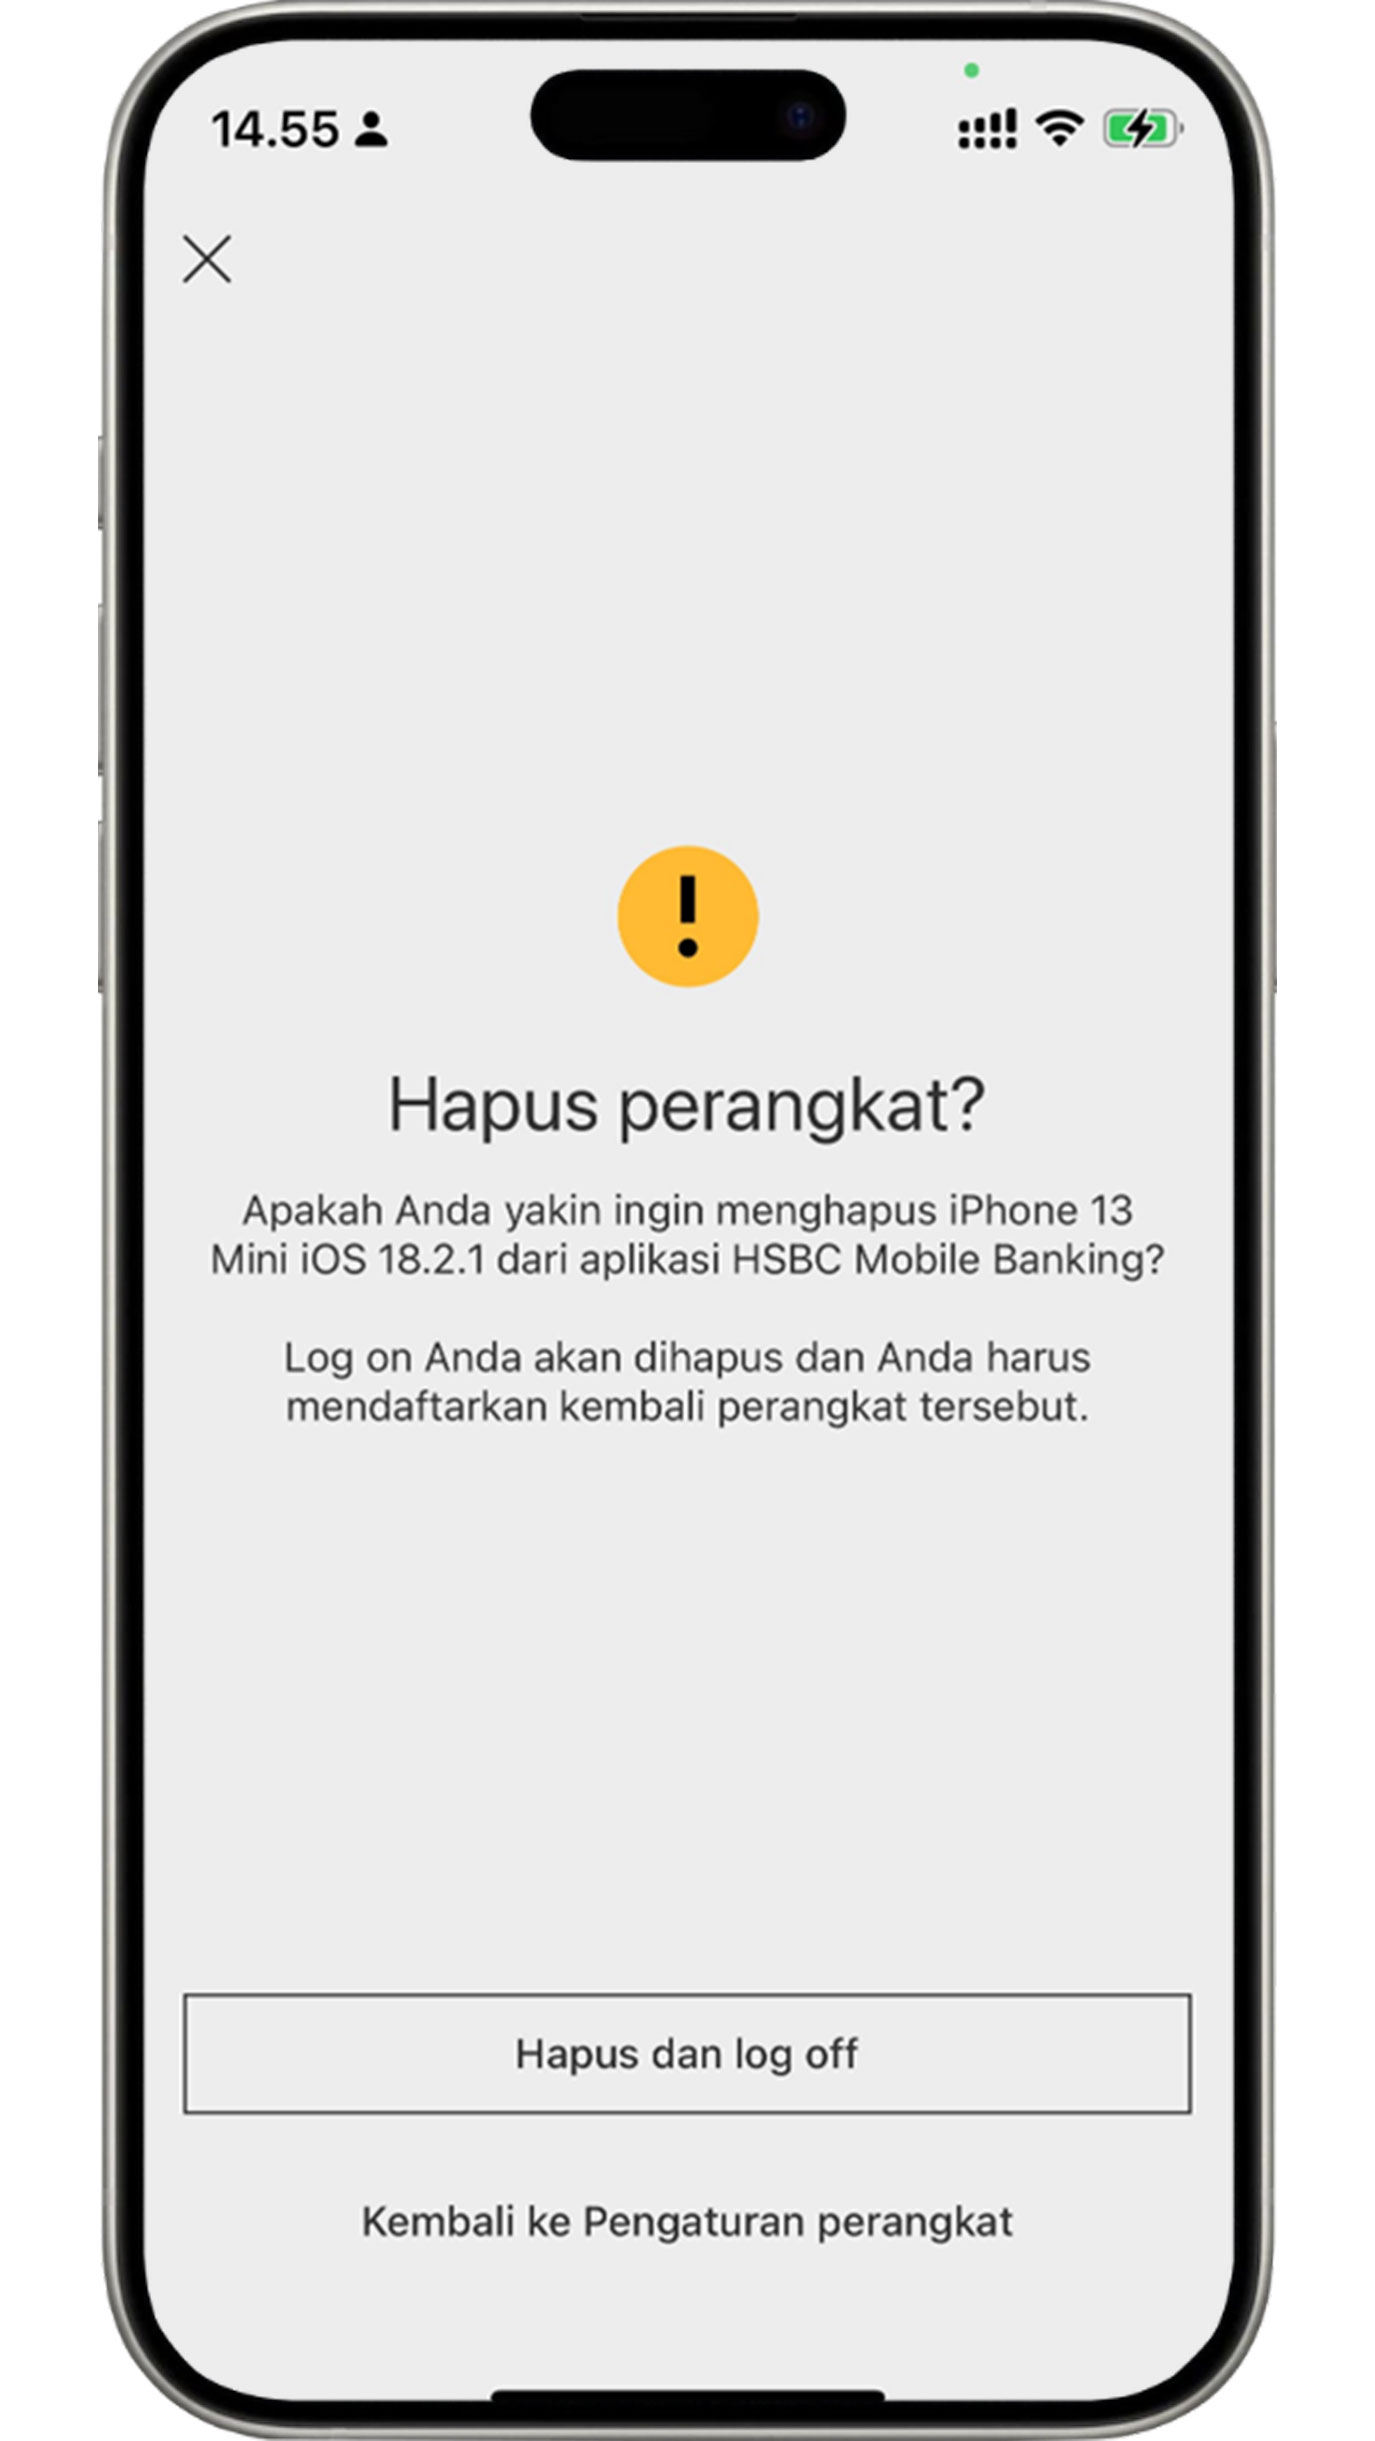
Confirm the removal of your device from the HSBC Mobile Banking app.
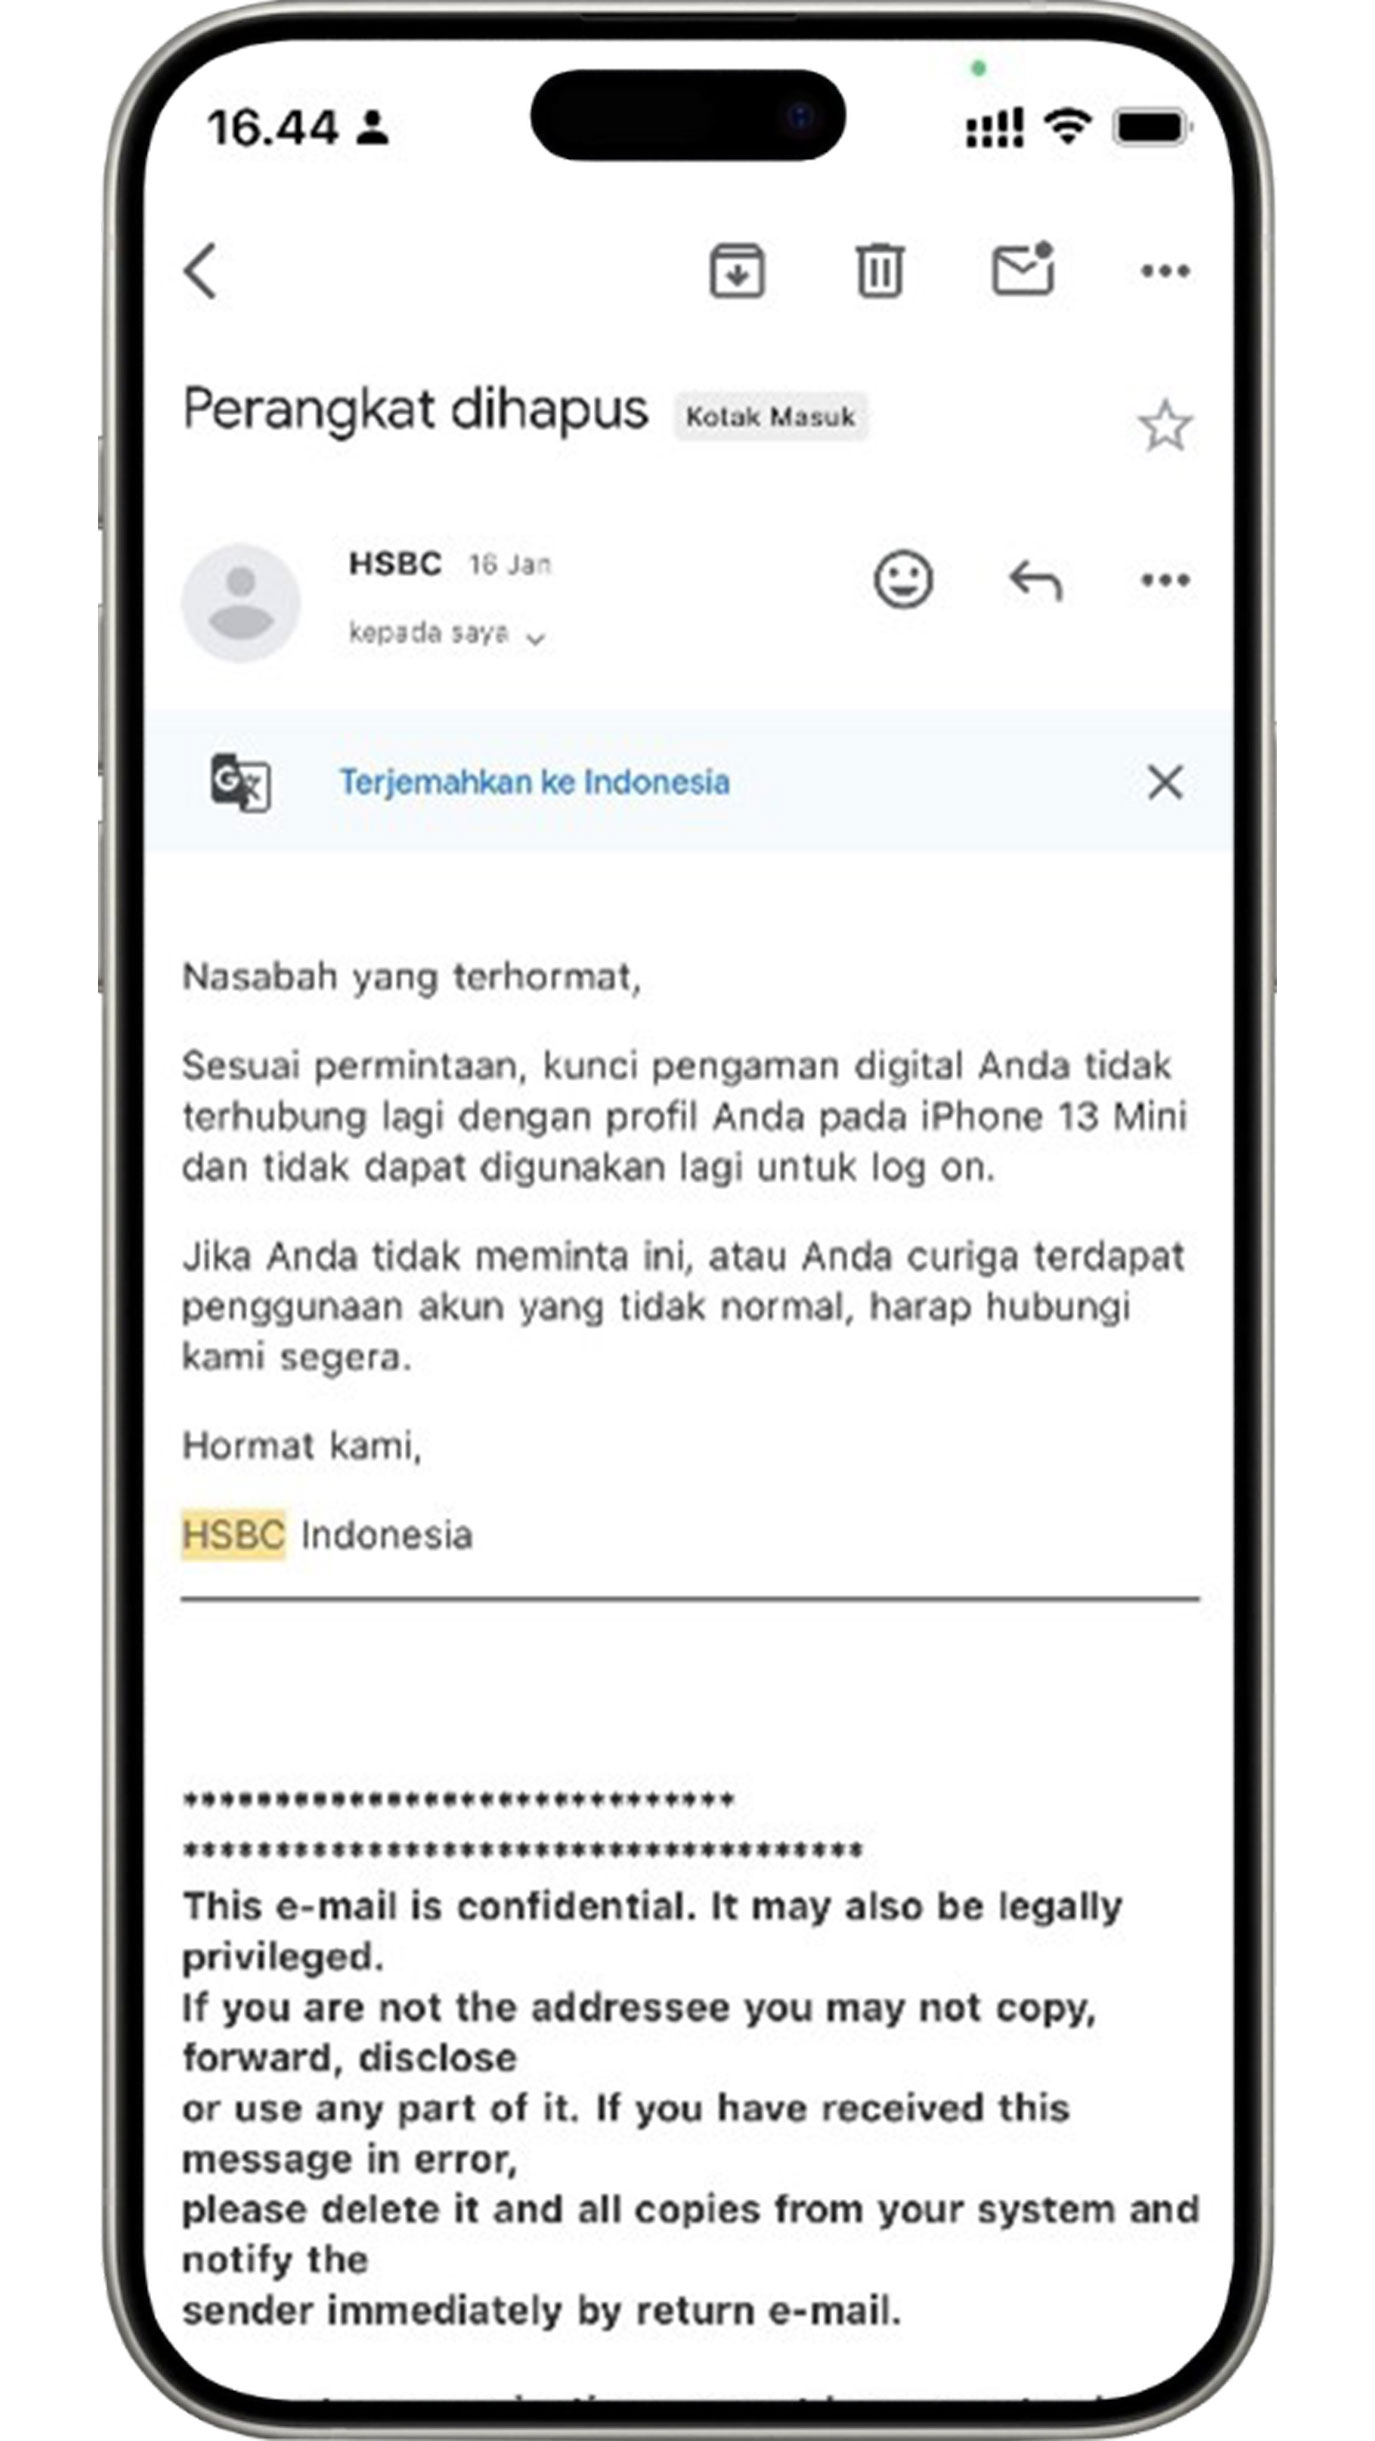
You will receive a confirmation email for device removal.
Steps on Other HSBC Mobile Banking Features
Review transaction documents
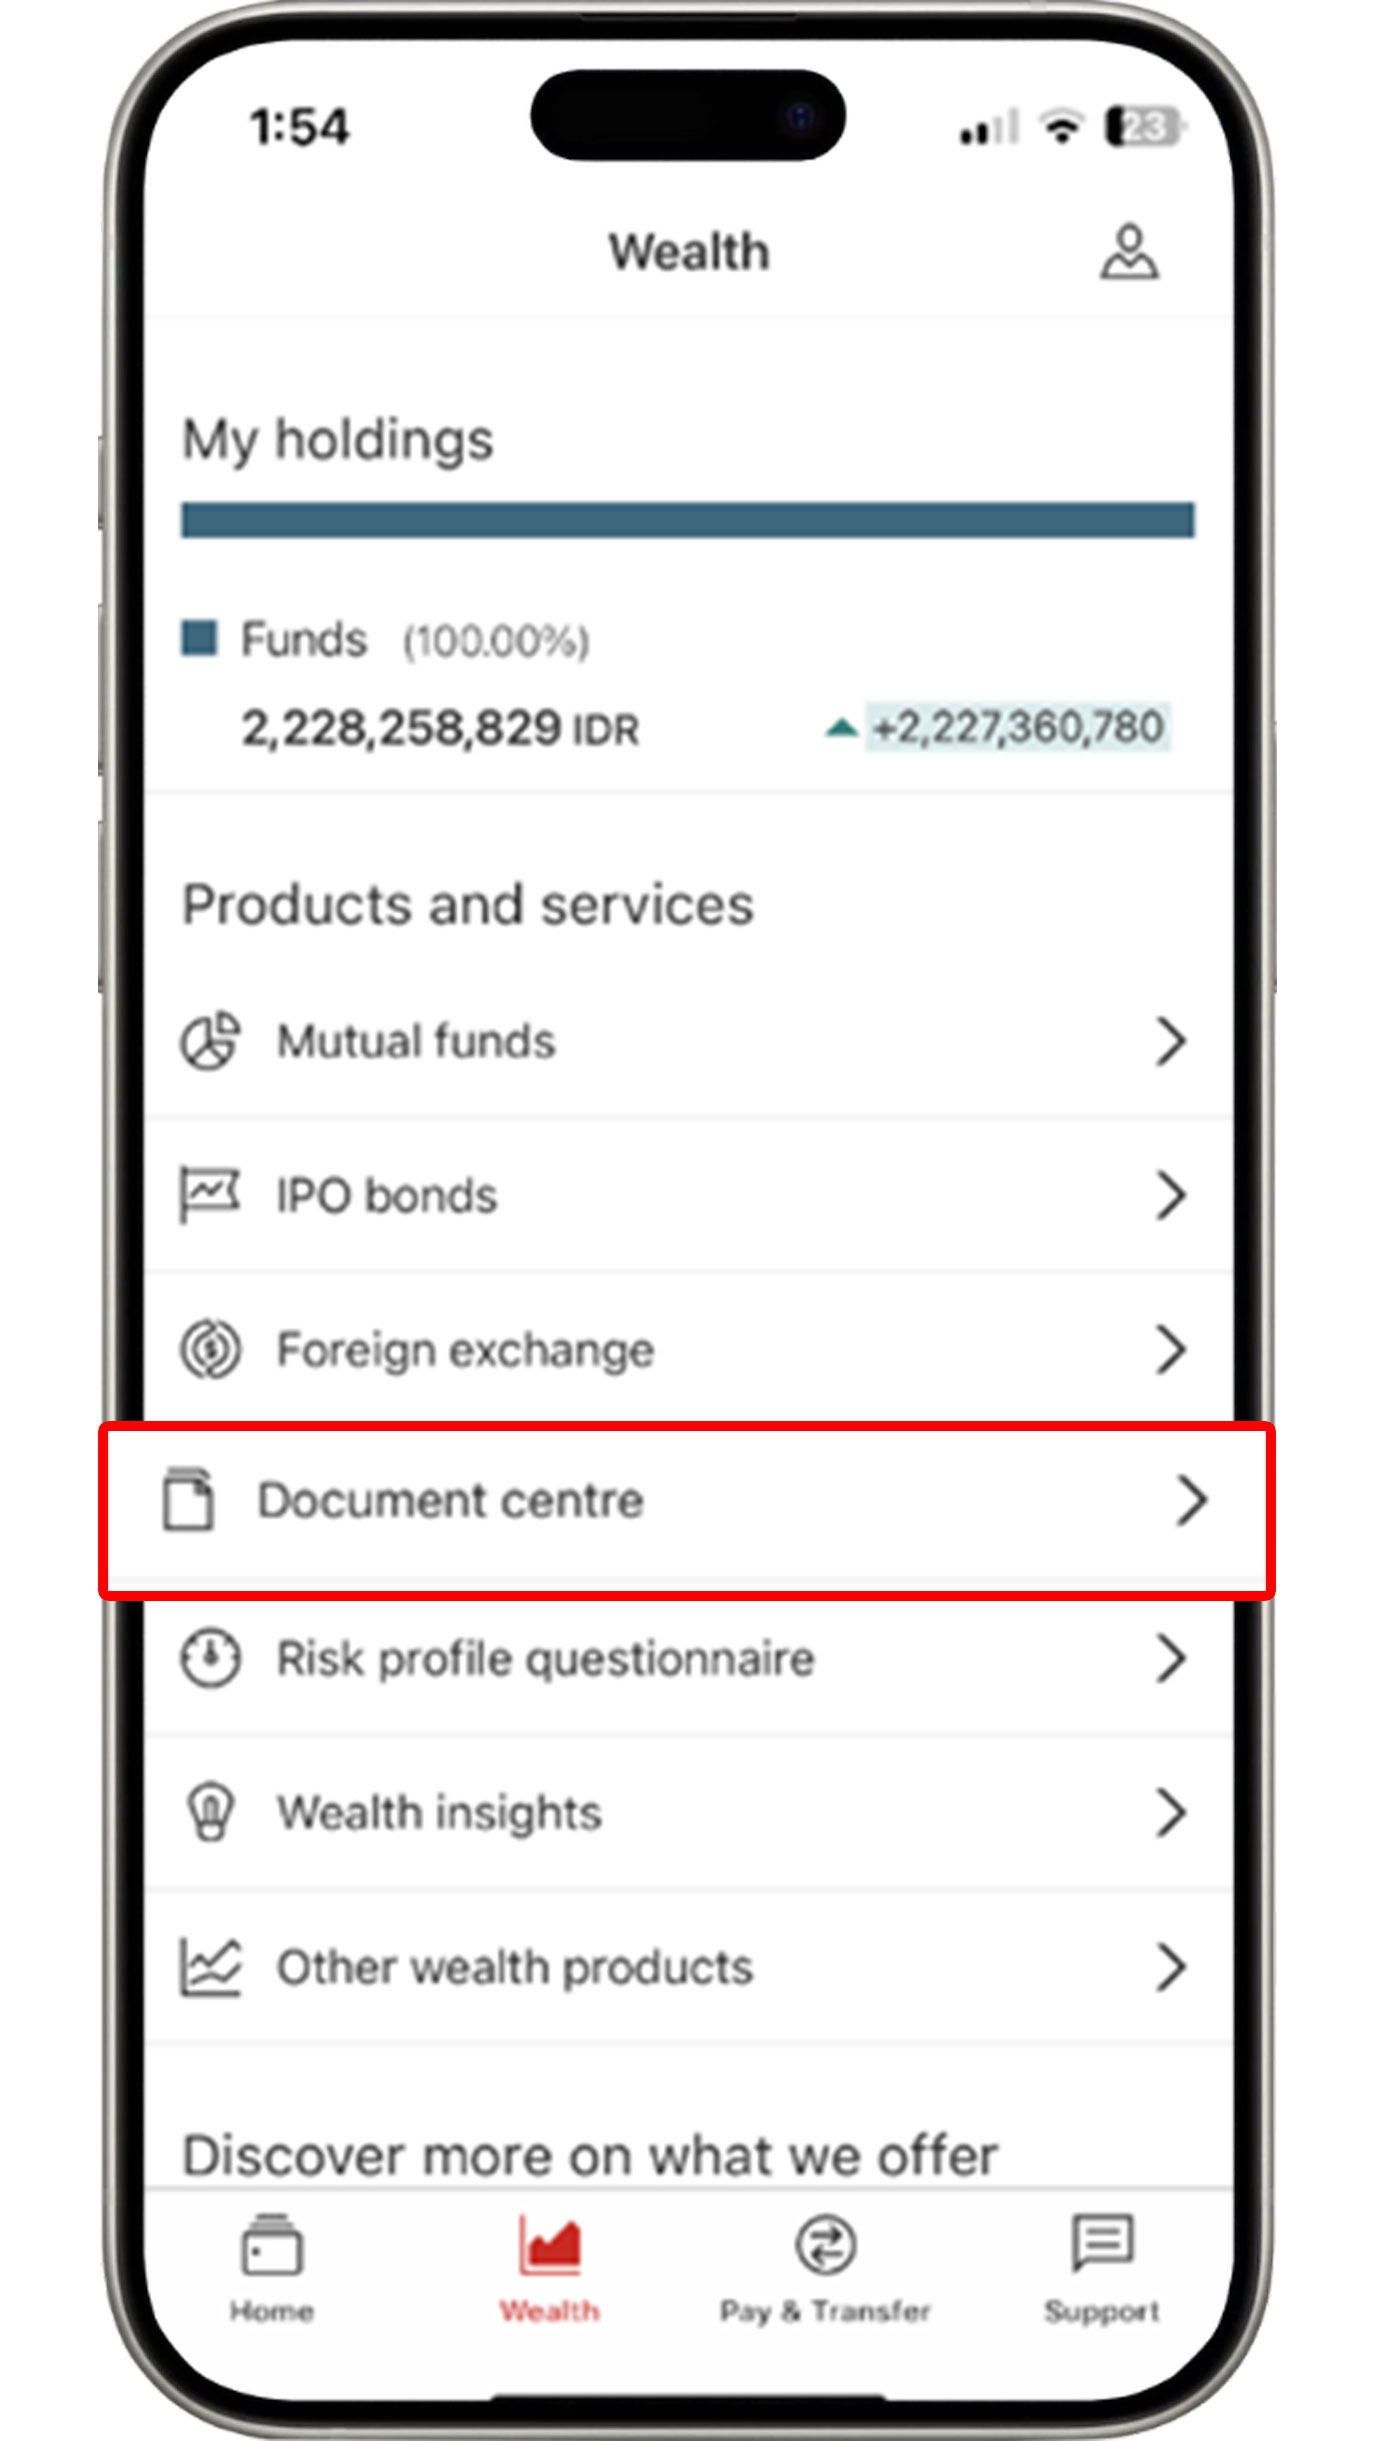
On the Wealth menu, click "Document Centre".
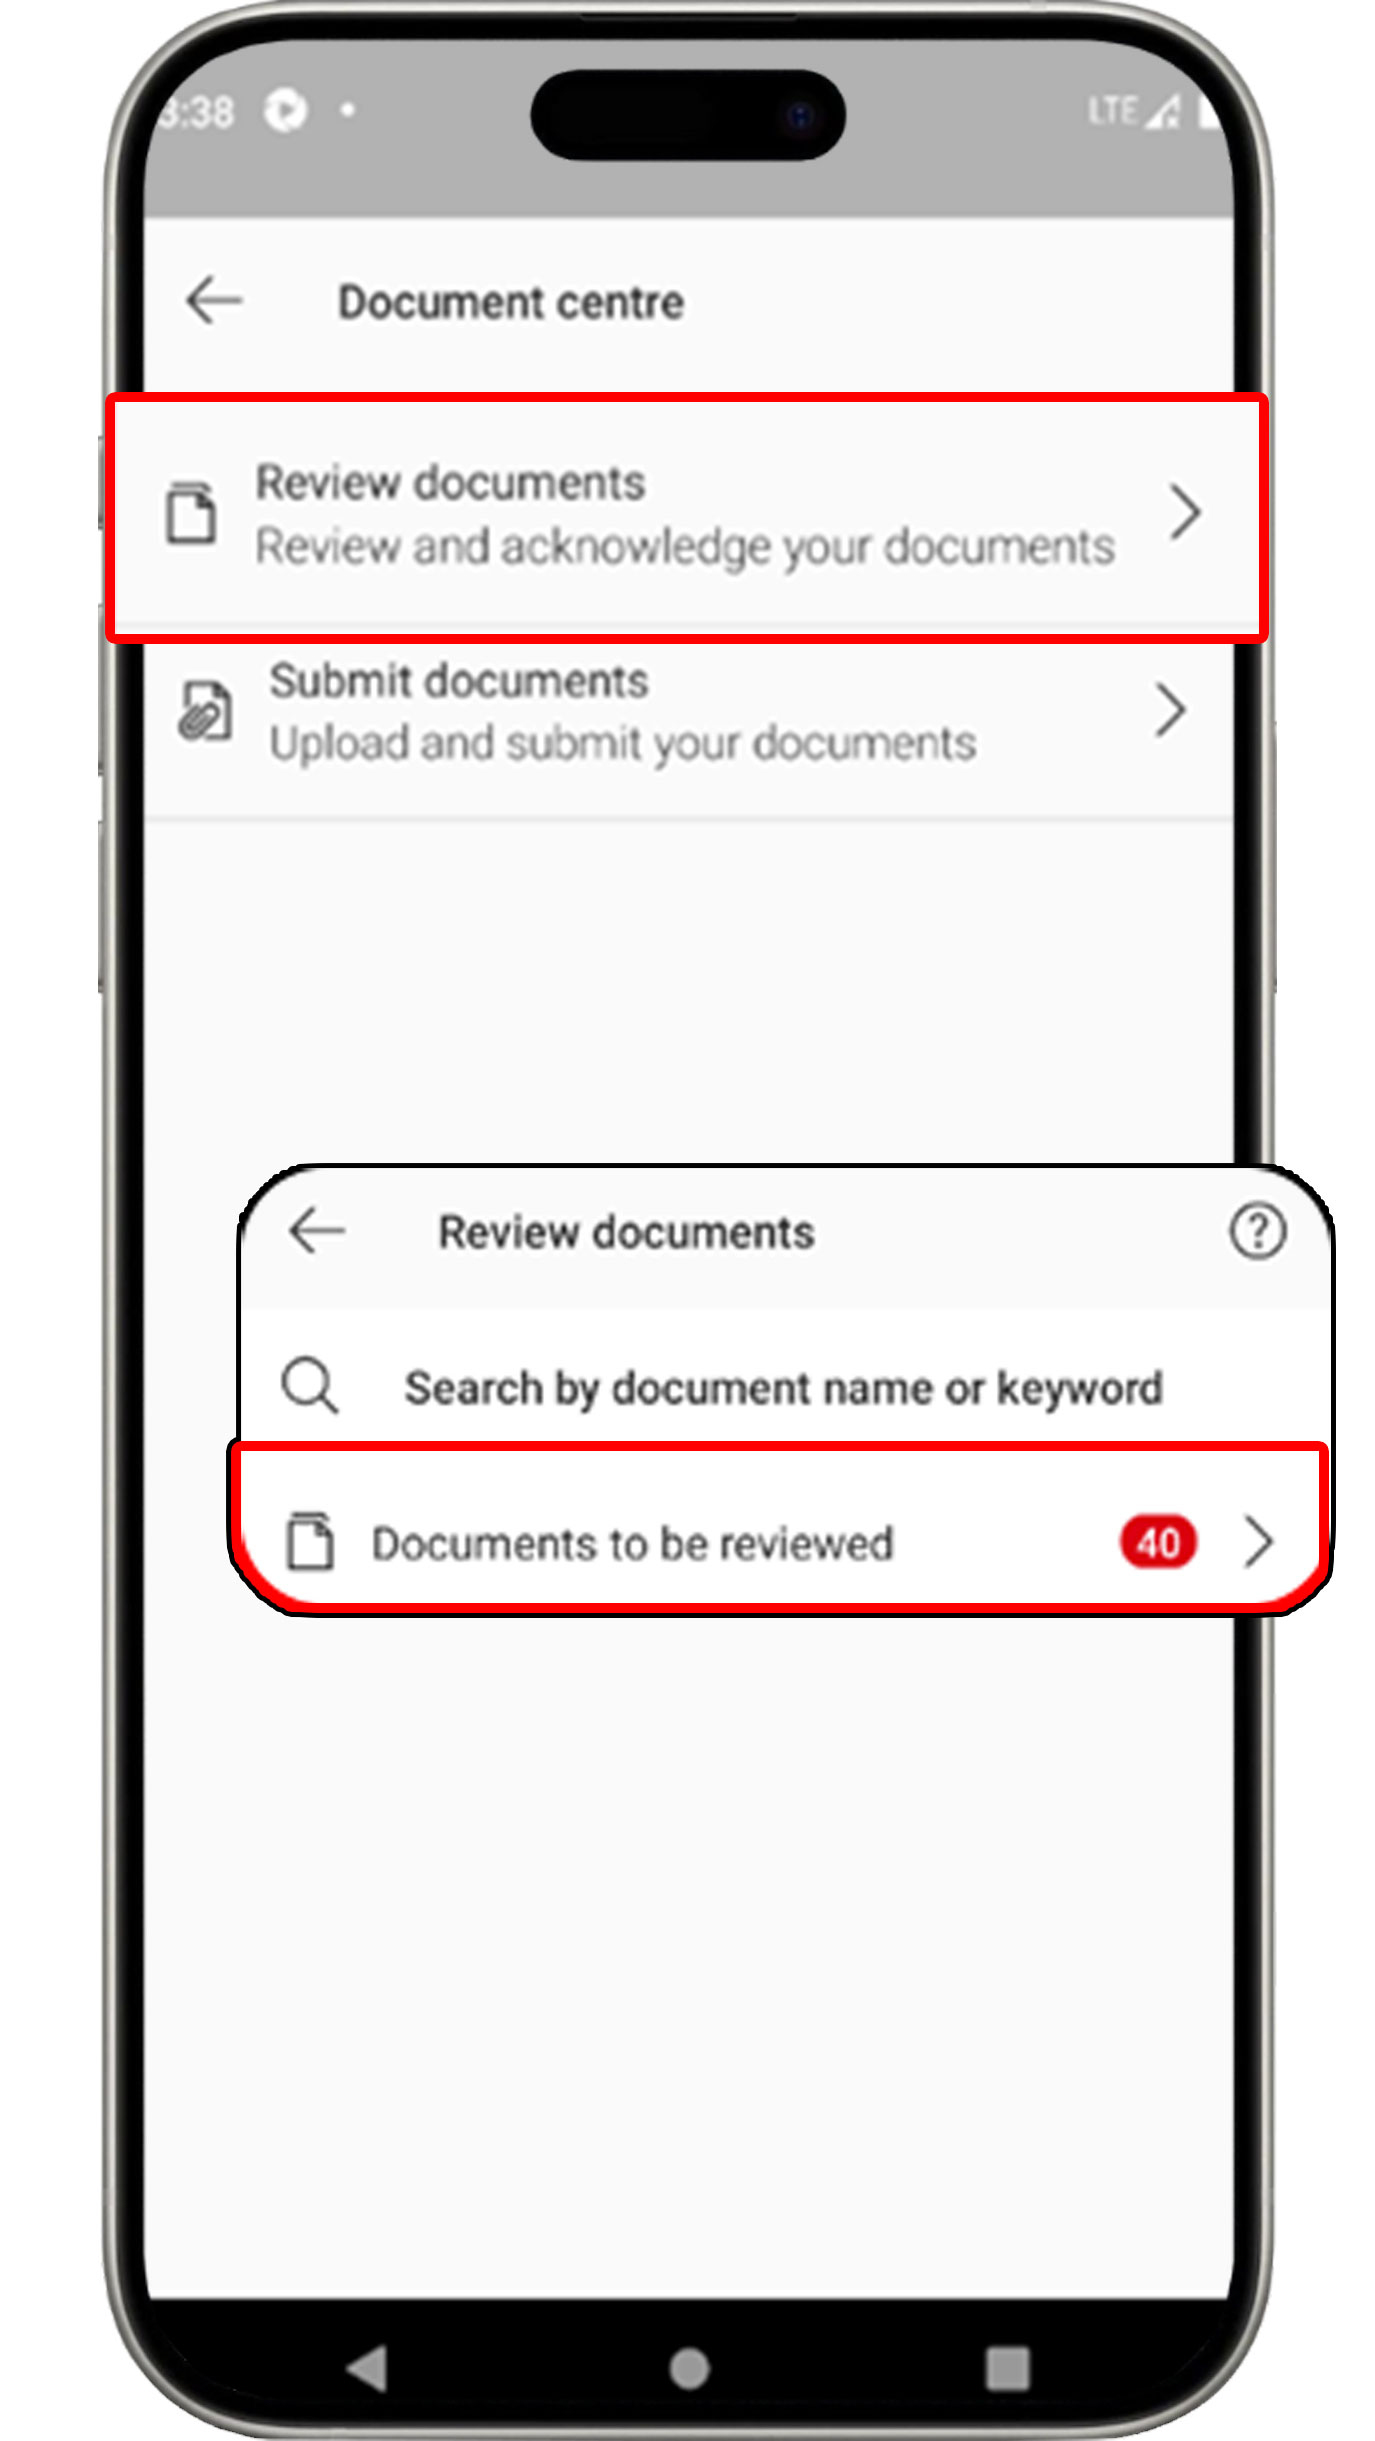
Select "Review documents" and click "Documents to be reviewed".
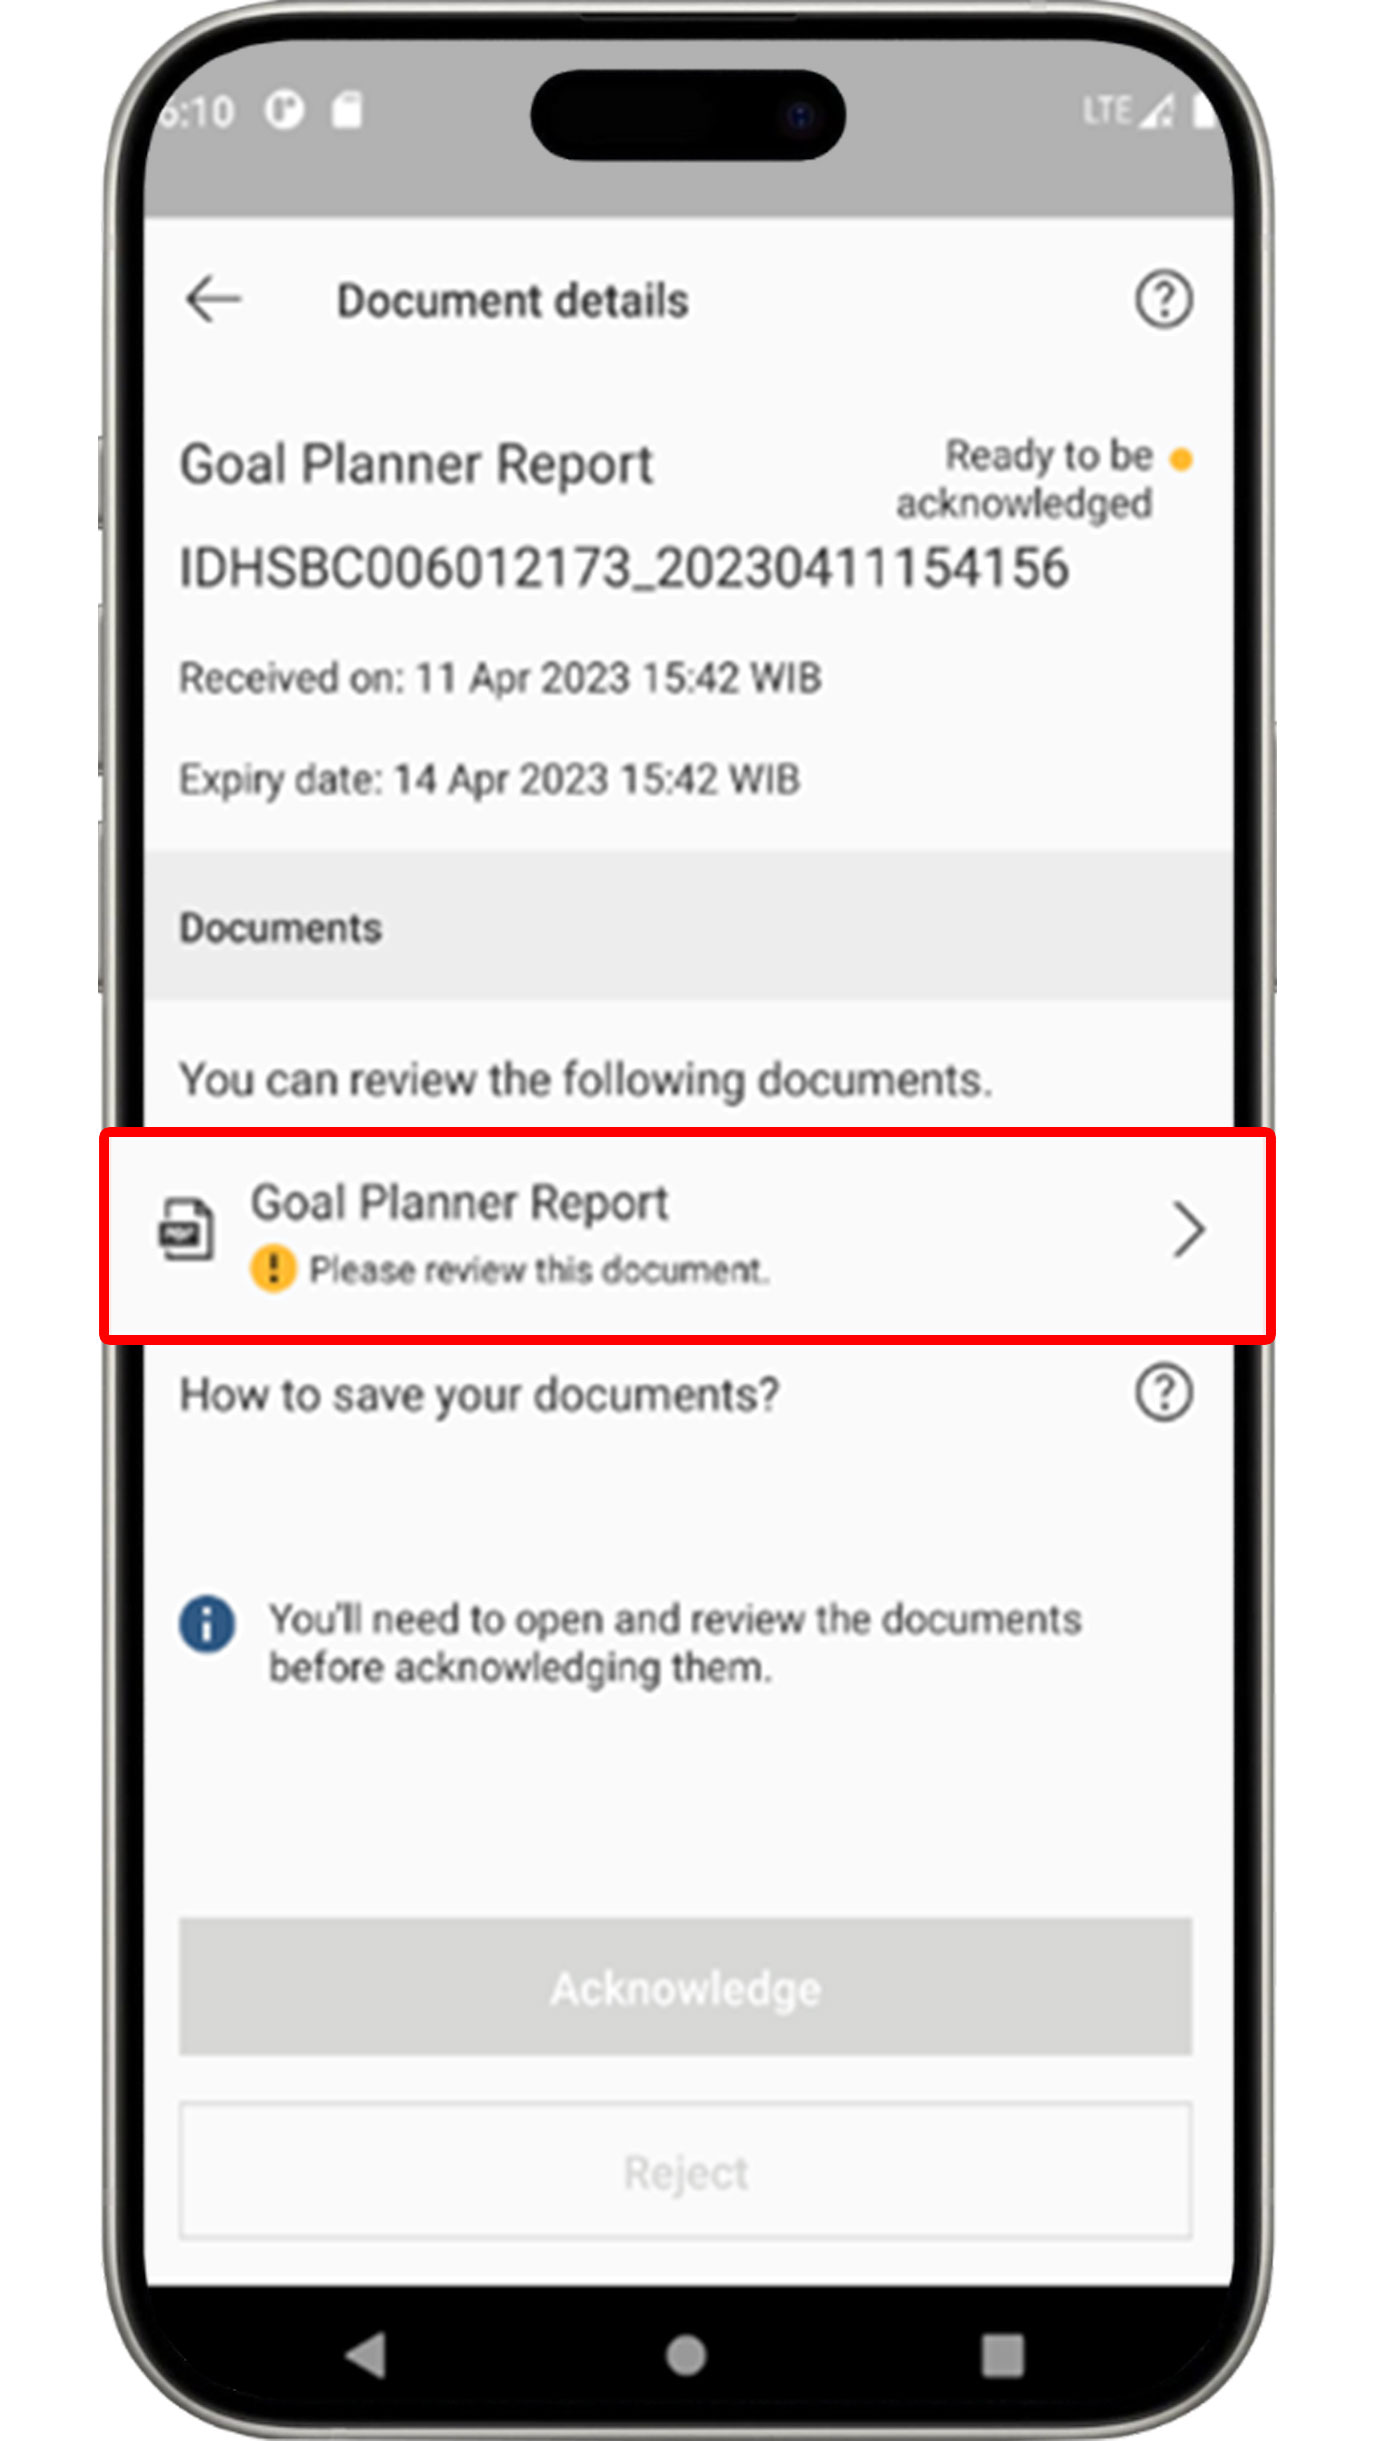
Select the document that you would like to review and acknowledge.
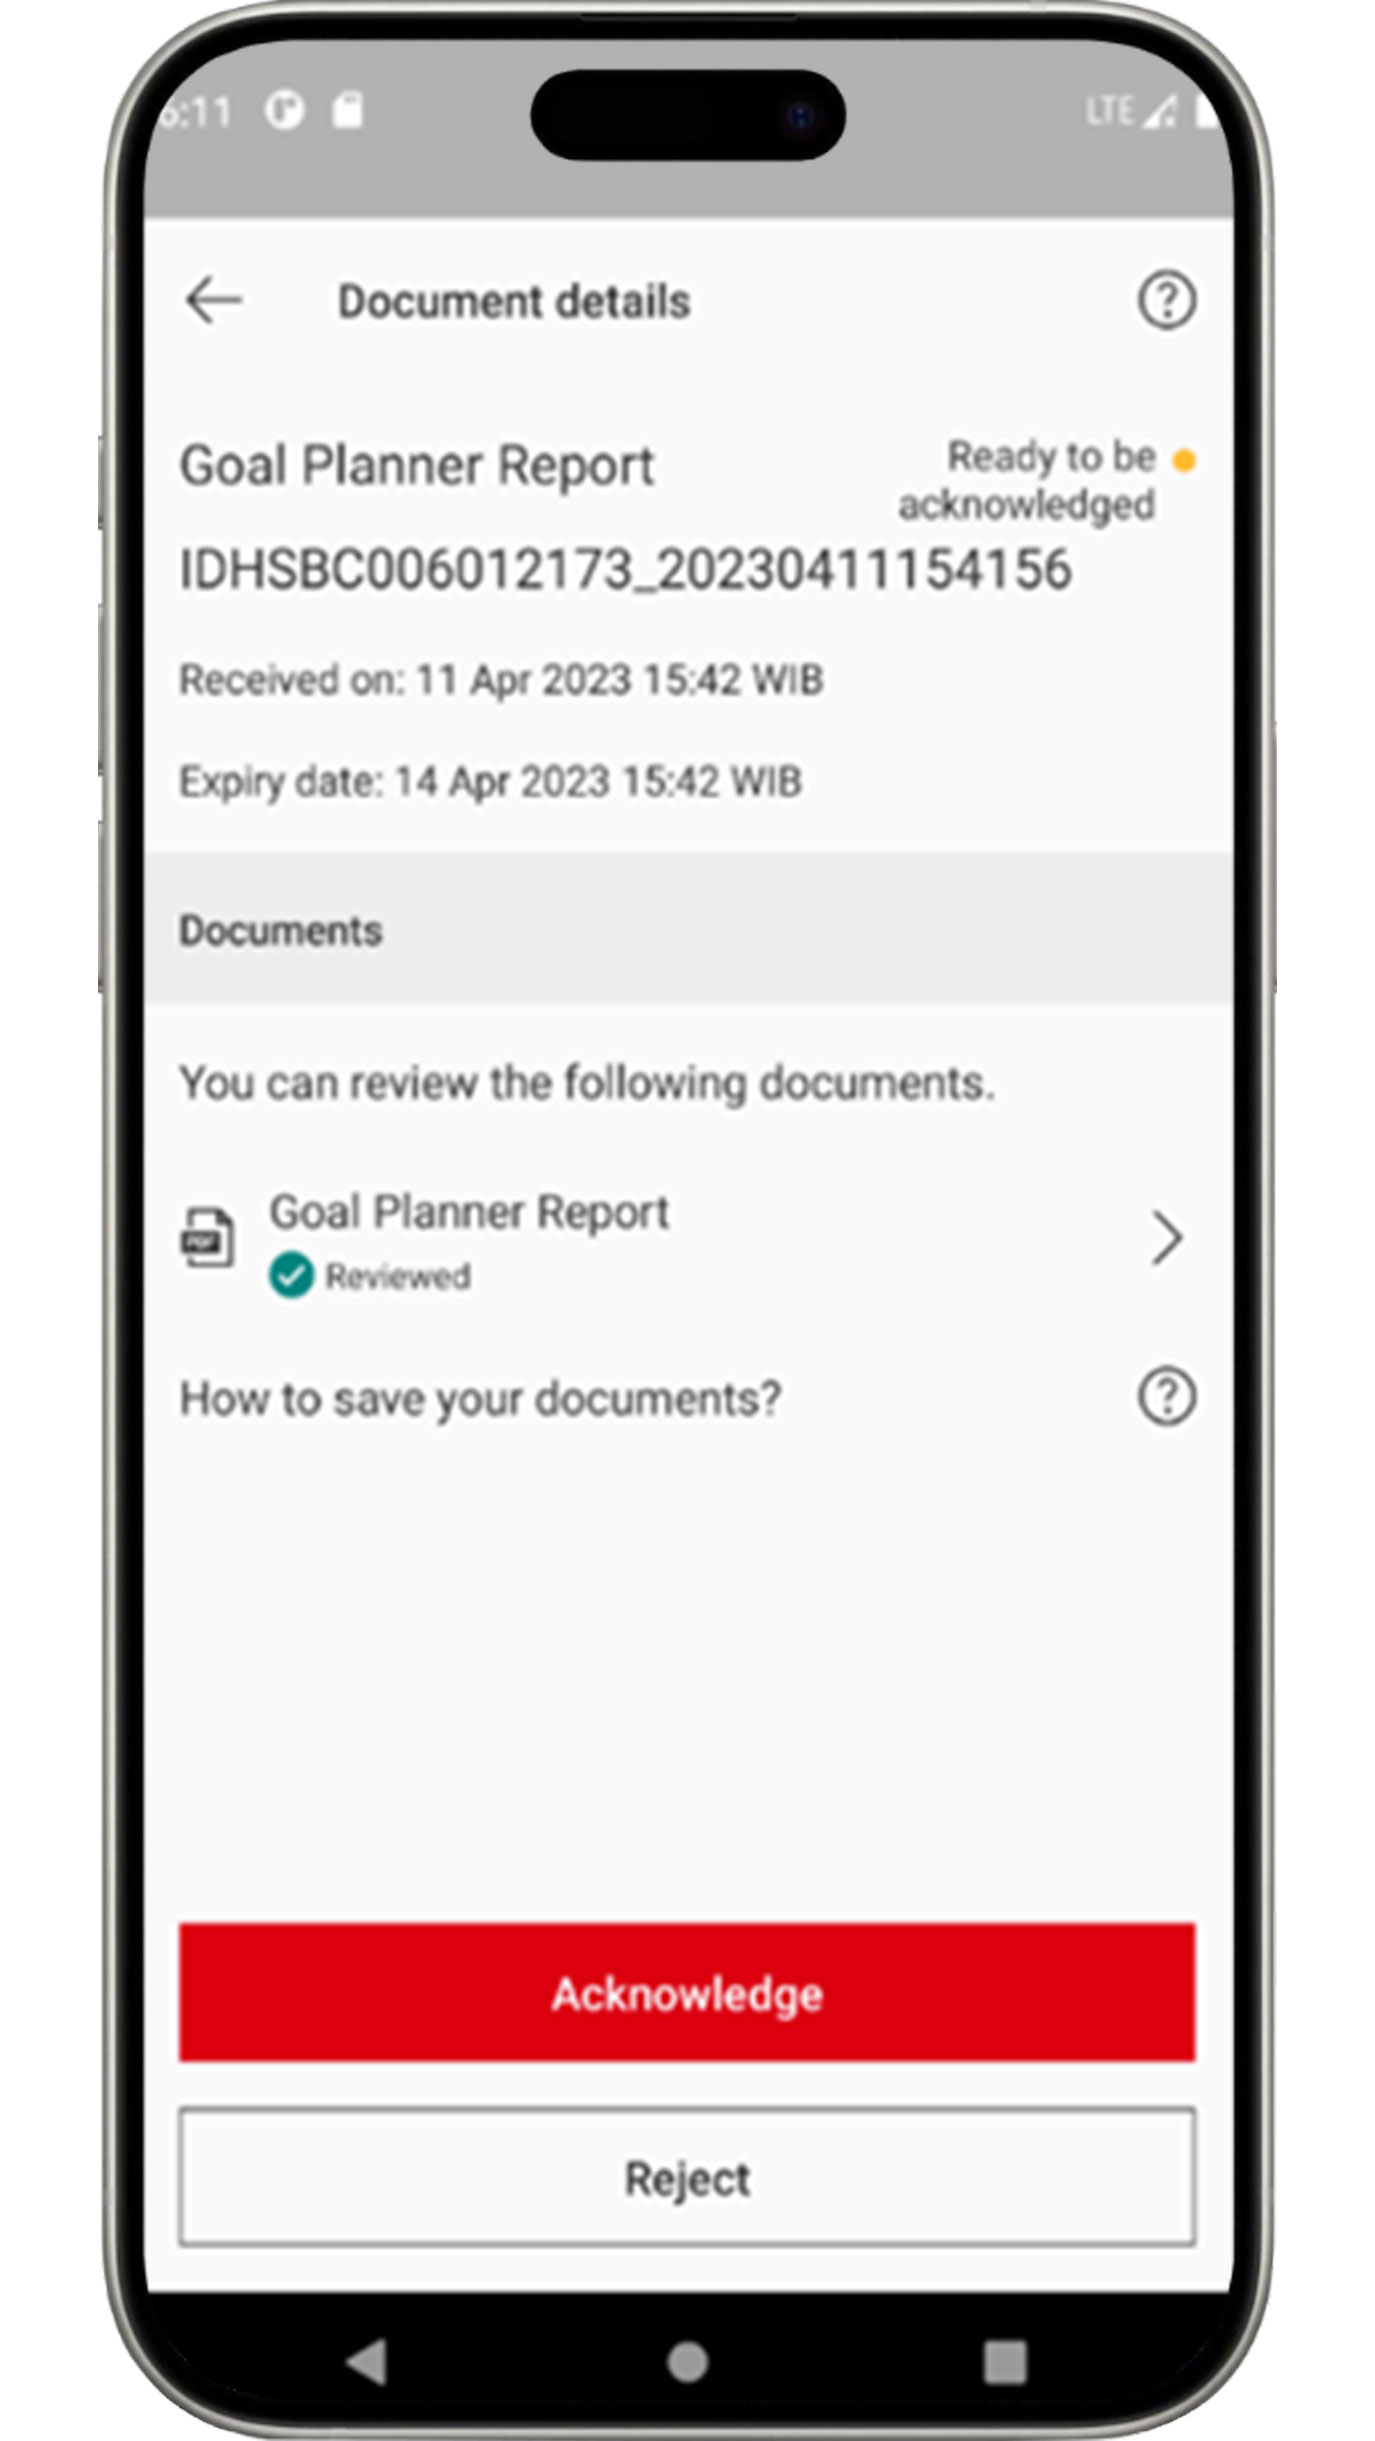
After reading and reviewing the document, click the
"Acknowledge"
button to approve the document.
If you would like to reject the document, click the "Reject"
button.
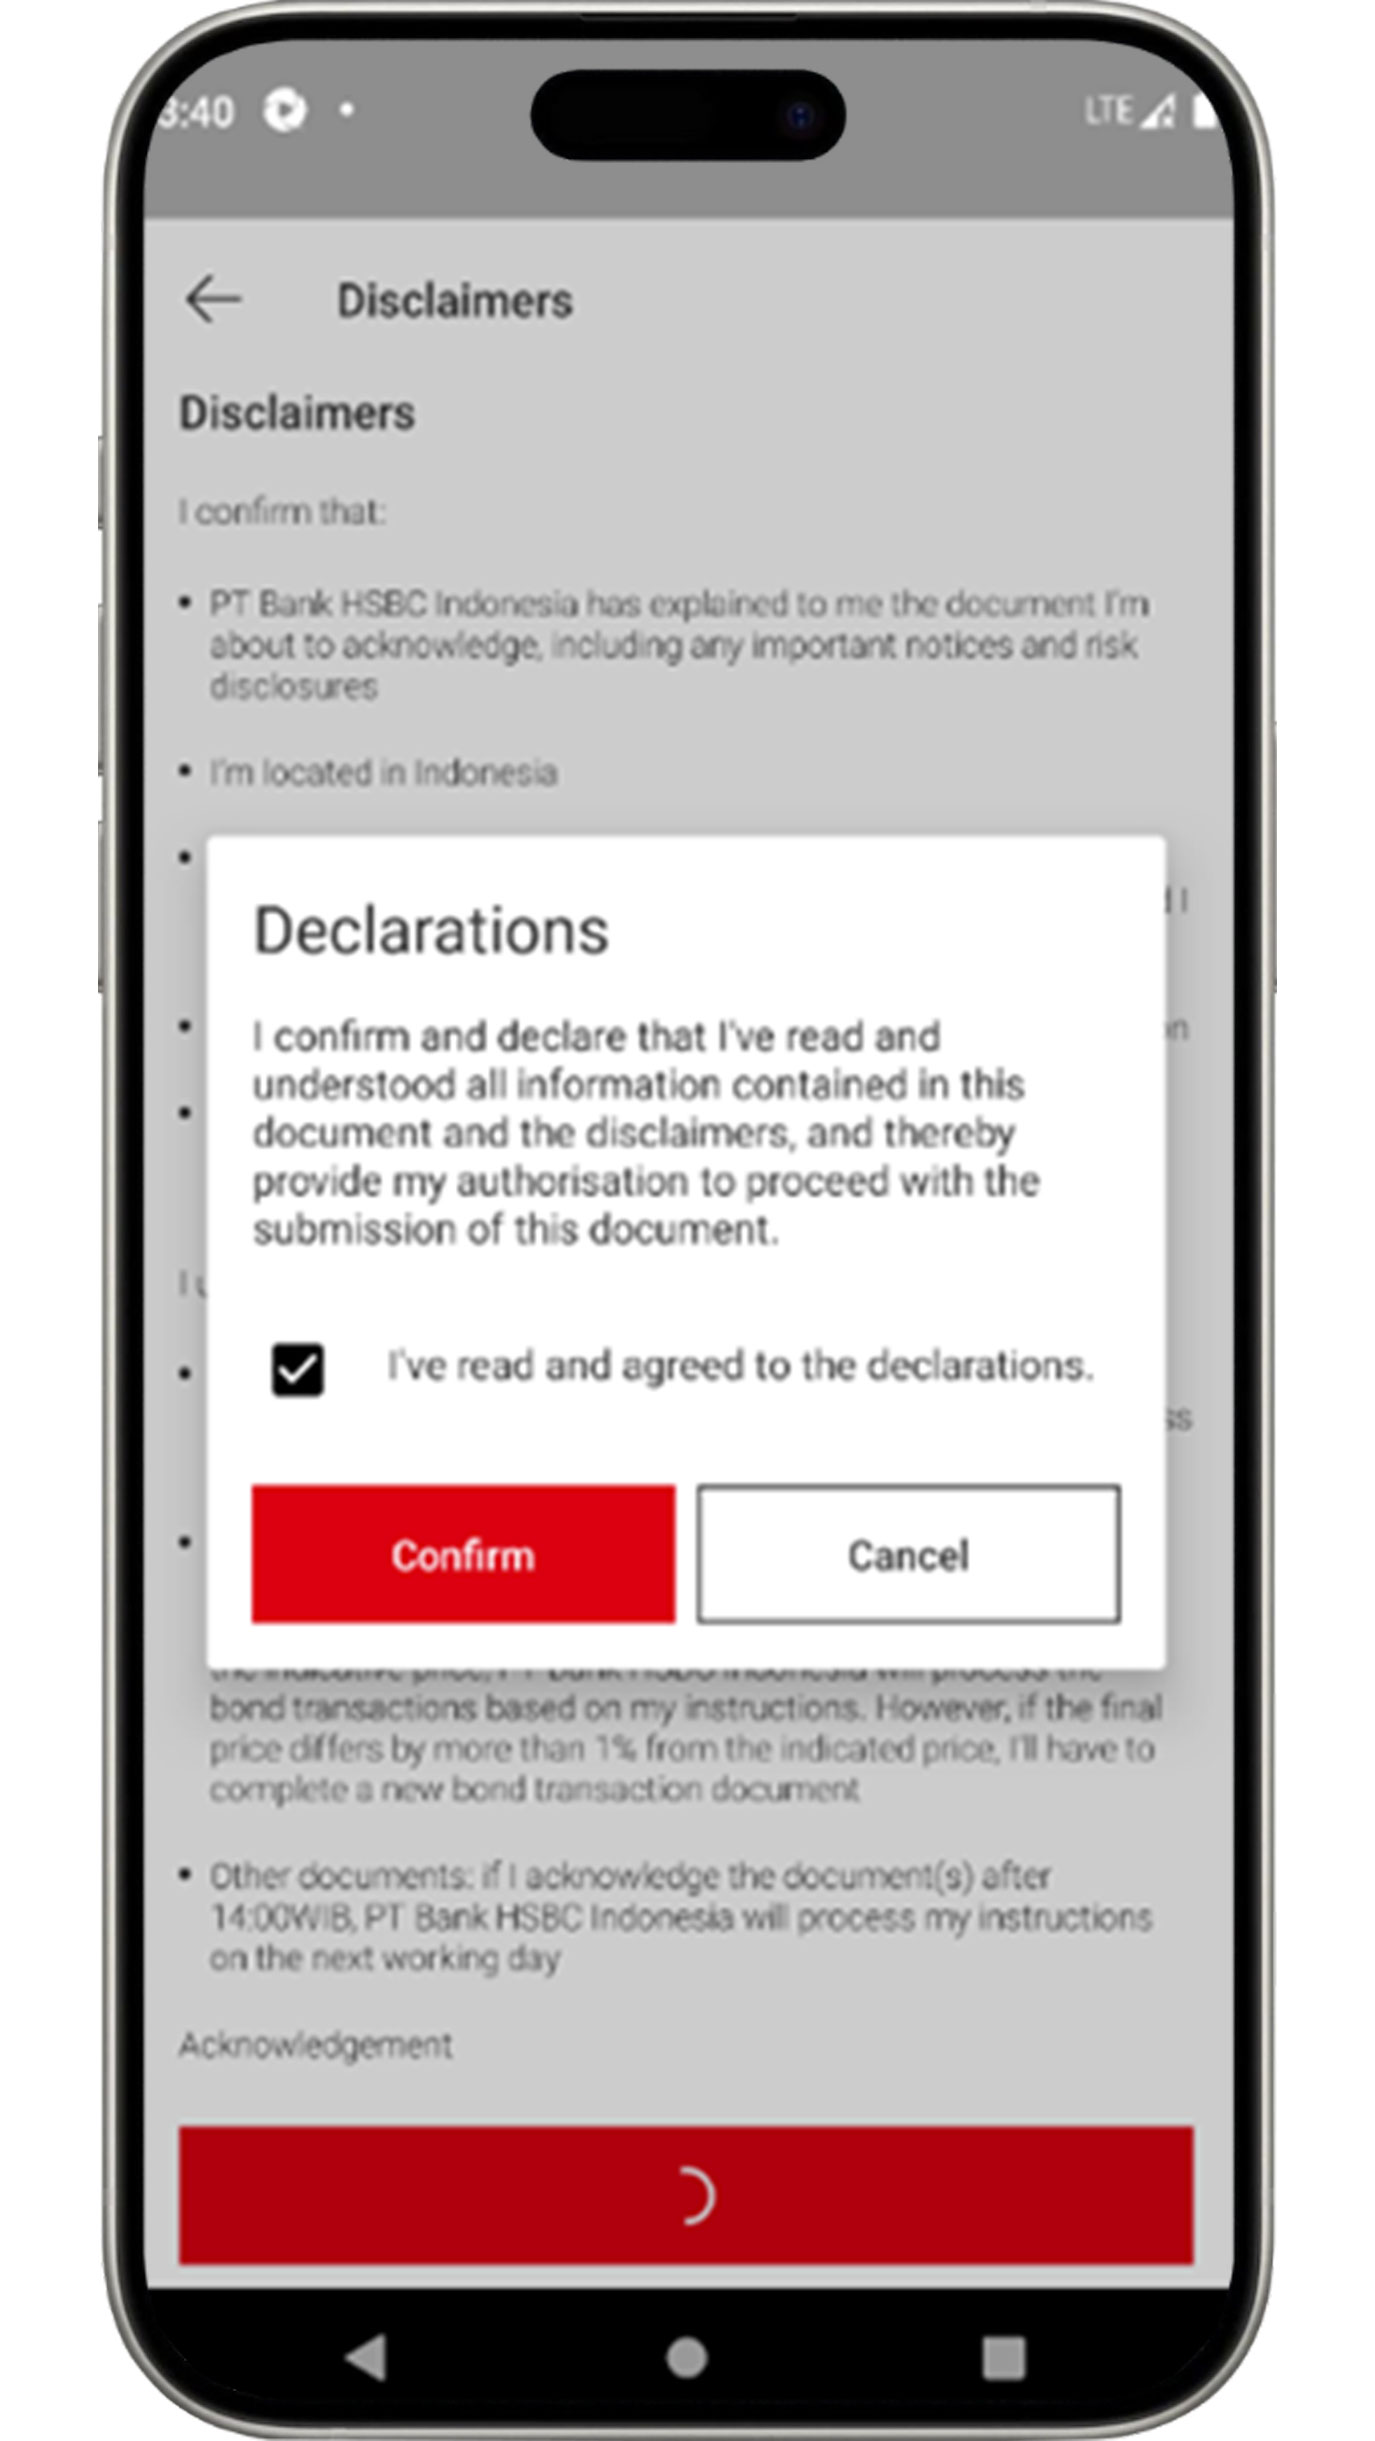
Before completing the document approval process, ensure that you have read the listed disclaimers and click the "Confirm" button.
More about Document Center features
Submit documents
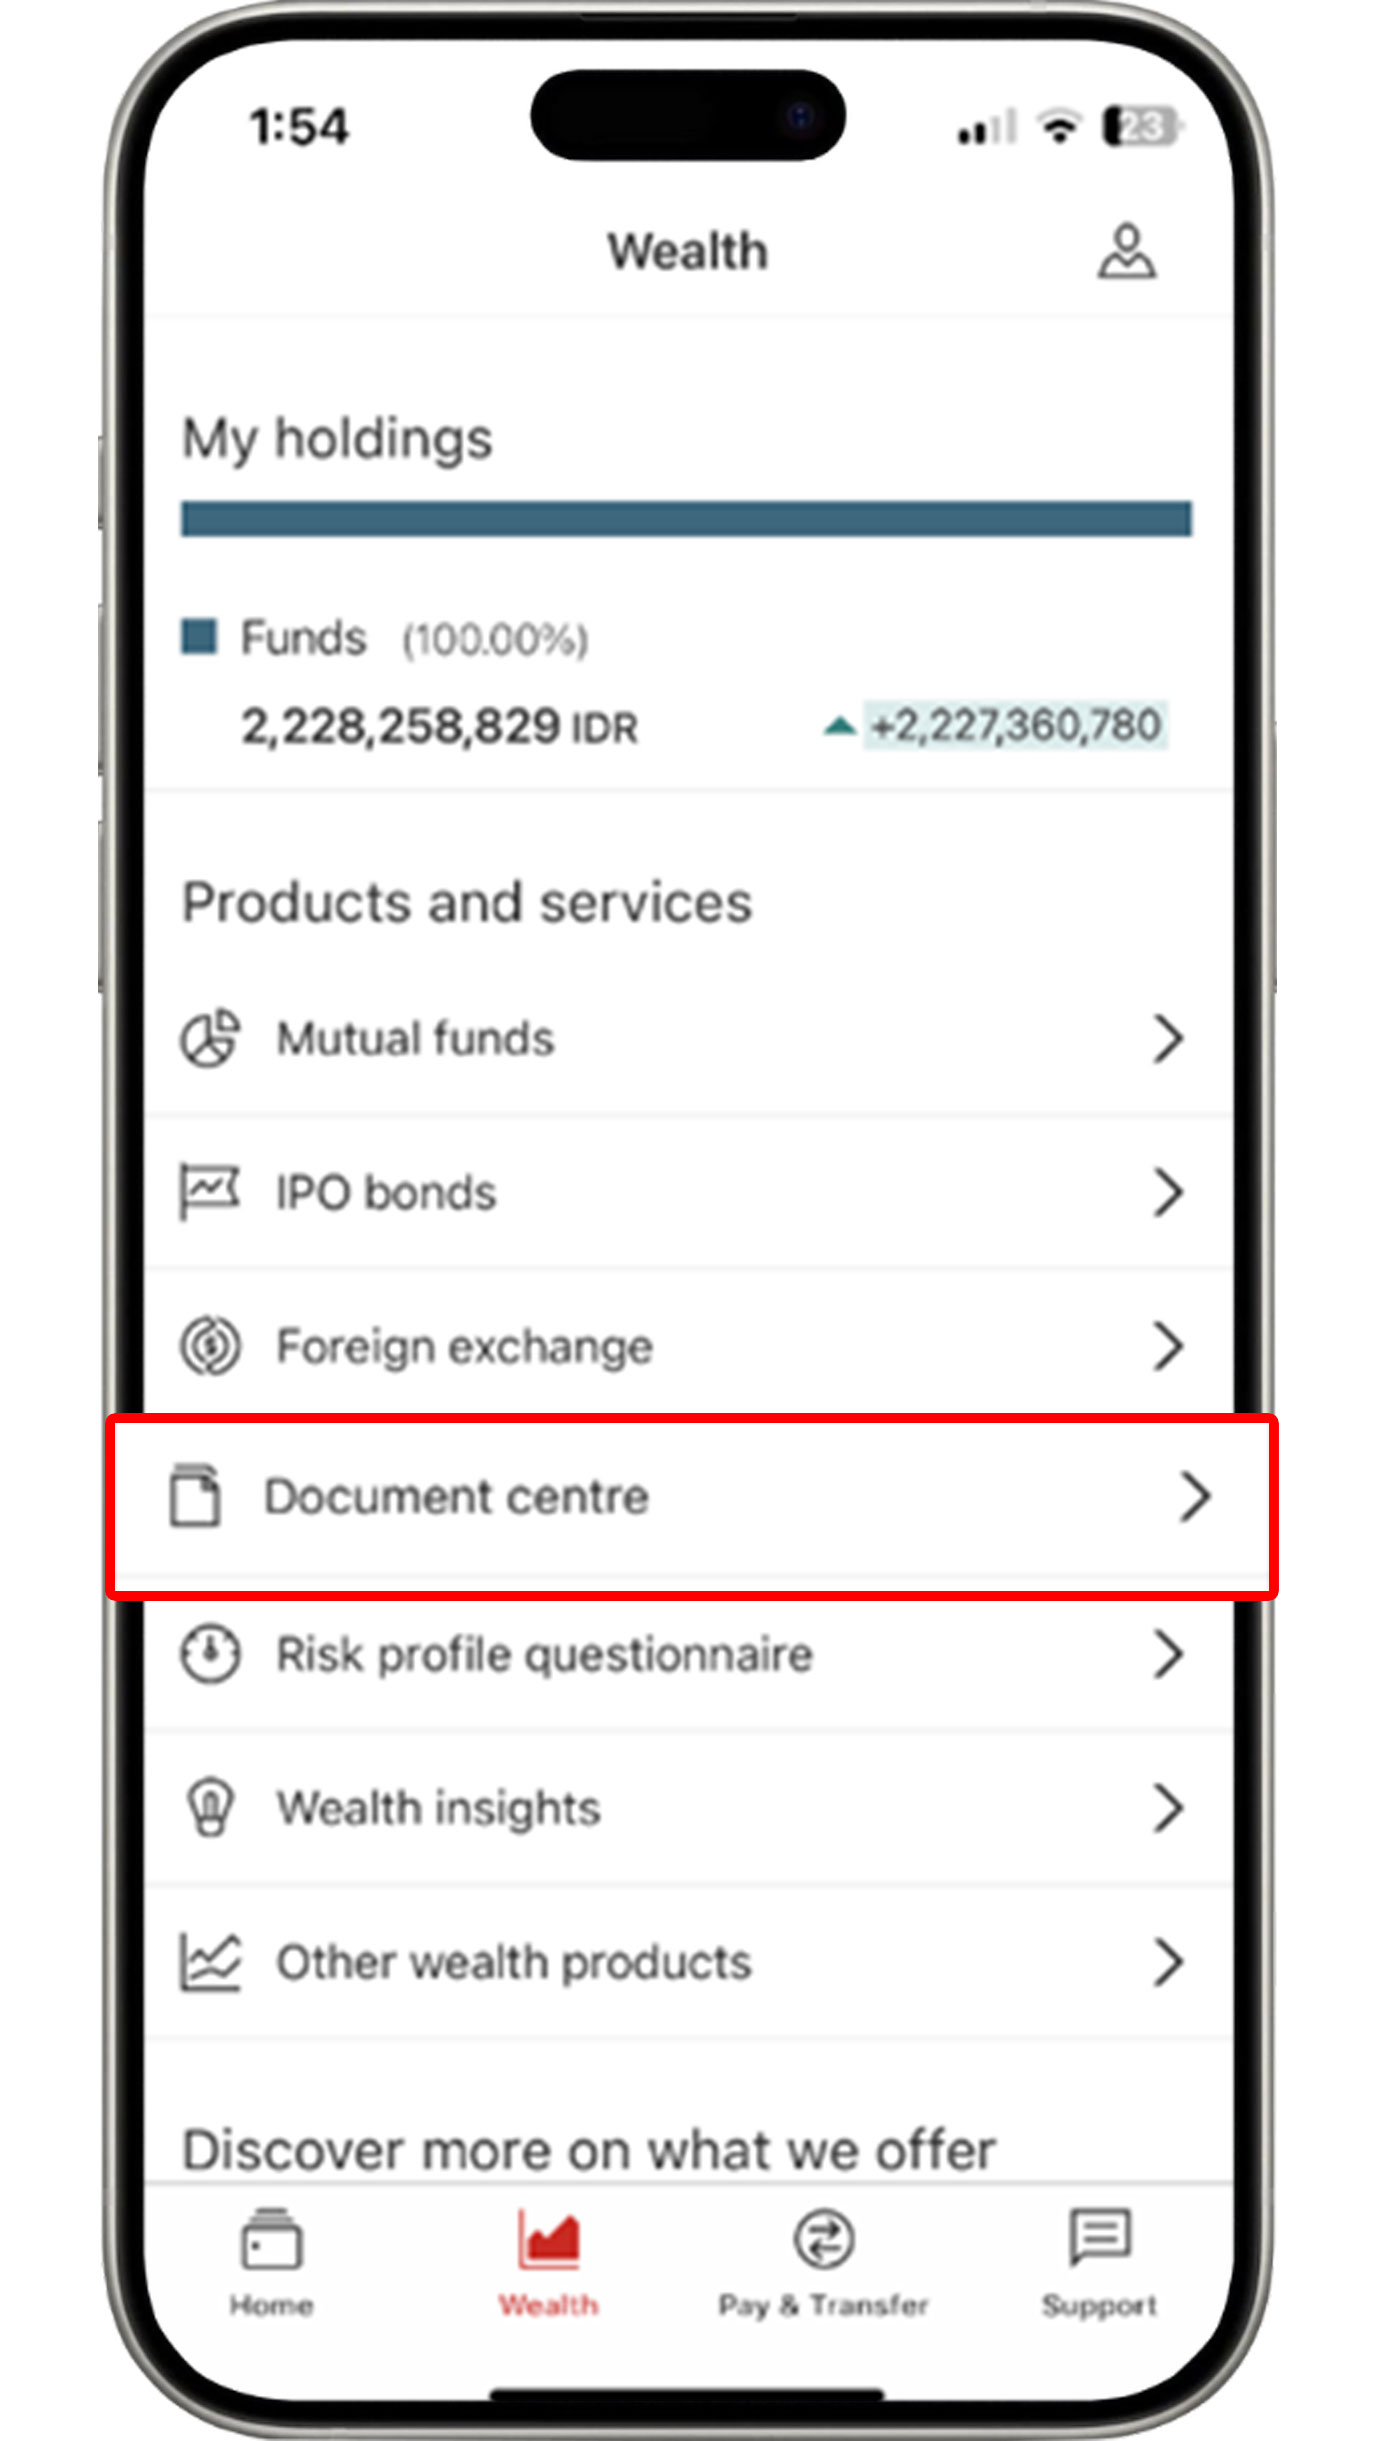
On the Wealth menu, click "Document Centre".
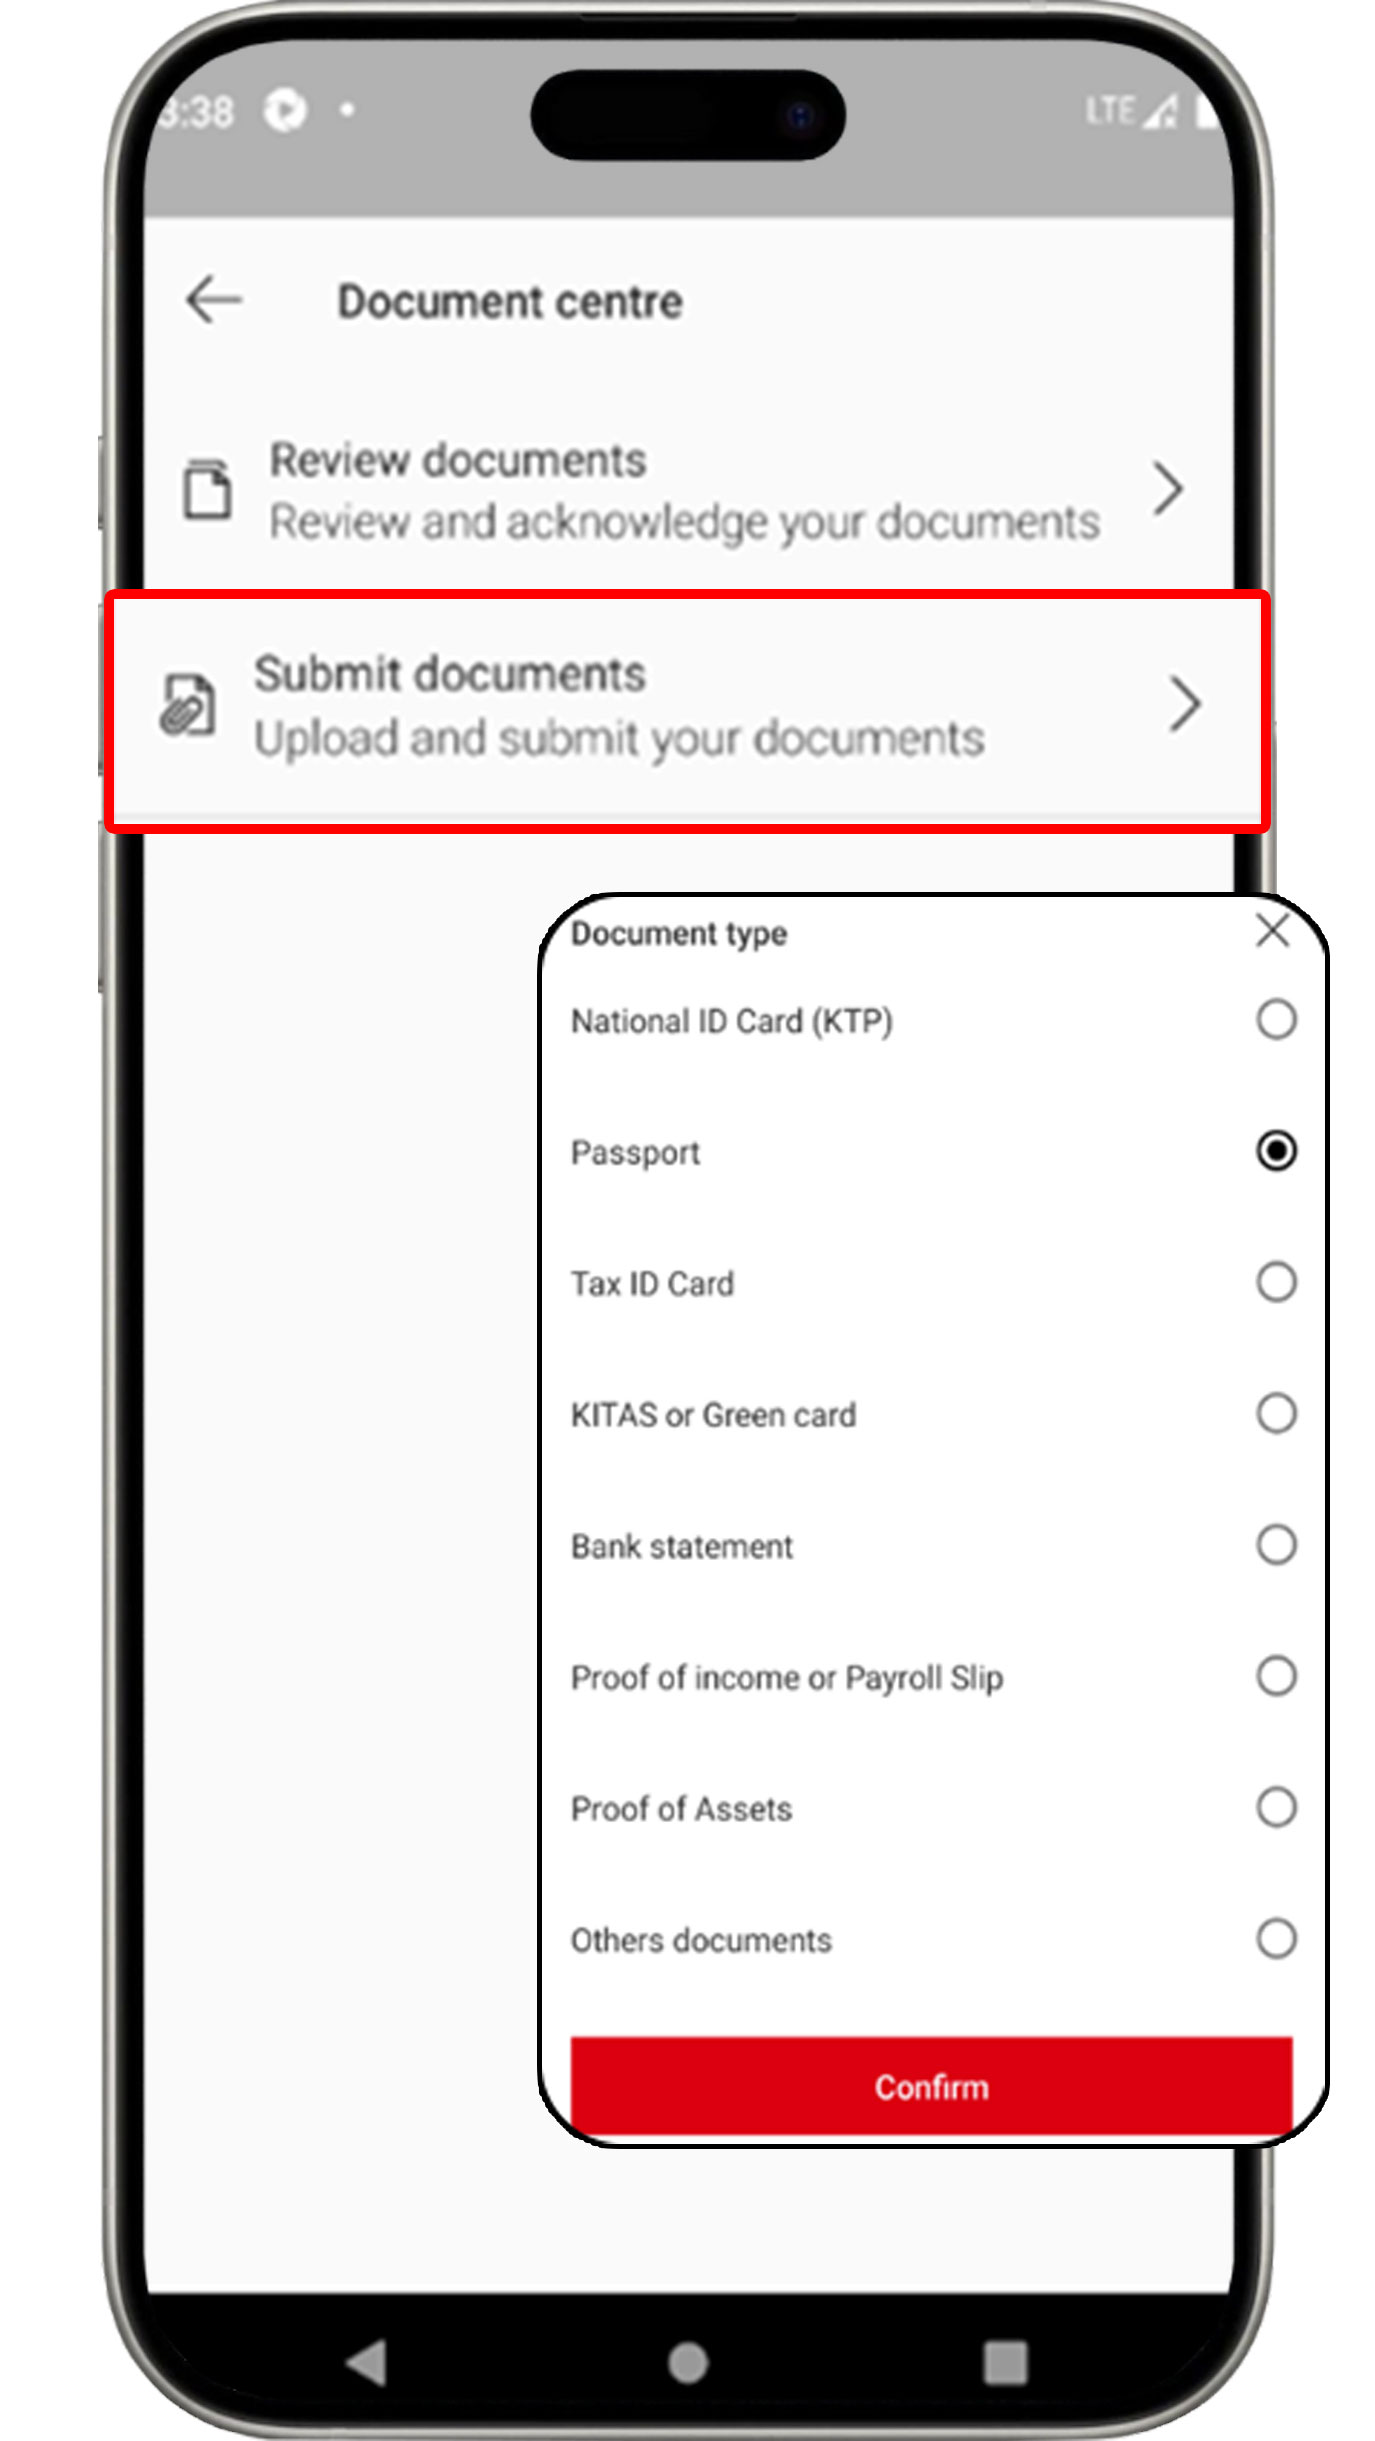
Select "Submit documents" and click the document that you would like to upload.
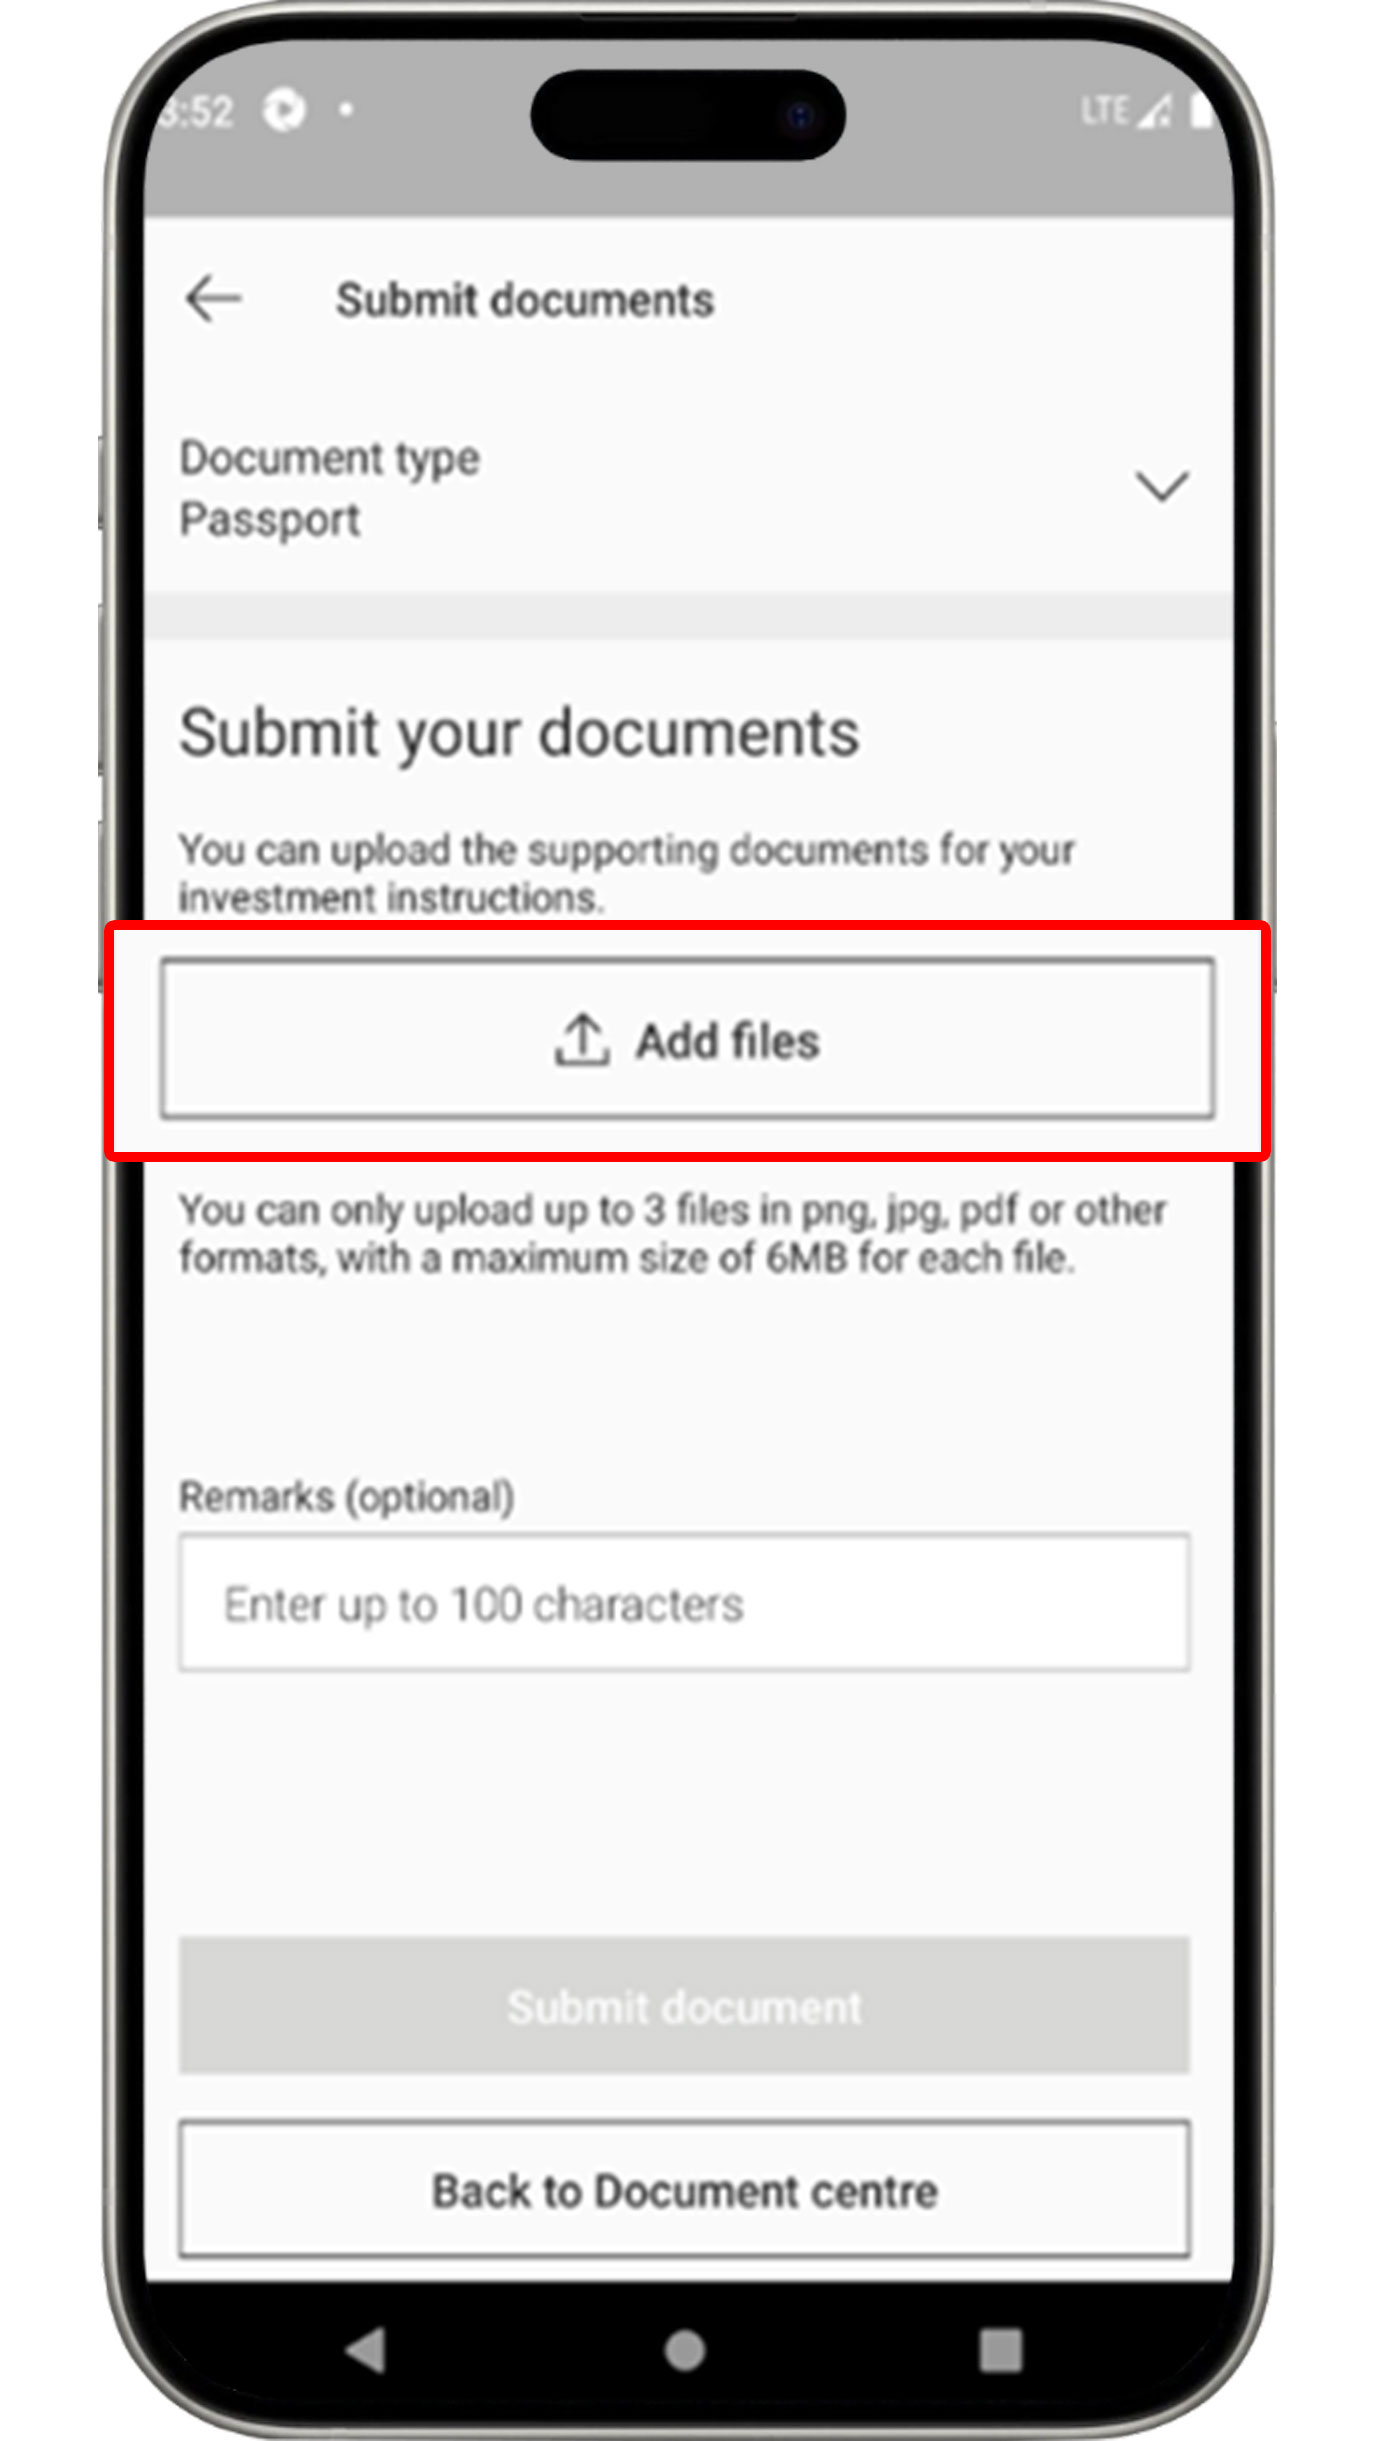
Click the "Add files" button to upload your document.
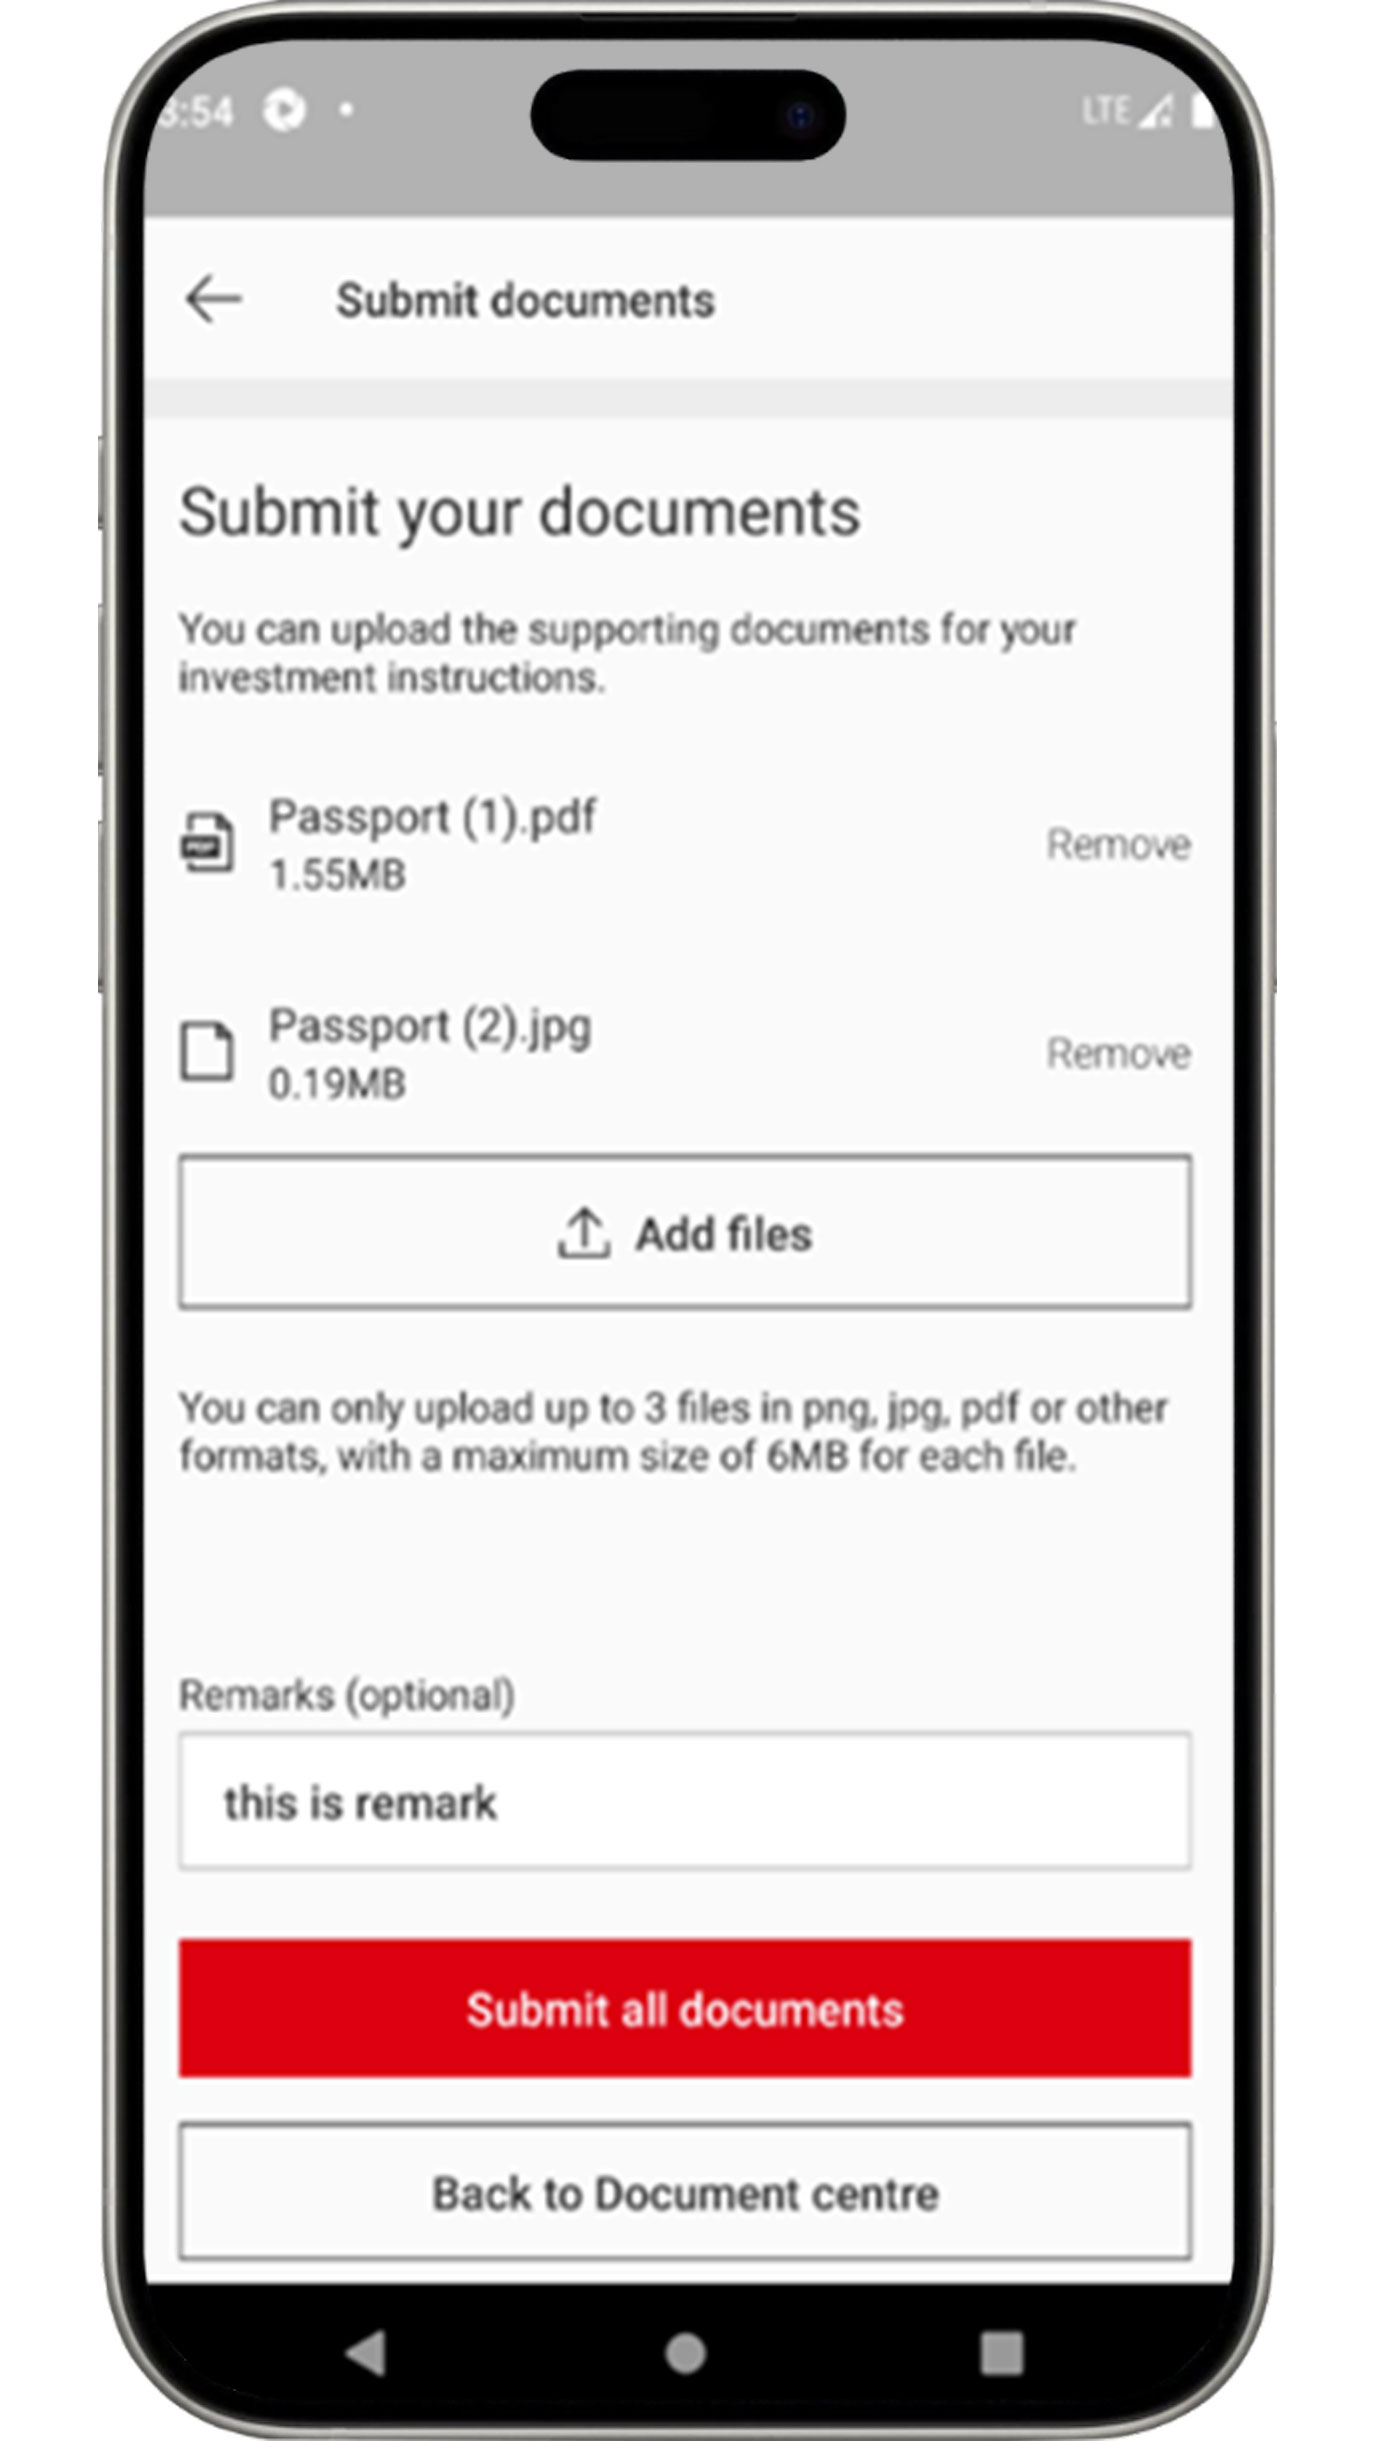
Click the "Submit all documents" button to complete the document upload process.
More about Document Center features
Send messages through app
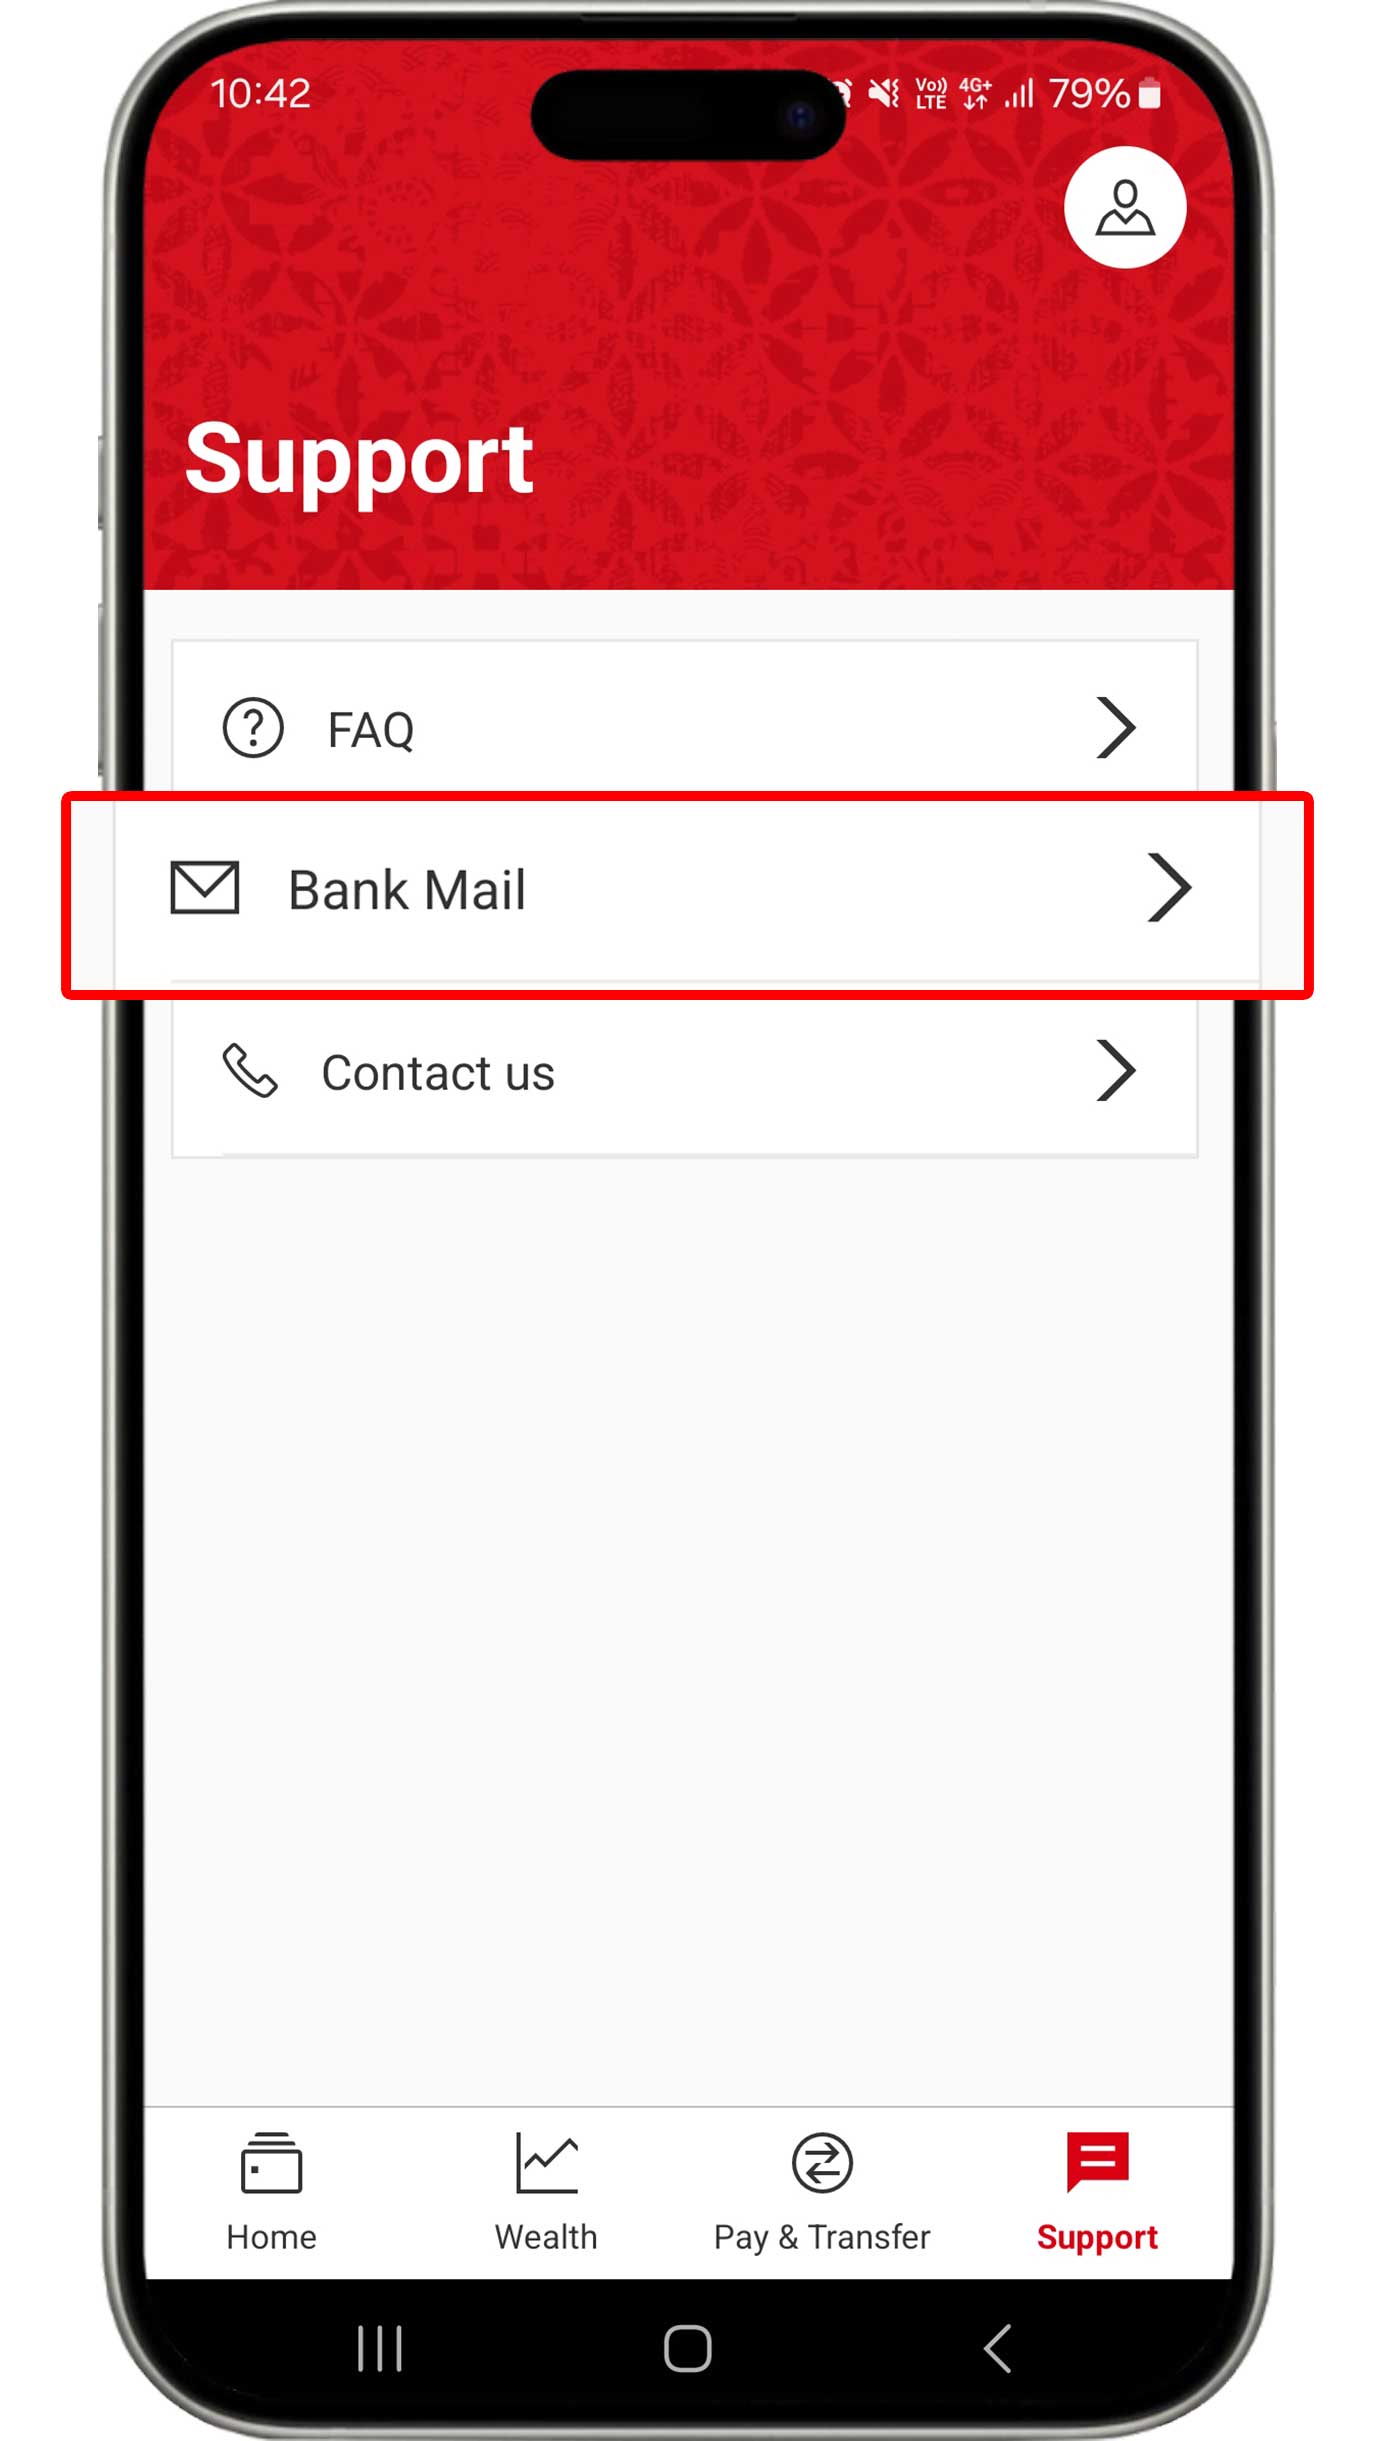
On the Support menu, select "Bank Mail".
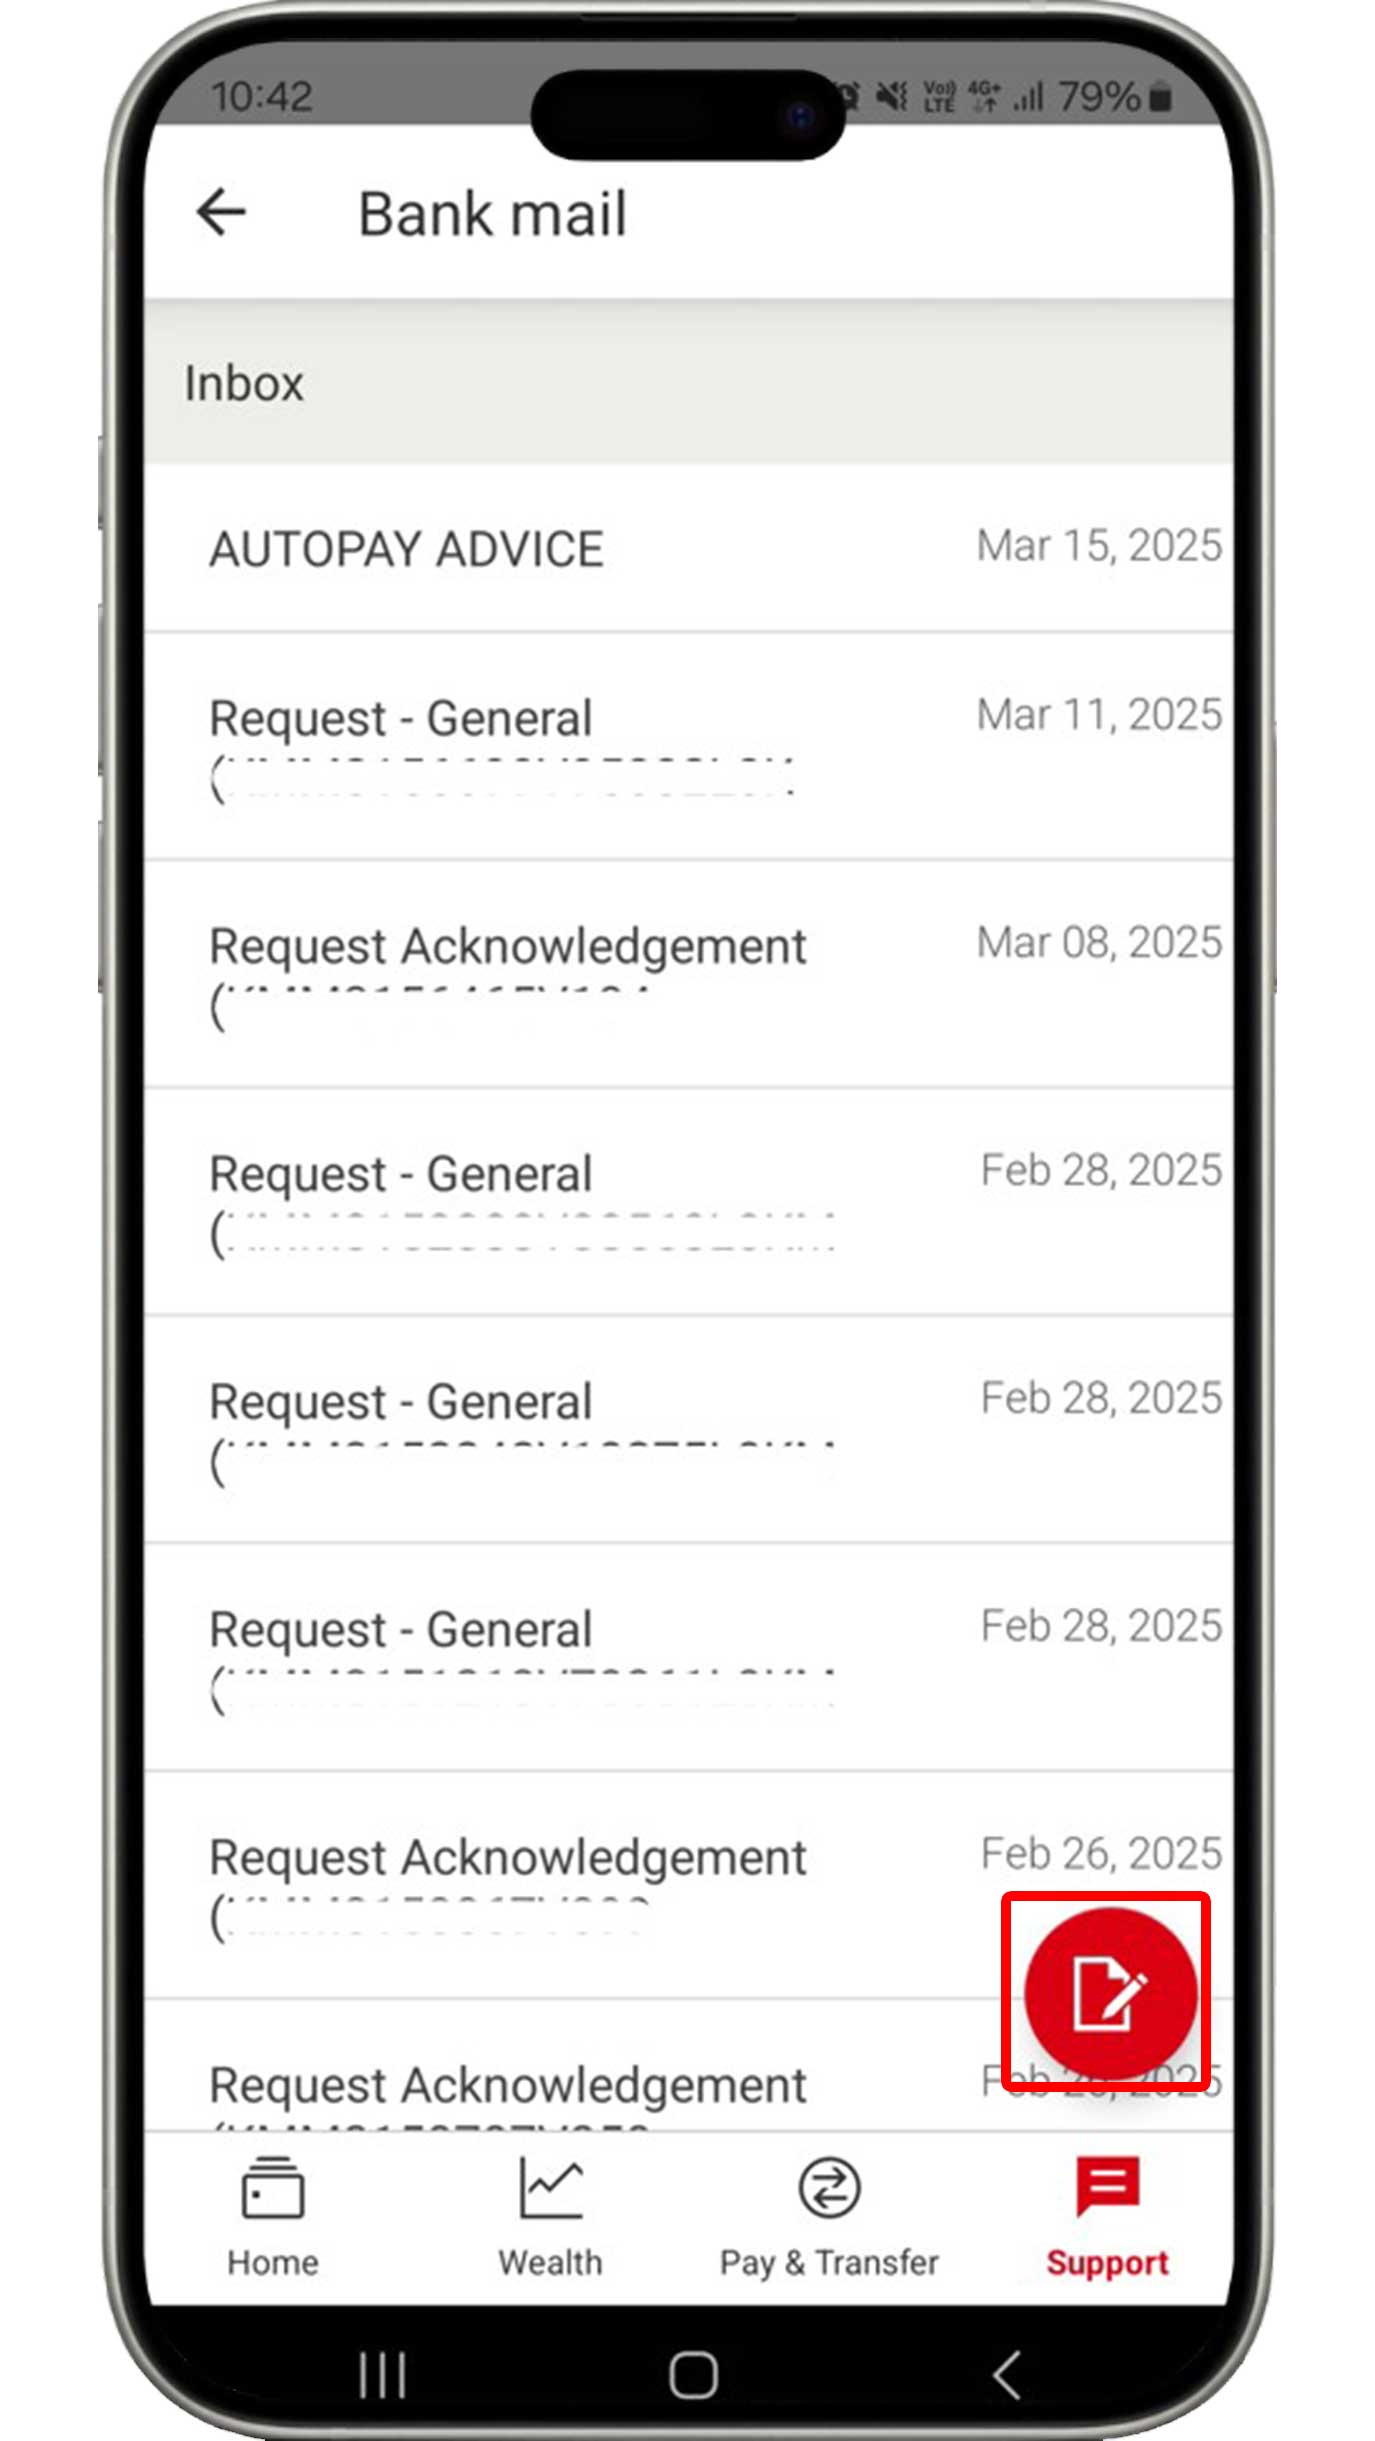
Click the message symbol to send a message to HSBC.
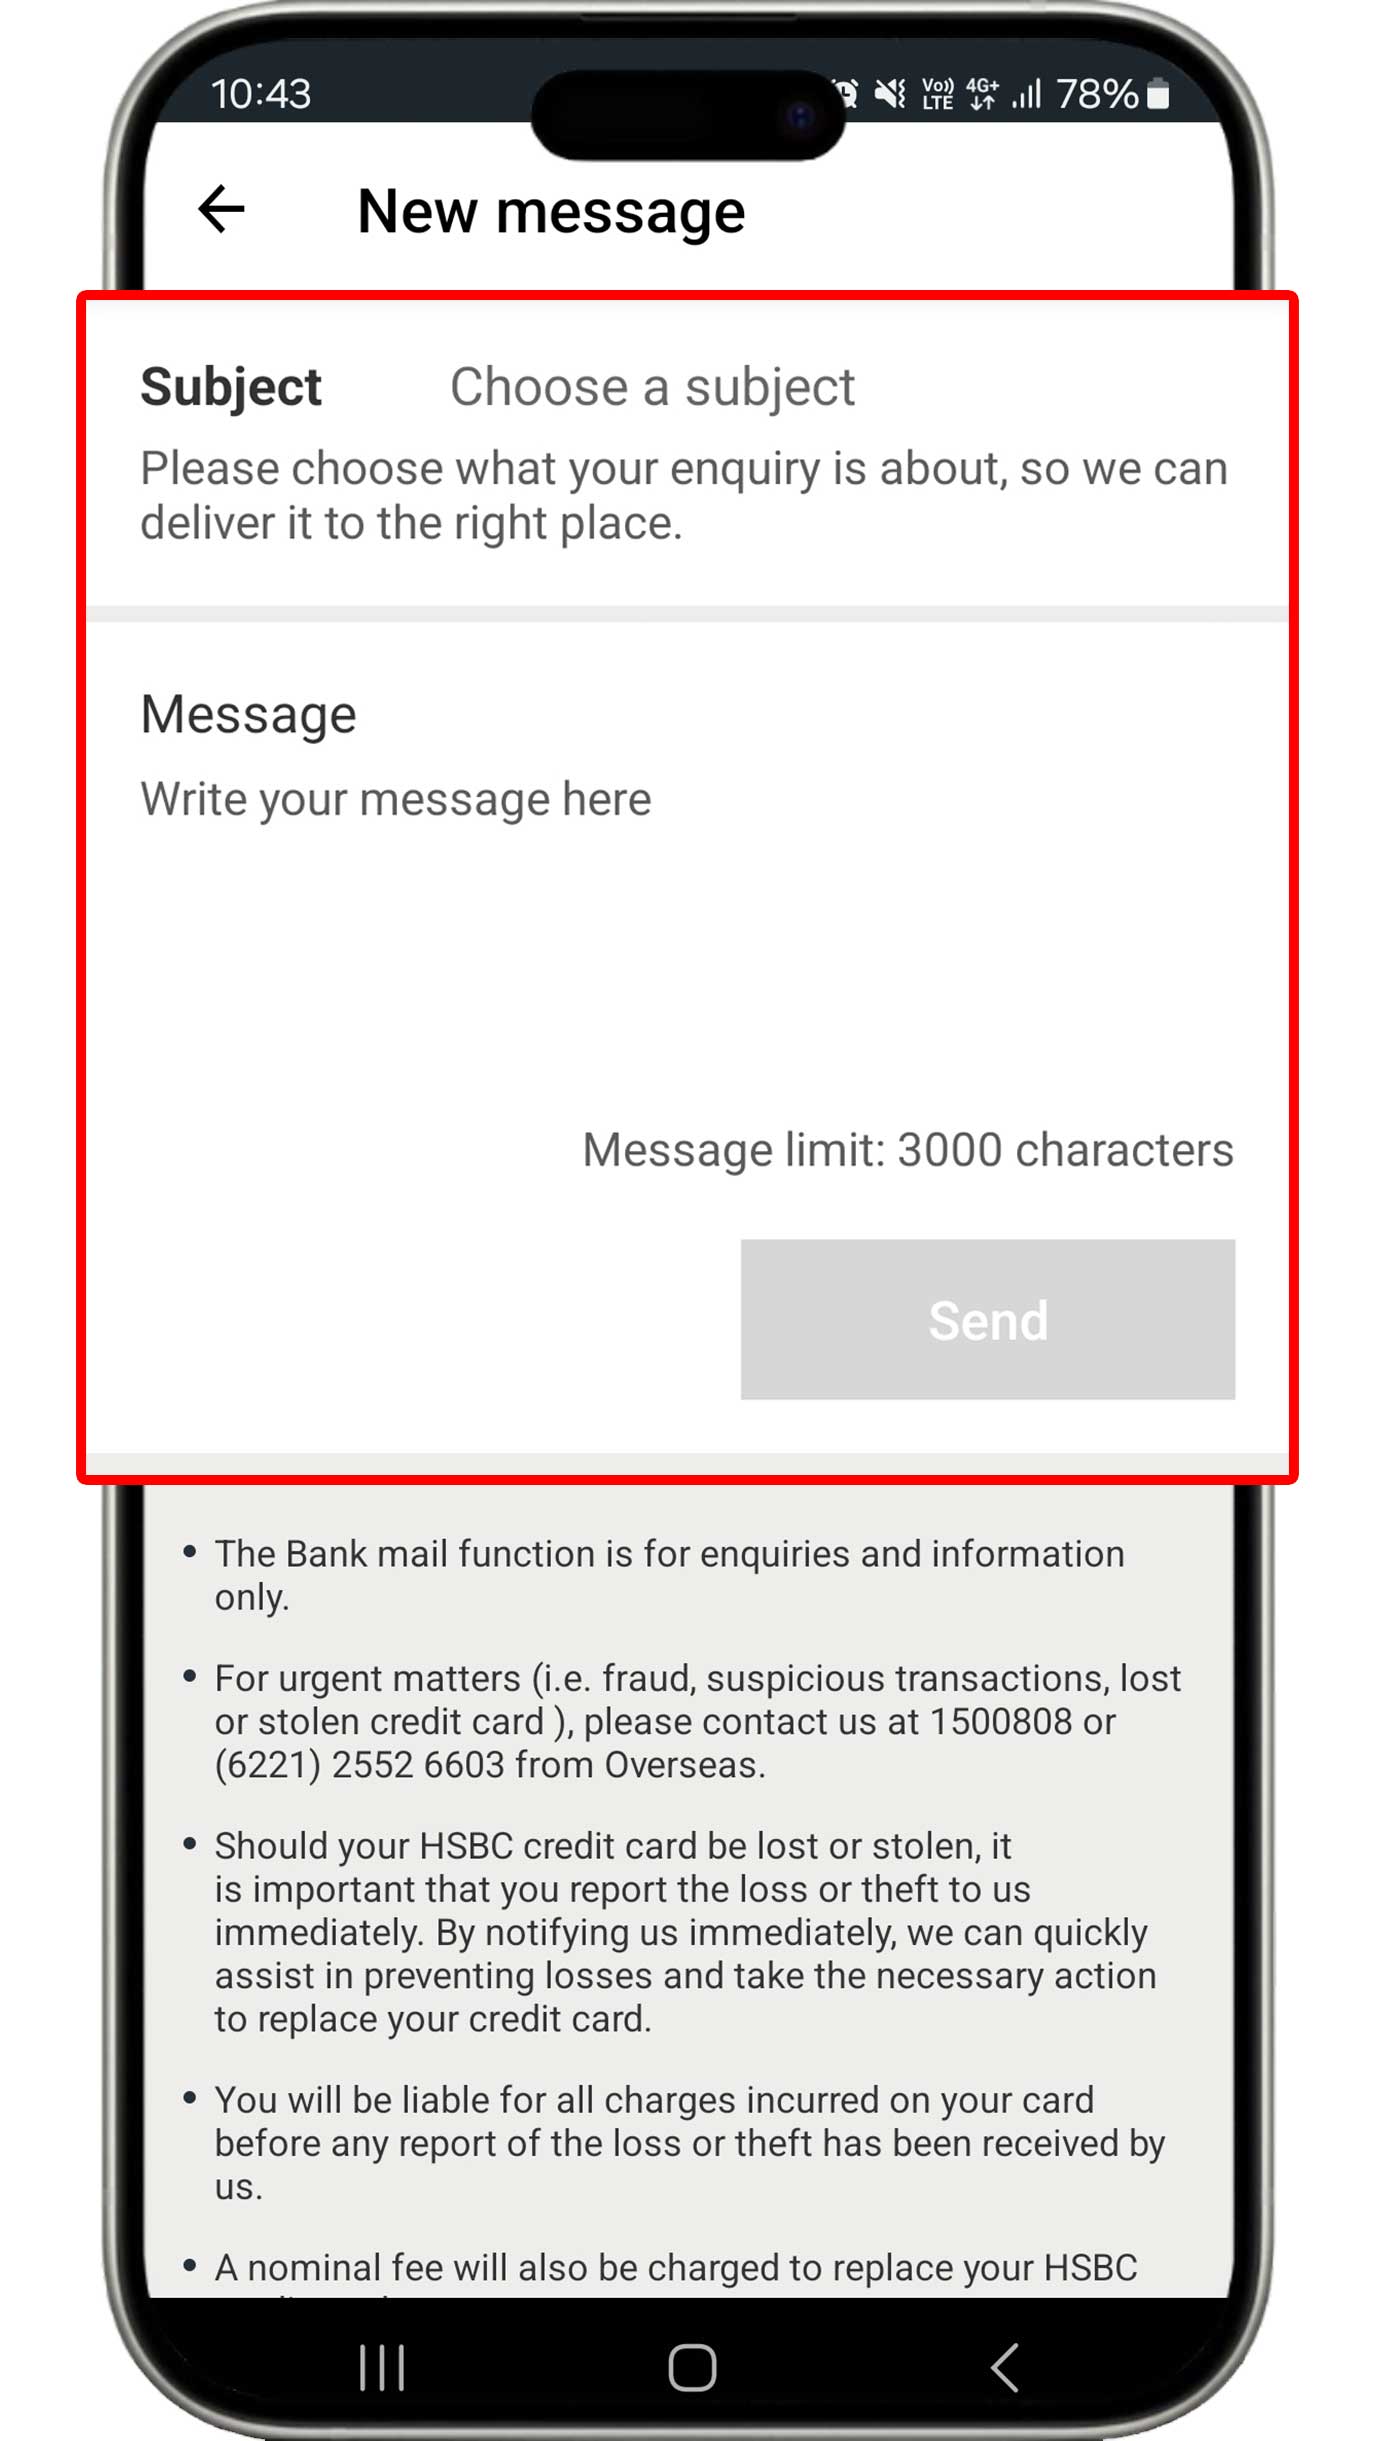
Type the message you want to convey and click the "Send" button.